What’s new
Red Hat Quay Release Notes
Review Red Hat Quay release notes for new features, configuration changes, API updates, bug fixes, and deprecations before you upgrade.
RHBA-TBD - Project Quay 5.0.0 release
Project Quay {producty} is available with Clair {clairproductminv}. You can review the advisory, compatibility matrix, and life cycle policy for this release.
Issued TBD
Project Quay release {producty} is now available with Clair {clairproductminv}. The bug fixes that are included in the update are listed in the RHBA-TBD advisory. For the most recent compatibility matrix, see Quay Enterprise 3.x Tested Integrations. For information on the release cadence of Project Quay, see the Project Quay Life Cycle Policy.
Project Quay new features and enhancements
You can review new features and enhancements in Project Quay {producty}.
Red Hat Quay on OpenShift Container Platform new features and enhancements
You can review new features and enhancements for Red Hat Quay on OpenShift Container Platform in {producty}.
Example one
Project Quay configuration fields updates and changes
You can review configuration fields that are new or changed in Project Quay {producty}.
API endpoint enhancements
You can review API enhancements in Project Quay {producty}.
Project Quay bug fixes
You can review bug fixes included in Project Quay {producty}.
The following issues were fixed with Project Quay {producty}:
-
PROJQUAY-. Previously,
Known issues and limitations
You can review known issues and limitations that affect Project Quay {producty} deployments.
Example
Project Quay feature tracker
You can track Project Quay feature availability across recent releases, including Technology Preview status, and review platform support for IBM Power, IBM Z, and IBM LinuxONE.
Some features available in previous releases have been deprecated or removed. Deprecated functionality is still included in Project Quay, but is planned for removal in a future release and is not recommended for new deployments. For the most recent list of deprecated and removed functionality in Project Quay, refer to Table 1.1. Additional details for more fine-grained functionality that has been deprecated and removed are listed after the table.
| Feature | Quay 5 | Quay 3.18 | Quay 3.17 |
|---|---|---|---|
- |
General Availability |
- |
|
- |
Technology Preview |
- |
|
- |
General Availability |
- |
|
- |
General Availability |
General Availability |
|
- |
General Availability |
General Availability |
|
- |
General Availability |
General Availability |
|
v1 UI |
- |
Deprecated |
Deprecated |
IBM Power, IBM Z, and IBM® LinuxONE support matrix
| Feature | IBM Power | IBM Z and IBM® LinuxONE |
|---|---|---|
Allow team synchronization via OIDC on Azure |
Not Supported |
Not Supported |
Backing up and restoring on a standalone deployment |
Supported |
Supported |
Clair Disconnected |
Supported |
Supported |
Geo-Replication (Standalone) |
Supported |
Supported |
Geo-Replication (Operator) |
Supported |
Supported |
IPv6 |
Not Supported |
Not Supported |
Migrating a standalone to operator deployment |
Supported |
Supported |
Mirror registry |
Supported |
Supported |
Quay config editor - mirror, OIDC |
Supported |
Supported |
Quay config editor - MAG, Kinesis, Keystone, GitHub Enterprise |
Not Supported |
Not Supported |
Quay config editor - Red Hat Quay V2 User Interface |
Supported |
Supported |
Quay Disconnected |
Supported |
Supported |
Repo Mirroring |
Supported |
Supported |
Get Red Hat Quay release notifications
Subscribe to Red Hat Customer Portal notifications so you know when new Red Hat Quay releases and related product updates are available.
Getting Project Quay release notifications
To keep up with the latest Project Quay releases and other changes related to Project Quay, you can sign up for update notifications on the Red Hat Customer Portal.
-
Log into the Red Hat Customer Portal with your Red Hat customer account credentials.
-
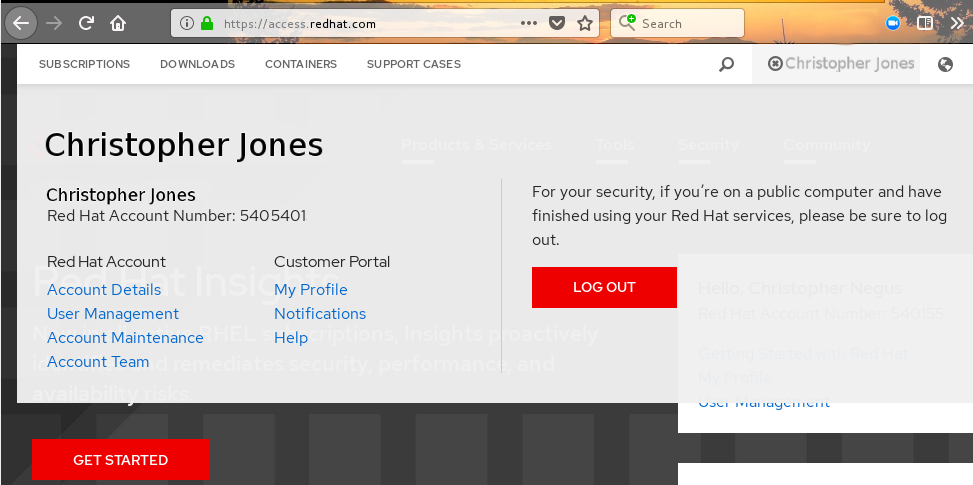
Select your user name (upper-right corner) to see Red Hat Account and Customer Portal selections:
-
Select Notifications. Your profile activity page appears.
-
Select the Notifications tab.
-
Select Manage Notifications.
-
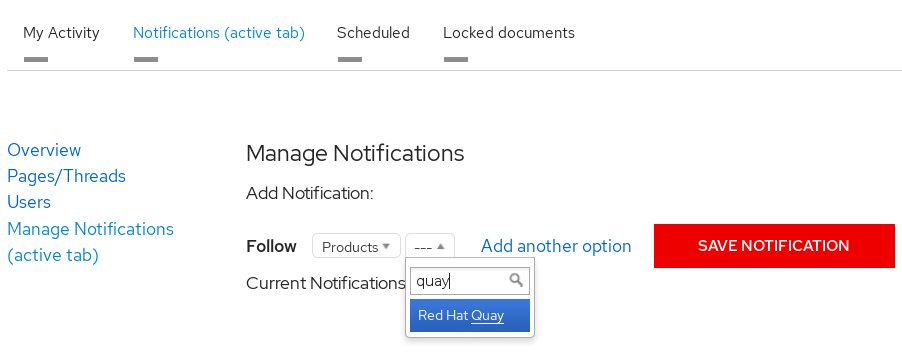
Select Follow, then choose Products from the drop-down box.
-
From the drop-down box next to the Products, search for and select Project Quay:
-
Select the SAVE NOTIFICATION button. Going forward, you will receive notifications when there are changes to the Project Quay product, such as a new release.
Discover
Understand Red Hat Quay capabilities and architecture
Review Red Hat Quay features, core architecture, scalability, build automation, integration, and security to evaluate whether the registry meets your requirements.
About Project Quay
Project Quay is a security-focused container registry platform for storing, distributing, and governing container images and other OCI artifacts.
You can deploy Project Quay as a standalone component or as an Operator on OpenShift Container Platform, and use it to deliver containerized software across OpenShift Container Platform and Kubernetes clusters in development and production.
Project Quay provides a single, resilient content repository with a web interface, access controls, and Continuous Integration/Continuous Deployment (CI/CD) integrations. Teams can upload and manage images in private repositories. Administrators can control who can view or change content and share images with designated teams.
Project Quay addresses container security through Clair, which scans images for known vulnerabilities and suggests remediation. The platform also integrates with CI/CD tools so that you can automate build and deployment workflows.
Project Quay supports multiple authentication and access methods, storage backends, and container image types, including custom certificates for Quay, Clair, and storage backends. It also supports small-scale and enterprise deployments. High availability configurations help organizations rely on the registry for mission-critical applications, and replication and distribution mechanisms deliver images across geographical locations.
Project Quay is regularly released with new features, bug fixes, and software updates.
Project Quay features and architecture
Project Quay is a distributed, highly available container image registry for the enterprise. Review the following sections for architectural patterns, core capabilities, sizing guidance, and best practices for deploying Project Quay with high availability.
Project Quay container registry platform provides secure storage, distribution, access controls, geo-replications, repository mirroring, and governance of containers and cloud-native artifacts on any infrastructure. It is available as a standalone component or as an Operator for OpenShift Container Platform, and is deployable on-prem or on a public cloud.
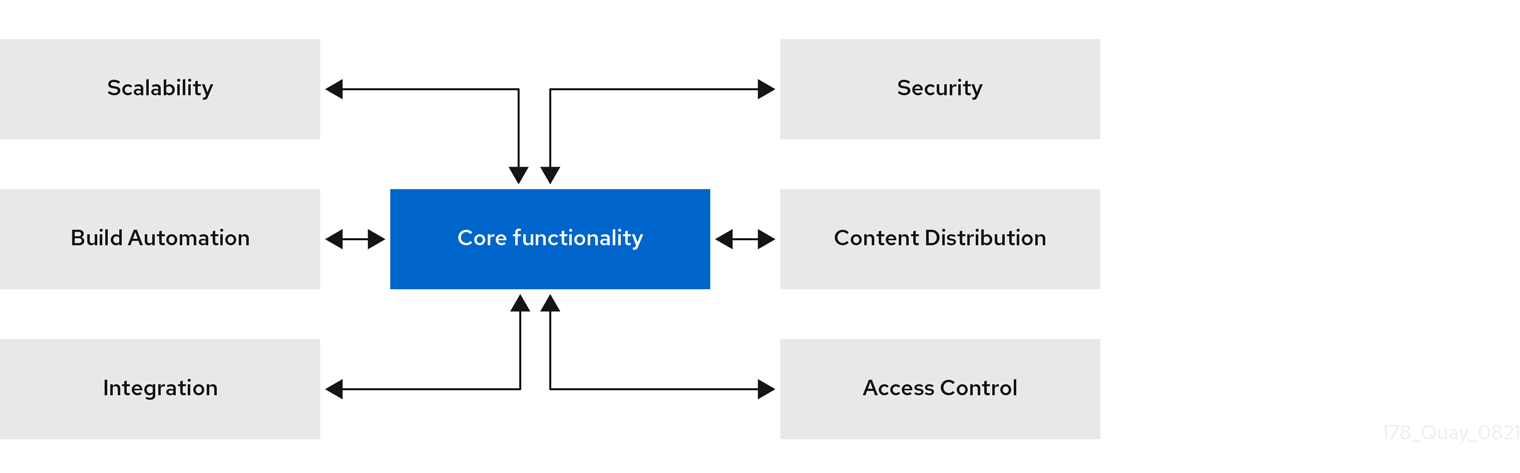
Image and artifact support
Project Quay stores and distributes container images and other OCI artifacts. It supports Docker v2, schema 2, including multi-architecture images, so teams can manage diverse workloads in one registry.
Day-2 operations
Project Quay includes operational capabilities such as custom log rotation and zero-downtime garbage collection. Red Hat provides 24/7 support for Project Quay.
Scalability and high availability (HA)
Project Quay uses the same codebase as Quay.io, Red Hat’s highly available container image registry. You can deploy at scale with high availability on-prem or in the cloud, with multitenant operation supported.
Quay.io and Project Quay offer a multitenant SaaS solution. As a result, users can be confident that their deployment can deliver at scale with high availability, whether their deployment is on-prem or on a public cloud.
Content distribution
Project Quay content distribution covers repository mirroring, geo-replication, and disconnected or air-gapped deployment. You can sync images from other registries, present multiple geo-distributed deployments as one registry, or run in air-gapped environments.
- Repository mirroring
-
Project Quay repository mirroring lets you mirror images from Project Quay and other container registries, like JFrog Artifactory, Harbor, or Sonatype Nexus Repository, into your Project Quay cluster. Using repository mirroring, you can synchronize images to Project Quay based on repository names and tags.
- Geo-replication
-
Project Quay geo-replication allows multiple, geographically distributed Project Quay deployments to work as a single registry from the perspective of a client or user. It significantly improves push and pull performance in a globally-distributed Project Quay setup. Image data is asynchronously replicated in the background with transparent failover and redirection for clients.
- Deployment in disconnected or air-gapped environments
-
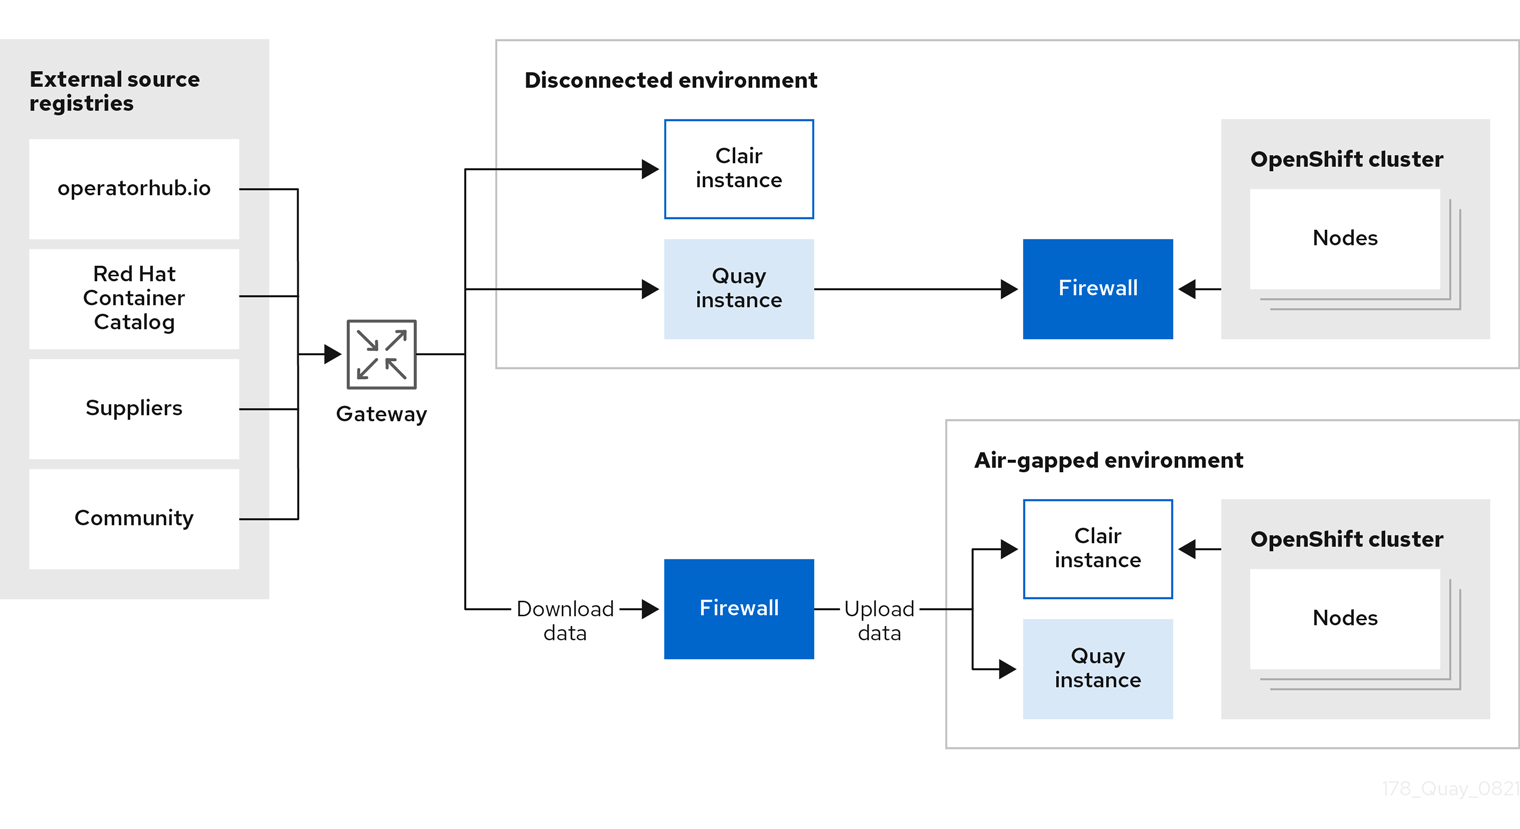
Project Quay is deployable in a disconnected environment in one of two ways:
-
Project Quay and Clair connected to the internet, with an air-gapped OpenShift Container Platform cluster accessing the Project Quay registry through an explicit, allowlisted hole in the firewall.
-
Using two independent Project Quay and Clair installations. One installation is connected to the internet and another within a disconnected, or firewalled, environment. Image and vulnerability data is manually transferred from the connected environment to the disconnected environment using offline media.
-
Build automation
Project Quay build automation builds Dockerfiles on worker nodes on OpenShift Container Platform or Kubernetes. You can configure build triggers such as GitHub webhooks to build new image versions when code is committed.
Project Quay enhanced build architecture
Project Quay enhanced build architecture uses a build manager that creates Job objects and unprivileged pods running the quay-builder image. The build manager coordinates status and image builds through the quay-builder binary and Podman inside each pod.
The following image shows the expected design flow and architecture of the enhanced build features:
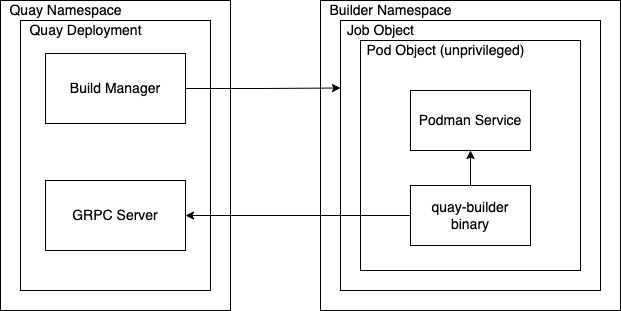
With this enhancement, the build manager first creates the Job Object. Then, the Job Object then creates a pod using the quay-builder-image. The quay-builder-image contains the quay-builder binary and the Podman service. The created pod runs as unprivileged. The quay-builder binary then builds the image while communicating status and retrieving build information from the Build Manager.
Recently added features
Project Quay release notes list the latest features, enhancements, deprecations, and known issues. You can use them to track current product capabilities and changes.
Integration
Project Quay integrates with Git-compatible systems such as GitHub, GitLab, and Bitbucket and provides a full OAuth 2 REST API. You can configure continuous builds from your repositories and manage Project Quay through the API.
REST API
Project Quay provides a full OAuth 2, RESTful API. RESTful API offers the following benefits:
-
Availability from endpoints of each Project Quay instance from the URL, for example,
https://quay-server.example.com/api/v1 -
Allow users to connect to endpoints through a browser, to
GET,DELETE,POST, andPUTProject Quay settings provided by a discovery endpoint that is usable by Swagger. -
The API can be invoked by the URL, for example,
https://quay-server.example.com/api/v1, and uses JSON objects as payload.
Security
Project Quay security includes vulnerability scanning with Clair, TLS configuration, isolated builds, and role-based access by organization and team. You can configure encryption, HTTPS, and fine-grained read, write, and administrative access.
TLS/SSL configuration
You can configure SSL/TLS for the Project Quay registry in the configuration tool UI or in the configuration bundle. SSL/TLS connections to the database, to image storage, and to Redis can also be specified through the configuration tool.
Sensitive fields in the database and at run time are automatically encrypted. You can also require HTTPS and verify certificates for the Project Quay registry during mirror operations.
Clair
Clair is an open source application that leverages static code analyses for parsing image content and reporting vulnerabilities affecting the content. Clair is packaged with Project Quay and can be used in both standalone and Operator deployments. It can be run in highly scalable configurations, where components can be scaled separately as appropriate for enterprise environments.
Project Quay Operator security
When Project Quay is deployed using the Project Quay Operator, the tls component is set to managed by default and the OpenShift Container Platform’s Certificate Authority is used to create HTTPS endpoints and to rotate TLS certificates.
If you set the tls component to unmanaged, you can provide custom certificates to the pass-through Routes, however you are responsible for certificate rotation.
Fully isolated builds
Project Quay now supports building Dockerfiles that uses both bare metal and virtual builders.
By using bare-metal worker nodes, each build is done in an ephemeral virtual machine to ensure isolation and security while the build is running. This provides the best protection against rogue payloads.
Running builds directly in a container does not have the same isolation as when using virtual machines, but it still provides good protection.
Role-based access controls
Project Quay provides full isolation of registry content by organization and team with fine-grained entitlements for read, write, and administrative access by users and automated tools.
Understand Red Hat Quay infrastructure and governance
Review how Red Hat Quay distributes content, supports air-gapped deployments, and governs storage through quotas and auto-pruning.
Project Quay infrastructure
Project Quay infrastructure options range from all-in-one to highly available and geo-distributed, on standalone hosts or on OpenShift Container Platform.
You can deploy standalone with automation or use the Project Quay Operator for OpenShift Container Platform for managed deployment, scaling, and integration. Project Quay runs on any physical or virtual infrastructure, both on premise or public cloud.
Running Project Quay on standalone hosts
You can automate the standalone deployment process by using Ansible or another automation suite. All standalone hosts require valid a Red Hat Enterprise Linux (RHEL) subscription.
- Proof of Concept deployment
-
Project Quay runs on a machine with image storage, containerized database, Redis, and optionally, Clair security scanning.
- Highly available setups
-
Project Quay and Clair run in containers across multiple hosts. You can use
systemdunits to ensure restart on failure or reboot.High availability setups on standalone hosts require customer-provided load balancers, either low-level TCP load balancers or application load balancers, capable of terminating TLS.
Running Project Quay on OpenShift Container Platform
The Project Quay Operator for OpenShift Container Platform provides the following features:
-
Automated deployment and management of Project Quay with customization options
-
Management of Project Quay and all of its dependencies
-
Automated scaling and updates
-
Integration with existing OpenShift Container Platform processes like GitOps, monitoring, alerting, logging
-
Provision of object storage with limited availability, backed by the multi-cloud object gateway (NooBaa), as part of the Red Hat OpenShift Data Foundation (ODF) Operator. This service does not require an additional subscription.
-
Scaled-out, high availability object storage provided by the ODF Operator. This service requires an additional subscription.
Project Quay can run on OpenShift Container Platform infrastructure nodes. As a result, no further subscriptions are required. Running Project Quay on OpenShift Container Platform has the following benefits:
-
Simplified deployment: Simplified deployment of Project Quay and associated components means that you can start using the product immediately
-
Scalability: Use cluster compute capacity to manage demand through automated scaling, based on actual load
-
Simplified Networking: Automated provisioning of load balancers and traffic ingress secured through HTTPS using OpenShift Container Platform TLS certificates and Routes
-
Declarative configuration management: Configurations stored in CustomResource objects for GitOps-friendly lifecycle management
-
Repeatability: Consistency regardless of the number of replicas of Project Quay and Clair
-
OpenShift integration: Additional services to use OpenShift Container Platform Monitoring and Alerting facilities to manage multiple Project Quay deployments on a single cluster
Integrating standalone Project Quay with OpenShift Container Platform
While the Project Quay Operator ensures seamless deployment and management of Project Quay running on OpenShift Container Platform, it is also possible to run Project Quay in standalone mode and then serve content to one or many OpenShift Container Platform clusters, wherever they are running.
The following figure shows integrating standalone Project Quay with OpenShift Container Platform:
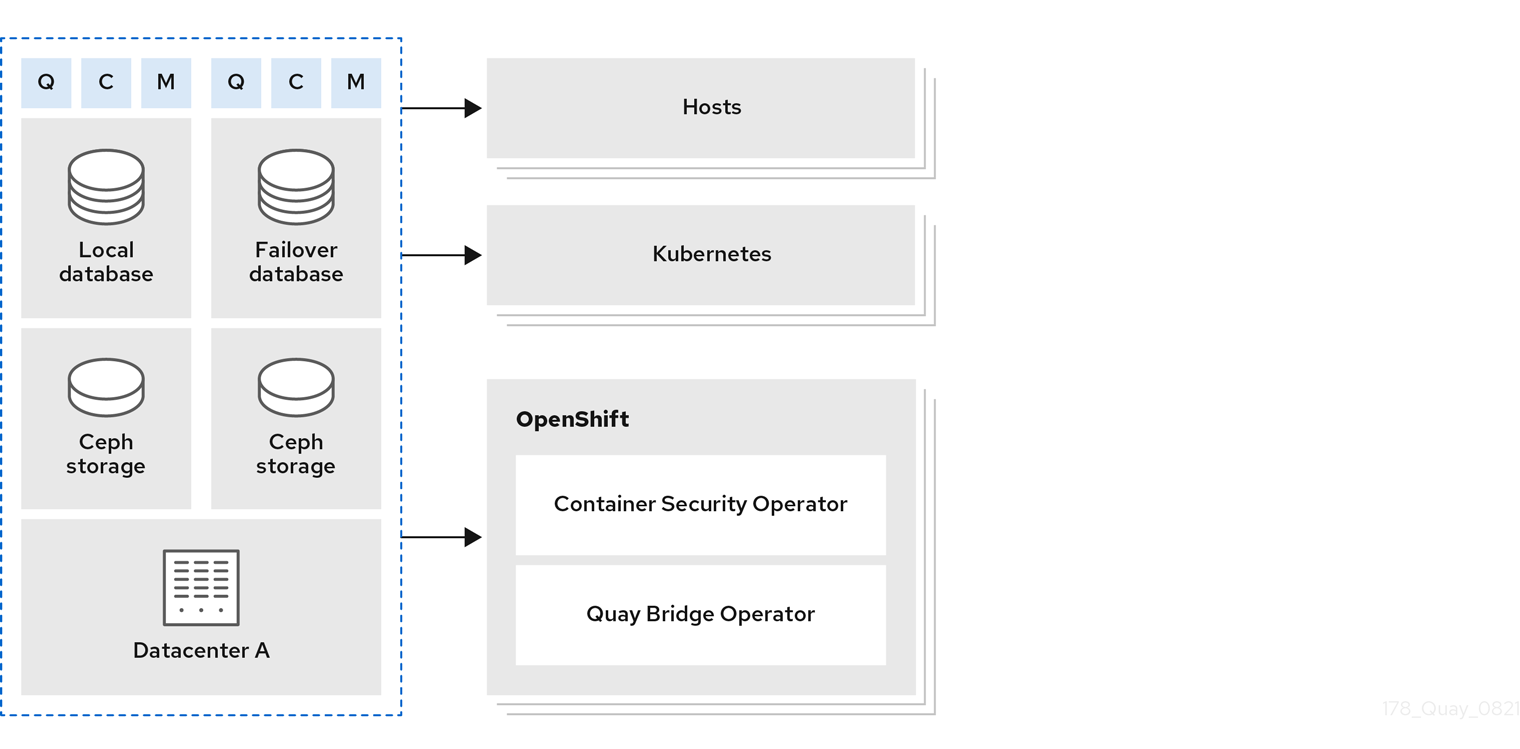
The following Operator is available to help integrate standalone and Operator based deployments of Project Quay with OpenShift Container Platform:
- Quay Bridge Operator
-
Ensures seamless integration and user experience by using Project Quay with OpenShift Container Platform in conjunction with OpenShift Container Platform Builds and ImageStreams
Repository mirroring
With repository mirroring in Project Quay, you can copy images from an external registry into your cluster. You sync by repository or organization name and tag, set intervals, and filter architectures.
From a Project Quay registry with mirroring enabled, you can:
-
Choose a repository or organization from an external registry to mirror
-
Add credentials to access the external registry
-
Identify specific container image repository or organization names and tags to sync
-
Set intervals at which a repository or organization is synced
-
Check the current state of synchronization
-
Filter the architectures that are mirrored
Repository mirroring suits distinct registries that must share selected upstream content. You can configure mirroring in the Project Quay configuration file or by using the Project Quay API when you are ready to implement it.
Mirror registry for Red Hat OpenShift
The mirror registry for OpenShift Container Platform is a small-scale Project Quay deployment for disconnected cluster installation. You can use it to mirror OpenShift Container Platform release images before you deploy a production-grade registry.
The mirror registry for Red Hat OpenShift is a small-scale version of Project Quay that you can use as a target for mirroring the required container images of OpenShift Container Platform for disconnected installations.
For disconnected deployments of OpenShift Container Platform, a container registry is required to execute the installation of the clusters. To run a production-grade registry service on such a cluster, you must create a separate registry deployment to install the first cluster. The mirror registry for Red Hat OpenShift addresses this need and is included in every OpenShift Container Platform subscription. You can download it from the OpenShift console Downloads page.
The mirror registry for Red Hat OpenShift allows users to install a small-scale version of Project Quay and its required components using the mirror-registry command line interface (CLI) tool. The mirror registry for Red Hat OpenShift is deployed automatically with pre-configured local storage and a local database. It also includes auto-generated user credentials and access permissions with a single set of inputs and no additional configuration choices to get started.
The mirror registry for Red Hat OpenShift provides a pre-determined network configuration and reports deployed component credentials and access URLs upon success. A limited set of optional configuration inputs like fully qualified domain name (FQDN) services, superuser name and password, and custom TLS certificates are also provided. This provides users with a container registry so that they can easily create an offline mirror of all OpenShift Container Platform release content when running OpenShift Container Platform in restricted network environments.
The mirror registry for Red Hat OpenShift is limited to hosting images that are required to install a disconnected OpenShift Container Platform cluster, such as release images or Operator images. It uses local storage. Content built by customers should not be hosted by the mirror registry for Red Hat OpenShift.
Unlike Project Quay, the mirror registry for Red Hat OpenShift is not a highly-available registry. Only local file system storage is supported. Using the mirror registry for Red Hat OpenShift with more than one cluster is discouraged, because multiple clusters can create a single point of failure when updating your cluster fleet. Use the mirror registry for Red Hat OpenShift to install a cluster that can host a production-grade, highly available registry such as Project Quay, which can serve OpenShift Container Platform content to other clusters.
Geo-replication
Geo-replication connects multiple geographically distributed Project Quay deployments so that clients use them as a single registry. Standalone and Operator-based deployments support geo-replication.
With geo-replication, regions share one database and one Redis instance while each region keeps local object storage. Clients push and pull through a common entrypoint, typically a global load balancer, and blob data replicates asynchronously between storage backends.
Mirroring compared to geo-replication
Mirroring and geo-replication solve different distribution needs in Project Quay. Mirroring syncs selected repositories between separate registries; geo-replication shares one database and replicates blob storage across regions.
For example, a geo-replicated Project Quay registry can use two different blob storage endpoints.
The primary use cases for geo-replication include the following:
-
Speeding up access to the binary blobs for geographically dispersed setups
-
Guaranteeing that the image content is the same across regions
Mirroring synchronizes selected repositories, or subsets of repositories, from one registry to another. The registries are distinct, with each registry having a separate database and separate image storage.
The primary use cases for mirroring include the following:
-
Independent registry deployments in different data centers or regions, where a certain subset of the overall content is supposed to be shared across the data centers and regions
-
Automatic synchronization or mirroring of selected (allowlisted) upstream repositories from external registries into a local Project Quay deployment
|
Note
|
Mirroring and geo-replication can be used simultaneously. |
| Feature / Capability | Geo-replication | Mirroring |
|---|---|---|
What is the feature designed to do? |
A shared, global registry |
Distinct, different registries |
What happens if replication or mirroring has not been completed yet? |
The remote copy is used (slower) |
No image is served |
Is access to all storage backends in both regions required? |
Yes (all Project Quay nodes) |
No (distinct storage) |
Can users push images from both sites to the same repository or organization? |
Yes |
No |
Is all registry content and configuration identical across all regions (shared database)? |
Yes |
No |
Can users select individual namespaces or repositories to be mirrored? |
No |
Yes |
Can users apply filters to synchronization rules? |
No |
Yes |
Are individual / different role-based access control configurations allowed in each region |
No |
Yes |
Air-gapped or disconnected deployments
Project Quay supports air-gapped and disconnected deployments with internet-connected registries and firewall access, or fully disconnected installations with offline media transfer. You can choose the pattern that matches your network constraints.
In the following diagram, the upper deployment in the diagram shows Project Quay and Clair connected to the internet, with an air-gapped OpenShift Container Platform cluster accessing the Project Quay registry through an explicit, allowlisted hole in the firewall.
The lower deployment in the diagram shows Project Quay and Clair running inside of the firewall, with image and CVE data transferred to the target system using offline media. The data is exported from a separate Project Quay and Clair deployment that is connected to the internet.
Storage governance
Project Quay helps you control how much storage organizations and repositories consume. You can set quotas to limit growth and use auto-pruning policies to remove tags by age or count so that registries stay within those limits.
Quota management architecture
Project Quay quota management sums blob sizes at the repository and namespace level without double-counting shared blobs. You can enforce storage limits and reject pushes when quotas are exceeded.
|
Important
|
Because manifest list totals are counted toward the repository total, the total quota consumed when upgrading from a previous version of Project Quay might be reportedly differently in Project Quay 3.9. In some cases, the new total might go over a repository’s previously-set limit. Project Quay administrators might have to adjust the allotted quota of a repository to account for these changes. |
The quota management feature works by calculating the size of existing repositories and namespace with a backfill worker, and then adding or subtracting from the total for every image that is pushed or garbage collected afterwords. Additionally, the subtraction from the total happens when the manifest is garbage collected.
|
Note
|
Because subtraction occurs from the total when the manifest is garbage collected, there is a delay in the size calculation until it is able to be garbage collected. |
The following database tables hold the quota repository size, quota namespace size, and quota registry size, in bytes, of a Project Quay repository within an organization:
-
QuotaRepositorySize -
QuotaNameSpaceSize -
QuotaRegistrySize
The organization size is calculated by the backfill worker to ensure that it is not duplicated. When an image push is initialized, the user’s organization storage is validated to check if it is beyond the configured quota limits. If an image push exceeds defined quota limitations, a soft or hard check occurs:
-
For a soft check, users are notified.
-
For a hard check, the push is stopped.
If storage consumption is within configured quota limits, the push is allowed to proceed.
Image manifest deletion follows a similar flow, whereby the links between associated image tags and the manifest are deleted. Additionally, after the image manifest is deleted, the repository size is recalculated and updated in the QuotaRepositorySize, QuotaNameSpaceSize, and QuotaRegistrySize tables.
Namespace auto-pruning architecture
Project Quay namespace auto-pruning uses database tables for policies and task status and an auto-prune worker that runs configured policies. You can use this overview to understand how policies are stored and executed.
For the namespace auto-pruning feature, two distinct database tables within a database schema were created: one for namespaceautoprunepolicy and another for autoprunetaskstatus. An auto-prune worker carries out the configured policies.
Namespace auto prune policy database table
The namespaceautoprunepolicy database table holds the policy configuration for a single namespace. There is only one entry per namespace, but there is support for multiple rows per namespace_id. The policy field holds the policy details, such as {method: "creation_date", olderThan: "2w"} or {method: "number_of_tags", numTags: 100}.
| Field | Type | Attributes | Description |
|---|---|---|---|
|
character varying (225) |
Unique, indexed |
Unique identifier for this policy |
|
Integer |
Foreign Key |
Namespace that the policy falls under |
|
text |
JSON |
Policy configuration |
Auto-prune task status database table
The autoprunetaskstatus table registers tasks to be executed by the auto-prune worker. Tasks are executed within the context of a single namespace. Only one task per namespace exists.
| Field | Type | Attributes | Description |
|---|---|---|---|
|
Integer |
Foreign Key |
Namespace that this task belongs to |
|
Big Integer (bigint) |
Nullable, indexed |
Last time that the worker executed the policies for this namespace |
|
text |
Nullable |
Details from the last execution task |
Auto-prune worker
The following sections detail information about the auto-prune worker.
- Auto-prune task creation
-
When a new policy is created in the
namespaceautoprunepolicydatabase table, a row is also created in theautoprunetasktable. This is done in the same transaction. The auto-prune worker uses the entry in theautoprunetasktable to identify which namespace it should execute policies for. - Auto-prune worker execution
-
The auto-pruning worker is an asynchronous job that executes configured policies. Its workflow is based on values in the
autoprunetasktable. When a task begins, the following occurs:
The auto-pruning worker is an asynchronous job that executes configured policies. Its workflow is based on values in the autoprunetask table. When a task begins, the following occurs:
-
The auto-prune worker starts on a set interval, which defaults at 30 seconds.
-
The auto-prune worker selects a row from
autoprunetaskwith the least, or null,last_ran_msandFOR UPDATE SKIP LOCKED.-
A null
last_ran_msindicates that the task was never ran. -
A task that has not run for the longest amount of time, or has never been run at all, is prioritized.
-
-
The auto-prune worker obtains the policy configuration from the
namespaceautoprunepolicytable.-
If no policy configuration exists, the entry from
autoprunetaskis deleted for this namespace and the procedure stops immediately.
-
-
The auto-prune worker begins a paginated loop of all repositories under the organization.
-
The auto-prune worker determines much pruning method to use based on
policy.method.
-
-
The auto-prune worker executes the pruning method with the policy configuration retrieved earlier.
-
For pruning by the number of tags: the auto-pruner worker gets the number of currently active tags sorted by creation date, and deletes the older tags to the configured number.
-
For pruning by date: the auto-pruner worker gets the active tags older than the specified time span and any tags returned are deleted.
-
-
The auto-prune worker adds audit logs of the tags deleted.
-
The
last_ran_msgets updated after a row fromautoprunetaskis selected. -
The auto-prune worker ends.
Evaluate Quay.io as a hosted registry option
Compare Quay.io hosted registry capabilities, support, and plan tiers with self-managed Red Hat Quay to decide whether a hosted option fits your organization.
Quay.io overview
Quay.io is a hosted registry service for storing, building, and distributing container images and other artifacts. It provides access controls, automated vulnerability scanning, and CI/CD integration for managing your container workflows.
Quay.io offers both free and paid tiers to cater to various user needs, and is primarily hosted in the United States (us-east-1 region of Amazon Web Services) with CDN edge servers scattered throughout the world.
Quay.io is flexible, easy to use, and allows users to upload and manage container images. Developers can create private repositories, ensuring sensitive or proprietary code remains secure within their organization. Additionally, users can set up access controls and manage team collaboration, enabling seamless sharing of container images among designated team members.
Quay.io addresses container security concerns through its integrated image scanner, Clair. The service automatically scans container images for known vulnerabilities and security issues, providing developers with valuable insights into potential risks and suggesting remediation steps.
Quay.io excels in automation and supports integration with popular Continuous Integration/Continuous Deployment (CI/CD) tools and platforms, enabling seamless automation of the container build and deployment processes. As a result, developers can streamline their workflows, significantly reducing manual intervention and improving overall development efficiency.
Quay.io caters to the needs of both large and small-scale deployments. The platform can handle significant container image traffic and offers efficient replication and distribution mechanisms to deliver container images to various geographical locations.
With Quay.io, you can discover pre-built public container images shared by other users on the Explore page, which makes it easier to find tools, applications, and services for your projects.
Quay.io support
Quay.io provides technical support for managing container images and for platform availability. You can use Red Hat support resources to resolve functional issues and service incidents.
The Red Hat Knowledgebase contains valuable content to maximize the potential of Red Hat’s products and technologies. Users can find articles, product documentation, and videos that outline best practices for installing, configuring, and utilizing Red Hat products. It also serves as a hub for solutions to known issues, providing concise root cause descriptions and remedial steps.
For incidents related to service disruptions or performance issues not listed on the Quay.io status page, which includes availability and functionality concerns, paying customers can raise a technical support ticket using the Red Hat Customer Portal. A service incident is defined as an unplanned interruption of service or reduction in service quality, affecting multiple users of the platform.
Quay.io plan tiers
Quay.io offers a free tier and paid plans with additional capacity and features. You can use this overview to compare hosted options when you evaluate Quay.io against a self-managed Project Quay deployment.
In addition to a free tier, Quay.io offers several paid plans with enhanced benefits. Plan names, limits, and prices are listed on the Quay.io Pricing page.
All Quay.io plans include the following benefits:
-
Continuous integration
-
Public repositories
-
Robot accounts
-
Teams
-
SSL/TLS encryption
-
Logging and auditing
-
Invoice history
Quay.io subscriptions are handled by the Stripe payment processing platform. A valid credit card is required to subscribe to a paid plan.
Choose a Quay.io plan
Compare Quay.io plan tiers and features to select the hosted registry option that fits your organization.
Quay.io plan tiers
Quay.io offers a free tier and paid plans with additional capacity and features. You can use this overview to compare hosted options when you evaluate Quay.io against a self-managed Project Quay deployment.
In addition to a free tier, Quay.io offers several paid plans with enhanced benefits. Plan names, limits, and prices are listed on the Quay.io Pricing page.
All Quay.io plans include the following benefits:
-
Continuous integration
-
Public repositories
-
Robot accounts
-
Teams
-
SSL/TLS encryption
-
Logging and auditing
-
Invoice history
Quay.io subscriptions are handled by the Stripe payment processing platform. A valid credit card is required to subscribe to a paid plan.
Signing up for a Quay.io plan
To subscribe to a paid Quay.io plan, you can select a tier on the Pricing page and complete checkout with Stripe. A valid credit card is required.
-
Navigate to the Quay.io Pricing page.
-
Decide on a plan, for example, Small, and click Buy Now. You are redirected to the Create New Organization page. Enter the following information:
-
Organization Name
-
Organization Email
-
Optional. You can select a different plan if you want a plan larger than, for example, Small.
-
-
Resolve the captcha, and select Create Organization.
-
You are redirected to Stripe. Enter the following information:
-
Card information, including MM/YY and the CVC
-
Name on card
-
Country or region
-
ZIP (if applicable)
-
Check the box if you want your information to be saved.
-
Phone Number
-
-
Click Subscribe after all boxes have been filled.
Reviewing Quay.io billing information
The Billing information section on the Quay.io User Settings page shows your current plan, invoices, and receipt options. You can review plan details and manage how receipts are sent.
The following information is available:
-
Current Plan. This section denotes the current plan Quay.io plan that you are signed up for. It also shows the amount of private repositories you have.
-
Invoices. If you are on a paid plan, you can click View Invoices to view a list of invoices.
-
Receipts. If you are on a paid plan, you can select whether to have receipts for payment emailed to you, another user, or to opt out of receipts altogether.
Understand Red Hat Quay’s tenancy model
Review how users, organizations, repositories, robot accounts, and teams relate in the Red Hat Quay tenancy model before you structure ownership and access.
Tenancy model
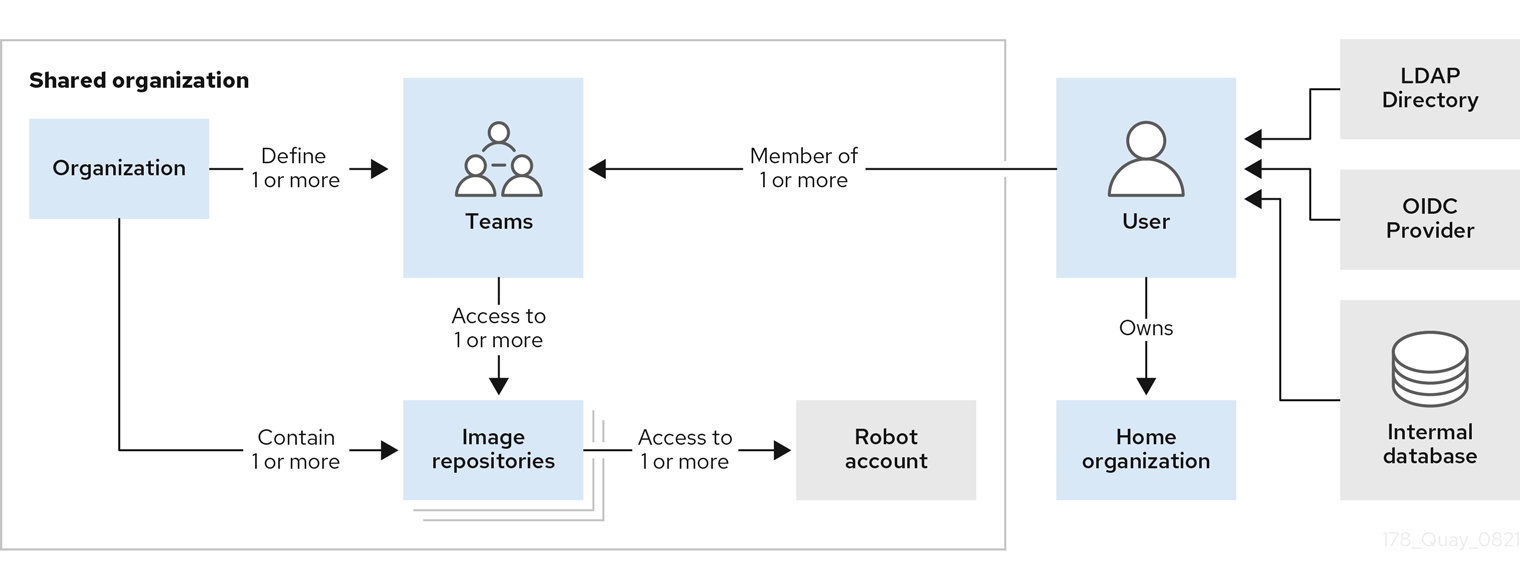
The tenancy model describes users, organizations, teams, and robot accounts in Project Quay. You can use these entities to control repository access and collaboration.
-
Organizations provide a way of sharing repositories under a common namespace that does not belong to a single user. Instead, these repositories belong to several users in a shared setting, such as a company.
-
Teams provide a way for an Organization to delegate permissions. Permissions can be set at the global level (for example, across all repositories), or on specific repositories. They can also be set for specific sets, or groups, of users.
-
Users can log in to a registry through the web UI or a by using a client like Podman and using their respective login commands, for example,
$ podman login. Each user automatically gets a user namespace, for example,<quay-server.example.com>/<user>/<username>, orquay.io/<username>if you are using Quay.io. -
Robot accounts provide automated access to repositories for non-human users like pipeline tools. Robot accounts are similar to OpenShift Container Platform Service Accounts. Permissions can be granted to a robot account in a repository by adding that account like you would another user or team.
User accounts overview
A user account is an authenticated identity on Project Quay that can create repositories, push and pull images, and manage access. You can create and delete users in the UI or by using the API.
Organizations overview
Organizations in Quay group users, repositories, and teams under a shared namespace for centralized access control. Administrators can assign roles and permissions to teams and users within an organization.
Other useful information about organizations includes the following:
-
You cannot have an organization embedded within another organization. To subdivide an organization, you use teams.
-
Organizations cannot contain users directly. You must first add a team, and then add one or more users to each team.
NoteIndividual users can be added to specific repositories inside of an organization. Consequently, those users are not members of any team on the Repository Settings page. The Collaborators View on the Teams and Memberships page shows users who have direct access to specific repositories within the organization without needing to be part of that organization specifically.
-
Teams can be set up in organizations as just members who use the repositories and associated images, or as administrators with special privileges for managing the Organization.
Project Quay repository overview
A repository provides a central location for storing a related set of container images that share a namespace in Quay. You can group repositories under namespaces for individual users, teams, or organizations.
For example, you might have a namespace for your personal projects, one for your company, or one for a specific team within your organization.
Project Quay Robot Account overview
A robot account provides automated, credential-based access to repositories in your registry, similar to OpenShift Container Platform service accounts. You can use robot accounts to grant container clients push and pull permissions without sharing personal credentials.
Setting up a Robot Account results in the following:
-
Credentials are generated for the Robot Account.
-
Repositories and images that the Robot Account can push and pull images from are identified.
-
Generated credentials can be copied and pasted to use with different container clients, such as Docker, Podman, Kubernetes, Mesos, and so on, to access each defined repository.
Each Robot Account is limited to a single user namespace or Organization. For example, the Robot Account could provide access to all repositories for the user quayadmin. However, it cannot provide access to repositories that are not in the user’s list of repositories.
Robot Accounts can be created using the Project Quay UI, or through the CLI using the Project Quay API. After creation, Project Quay administrators can leverage more advanced features with Robot Accounts, such as keyless authentication.
Project Quay teams overview
A team in Quay is a group of users that share permissions, which simplifies access control and collaboration across organizations and repositories. You can assign a team specific permissions so that its members have appropriate access based on their roles.
Understand the Red Hat Quay permissions model
Review Red Hat Quay permission levels and role-based access control to grant appropriate access without over-permissioning.
Project Quay permissions model
Project Quay provides a fine-grained permissions model that controls access to repositories and their content. Administrators can grant read, write, or admin access to users, robots, and teams to support secure collaboration and automation.
Project Quay administrators can grant users and robot accounts one of the following levels of access:
-
Read: Allows users, robots, and teams to pull images.
-
Write: Allows users, robots, and teams to push images.
-
Admin: Provides users, robots, and teams administrative privileges.
|
Note
|
Administrative users can delegate new permissions for existing users and teams, change existing permissions, and revoke permissions when necessary |
Collectively, these levels of access provide users or robot accounts the ability to perform specific tasks, like pulling images, pushing new versions of an image into the registry, or managing the settings of a repository. These permissions can be delegated across the entire organization and on specific repositories. For example, Read permissions can be set to a specific team within the organization, while Admin permissions can be given to all users across all repositories within the organization.
Understand Clair vulnerability scanning
Review Clair vulnerability scanning concepts and how scan results are produced to plan image security for your registry.
Clair security scanner
Clair is a vulnerability scanner that analyzes container image layers and reports security issues from upstream CVE databases in Project Quay. You can use these reports to identify vulnerabilities that affect image content.
About Clair
Clair scans container images for known vulnerabilities in Project Quay. You can use National Vulnerability Database (NVD) enrichment, including CVSS severity scores, to prioritize remediation.
The NVD is a United States government repository of security-related information, including known vulnerabilities and security issues in various software components and systems. NVD scores provide the following benefits:
-
Data synchronization. Clair can periodically synchronize its vulnerability database with the NVD. This ensures that it has the latest vulnerability data.
-
Matching and enrichment. Clair compares the metadata and identifiers of vulnerabilities it discovers in container images with the data from the NVD. This process involves matching the unique identifiers, such as Common Vulnerabilities and Exposures (CVE) IDs, to the entries in the NVD. When a match is found, Clair can enrich its vulnerability information with additional details from NVD, such as severity scores, descriptions, and references.
-
Severity scores. The NVD assigns severity scores to vulnerabilities, such as the Common Vulnerability Scoring System (CVSS) score, to indicate the potential impact and risk associated with each vulnerability. By incorporating NVD severity scores, Clair can provide more context on the seriousness of the vulnerabilities it detects.
If Clair finds vulnerabilities from NVD, a detailed and standardized assessment of the severity and potential impact of vulnerabilities detected within container images is reported to users on the UI. CVSS enrichment data provides the following benefits:
-
Vulnerability prioritization. By using CVSS scores, you can prioritize vulnerabilities based on their severity and address the most critical issues first.
-
Assess risk. CVSS scores can help you understand the potential risk a vulnerability poses to your containerized applications.
-
Communicate severity. CVSS scores provide a standardized way to communicate the severity of vulnerabilities across teams and organizations.
-
Inform remediation strategies. CVSS enrichment data can guide Quay.io users in developing appropriate remediation strategies.
-
Compliance and reporting. Integrating CVSS data into reports generated by Clair can help organizations demonstrate their commitment to addressing security vulnerabilities and complying with industry standards and regulations.
Clair concepts
Clair breaks container image analysis into indexing, matching, and notification. You can use these concepts to understand how Clair builds and updates vulnerability reports in Project Quay.
Indexing
Clair’s indexer service plays a crucial role in understanding the makeup of a container image. In Clair, container image representations are called "manifests." Manifests are used to comprehend the contents of the image’s layers. To streamline this process, Clair takes advantage of the fact that Open Container Initiative (OCI) manifests and layers are designed for content addressing, reducing repetitive tasks.
During indexing, a manifest that represents a container image is taken and broken down into its essential components. The indexer’s job is to uncover the image’s contained packages, its origin distribution, and the package repositories it relies on. This valuable information is then recorded and stored within Clair’s database. The insights gathered during indexing serve as the basis for generating a comprehensive vulnerability report. This report can be seamlessly transferred to a matcher node for further analysis and action, helping users make informed decisions about their container images' security.
Matching
With Clair, a matcher node is responsible for matching vulnerabilities to a provided index report.
Matchers are responsible for keeping the database of vulnerabilities up to date. Matchers run a set of updaters, which periodically probe their data sources for new content. New vulnerabilities are stored in the database when they are discovered.
The matcher API is designed to always provide the most recent vulnerability report when queried. The vulnerability report summarizes both a manifest’s content and any vulnerabilities affecting the content.
Notifier service
Clair uses a notifier service that keeps track of new security database updates and informs users if new or removed vulnerabilities affect an indexed manifest.
When the notifier becomes aware of new vulnerabilities affecting a previously indexed manifest, it uses the configured methods in your config.yaml file to issue notifications about the new changes. Returned notifications express the most severe vulnerability discovered because of the change. This avoids creating excessive notifications for the same security database update.
When a user receives a notification, it issues a new request against the matcher to receive an up-to-date vulnerability report.
You can subscribe to notifications through the following mechanics:
-
Webhook delivery
-
AMQP delivery
-
STOMP delivery
Configuring the notifier is done through the Clair YAML configuration file.
|
Note
|
By default, the notifier service on Quay.io is disabled. As a result, repository owners cannot configure notifications when new CVEs are reported. However, when CVE databases are updated, which is every 6 hours on Quay.io, new vulnerabilities affecting previously indexed manifests are automatically updated. As a result, manual re-scans are not required, and users can view new CVEs directly on Quay.io. |
Understand the Quay Bridge Operator
Review Quay Bridge Operator features to decide whether to integrate OpenShift cluster builds with your Red Hat Quay registry.
Quay Bridge Operator features
The Quay Bridge Operator duplicates integrated OpenShift Container Platform registry features in Project Quay and synchronizes namespaces, image streams, and robot accounts between your clusters.
The features enabled with the Quay Bridge Operator include:
-
Synchronizing OpenShift Container Platform namespaces as Project Quay organizations.
-
Creating robot accounts for each default namespace service account.
-
Creating secrets for each created robot account, and associating each robot secret to a service account as
MountableandImage Pull Secret. -
Synchronizing OpenShift Container Platform image streams as Project Quay repositories.
-
Automatically rewriting new builds making use of image streams to output to Project Quay.
-
Automatically importing an image stream tag after a build completes.
Get started
Get started with Quay.io
Create a Quay.io account, sign in, review plan and billing options, and prepare to create an organization and push your first image.
Creating a Quay.io account
New Quay.io users need both a Red Hat account and a Quay.io username. You use the Quay.io account for image storage and the Red Hat account for UI and catalog access.
New users of Quay.io are required to both register for a Red Hat account and create a Quay.io username. These accounts are correlated, with two distinct differences:
-
The Quay.io account can be used to push and pull container images or Open Container Initiative images to Quay.io to store images.
-
The Red Hat account provides users access to the Quay.io user interface. For paying customers, this account can also be used to access images from the Red Hat Ecosystem Catalog, which can be pushed to their Quay.io repository.
Users must first register for a Red Hat account, and then create a Quay.io account. Users need both accounts to properly use all features of Quay.io.
Registering for a Red Hat Account
To use Quay.io, you can register for a Red Hat account on the Red Hat Customer Portal. You create login credentials and provide the required contact information.
Use the following procedure to register for a Red Hat account for Quay.io.
-
Navigate to the Red Hat Customer Portal.
-
In navigation pane, click Log In.
-
When navigated to the log in page, click Register for a Red Hat Account.
-
Enter a Red Hat login ID.
-
Enter a password.
-
Enter the following personal information:
-
First name
-
Last name
-
Email address
-
Phone number
-
-
Enter the following contact information that is relative to your country or region. For example:
-
Country/region
-
Address
-
Postal code
-
City
-
County
-
-
Select and agree to Red Hat’s terms and conditions.
-
Click Create my account.
-
Navigate to Quay.io and log in.
Quay.io Single Sign On support
To link legacy Quay.io credentials with Red Hat Single Sign-On, you can attach your account from the Recovery page. Most accounts are already linked.
Red Hat Single Sign On (SSO) can be used with Quay.io. Use the following procedure to set up Red Hat SSO with Quay.io. For most users, these accounts are already linked. However, for some legacy Quay.io users, this procedure might be required.
-
You have created a Quay.io account.
-
Navigate to the Quay.io Recovery page.
-
Enter your username and password, then click Sign in to Quay Container Registry.
-
In the navigation pane, click your username → Account Settings.
-
In the navigation pane, click External Logins and Applications.
-
Click Attach to Red Hat.
-
If you are already signed into Red Hat SSO, your account is automatically linked. Otherwise, you are prompted to sign into Red Hat SSO by entering your Red Hat login or email, and the password. Alternatively, you might need to create a new account first.
After signing into Red Hat SSO, you can choose to authenticate against Quay.io using your Red Hat account from the login page.
Logging into Quay.io
To sign in to Quay.io, you can use the Quay.io UI with your Red Hat credentials. On first login, you confirm the generated username.
-
You have created a Red Hat account and a Quay.io account. For more information, see "Creating a Quay.io account".
-
Navigate to Quay.io.
-
In the navigation pane, select Sign In and log in using your Red Hat credentials.
-
If it is your first time logging in, you must confirm the automatically-generated username. Click Confirm Username to log in.
You are redirected to the Quay.io repository landing page.
Logging into Quay through the Hybrid Cloud Console
To sign in to Quay on the Red Hat Hybrid Cloud Console, you can use your Red Hat account. You are redirected to the Quay repository landing page after authentication.
-
You have created a Red Hat account and a Quay.io account. For more information, see "Creating a Quay.io account".
-
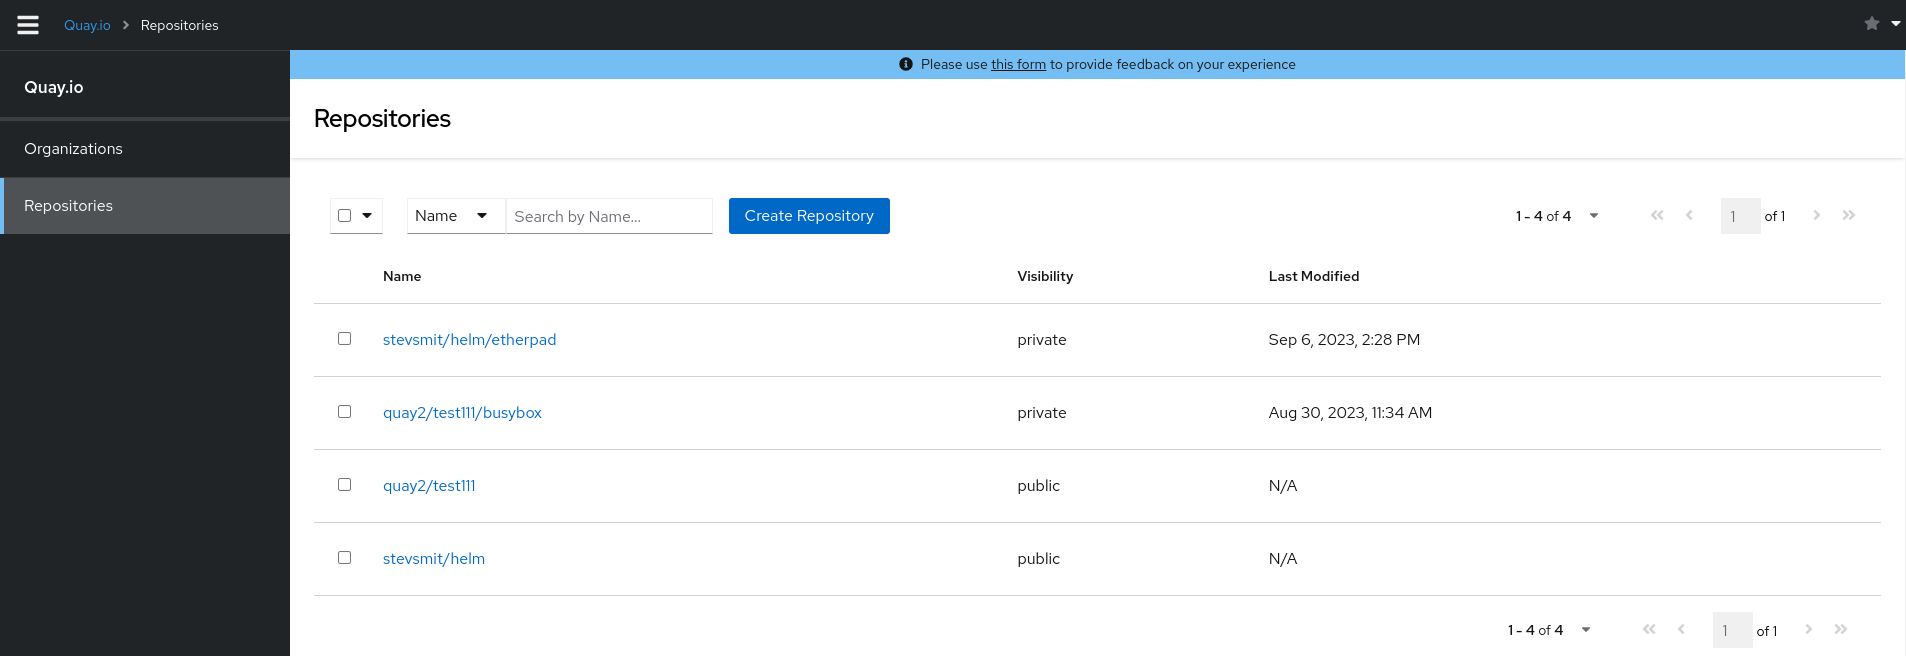
Navigate to Quay on the Red Hat Hybrid Cloud Console and log in using your Red Hat account. You are redirected to the Quay repository landing page:
Signing up for a Quay.io plan
To subscribe to a paid Quay.io plan, you can select a tier on the Pricing page and complete checkout with Stripe. A valid credit card is required.
-
Navigate to the Quay.io Pricing page.
-
Decide on a plan, for example, Small, and click Buy Now. You are redirected to the Create New Organization page. Enter the following information:
-
Organization Name
-
Organization Email
-
Optional. You can select a different plan if you want a plan larger than, for example, Small.
-
-
Resolve the captcha, and select Create Organization.
-
You are redirected to Stripe. Enter the following information:
-
Card information, including MM/YY and the CVC
-
Name on card
-
Country or region
-
ZIP (if applicable)
-
Check the box if you want your information to be saved.
-
Phone Number
-
-
Click Subscribe after all boxes have been filled.
Reviewing Quay.io billing information
The Billing information section on the Quay.io User Settings page shows your current plan, invoices, and receipt options. You can review plan details and manage how receipts are sent.
The following information is available:
-
Current Plan. This section denotes the current plan Quay.io plan that you are signed up for. It also shows the amount of private repositories you have.
-
Invoices. If you are on a paid plan, you can click View Invoices to view a list of invoices.
-
Receipts. If you are on a paid plan, you can select whether to have receipts for payment emailed to you, another user, or to opt out of receipts altogether.
Get started after deploying Quay on OpenShift Container Platform
After deploying Red Hat Quay on OpenShift Container Platform, create the first user in the UI and prepare to create a repository and push your first image.
Creating the first user by using the UI
To create the first user for your Project Quay registry, you can use the UI for a visual workflow. The UI method is simpler because it does not require additional configuration in the config.yaml file.
-
You have deployed the Project Quay registry.
-
On the OpenShift Container Platform web console, click Operators → Installed Operators → Project Quay.
-
On the Project Quay Operators page, click Quay Registry, and then the name of your registry.
-
On the QuayRegistry details page, click the Registry Endpoint link, for example, example-registry-quay.username-cluster-new.gcp.quaydev.org. You are navigated to the registry’s main page.
-
Click Create Account.
-
Enter the details for Username, Password, Email, and then click Create Account. After creating the first user, you are automatically logged in to the Project Quay registry.
Get started after deploying Project Quay on standalone hosts
After you install Project Quay as a proof of concept or in high availability on standalone hosts, create the first user in the UI and confirm you can reach the service.
Creating the first user on a standalone registry
To create the first user account on a standalone Project Quay registry, you can open the UI and complete Create Account. You can then log in from the CLI to confirm access.
-
You have deployed a proof of concept, standalone, or high availability Project Quay registry.
-
You can reach the registry UI, for example,
http://quay-server.example.com.
-
Open the Project Quay UI in a browser.
-
Click Create Account.
-
Enter the details for Username, Password, Email, and then click Create Account. After creating the first user, you are automatically logged in to the Project Quay registry.
Create your first organization
Create your first organization by using the Red Hat Quay UI to group repositories and teams.
Creating an organization by using the UI
To create an organization in Quay, you can use the UI. You set an organization name and then manage repositories and teams under that namespace.
In context of organizations, the contact email is used for the following purposes:
-
Quota warnings notifications
-
Quota errors notifications
-
Organization account recovery
-
Billing notifications
Use the following procedure to create a new organization by using the UI.
-
Log in to your Project Quay registry.
-
Click Organization in the navigation pane.
-
Click Create Organization.
-
Enter an Organization Name, for example,
testorg. -
Optional: Enter an Email for the organization. If not specified, notifications default to the organization owners.
NoteMultiple organizations can share the same organization email address, such as a team distribution list. By default, the address cannot match a user account email unless
FEATURE_ORG_SHARED_EMAILis enabled. -
Click Create.
Now, your example organization should populate under the Organizations page.
Create your first repository
Create your first repository by using the Red Hat Quay UI to store and share container images.
Creating a repository by using the UI
To create an image repository in Quay, you can use the UI. You select a namespace and set a repository name and visibility.
Use the following procedure to create a repository using the Quay UI.
-
Click Repositories on the navigation pane.
-
Click Create Repository.
-
Select a namespace, for example, quayadmin, and then enter a Repository name, for example,
testrepo.ImportantDo not use the following words in your repository name: *
build*trigger*tag*notificationWhen these words are used for repository names, users are unable access the repository, and are unable to permanently delete the repository. Attempting to delete these repositories returns the following error:
Failed to delete repository <repository_name>, HTTP404 - Not Found. -
Click Create.
Now, your example repository should populate under the Repositories page.
-
Optional. Click Settings → Repository visibility → Make private to set the repository to private.
Push and pull your first image
Push and pull your first container image with Podman to confirm your registry accepts content from the CLI.
Pushing and pulling your first image
To push and pull your first container image in Project Quay, you can log in with Podman, tag a sample image, and push it to a repository that you own.
-
You can log in to your Project Quay or Quay.io registry as a user.
-
You have a repository where you can push images, or you can create one by pushing to a new repository path.
-
Log in to your registry:
$ podman login <quay-server.example.com>Replace
<quay-server.example.com>with your registry hostname, for example,quay.ioor your Operator registry endpoint.For standalone proof of concept registries that use self-signed certificates, you might need
--tls-verify=false. -
Pull a sample image from an external registry:
$ podman pull busybox -
Tag the image for your registry namespace and repository:
$ podman tag docker.io/library/busybox <quay-server.example.com>/<namespace>/<repository>:testReplace
<namespace>with your user or organization name and<repository>with the repository name. -
Push the image to your registry:
$ podman push <quay-server.example.com>/<namespace>/<repository>:testFor standalone proof of concept registries that use self-signed certificates, you might need
--tls-verify=false. -
Pull the image from your registry to confirm that the push succeeded:
$ podman pull <quay-server.example.com>/<namespace>/<repository>:test
View your first Clair scan
View your first Clair vulnerability report in the Red Hat Quay UI to confirm security scanning is working.
Viewing Clair security scans by using the UI
To review the results of a Clair security scan, you can open the Security Scanner page for a tag in the Project Quay UI. You can inspect detected CVEs and check available remediation options.
-
For standalone Project Quay deployments, you have deployed Clair. For more information, see "Setting up Clair on standalone Project Quay deployments"
-
Navigate to a repository and click Tags in the navigation pane. This page shows the results of the security scan.
-
To reveal more information about multi-architecture images, click See Child Manifests to see the list of manifests in extended view.
-
Click a relevant link under See Child Manifests, for example, 1 Unknown to be redirected to the Security Scanner page.
-
The Security Scanner page provides information for the tag, such as which CVEs the image is susceptible to, and what remediation options you might have available.
NoteImage scanning only lists vulnerabilities found by Clair security scanner. What users do about the vulnerabilities are uncovered is up to said user.
Enable and make your first Quay API call
Review the Red Hat Quay API overview, create an OAuth 2 access token, and make your first API call.
About the Project Quay API
The Project Quay API exposes REST endpoints that you can use to automate registry tasks such as repository and user management. You authenticate requests with an OAuth 2 access token.
Before you call an endpoint, create an OAuth application in the Project Quay UI and generate an OAuth 2 access token with the scopes that you need. Pass that token in the Authorization: Bearer header of each request.
Creating an OAuth 2 access token
To create an OAuth 2 access token for Project Quay API calls, you can generate a named token from an organization OAuth application in the UI.
-
You have logged in to Project Quay as an administrator.
-
You have created an organization.
-
On the Project Quay UI, select your organization.
-
In the navigation pane, click OAuth Applications.
-
Create an application if you do not already have one:
-
Click Create OAuth Application.
-
Enter an application name and any required application details, such as homepage URL, description, avatar e-mail, and redirect/callback URL.
-
Click Create application.
-
-
Click the name of your OAuth application.
-
Click API Access Tokens.
-
Click Generate New Token.
-
Configure the token:
-
Enter a Token name.
-
Set an expiration period, such as 10 years.
-
Optional: Click Assign another user to assign this OAuth token to another user. When prompted, select the desired user.
-
Select the permissions, or scopes, for the token. For example:
-
Administer Organization. This application can administer your organizations, including creating robots, creating teams, adjusting team membership, and changing billing settings. Grant this permission only when you have absolute trust in the requesting application.
-
Administer Repositories. This application has administrator access to all repositories to which the granting user has access.
-
Create Repositories. This application can create repositories in all namespaces where the granting user can create repositories.
-
View all visible repositories. This application can view and pull all repositories visible to the granting user.
-
Read/Write to any accessible repositories. This application can view, push, and pull to all repositories to which the granting user has write access.
-
Super User Access. This application can administer your installation, including managing users, managing organizations, and other features found in the superuser panel. Grant this permission only when you have absolute trust in the requesting application.
-
Administer User. This application can administer your account, including creating robots and granting them permissions to your repositories. Grant this permission only when you have absolute trust in the requesting application.
-
Read User Information. This application can read user information such as username and email address.
-
-
-
Click Generate token.
-
Review the requested permissions, then click Authorize Application. Confirm the authorization when prompted.
ImportantAssign only the scopes that the token holder needs. Treat Administer Organization, Super User Access, and Administer User as high-trust permissions.
-
Copy and store the access token secret.
ImportantThis is the only opportunity to copy the token secret. Project Quay does not show the full secret again after you leave the page.
-
Confirm that the new token appears on the API Access Tokens page for the application. The list can include the token name, creator, scopes, expiration, and last-used information when those columns are available.
-
Optional. Call an API endpoint with the token to confirm that it works. For example:
$ curl -X GET "https://<quay-server.example.com>/api/v1/user/" \
     -H "Authorization: Bearer <access_token>"
Using a Project Quay API endpoint
To use an API endpoint, you pass in your access token and then include the appropriate fields depending on your needs.
-
You have access to the Project Quay API, which entails having already created an OAuth 2 access token.
-
Create a user application by entering the
POST /api/v1/user/apptokenAPI call:$ curl -X POST \ -H "Authorization: Bearer <access_token>" \ -H "Content-Type: application/json" \ -d '{ "title": "MyAppToken" }' \ "http://quay-server.example.com/api/v1/user/apptoken"where:
<access_token>-
Specifies the OAuth access token.
"MyAppToken"-
Specifies the name of your application token.
http://quay-server.example.com/api/v1/user/apptoken-
Specifies your Project Quay deployment appended with the
/api/v1/user/apptokenendpoint.Example output{"token": {"uuid": "6b5aa827-cee5-4fbe-a434-4b7b8a245ca7", "title": "MyAppToken", "last_accessed": null, "created": "Wed, 08 Jan 2025 19:32:48 -0000", "expiration": null, "token_code": "string"}}
-
On the Project Quay UI, click your username in the navigation pane → Account Settings. The name of your application appears under the Docker CLI and other Application Tokens heading. For example:

Plan
Plan supporting infrastructure for Red Hat Quay
Before you deploy Red Hat Quay, review supported options for image storage, database, and Redis backends.
Image storage backend
Image storage for Project Quay holds all binary blobs and can be local, highly available, or geo-replicated. You can use local storage for proof of concept or choose supported object storage such as Ceph, Red Hat OpenShift Data Foundation, or cloud providers for production.
- Local storage
-
Project Quay can work with local storage, however this should only be used for proof of concept or test setups, as the durability of the binary blobs cannot be guaranteed. Mounted NFS volumes are not supported. Local storage is meant for Project Quay test-only installations.
- HA storage setup
-
For a Project Quay HA deployment, you must provide HA image storage, for example Red Hat OpenShift Data Foundation or Ceph Object Gateway (also called RADOS Gateway). Detailed instructions on how to use Ceph storage as a highly available storage backend can be found in the Quay High Availability Guide. Further information about Red Hat Ceph Storage and HA setups can be found in the Red Hat Ceph Storage Architecture Guide.
- Geo-replication
-
Local storage cannot be used for geo-replication. Geo-replication requires object storage in each region, and object storage must be geographically accessible by all other regions.
Supported image storage engines
Project Quay supports the following on premise storage types:
-
Ceph/Rados RGW
-
OpenStack Swift
-
Red Hat OpenShift Data Foundation 4 (through NooBaa)
Project Quay supports the following public cloud storage engines:
-
Amazon Web Services (AWS) S3
-
Google Cloud Storage
-
Azure Blob Storage
-
Hitachi Content Platform (HCP)
Database backend
The Project Quay database backend stores registry metadata such as users, organizations, images, and tags. PostgreSQL is the preferred database for Project Quay and Clair.
Support for MySQL and MariaDB as the database backend is deprecated since the Project Quay 3.6 release and is planned for removal. Until then, MySQL remains supported according to the support matrix, but does not receive additional features or explicit testing coverage. The Project Quay Operator supports only PostgreSQL deployments when the database is managed. If you want to use MySQL, you must deploy it manually and set the database component to managed: false.
Deploying Project Quay in a highly available (HA) configuration requires that your database services are provisioned for high availability. If Project Quay is running on public cloud infrastructure, use the PostgreSQL services that your cloud provider offers; MySQL is also supported. PostgreSQL includes the features needed to support Clair security scanning; MySQL can run the registry database but does not provide the Clair features that PostgreSQL does.
When you use Clair vulnerability scanning, plan a separate PostgreSQL database for Clair. Do not use the same PostgreSQL database for both Project Quay and Clair. The Operator can manage a Clair database (clairpostgres), or you can provision Clair’s database yourself.
Geo-replication requires a single, shared database that is accessible from all regions.
Redis backend
Project Quay uses Redis to support backend tasks such as live builder logs, user events, and the locking mechanism that is required for garbage collection. Redis data is ephemeral.
You do not need high availability for Redis because the data is not persistent. If Redis fails, you will lose access to build logs, builders, and the garbage collector service. Additionally, user events will be unavailable.
For geo-replication, a single Redis cache is shared across the entire Project Quay setup and must be accessible by all Project Quay pods.
You can use a Redis image from the Red Hat Software Collections or from any other source you prefer.
Choose a single registry or multiple registries
Compare running one shared Red Hat Quay registry with deploying multiple distinct registries to balance cost, isolation, and operational complexity.
Choosing a single registry or multiple registries
A single shared Project Quay registry can serve many clusters and data centers with organizations, RBAC, and geo-replication. You can avoid multiple distinct registries and reduce storage, infrastructure, and operational costs in most scenarios.
Many users consider running multiple, distinct registries. The preferred approach with Project Quay is to have a single, shared registry:
-
If you want a clear separation between development and production images, or a clear separation by content origin, for example, keeping third-party images distinct from internal ones, you can use organizations and repositories, combined with role-based access control (RBAC), to achieve the desired separation.
-
Given that the image registry is a critical component in an enterprise environment, you may be tempted to use distinct deployments to test upgrades of the registry software to newer versions. The Project Quay Operator updates the registry for patch releases as well as minor or major updates. This means that any complicated procedures are automated and, as a result, you do not need to provision multiple instances of the registry to test the upgrade.
-
With Project Quay, you do not need a separate registry for each cluster you deploy. Project Quay is proven to work at scale at Quay.io, and can serve content to thousands of clusters.
-
Even if you have deployments in multiple data centers, you can still use a single Project Quay instance to serve content to multiple physically-close data centers, or use the HA functionality with load balancers to stretch across data centers. Alternatively, you can use the Project Quay geo-replication feature to stretch across physically distant data centers. This requires the provisioning of a global load balancer or DNS-based geo-aware load balancing.
-
One scenario where it may be appropriate to run multiple distinct registries, is when you want to specify different configuration for each registry.
In summary, running a shared registry helps you to save storage, infrastructure and operational costs, but a dedicated registry might be needed in specific circumstances.
Size and subscribe to Red Hat Quay
Review sample deployment sizes, minimum requirements, and subscription options to budget and right-size your Red Hat Quay deployment.
Scalability and minimum requirements
Project Quay scales from proof of concept to large deployments such as Quay.io. You can use sample sizing tables and subscription guidance to plan capacity for your environment.
Scalability of Project Quay is one of its key strengths, with a single code base supporting a broad spectrum of deployment sizes, including the following:
-
Proof of Concept deployment on a single development machine
-
Mid-size deployment of approximately 2,000 users that can serve content to dozens of Kubernetes clusters
-
High-end deployment such as Quay.io that can serve thousands of Kubernetes clusters world-wide
Sizing depends on many factors, such as the number of users, images, concurrent pulls and pushes, so standard sizing recommendations are not available.
The following are the minimum requirements for systems running Project Quay (per container/pod instance):
-
Quay: minimum 6 GB; recommended 8 GB, 2 or more vCPUs
-
Clair: recommended 2 GB RAM and 2 or more vCPUs
-
Storage: recommended 30 GB
-
NooBaa: minimum 2 GB, 1 vCPU (when you select the
objectstoragecomponent in the Operator) -
Clair database: minimum 5 GB required for security metadata
Stateless components of Project Quay can be scaled out, but scaling increases load on stateful backend services.
Sample deployment sizes
Sample Project Quay sizing tables list approximate resources for proof of concept, mid-size, and high-end deployments. You can use these figures as a starting point and adjust based on your workload.
The following table shows approximate sizing for Proof of Concept, mid-size, and high-end deployments. Whether a deployment runs appropriately with the same metrics depends on many factors not shown below.
| Metric | Proof of concept | Mid-size | High End (Quay.io) |
|---|---|---|---|
No. of Quay containers by default |
1 |
4 |
15 |
No. of Quay containers max at scale-out |
N/A |
8 |
30 |
No. of Clair containers by default |
1 |
3 |
10 |
No. of Clair containers max at scale-out |
N/A |
6 |
15 |
No. of mirroring pods (to mirror 100 repositories) |
1 |
5-10 |
N/A |
Database sizing |
2-4 Cores; 6-8 GB RAM; 10-20 GB disk |
4-8 Cores; 6-32 GB RAM; 100 GB - 1 TB disk |
32 cores; 244 GB; 1+ TB disk |
Object storage backend sizing |
10-100 GB |
1 - 20 TB |
50+ TB up to PB |
Redis cache sizing |
2 Cores; 2-4 GB RAM |
4 cores; 28 GB RAM |
|
Underlying node sizing (physical or virtual) |
4 Cores; 8 GB RAM |
4-6 Cores; 12-16 GB RAM |
Quay: 13 cores; 56 GB RAM. Clair: 2 cores; 4 GB RAM |
Redis cache sizing applies only when you use Quay builders; otherwise Redis sizing is not significant.
Subscription options
Project Quay subscriptions are based on deployments and include Standard or Premium support. You can review subscription models and entitlements when planning your registry deployment.
|
Note
|
Deployment means an installation of a single Project Quay registry using a shared data backend. |
With a Project Quay subscription, the following options are available:
-
You can deploy any number of pods, such as Quay, Clair, Builder, and so on.
-
Project Quay pods can run in multiple data centers or availability zones.
-
Storage and database backends can be deployed across multiple data centers or availability zones, but only as a single, shared storage backend and single, shared database backend.
-
Project Quay can manage content for an unlimited number of clusters or standalone servers.
-
Clients can access the Project Quay deployment regardless of their physical location.
-
You can deploy Project Quay on OpenShift Container Platform infrastructure nodes to minimize subscription requirements.
-
You can run the Container Security Operator (CSO) and the Quay Bridge Operator (QBO) on your OpenShift Container Platform clusters at no additional cost.
|
Note
|
Project Quay geo-replication requires a subscription for each storage replication. The database, however, is shared. |
Plan a deployment topology
Compare example proof of concept, high availability, and Operator deployment topologies, including storage proxy layouts, to choose a model that fits your environment.
Example deployment topologies
Project Quay deployment examples include standalone proof of concept, highly available multi-host, and OpenShift Container Platform with the Project Quay Operator. You can reference these examples when planning your registry topology.
The following image shows examples for on premise configuration, for the following types of deployments:
-
Standalone Proof of Concept
-
Highly available deployment on multiple hosts
-
Deployment on an OpenShift Container Platform cluster by using the Project Quay Operator
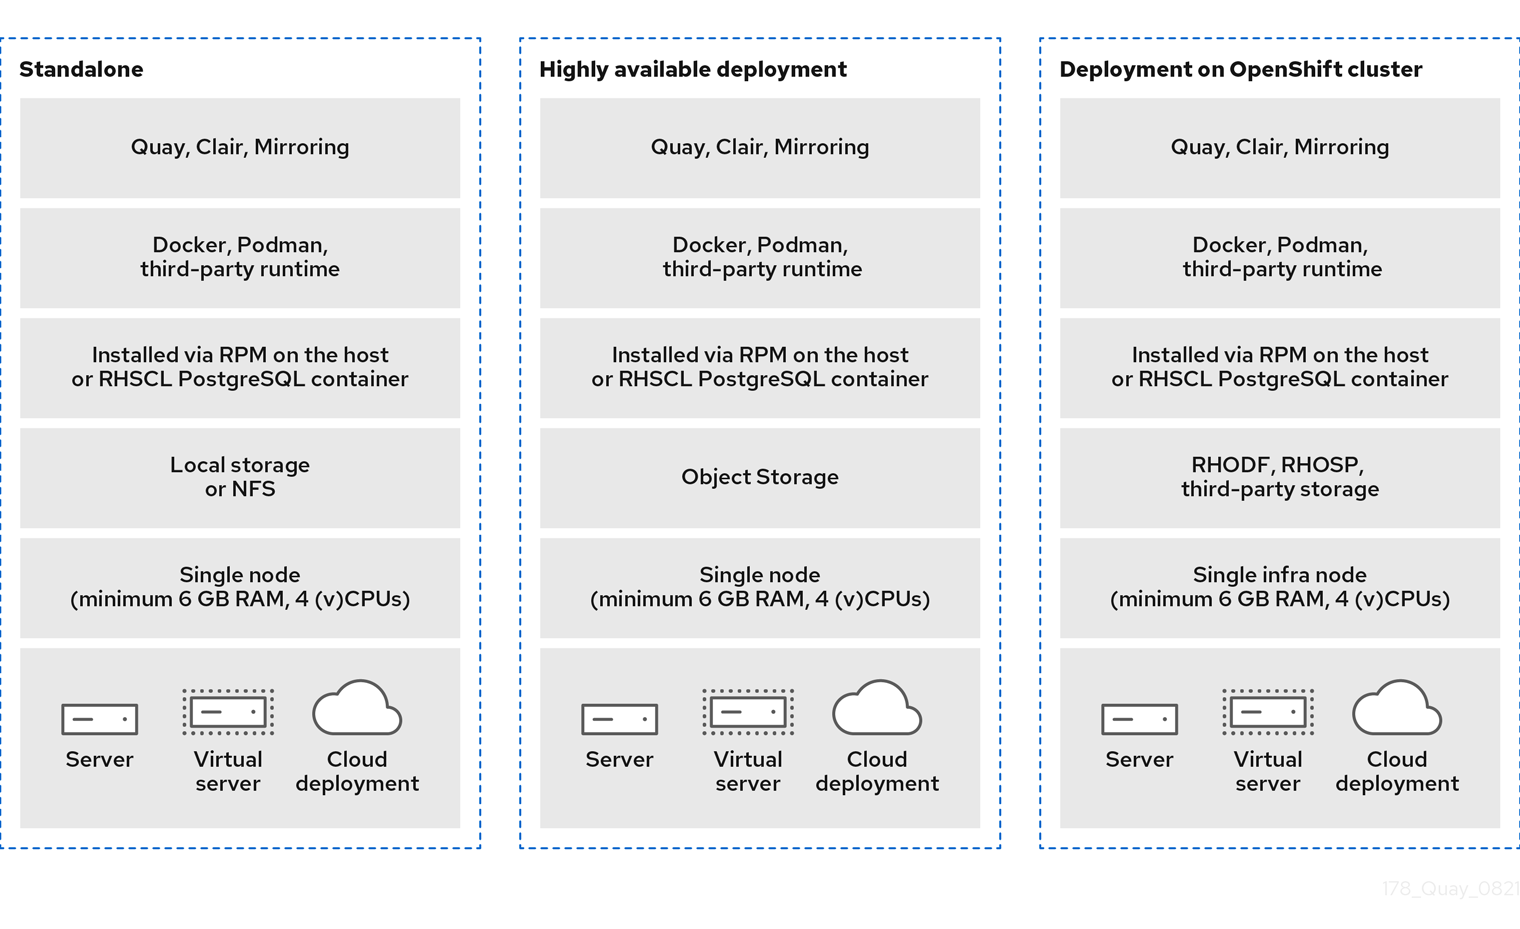
Project Quay example deployments
Example Project Quay deployments include proof of concept on a single node, highly available in a single data center, and highly available across multiple data centers. You can reference these examples when planning your deployment.
The following image shows three possible deployments for Project Quay:
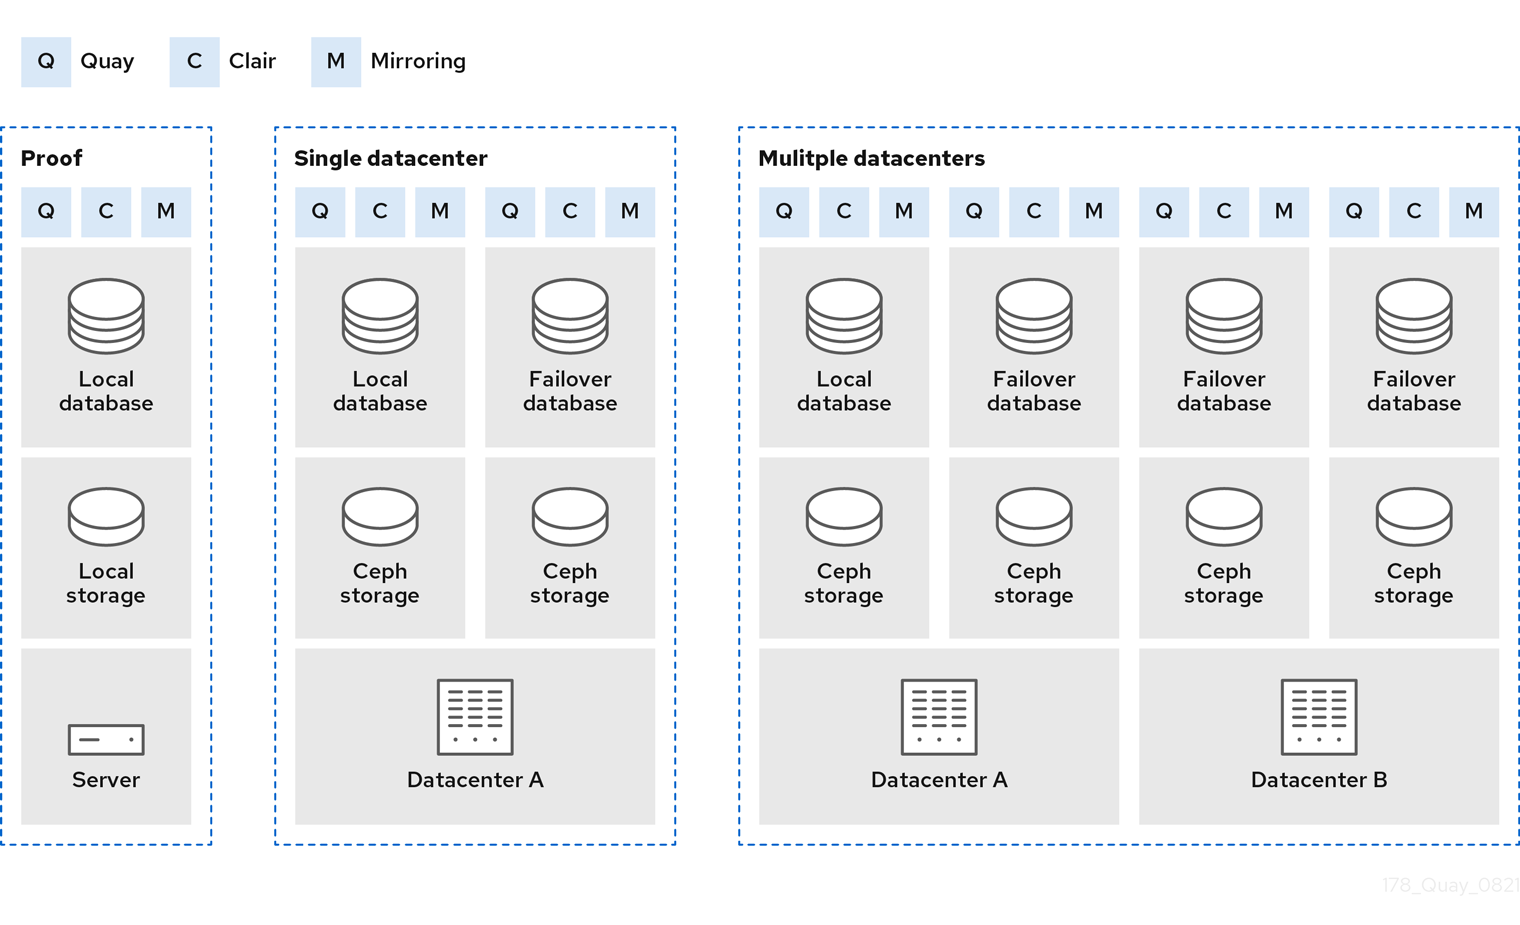
- Proof of Concept
-
Running Project Quay, Clair, and mirroring on a single node, with local image storage and local database
- Single data center
-
Running highly available Project Quay, Clair ,and mirroring, on multiple nodes, with HA database and image storage
- Multiple data centers
-
Running highly available Project Quay, Clair, and mirroring, on multiple nodes in multiple data centers, with HA database and image storage
Project Quay deployment topology
Project Quay deployment topology sends pushes, UI, and API traffic to public endpoints and serves pulls from object storage. You can use this overview to understand traffic flow in your deployment.
The following image provides a high level overview of a Project Quay deployment topology:
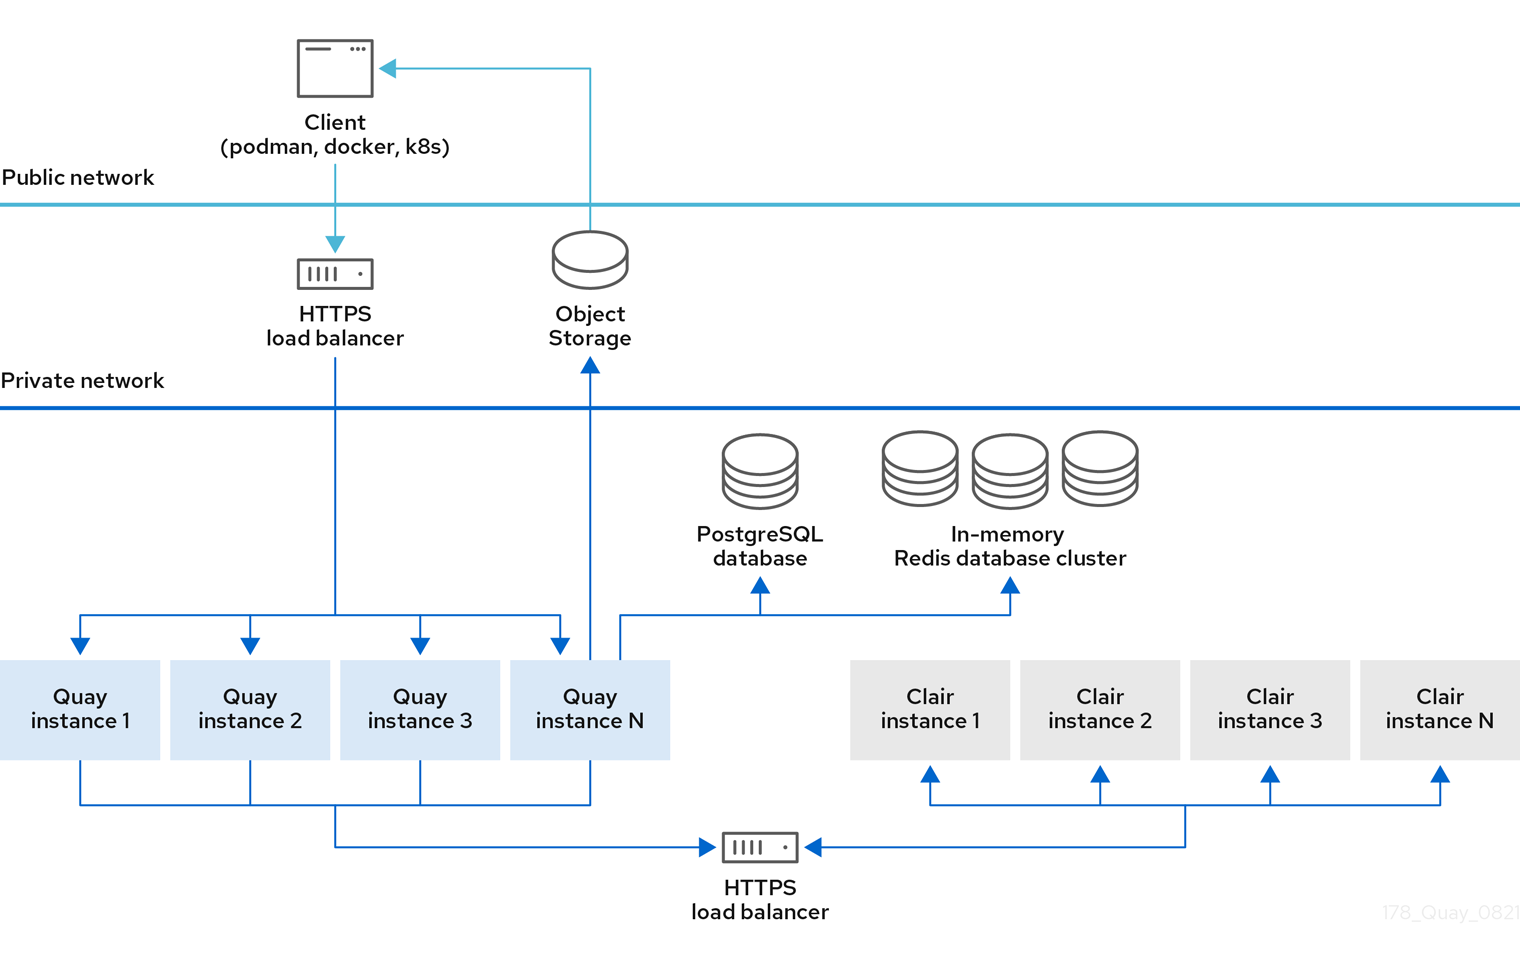
In this deployment, all pushes, user interface, and API requests are received by public Project Quay endpoints. Pulls are served directly from object storage.
Project Quay deployment topology with storage proxy
Project Quay deployment topology with storage proxy routes all traffic, including pulls, through the public endpoint. You can use this topology when clients cannot access object storage directly or when you need a single entry point.
The following image provides a high level overview of a Project Quay deployment topology with storage proxy configured:
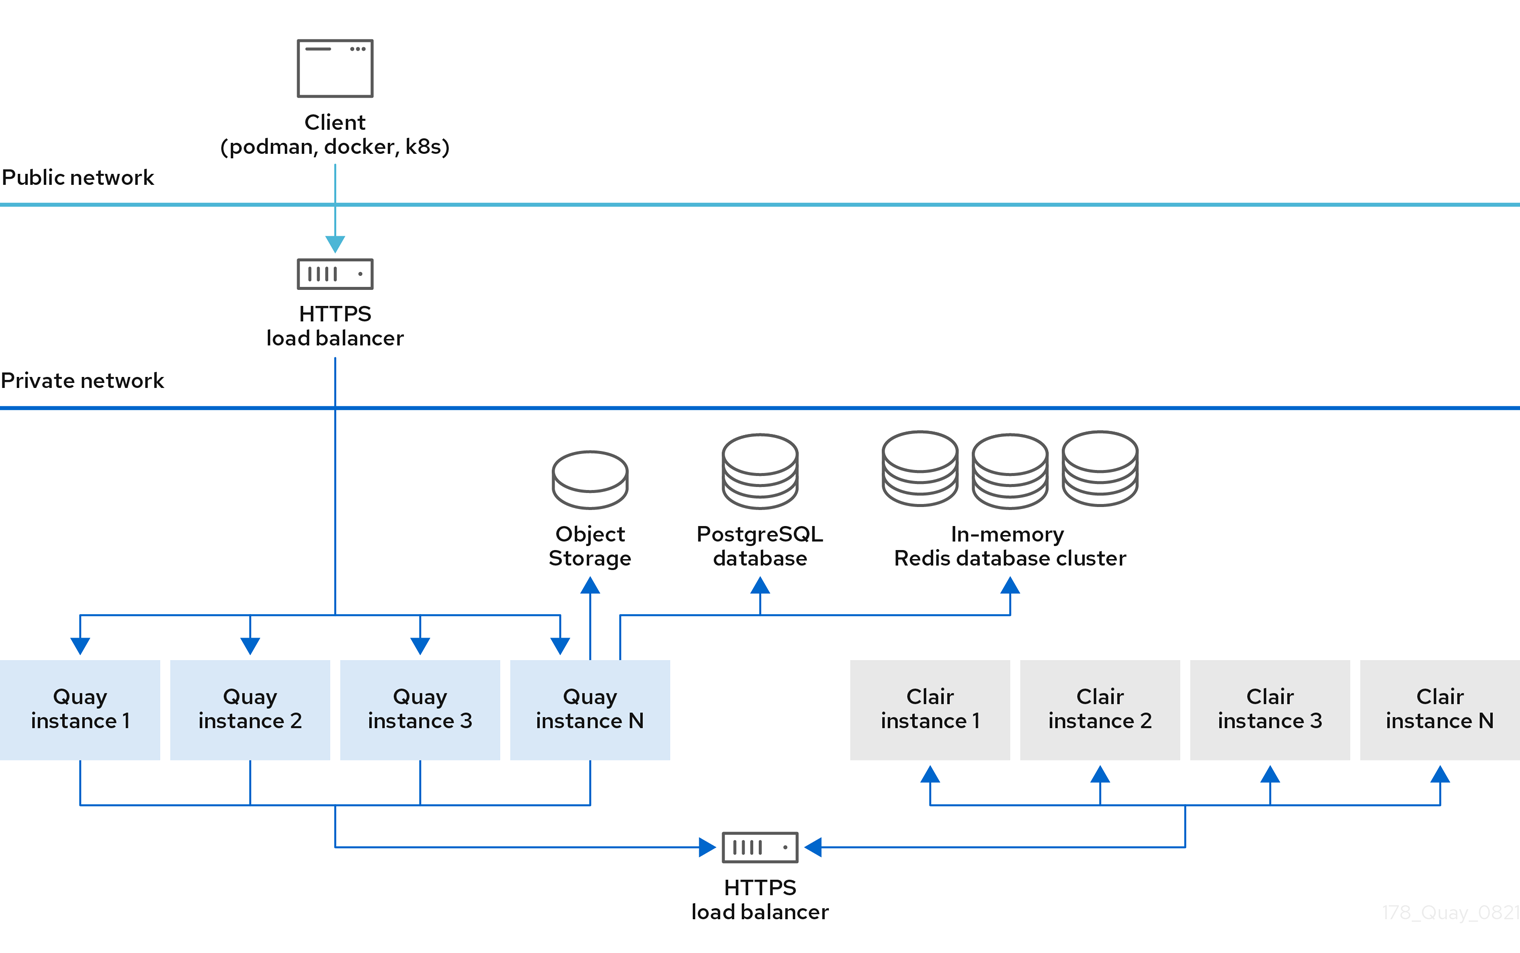
With storage proxy configured, all traffic passes through the public Project Quay endpoint.
Plan a Project Quay proof of concept deployment
Before you install a proof of concept deployment, review host, RHEL subscription, and resource requirements for Red Hat Quay.
Project Quay proof of concept host requirements
Before you deploy a proof of concept Project Quay registry, ensure your host meets minimum hardware requirements and you have Red Hat Enterprise Linux (RHEL) 9 with an active subscription. You also need Podman for running containers in this guide.
-
Two or more virtual CPUs
-
4 GB or more of RAM
-
Approximately 30 GB of disk space on your test system, which can be broken down as follows:
-
Approximately 10 GB of disk space for the Red Hat Enterprise Linux (RHEL) operating system.
-
Approximately 10 GB of disk space for Docker storage for running three containers.
-
Approximately 10 GB of disk space for Project Quay local storage.
NoteCEPH or other local storage might require more memory.
See the Quay 3.x sizing guidelines for more information on sizing.
-
-
The following architectures are supported for Project Quay:
-
amd64/x86_64
-
s390x
-
ppc64le
-
Plan a Project Quay deployment on OpenShift Container Platform
Before you deploy Red Hat Quay on OpenShift Container Platform, review what the Operator manages, how configuration works through the QuayRegistry CR, and external registry integration options.
What the Project Quay Operator manages
The Project Quay Operator simplifies installation, deployment, and management of the Project Quay container registry on OpenShift Container Platform. You can use the Operator to treat Quay as a native OpenShift Container Platform application and manage its full lifecycle.
The Operator can manage Quay components for you, or you can provide external dependencies such as the database and object storage when you need more control. Planning an Operator deployment means deciding which components stay managed and which you supply yourself.
How Operator configuration works
When deploying Red Hat Quay on OpenShift Container Platform, the registry configuration is managed declaratively through two primary mechanisms: the QuayRegistry custom resource (CR) and the configBundleSecret resource. You use these mechanisms to configure and manage your registry deployment.
Understanding the QuayRegistry CR
The QuayRegistry CR is used to determine whether a component is managed, or automatically handled by the Operator, or unmanaged, or provided externally by the user.
By default, the QuayRegistry CR contains the following key fields:
-
configBundleSecret: The name of a Kubernetes Secret containing theconfig.yamlfile which defines additional configuration parameters. -
name: The name of your Project Quay registry. -
namespace: The namespace, or project, in which the registry was created. -
spec.components: A list of components that the Operator automatically manages. Each component entry includes the following fields:-
kind: The name of the component -
managed: A boolean that addresses whether the component lifecycle is handled by the Project Quay Operator. Settingmanaged: trueto a component in theQuayRegistryCR means that the Operator manages the component. -
secretRef: Optional. For thetlscomponent only, references an externalkubernetes.io/tlsSecret whenmanagedisfalse. For more information, see Referencing an external TLS Secret for Red Hat Quay on OpenShift Container Platform.
-
All QuayRegistry components are automatically managed and auto-filled upon reconciliation for visibility unless specified otherwise. The following sections highlight the major QuayRegistry components and provide an example YAML file that shows the default settings.
Managed components
Managed components are Project Quay registry components that the Operator automatically configures and installs. By using managed components, you simplify deployment and reduce manual configuration tasks.
| Field | Type | Description |
|---|---|---|
|
Boolean |
Holds overrides for deployment of Red Hat Quay on OpenShift Container Platform, such as environment variables and number of replicas. This component cannot be set to unmanaged ( |
|
Boolean |
Used for storing registry metadata. Currently, PostgreSQL version 13 is used. |
|
Boolean |
Provides image vulnerability scanning. You can override ephemeral scratch storage for image layer extraction by using |
|
Boolean |
Stores live builder logs and the locking mechanism that is required for garbage collection. You can override CPU and memory resources for this component when it is managed. |
|
Boolean |
Adjusts the number of |
|
Boolean |
Stores image layer blobs. When set to |
|
Boolean |
Provides an external entrypoint to the Project Quay registry from outside of OpenShift Container Platform. |
|
Boolean |
Configures repository mirror workers to support optional repository mirroring. |
|
Boolean |
Features include a Grafana dashboard, access to individual metrics, and notifications for frequently restarting |
|
Boolean |
Configures whether SSL/TLS is automatically handled. When |
|
Boolean |
Configures a managed Clair database. This is a separate database than the PostgreSQL database that is used to deploy Project Quay. |
The following example shows you the default configuration for the QuayRegistry custom resource provided by the Project Quay Operator. It is available on the OpenShift Container Platform web console.
apiVersion: quay.redhat.com/v1
kind: QuayRegistry
metadata:
  name: <example_registry>
  namespace: <namespace>
  spec:
    configBundleSecret: config-bundle-secret
    components:
    - kind: quay
      managed: true
    - kind: postgres
      managed: true
    - kind: clair
      managed: true
    - kind: redis
      managed: true
    - kind: horizontalpodautoscaler
      managed: true
    - kind: objectstorage
      managed: true
    - kind: route
      managed: true
    - kind: mirror
      managed: true
    - kind: monitoring
      managed: true
    - kind: tls
      managed: true
    - kind: clairpostgres
      managed: true
Using unmanaged components for dependencies
Unmanaged components are Project Quay dependencies such as PostgreSQL, Redis, or object storage that you deploy and maintain outside of the Operator’s control. You use unmanaged components to integrate existing infrastructure or meet specific configuration requirements.
|
Note
|
If you are using an unmanaged PostgreSQL database, and the version is PostgreSQL 10, it is highly recommended that you upgrade to PostgreSQL 13. PostgreSQL 10 had its final release on November 10, 2022 and is no longer supported. For more information, see the PostgreSQL Versioning Policy. |
For more information about configuring unmanaged components, see "Configure Red Hat Quay database and Redis backends", "Object storage backend configuration fields", "Configure networking for Red Hat Quay", and "Tune Operator autoscaling and component resources".
Project Quay as an external registry for OpenShift Container Platform
You can run Project Quay as an external registry in front of multiple OpenShift Container Platform clusters that use internal registries, or rely on cluster-internal registries alone. You can choose the approach that fits your image governance and distribution needs.
The required coordination of Secrets and ImageStreams is automated by the Quay Bridge Operator, which can be launched from the OperatorHub for OpenShift Container Platform.
Plan OpenShift cluster and storage requirements for Project Quay
Review OpenShift Container Platform cluster prerequisites and object storage options — managed, unmanaged, and storage class — before deploying Red Hat Quay on OpenShift Container Platform.
OpenShift Container Platform cluster
To deploy and manage the Project Quay Operator, you need an OpenShift Container Platform cluster running version 4.5 or later and an administrative account with sufficient permissions to perform cluster-scoped actions.
Cluster resource requirements
The Project Quay Operator requires dedicated compute resources for each application pod. Ensure that your OpenShift Container Platform cluster meets the following minimum requirements for sufficient capacity.
| Resource type | Requirement |
|---|---|
Memory |
8 Gi |
CPU |
2000 millicores (2 vCPUs) |
The Operator creates at least one main application pod per Project Quay deployment that it manages. Plan your cluster capacity accordingly.
Object Storage
Project Quay requires object storage to store all container image layer blobs. You can provide this storage through managed storage that the Operator configures automatically, or through unmanaged storage using an existing external service.
Choosing managed object storage
If you want the Operator to manage object storage for Project Quay, your cluster needs to be capable of providing it through the ObjectBucketClaim API. There are multiple implementations of this API available, for instance, NooBaa in combination with Kubernetes PersistentVolumes or scalable storage backends like Ceph. Refer to Additional resources for more details on how to deploy this component.
Choosing unmanaged object storage
Unmanaged storage is Project Quay object storage that you provide and manage externally, such as AWS S3, Google Cloud Storage, or self-hosted S3-compatible services. You use unmanaged storage when you need to connect to a specific storage provider that you manage yourself.
Project Quay supports the following major cloud and on-premises object storage providers:
-
Amazon Web Services (AWS) S3
-
AWS STS S3 (Security Token Service)
-
AWS CloudFront (CloudFront S3Storage)
-
Google Cloud Storage
-
Microsoft Azure Blob Storage
-
Swift Storage
-
Nutanix Object Storage
-
IBM Cloud Object Storage
-
NetApp ONTAP S3 Object Storage
-
Hitachi Content Platform (HCP) Object Storage
For a complete list of object storage providers, the Quay Enterprise 3.x support matrix.
For example configurations of external object storage, see Storage object configuration fields, which provides the required YAML configuration examples, credential formatting, and full field descriptions for all supported external storage providers.
StorageClass
The Project Quay Operator uses the default StorageClass in your cluster to provision persistent storage for the Quay and Clair PostgreSQL databases.
Ensure that your cluster has a default StorageClass configured before installation so that the Operator can create the required Persistent Volume Claims.
|
Important
|
Before proceeding with the installation, verify that a default |
Plan a Project Quay high availability deployment
Before you install a highly available registry, review shared infrastructure requirements and host capacity for Red Hat Quay HA deployments.
High availability infrastructure requirements
High availability Project Quay deployments need a shared database, highly available object storage, a load balancer, and multiple registry hosts. You can use these requirements to design a resilient topology before you install.
|
Important
|
The Project Quay configuration tool is unsupported for standalone high availability deployments. Create and maintain the |
Plan for the following supporting infrastructure:
- Database
-
Use PostgreSQL for production HA deployments when you need Clair vulnerability scanning. You can use an existing HA database that meets the Project Quay support policy, or a supported PostgreSQL Operator offering from a vendor such as Crunchy Data when you have a support relationship with that vendor. MySQL can run the registry database but does not provide the Clair features that PostgreSQL does.
- Object storage
-
Provide highly available object storage for image blobs. Local storage is not suitable for HA or geo-replication. Supported options include Ceph Object Gateway (RADOS Gateway), Amazon S3, Azure Blob Storage, Google Cloud Storage, OpenStack Swift, CloudFront with S3, and NooBaa S3 storage.
- Load balancer
-
Place a load balancer in front of the Project Quay application nodes. HAProxy is a common example; you can use any proxy that fits your environment.
- Registry and Redis hosts
-
Run Project Quay and Redis on multiple systems so that you can lose a node without losing the registry service. A typical planning model uses three or more hosts for Quay and Redis, separate capacity for the database and load balancer tier, and a dedicated HA storage cluster or cloud object storage.
Project Quay high availability host capacity
To plan host capacity for a high availability Project Quay deployment, you can start from per-role CPU, memory, and disk guidance and adjust for your workload.
Use the following starting points per system (physical or virtual). Increase capacity for production traffic, Clair, builders, and storage growth.
- Load balancer and database hosts
-
-
2 or more vCPUs
-
4 GB RAM
-
About 20 GB disk (operating system plus container storage)
-
- Project Quay and Redis hosts
-
-
2 or more vCPUs
-
4 GB RAM
-
About 20 GB disk (operating system plus container storage)
-
- Object storage hosts (when you run Ceph or similar on premise)
-
-
2 or more vCPUs
-
8 GB RAM
-
At least 30 GB disk, and more based on the image storage that you need
-
For broader sample sizes across proof of concept, mid-size, and high-end deployments, see the sizing guidance earlier in this Plan guide.
Plan a Project Quay public cloud deployment
Review AWS and Azure services used in public cloud Red Hat Quay deployments to align your architecture with your cloud strategy.
Amazon Web Services services for Project Quay
When you run Project Quay on Amazon Web Services, you can use AWS Elastic Load Balancer, S3 storage, RDS, and ElastiCache Redis for backend services. You can reference the overview and EC2 instance recommendations when planning your AWS deployment.
If Project Quay is running on Amazon Web Services (AWS), you can use the following features:
-
AWS Elastic Load Balancer
-
AWS S3 (hot) blob storage
-
AWS RDS database
-
AWS ElastiCache Redis
-
EC2 virtual machine recommendation: M3.Large or M4.XLarge
The following image provides a high level overview of Project Quay running on AWS:
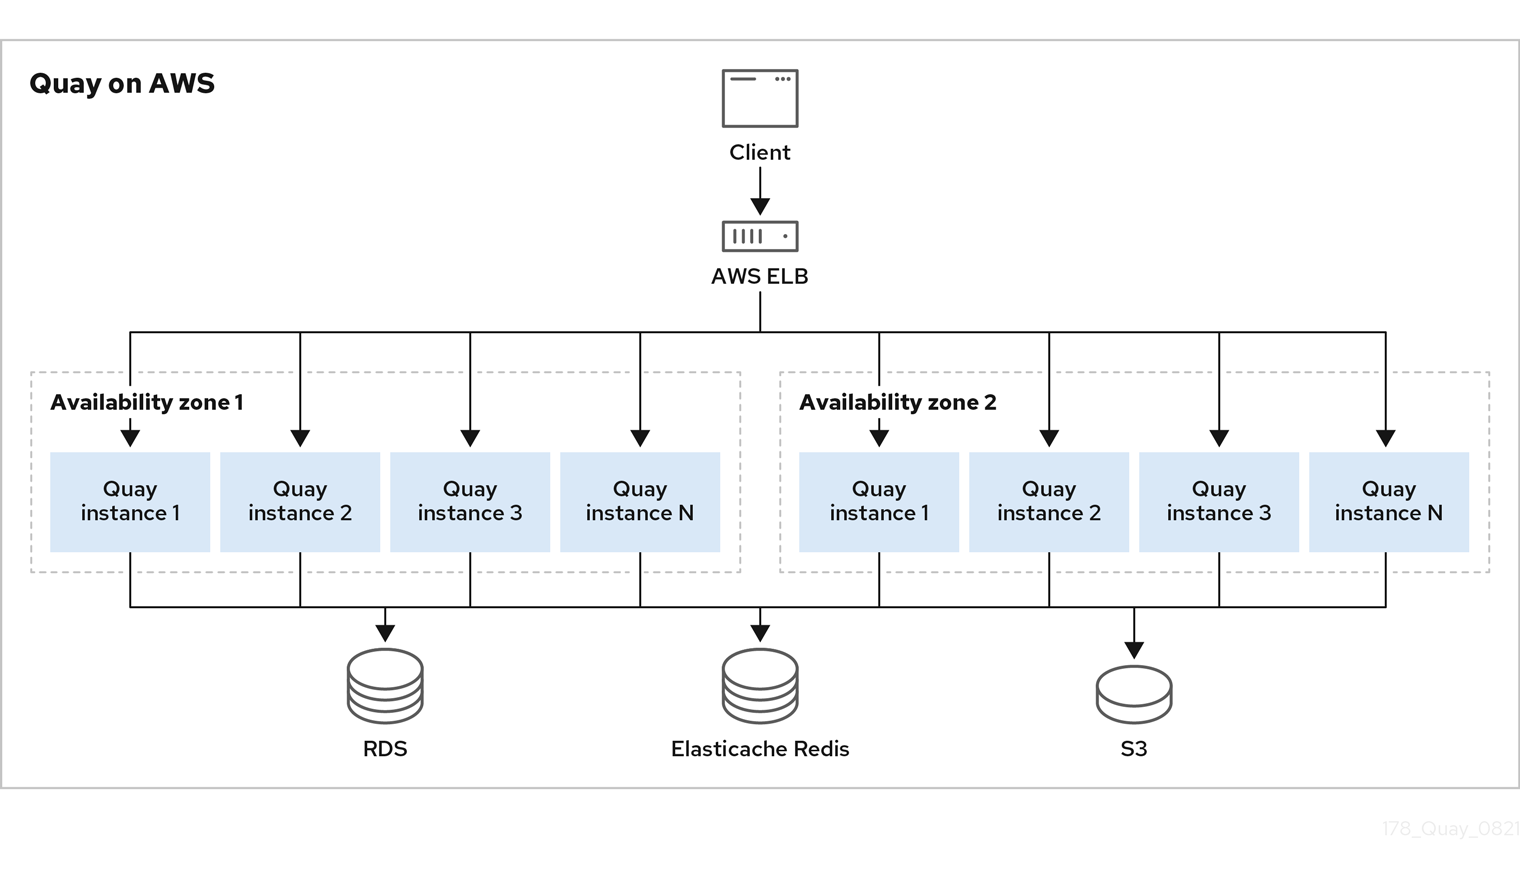
Microsoft Azure services for Project Quay
When you run Project Quay on Microsoft Azure, you can use Azure managed PostgreSQL, Blob Storage (hot), and Azure Cache for Redis for backend services. You can reference the overview when planning your Azure deployment.
The following image provides a high level overview of Project Quay running on Microsoft Azure:
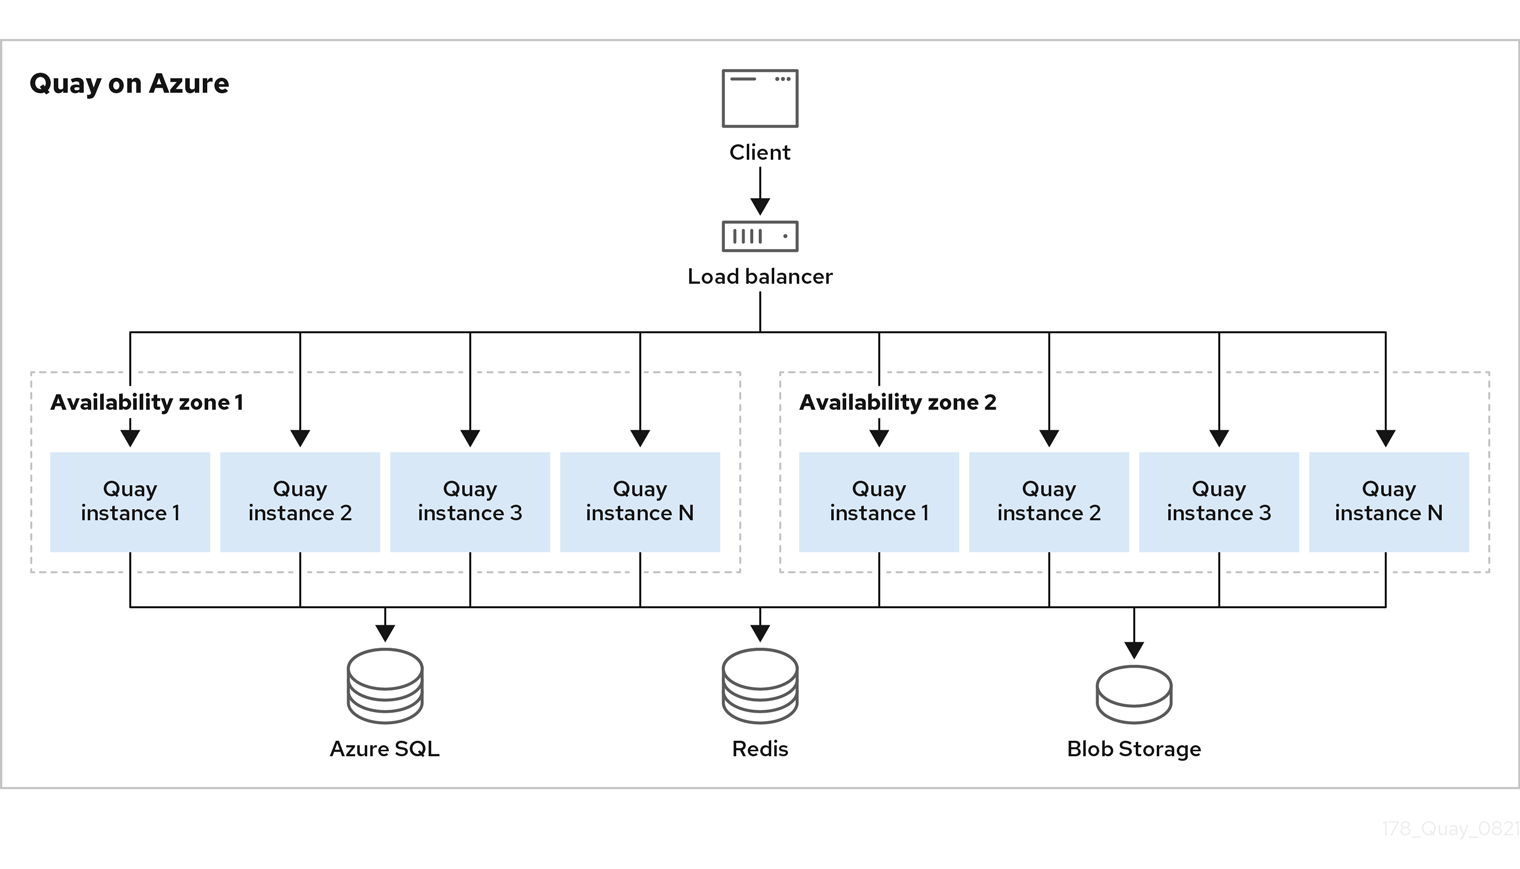
Plan content distribution and geo-replication
Compare repository mirroring, geo-replication, and air-gapped distribution options, including architecture and capacity tradeoffs for standalone and Operator deployments.
Repository mirroring
With repository mirroring in Project Quay, you can copy images from an external registry into your cluster. You sync by repository or organization name and tag, set intervals, and filter architectures.
From a Project Quay registry with mirroring enabled, you can:
-
Choose a repository or organization from an external registry to mirror
-
Add credentials to access the external registry
-
Identify specific container image repository or organization names and tags to sync
-
Set intervals at which a repository or organization is synced
-
Check the current state of synchronization
-
Filter the architectures that are mirrored
Repository mirroring suits distinct registries that must share selected upstream content. You can configure mirroring in the Project Quay configuration file or by using the Project Quay API when you are ready to implement it.
Repository mirroring capacity considerations
For Project Quay repository mirroring, you can run mirroring workers on any node and size the number of workers to how many repositories you want to sync in parallel.
When you plan mirroring capacity, consider the following:
-
Mirroring workers can run on nodes that already run Project Quay.
-
Mirroring runs in scheduled batches. More workers allow more repositories to sync at the same time. For example, 10 workers can run 10 mirroring operations in parallel.
-
Size workers based on how many repositories you need to mirror in parallel, how many images and tags those repositories contain, and how often content changes.
-
Multiple tags in the same repository cannot be mirrored in parallel.
Geo-replication
Geo-replication connects multiple geographically distributed Project Quay deployments so that clients use them as a single registry. Standalone and Operator-based deployments support geo-replication.
With geo-replication, regions share one database and one Redis instance while each region keeps local object storage. Clients push and pull through a common entrypoint, typically a global load balancer, and blob data replicates asynchronously between storage backends.
Geo-replication features
With geo-replication in Project Quay, image pushes go to the nearest storage backend and data replicates in the background so that pulls can use the closest available engine.
The following are the key features of geo-replication:
-
When geo-replication is configured, container image pushes are written to the preferred storage engine for that Project Quay instance. This is typically the nearest storage backend within the region.
-
After the initial push, image data is replicated in the background to other storage engines.
-
The list of replication locations is configurable and those can be different storage backends.
-
An image pull always uses the closest available storage engine to maximize pull performance.
-
If replication has not been completed yet, the pull uses the source storage backend instead.
Mirroring compared to geo-replication
Mirroring and geo-replication solve different distribution needs in Project Quay. Mirroring syncs selected repositories between separate registries; geo-replication shares one database and replicates blob storage across regions.
For example, a geo-replicated Project Quay registry can use two different blob storage endpoints.
The primary use cases for geo-replication include the following:
-
Speeding up access to the binary blobs for geographically dispersed setups
-
Guaranteeing that the image content is the same across regions
Mirroring synchronizes selected repositories, or subsets of repositories, from one registry to another. The registries are distinct, with each registry having a separate database and separate image storage.
The primary use cases for mirroring include the following:
-
Independent registry deployments in different data centers or regions, where a certain subset of the overall content is supposed to be shared across the data centers and regions
-
Automatic synchronization or mirroring of selected (allowlisted) upstream repositories from external registries into a local Project Quay deployment
|
Note
|
Mirroring and geo-replication can be used simultaneously. |
| Feature / Capability | Geo-replication | Mirroring |
|---|---|---|
What is the feature designed to do? |
A shared, global registry |
Distinct, different registries |
What happens if replication or mirroring has not been completed yet? |
The remote copy is used (slower) |
No image is served |
Is access to all storage backends in both regions required? |
Yes (all Project Quay nodes) |
No (distinct storage) |
Can users push images from both sites to the same repository or organization? |
Yes |
No |
Is all registry content and configuration identical across all regions (shared database)? |
Yes |
No |
Can users select individual namespaces or repositories to be mirrored? |
No |
Yes |
Can users apply filters to synchronization rules? |
No |
Yes |
Are individual / different role-based access control configurations allowed in each region |
No |
Yes |
Geo-replication requirements and constraints
Project Quay geo-replication requires shared storage, database, Redis, network access between regions, and a global load balancer. Review these constraints before you deploy.
The following are the requirements and constraints for geo-replication:
-
In geo-replicated setups, Project Quay requires that all regions are able to read and write to all other regions' object storage. Object storage must be geographically accessible by all other regions.
-
Project Quay has no internal awareness of object storage health. Plan a global load balancer that monitors site and storage health and redirects clients when a site must be taken offline.
-
Geo-replication does not automatically fail over object storage. If one site’s storage is unavailable, you must shut down that site’s Project Quay deployment so the load balancer can send clients to healthy sites. Otherwise, clients experience pull and push failures.
-
Geo-replication is asynchronous. Permanent loss of a site can lose blobs that were stored there but not yet replicated.
-
A single database, and therefore all metadata and Project Quay configuration, is shared across all regions. Geo-replication does not replicate the database and does not fail over to another database.
-
A single Redis cache is shared across the entire Project Quay setup and must be accessible by all Project Quay pods.
-
Use the same configuration across regions, except for the preferred storage backend per region.
-
Geo-replication requires object storage in each region. It does not work with local storage.
-
Each region must be able to access every storage engine in each region, which requires a network path. A storage proxy is an alternative when direct paths are not practical.
-
The entire storage backend, for example, all blobs, is replicated. Repository mirroring, by contrast, can be limited to a repository or an image.
-
All Project Quay instances must share the same entrypoint, typically through a load balancer.
-
All Project Quay instances must have the same set of superusers, as they are defined inside the common configuration file.
-
For Operator-based geo-replication, plan a shared Clair database (typically an unmanaged Clair database) so every region uses the same vulnerability data store.
-
Geo-replication requires SSL/TLS certificates and keys.
If the above requirements cannot be met, you should instead use two or more distinct Project Quay deployments and take advantage of repository mirroring functions.
Standalone geo-replication architecture
Standalone Project Quay geo-replication runs in multiple regions with a shared database and Redis and localized storage per region. Image pulls use the closest storage and pushes replicate in the background, improving performance for distributed users.
In the following image, Project Quay is running standalone in two separate regions, with a common database and a common Redis instance. Localized image storage is provided in each region and image pulls are served from the closest available storage engine. Container image pushes are written to the preferred storage engine for the Project Quay instance, and are then replicated in the background to the other storage engines.
|
Note
|
If Clair fails in one cluster, for example, the US cluster, US users would not see vulnerability reports in Project Quay for the second cluster (EU). This is because all Clair instances have the same state. When Clair fails, it is usually because of a problem within the cluster. |
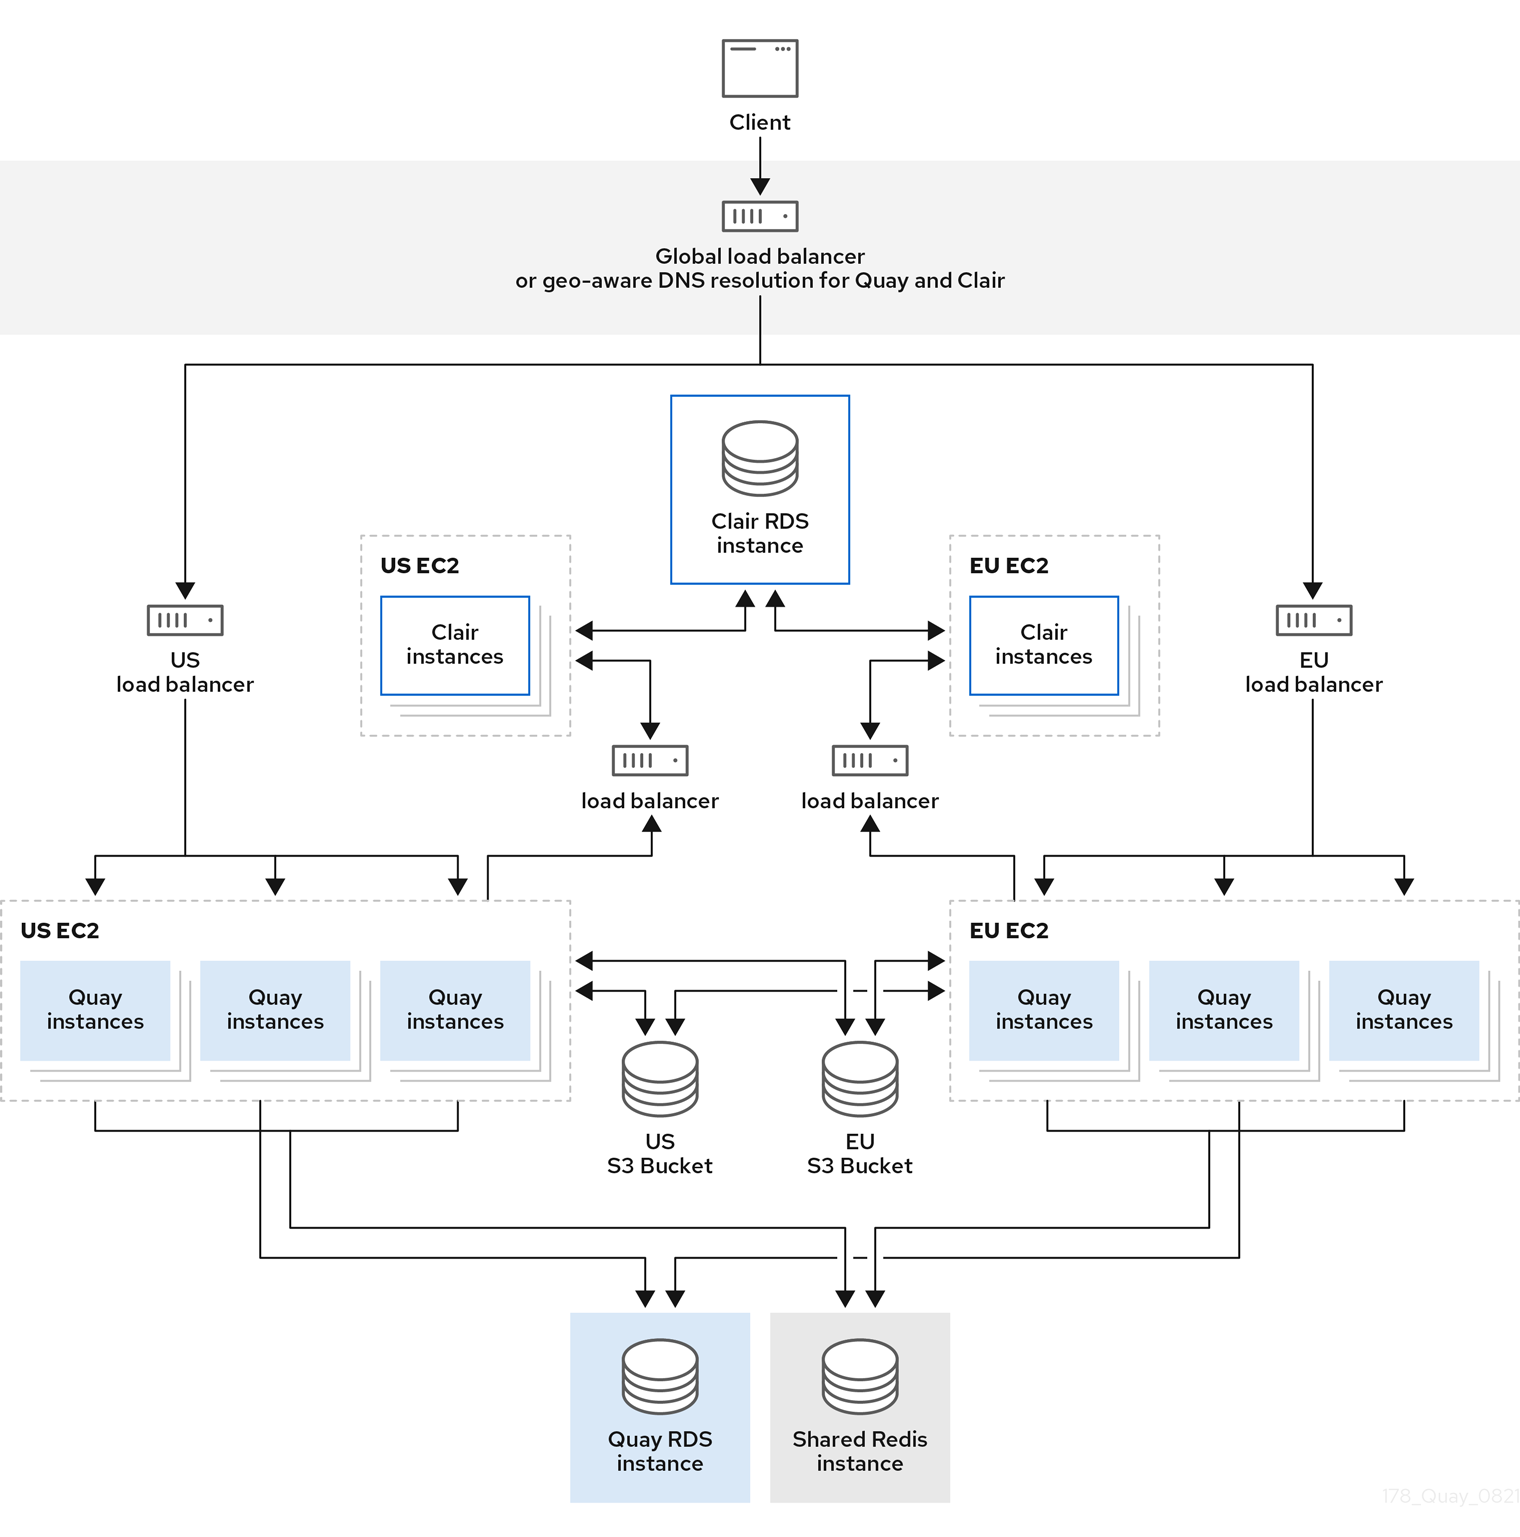
Operator geo-replication architecture
Project Quay geo-replication on OpenShift Container Platform uses the Operator in multiple regions with a shared database and Redis and localized storage per region. Image pulls use the closest storage and pushes replicate in the background for distributed users.
In the following example, the Project Quay Operator is deployed in two separate regions, with a common database and a common Redis instance. Localized image storage is provided in each region and image pulls are served from the closest available storage engine. Container image pushes are written to the preferred storage engine for the Quay instance, and are then replicated in the background to the other storage engines.
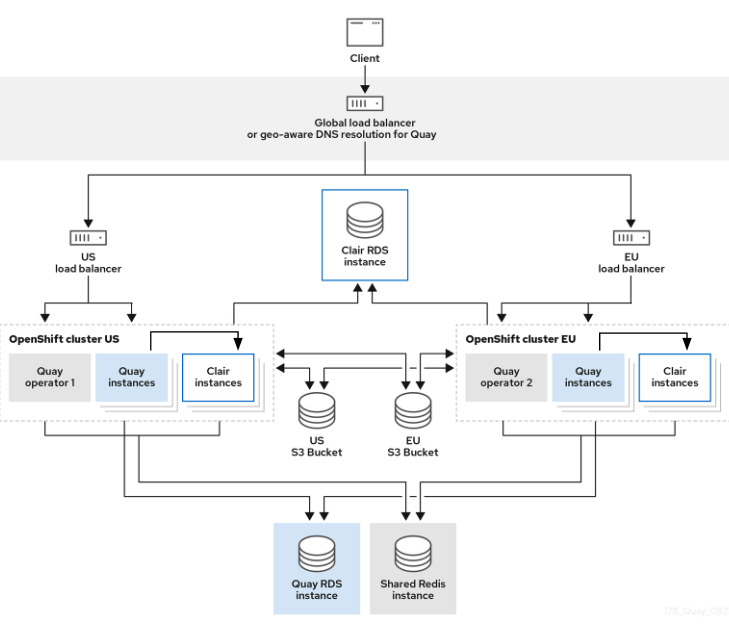
Because the Operator now manages the Clair security scanner and its database separately, geo-replication setups can be leveraged so that they do not manage the Clair database. Instead, an external shared database would be used. Project Quay and Clair support several providers and vendors of PostgreSQL, which can be found in the Project Quay 3.x test matrix. Additionally, the Operator also supports custom Clair configurations that can be injected into the deployment, which allows users to configure Clair with the connection credentials for the external database.
Mixed storage for geo-replication
Geo-replication in Project Quay can use mixed storage backends, such as public-cloud object storage and on-premise Ceph, when you secure cross-site access appropriately.
Because geo-replication supports multiple replication targets, Red Hat recommends that you use a VPN or token pair with bucket-specific access to meet security requirements. This results in the public cloud instance of Project Quay having access to on-premise storage, but the network is encrypted, protected, and uses ACLs, thereby meeting security requirements. If you cannot implement these security measures, it might be preferable to deploy two distinct Project Quay registries and to use repository mirroring as an alternative to geo-replication.
Air-gapped or disconnected deployments
Project Quay supports air-gapped and disconnected deployments with internet-connected registries and firewall access, or fully disconnected installations with offline media transfer. You can choose the pattern that matches your network constraints.
In the following diagram, the upper deployment in the diagram shows Project Quay and Clair connected to the internet, with an air-gapped OpenShift Container Platform cluster accessing the Project Quay registry through an explicit, allowlisted hole in the firewall.
The lower deployment in the diagram shows Project Quay and Clair running inside of the firewall, with image and CVE data transferred to the target system using offline media. The data is exported from a separate Project Quay and Clair deployment that is connected to the internet.
Plan container image builds with Red Hat Quay
Review Red Hat Quay build worker options, build architecture, and OpenShift route limitations to decide whether in-registry builds fit your pipeline.
Container image builds
Project Quay can build container images from Dockerfiles on worker nodes. You can start builds manually or automatically from source-control events so that registry images stay aligned with your code.
Builds are supported on Red Hat Quay on OpenShift Container Platform and Kubernetes. A build manager coordinates build jobs. You can run builders on bare metal nodes or as virtual (unprivileged container) builders, depending on isolation needs and available infrastructure.
When you plan builds, decide whether Project Quay should own image builds in your pipeline or whether an external CI system should push finished images into the registry. If you use Project Quay builds, choose a builder strategy and confirm networking constraints for your cluster.
|
Note
|
Running builds directly in a container on bare metal does not provide the same isolation as virtual machines, but it still provides meaningful process isolation. |
Bare metal builds
Bare metal builds run Project Quay build workers on physical Red Hat Quay on OpenShift Container Platform or Kubernetes nodes so you can use existing hardware capacity for Dockerfile builds.
Use bare metal builds when you want builders on dedicated worker nodes and can accept container-level isolation rather than a full virtual machine per build. Plan for labeled worker nodes that can schedule build pods, a builder service account with the required permissions, and network access from builders to the build manager and to your Git sources.
Configure bare metal builder infrastructure when you are ready to implement builds; planning focuses on node capacity, isolation tradeoffs, and whether bare metal or virtual builders better match your security model.
Virtual builds
Virtual builds in Project Quay run build workers in unprivileged containers on Red Hat Quay on OpenShift Container Platform. This approach provides process isolation without requiring a dedicated virtual machine for each build.
With virtual builds, the build manager creates a Kubernetes Job that starts a pod from the builder image. That image includes the builder binary and Podman. The pod runs unprivileged; the builder builds the image and reports status to the build manager.
Virtual builds limitations
The following limitations apply to virtual builds:
-
Running virtual builds in an unprivileged context might cause some Dockerfile commands that worked under a previous build strategy to fail. Changing build strategy can also affect build performance and reliability.
-
Running virtual builds directly in a container does not provide the same isolation as virtual machines. Changing the build environment might cause builds that previously succeeded to fail.
Builds limitations with managed routes
Project Quay builds have networking constraints when Red Hat Quay on OpenShift Container Platform uses managed routes. Plan for these constraints so build workers can reach the build manager.
OpenShift Container Platform routes typically serve traffic on a single port. Because builds use gRPC, the Operator creates a dedicated Route that directs that traffic to the build manager.
When you plan builds on OpenShift Container Platform, account for the following:
-
OpenShift ingress must support HTTP/2 for the gRPC protocol used by the build manager.
-
The build manager needs the build cluster CA certificate in the Project Quay configuration so workers can establish a secure connection.
-
Build jobs must resolve the build manager hostname. Custom subdomains require DNS that points to the OpenShift router.
See "Configuring Project Quay builds for managed routes" for implementation steps.
Install
Install Red Hat Quay on OpenShift Container Platform Container Platform
Install the Red Hat Quay Operator from OperatorHub and deploy a QuayRegistry, including infrastructure-node options.
Installing the Project Quay Operator from the OperatorHub
To install the Project Quay Operator from the OpenShift Container Platform OperatorHub, you can configure the installation mode and update approval strategy. Install the Operator cluster-wide to ensure the monitoring component is available.
-
On the OpenShift Container Platform web console, click Operators → OperatorHub.
-
In the search box, type Project Quay and select the official Project Quay Operator provided by Red Hat.
-
Select Install.
-
Select the update channel, for example, stable-{producty} and the version.
-
For the Installation mode, select one of the following:
-
All namespaces on the cluster. Select this option if you want the Project Quay Operator to be available cluster-wide. It is recommended that you install the Project Quay Operator cluster-wide. If you choose a single namespace, the monitoring component is not available.
-
A specific namespace on the cluster. Select this option if you want Project Quay deployed within a single namespace. Note that selecting this option renders the
monitoringcomponent unavailable.
-
-
Select an Approval Strategy. Choose to approve either automatic or manual updates. Automatic update strategy is recommended.
-
Select Install.
Deploying the Project Quay registry by using the OpenShift Container Platform web console
To deploy a basic Project Quay registry instance, you can use the OpenShift Container Platform web console to create a QuayRegistry custom resource. You configure managed or unmanaged object storage during the deployment process.
-
You have installed the Project Quay Operator.
-
You have have administrative privileges to the cluster.
-
On the OpenShift Container Platform web console, click Operators → Installed Operators → Red Hat Quay.
-
On the Red Hat Quay dashboard, click Create instance.
-
On the Create QuayRegistry page, review the default settings of the
QuayRegistrycustom resource (CR). Here, you decide whether to to use managed or unmanaged object storage.-
If you are using the Multicloud Object Gateway or Red Hat OpenShift Data Foundation as your object storage, keep the following settings:
- kind: objectstorage managed: true -
If you are using a different storage provider, such as Google Cloud Platform, AWS S3, or Nutanix, set the
objectstoragecomponent as follows:- kind: objectstorage managed: false
-
-
Click Create. You are redirected to the Quay Registry tab on the Operator page.
-
Click the name of the Project Quay registry that you created, then click Events to view the status of creation. If you used managed storage and leveraged the Multicloud Object Gateway, the registry completes creation. If you are using Red Hat OpenShift Data Foundation or an unmanaged storage backend provider, complete the following steps:
-
Click the Details page of the Project Quay registry.
-
Click the name of the Config Bundle Secret resource, for example, <example_registry_name_config-bundle-secret-12345>.
-
Click Actions → Edit Secret, and pass in the following information from your backend storage provider:
# ... DISTRIBUTED_STORAGE_CONFIG: <storage_provider>: - <storage_provider_name> - access_key: <access_key> bucket_name: <bucket_name> secret_key: <secret_key> storage_path: /datastorage/registry # ...NoteDepending on your storage provider, different information is required. For more information, see see Storage object configuration fields.
-
Click Save, and then re-navigate to the Events page of the registry to ensure successful deployment.
-
Deploying the Project Quay registry by using the CLI
To deploy a basic Project Quay registry instance, you can use the oc CLI to create a QuayRegistry custom resource. You configure managed or unmanaged object storage during the deployment process.
|
Note
|
The following For more information, see Automation configuration options. |
-
You have logged into OpenShift Container Platform using the CLI.
-
Create a namespace, for example,
quay-enterprise, by entering the following command:$ oc new-project quay-enterprise -
Create the
QuayRegistrycustom resource (CR).-
If the
objectstoragecomponent is set tomanaged: true, complete the following steps:-
Create the
QuayRegistryCR by entering the following command:$ cat <<EOF | oc create -n quay-enterprise -f - apiVersion: quay.redhat.com/v1 kind: QuayRegistry metadata: name: example-registry namespace: quay-enterprise EOF
-
-
If the
objectstoragecomponent is set tomanaged: false, complete the following steps:-
Create the
config.yamlfile for Project Quay by entering the following command. You must include the information required for your backend storage provider. During this step, you can enable additional Project Quay features. The following example is for a minimal configuration that includes the configuration options for automating early setup tasks:$ cat <<EOF > config.yaml ALLOW_PULLS_WITHOUT_STRICT_LOGGING: false AUTHENTICATION_TYPE: Database DEFAULT_TAG_EXPIRATION: 2w FEATURE_USER_INITIALIZE: true SUPER_USERS: - <username> BROWSER_API_CALLS_XHR_ONLY: false FEATURE_USER_CREATION: false DISTRIBUTED_STORAGE_CONFIG: <storage_provider>: - <storage_provider_name> - access_key: <access_key> bucket_name: <bucket_name> secret_key: <secret_key> storage_path: /datastorage/registry ENTERPRISE_LOGO_URL: /static/img/RH_Logo_Quay_Black_UX-horizontal.svg FEATURE_BUILD_SUPPORT: false FEATURE_DIRECT_LOGIN: true FEATURE_MAILING: false REGISTRY_TITLE: Red Hat Quay REGISTRY_TITLE_SHORT: Red Hat Quay SETUP_COMPLETE: true TAG_EXPIRATION_OPTIONS: - 2w TEAM_RESYNC_STALE_TIME: 60m TESTING: false EOF-
FEATURE_USER_INITIALIZE: Set this field totrueif you plan to create the first user by using API. -
SUPER_USERS: Include this field and the username that you plan to leverage as a Project Quay administrator. -
BROWSER_API_CALLS_XHR_ONLY: Set this field tofalseto allow general browser-based access to the API. -
FEATURE_USER_CREATION: Set this field tofalseto relegate the creation of new users to only superusers.
-
-
-
Create a secret for the configuration by entering the following command:
$ oc create secret generic <quay_config_bundle_name> \ --from-file=config.yaml=</path/to/config.yaml> \ -n quay-enterprise \ --dry-run=client -o yaml | oc apply -f - -
Create the
QuayRegistryCR by entering the following command:$ cat <<EOF | oc create -n quay-enterprise -f - apiVersion: quay.redhat.com/v1 kind: QuayRegistry metadata: name: example-registry namespace: quay-enterprise spec: configBundleSecret: <quay_config_bundle_name> components: - kind: clair managed: true - kind: objectstorage managed: false - kind: mirror managed: true - kind: monitoring managed: true EOFobjectstorage: Set this field tofalsewhen providing your own storage backend.
-
-
Check the status of your registry by entering the following command:
$ oc describe quayregistry <registry_name> -n quay-enterprise... Events: Type Reason Age From Message ---- ------ ---- ---- ------- Normal ComponentsCreationSuccess 23s (x2458 over 42h) quayregistry-controller All objects created/updated successfully -
Alternatively, you can check pod statuses for your registry deployment by entering the following command:
-
Enter the following command to view the deployed components:
$ oc get pods -n quay-enterpriseNAME READY STATUS RESTARTS AGE example-registry-clair-app-5ffc9f77d6-jwr9s 1/1 Running 0 3m42s example-registry-clair-app-5ffc9f77d6-wgp7d 1/1 Running 0 3m41s example-registry-clair-postgres-54956d6d9c-rgs8l 1/1 Running 0 3m5s example-registry-quay-app-79c6b86c7b-8qnr2 1/1 Running 4 3m42s example-registry-quay-app-79c6b86c7b-xk85f 1/1 Running 4 3m41s example-registry-quay-app-upgrade-5kl5r 0/1 Completed 4 3m50s example-registry-quay-database-b466fc4d7-tfrnx 1/1 Running 2 3m42s example-registry-quay-mirror-6d9bd78756-6lj6p 1/1 Running 0 2m58s example-registry-quay-mirror-6d9bd78756-bv6gq 1/1 Running 0 2m58s example-registry-quay-postgres-init-dzbmx 0/1 Completed 0 3m43s example-registry-quay-redis-8bd67b647-skgqx 1/1 Running 0 3m42s
Deploying Project Quay on infrastructure nodes
Deploying Project Quay on infrastructure nodes dedicates specific nodes for registry workloads to improve performance and isolate critical components. You can use infrastructure machine sets or label and taint worker nodes to control where quay pods are scheduled.
By default, all quay-related pods are scheduled on available worker nodes in your OpenShift Container Platform cluster. In some environments, you might want to dedicate certain nodes specifically for infrastructure workloads—such as registry, database, and monitoring pods—to improve performance, isolate critical components, or simplify maintenance.
OpenShift Container Platform supports this approach using infrastructure machine sets, which automatically create and manage nodes reserved for infrastructure.
As an OpenShift Container Platform administrator, you can achieve the same result by labeling and tainting worker nodes. This ensures that only infrastructure workloads, like quay pods, are scheduled on these nodes. After your infrastructure nodes are configured, you can control where quay pods run using node selectors and tolerations.
The following procedures is intended for new deployments that install the Project Quay Operator in a single namespace and provide their own backend storage. The procedure shows you how to prepare nodes and deploy Project Quay on dedicated infrastructure nodes. In this procedure, all quay-related pods are placed on dedicated infrastructure nodes.
Labeling and tainting nodes for infrastructure use
To dedicate nodes for infrastructure workloads like quay pods, you can label and taint worker nodes with the infra role. This prevents user workloads from being scheduled on infrastructure nodes and ensures only infrastructure pods run on these dedicated nodes.
|
Note
|
The following procedure labels three worker nodes with the |
-
Obtain a list of worker nodes in your deployment by entering the following command:
$ oc get nodes | grep workerNAME STATUS ROLES AGE VERSION --- example-cluster-new-c5qqp-worker-b-4zxx5.c.quay-devel.internal Ready worker 401d v1.31.11 example-cluster-new-c5qqp-worker-b-kz6jn.c.quay-devel.internal Ready worker 402d v1.31.11 example-cluster-new-c5qqp-worker-b-wrhw4.c.quay-devel.internal Ready worker 401d v1.31.11 --- -
Add the
node-role.kubernetes.io/infra=label to the worker nodes by entering the following command. The number of infrastructure nodes required depends on your environment. Production environments should provision enough infra nodes to ensure high availability and sufficient resources for allquay-related components. Monitor CPU, memory, and storage utilization to determine if additional infra nodes are required.$ oc label node --overwrite <infra_node_one> <infra_node_two> <infra_node_three> node-role.kubernetes.io/infra= -
Confirm that the
node-role.kubernetes.io/infra=label has been added to the proper nodes by entering the following command:$ oc get node | grep infra--- example-cluster-new-c5qqp-worker-b-4zxx5.c.quay-devel.internal Ready infra,worker 405d v1.32.8 example-cluster-new-c5qqp-worker-b-kz6jn.c.quay-devel.internal Ready infra,worker 406d v1.32.8 example-cluster-new-c5qqp-worker-b-wrhw4.c.quay-devel.internal Ready infra,worker 405d v1.32.8 --- -
When a worker node is assigned the
infrarole, there is a chance that user workloads could get inadvertently assigned to an infra node. To avoid this, you can apply a taint to the infra node, and then add tolerations for the pods that you want to control. Taint the worker nodes with theinfralabel by entering the following command:$ oc adm taint nodes -l node-role.kubernetes.io/infra \ node-role.kubernetes.io/infra=reserved:NoSchedule --overwritenode/example-cluster-new-c5qqp-worker-b-4zxx5.c.quay-devel.internal modified node/example-cluster-new-c5qqp-worker-b-kz6jn.c.quay-devel.internal modified node/example-cluster-new-c5qqp-worker-b-wrhw4.c.quay-devel.internal modified
Creating a project with node selector and tolerations
To ensure that Project Quay pods run on infrastructure nodes, you can create a project with node selector and tolerations annotations. These annotations direct pods to infrastructure nodes and allow them to tolerate the node taints.
-
Add the
node-selectorannotation to the namespace by entering the following command:$ oc annotate namespace <namespace> openshift.io/node-selector='node-role.kubernetes.io/infra=' -
Add the
tolerationsannotation to the namespace by entering the following command:$ oc annotate namespace <namespace> scheduler.alpha.kubernetes.io/defaultTolerations='[{"operator":"Equal","value":"reserved","effect":"NoSchedule","key":"node-role.kubernetes.io/infra"},{"operator":"Equal","value":"reserved","effect":"NoExecute","key":"node-role.kubernetes.io/infra"}]' --overwritenamespace/<namespace> annotatedImportantThe tolerations in this example are specific to two taints commonly applied to infra nodes. The taints configured in your environment might differ. You must set the tolerations accordingly to match the taints applied to your infra nodes.
Installing the Project Quay Operator on the annotated namespace
To install the Project Quay Operator on infrastructure nodes, you can install it in the namespace that has node-selector and tolerations annotations. This ensures the Operator and its pods run on the dedicated infrastructure nodes.
-
On the OpenShift Container Platform web console, click Operators → OperatorHub.
-
In the search box, type Project Quay.
-
Click Project Quay → Install.
-
Select the update channel, for example, stable-{producty} and the version.
-
Click A specific namespace on the cluster for the installation mode, and then select the namespace that you applied the
node-selectorandtolerationsannotations to. -
Click Install.
-
Confirm that the Operator is installed by entering the following command:
$ oc get pods -n <annotated_namespace> -o wide | grep quay-operatorquay-operator.v3.15.1-858b5c5fdc-lf5kj 1/1 Running 0 29m 10.130.6.18 example-cluster-new-c5qqp-worker-f-mhngl.c.quay-devel.internal <none> <none>
Creating the Project Quay registry on infrastructure nodes
To create a Project Quay registry that runs on infrastructure nodes, you can create a QuayRegistry custom resource in the annotated namespace. You must patch the registry components (clair, postgres, redis, and so on) with toleration annotations so they can schedule onto the infra worker nodes.
-
On the OpenShift Container Platform web console, click Operators → Installed Operators → Red Hat Quay.
-
On the Project Quay Operator details page, click Quay Registry → Create QuayRegistry.
-
On the Create QuayRegistry page, set the
monitoringandobjectstoragefields tofalse. The monitoring component cannot be enabled when Project Quay is installed in a single namespace. For example:# ... - kind: monitoring managed: false - kind: objectstorage managed: false # ... -
Click Create.
-
Optional: Confirm that the pods are running on infra nodes.
-
List all
Quay-related pods along with the nodes that they are scheduled on by entering the following command:$ oc get pods -n <annotated_namespace> -o wide | grep example-registry
-
... NAME READY STATUS RESTARTS AGE IP NODE NOMINATED NODE READINESS GATES example-registry-clair-app-5f95d685bd-dgjf6 1/1 Running 0 52m 10.128.4.12 example-cluster-new-c5qqp-worker-b-wrhw4.c.quay-devel.internal <none> <none> ...
-
Confirm that the nodes listed include only nodes labeled
infraby running the following command:$ oc get nodes -l node-role.kubernetes.io/infra -o nameExample outputnode/example-cluster-new-c5qqp-worker-b-4zxx5.c.quay-devel.internal modified node/example-cluster-new-c5qqp-worker-b-kz6jn.c.quay-devel.internal modified node/example-cluster-new-c5qqp-worker-b-wrhw4.c.quay-devel.internal modified
NoteIf any pod appears on a non-infra node, revisit your namespace annotations and deployment patching.
-
Restart all pods for the Project Quay registry by entering the following command:
$ oc delete pod -n <annotated_namespace> --all -
Check the status of the pods by entering the following command:
$ oc get pods -n <annotated_namespace>... NAME READY STATUS RESTARTS AGE example-registry-clair-app-5f95d685bd-dgjf6 1/1 Running 0 5m4s ...
-
Prepare a host for Red Hat Quay proof of concept
Prepare a RHEL host with Podman, network access, authentication, firewall, and port mapping before deploying a proof of concept Red Hat Quay registry.
Installing Podman
To install Podman on Red Hat Enterprise Linux (RHEL) for a proof of concept Project Quay deployment, you can use yum to install the podman package or the container-tools module. Podman is required for running registry containers in this guide.
This document uses Podman for creating and deploying containers.
|
Important
|
If you do not have Podman installed on your system, the use of equivalent Docker commands might be possible, however this is not recommended. Docker is not tested with Project Quay {producty}, and will be deprecated in a future release. Podman is recommended for highly available, production quality deployments of Project Quay {producty}. |
-
Enter the following command to install Podman:
$ sudo yum install -y podman -
Alternatively, install the
container-toolsmodule, which pulls in the full set of container software packages:$ sudo yum module install -y container-tools
Preparing Red Hat Enterprise Linux for a Project Quay proof of concept deployment
Preparing Red Hat Enterprise Linux (RHEL) for a Project Quay proof of concept deployment includes server registration, registry authentication, firewall rules, and network addressing. You can complete these host configuration tasks before deploying the registry container.
Install and register the RHEL server
To prepare Red Hat Enterprise Linux (RHEL) for a proof of concept Project Quay deployment, you can install RHEL 9, register the system, and attach a subscription. You can then update to the latest packages before deploying components.
-
Install the latest RHEL 9 server. You can do a minimal, shell-access only install, or Server plus GUI if you want a desktop.
-
Register and subscribe your RHEL server system as described in How to register and subscribe a RHEL system to the Red Hat Customer Portal using Red Hat Subscription-Manager
-
Enter the following commands to register your system and list available subscriptions. Choose an available RHEL server subscription, attach to its pool ID, and upgrade to the latest software:
# subscription-manager register --username=<user_name> --password=<password> # subscription-manager refresh # subscription-manager list --available # subscription-manager attach --pool=<pool_id> # yum update -y
Registry authentication
To pull Project Quay container images for a proof of concept deployment, you can authenticate to registry.redhat.io and log in with Podman. Images are hosted on the Red Hat container registry rather than Quay.io.
-
Configure authentication to
registry.redhat.ioby following the Red Hat Container Registry Authentication procedure. Configuring authentication allows you to pull theQuaycontainer.NoteThis differs from earlier versions of Project Quay, when the images were hosted on Quay.io.
-
Enter the following command to log in to the registry:
$ sudo podman login registry.redhat.ioYou are prompted to enter your
usernameandpassword.
Firewall configuration
To allow network access to your proof of concept Project Quay deployment, you can open firewall ports that match your container port mappings. The required ports depend on which services you expose on the host.
If you have a firewall running on your system, you might have to add rules that allow access to Project Quay.
-
Enter firewall commands for the ports that you have mapped on your system, for example:
# firewall-cmd --permanent --add-port=80/tcp \ && firewall-cmd --permanent --add-port=443/tcp \ && firewall-cmd --permanent --add-port=5432/tcp \ && firewall-cmd --permanent --add-port=5433/tcp \ && firewall-cmd --permanent --add-port=6379/tcp \ && firewall-cmd --reload
IP addressing and naming services for a proof of concept deployment
Container networking for a proof of concept Project Quay deployment can use naming services, host networking, or port mapping. This guide uses port mapping with a static host IP address.
You can configure the component containers in Project Quay to communicate with each other in several ways, for example:
-
Using a naming service. If you want your deployment to survive container restarts, which typically result in changed IP addresses, you can implement a naming service. For example, the
dnsnameplugin allows containers to resolve each other by name. -
Using the host network. You can use the
podman runcommand with the--net=hostoption and then use container ports on the host when specifying the addresses in the configuration. This option is susceptible to port conflicts when two containers want to use the same port. This method is not recommended. -
Configuring port mapping. You can use port mappings to expose ports on the host and then use these ports in combination with the host IP address or host name.
This document uses port mapping and assumes a static IP address for your host system.
| Component | Port mapping | Address |
|---|---|---|
Quay |
|
http://quay-server.example.com |
Postgres for Quay |
|
quay-server.example.com:5432 |
Redis |
|
quay-server.example.com:6379 |
Postgres for Clair V4 |
|
quay-server.example.com:5433 |
Clair V4 |
|
http://quay-server.example.com:8081 |
Preparing your system to deploy Project Quay
For a proof of concept Project Quay deployment, you must configure port mapping, a database, and Redis prior to deploying the registry.
Configuring port mapping for Project Quay
To reach your proof of concept Project Quay registry by hostname, you can map container ports on the host and add a static IP and hostname to /etc/hosts.
You can use port mappings to expose ports on the host and then use these ports in combination with the host IP address or host name to navigate to the Project Quay endpoint.
-
Enter the following command to obtain your static IP address for your host system:
$ ip aExample output--- link/ether 6c:6a:77:eb:09:f1 brd ff:ff:ff:ff:ff:ff inet 192.168.1.132/24 brd 192.168.1.255 scope global dynamic noprefixroute wlp82s0 --- -
Add the IP address and a local hostname, for example,
quay-server.example.comto your/etc/hostsfile that you use to reach the Project Quay endpoint. You can confirm that the IP address and hostname have been added to the/etc/hostsfile by entering the following command:$ cat /etc/hostsExample output192.168.1.132 quay-server.example.com
Deploy Red Hat Quay proof of concept
Deploy the database, Redis, and Red Hat Quay containers for a proof of concept registry with local storage.
Configuring the database
Project Quay requires a database for storing metadata. To configure the database for your proof of concept Project Quay deployment, you can create a local PostgreSQL data directory and start a Postgres container with Podman. You must also install the pg_trgm extension required by the registry.
-
In the installation folder, denoted here by the
$QUAYvariable, create a directory for the database data by entering the following command:$ mkdir -p $QUAY/postgres-quay -
Set the appropriate permissions by entering the following command:
$ setfacl -m u:26:-wx $QUAY/postgres-quay -
Start the
Postgrescontainer, specifying the username, password, and database name and port, with the volume definition for database data:$ sudo podman run -d --rm --name postgresql-quay \ -e POSTGRESQL_USER=quayuser \ -e POSTGRESQL_PASSWORD=quaypass \ -e POSTGRESQL_DATABASE=quay \ -e POSTGRESQL_ADMIN_PASSWORD=adminpass \ -p 5432:5432 \ -v $QUAY/postgres-quay:/var/lib/pgsql/data:Z \ {postgresimage} -
Ensure that the Postgres
pg_trgmmodule is installed by running the following command:$ sudo podman exec -it postgresql-quay /bin/bash -c 'echo "CREATE EXTENSION IF NOT EXISTS pg_trgm" | psql -d quay -U postgres'NoteThe
pg_trgmmodule is required for theQuaycontainer.
Configuring Redis
To configure Redis for your proof of concept Project Quay deployment, you can start a Redis container with Podman and expose port 6379 with a password. Project Quay uses Redis for live builder logs during image builds.
Redis is a key-value store that is used by Project Quay for live builder logs.
-
Start the
Rediscontainer, specifying the port and password, by entering the following command:$ sudo podman run -d --rm --name redis \ -p 6379:6379 \ -e REDIS_PASSWORD=strongpassword \ {redisimage}
Deploying Project Quay
To deploy your proof of concept Project Quay registry, you can create a config.yaml file, prepare local storage for images, and start the registry container with Podman. You can optionally configure a superuser account during setup.
Preparing the YAML configuration file by using the CLI
To prepare your proof of concept Project Quay deployment for launch, you can create a config.yaml file with database, Redis, and storage settings and copy it to your configuration directory. You can use the CLI to build the configuration bundle that the registry container reads at startup.
-
Enter the following command to create a minimal
config.yamlfile that is used to deploy the Project Quay container:$ touch config.yaml -
Copy and paste the following YAML configuration into the
config.yamlfile:BUILDLOGS_REDIS: host: quay-server.example.com password: strongpassword port: 6379 CREATE_NAMESPACE_ON_PUSH: true DATABASE_SECRET_KEY: a8c2744b-7004-4af2-bcee-e417e7bdd235 DB_URI: postgresql://quayuser:quaypass@quay-server.example.com:5432/quay DISTRIBUTED_STORAGE_CONFIG: default: - LocalStorage - storage_path: /datastorage/registry DISTRIBUTED_STORAGE_DEFAULT_LOCATIONS: [] DISTRIBUTED_STORAGE_PREFERENCE: - default FEATURE_MAILING: false SECRET_KEY: e9bd34f4-900c-436a-979e-7530e5d74ac8 SERVER_HOSTNAME: quay-server.example.com SETUP_COMPLETE: true USER_EVENTS_REDIS: host: quay-server.example.com password: strongpassword port: 6379 -
Create a directory to copy the Project Quay configuration bundle to:
$ mkdir $QUAY/config -
Copy the Project Quay configuration file to the directory:
$ cp -v config.yaml $QUAY/config
Configuring a Project Quay superuser
To configure a superuser account for your proof of concept Project Quay deployment, you can add the SUPER_USERS array to config.yaml. Superusers can manage users, organizations, service keys, and global settings from the admin panel.
-
Add the
SUPER_USERSarray to theconfig.yamlfile:SERVER_HOSTNAME: quay-server.example.com SETUP_COMPLETE: true SUPER_USERS: - quayadmin ...
Preparing local storage for image data
To prepare local storage for your proof of concept Project Quay deployment, you can create a directory for registry images and set file system permissions for the registry user. Local storage lets the registry container persist image data on the host.
-
Create a local directory that stores registry images by entering the following command:
$ mkdir $QUAY/storage -
Set the directory to store registry images:
$ setfacl -m u:1001:-wx $QUAY/storage
Deploy the Project Quay registry by using the CLI
To deploy your proof of concept Project Quay registry, you can start the registry container with Podman.
-
Enter the following command to start the
Quayregistry container, specifying the appropriate volumes for configuration data and local storage for image data:$ sudo podman run -d --rm -p 80:8080 -p 443:8443 \ --name=quay \ -v $QUAY/config:/conf/stack:Z \ -v $QUAY/storage:/datastorage:Z \ {productrepo}/{quayimage}:{productminv}
Configure SSL/TLS for Red Hat Quay proof of concept
Configure SSL/TLS certificates for a proof of concept Red Hat Quay deployment to enable encrypted communication.
Proof of concept deployment using SSL/TLS certificates
To secure a proof of concept Project Quay deployment with SSL/TLS, you can create certificates, configure your registry, and test secure connections. You can also add the certificate authority to system or Podman trust stores.
Creating a Certificate Authority
To secure your Project Quay deployment with self-signed certificates, you can create a root certificate authority and generate a server certificate for your registry hostname. You can use OpenSSL to create the CA key, signing request, and certificate files.
-
Generate the root CA key by entering the following command:
$ openssl genrsa -out rootCA.key 2048 -
Generate the root CA certificate by entering the following command:
$ openssl req -x509 -new -nodes -key rootCA.key -sha256 -days 1024 -out rootCA.pem -
Enter the information to incorporate into your certificate request, including the server hostname, for example:
Country Name (2 letter code) [XX]:IE State or Province Name (full name) []:GALWAY Locality Name (eg, city) [Default City]:GALWAY Organization Name (eg, company) [Default Company Ltd]:QUAY Organizational Unit Name (eg, section) []:DOCS Common Name (eg, your name or your server's hostname) []:quay-server.example.com -
Generate the server key by entering the following command:
$ openssl genrsa -out ssl.key 2048 -
Generate a signing request by entering the following command:
$ openssl req -new -key ssl.key -out ssl.csr -
Enter the information to incorporate into your certificate request, including the server hostname, for example:
Country Name (2 letter code) [XX]:IE State or Province Name (full name) []:GALWAY Locality Name (eg, city) [Default City]:GALWAY Organization Name (eg, company) [Default Company Ltd]:QUAY Organizational Unit Name (eg, section) []:DOCS Common Name (eg, your name or your server's hostname) []:quay-server.example.com Email Address []: -
Create a configuration file
openssl.cnf, specifying the server hostname, for example:Exampleopenssl.cnffile[req] req_extensions = v3_req distinguished_name = req_distinguished_name [req_distinguished_name] [ v3_req ] basicConstraints = CA:FALSE keyUsage = nonRepudiation, digitalSignature, keyEncipherment subjectAltName = @alt_names [alt_names] DNS.1 = <quay-server.example.com> IP.1 = 192.168.1.112 -
Use the configuration file to generate the certificate
ssl.cert:$ openssl x509 -req -in ssl.csr -CA rootCA.pem -CAkey rootCA.key -CAcreateserial -out ssl.cert -days 356 -extensions v3_req -extfile openssl.cnf -
Confirm your created certificates and files by entering the following command:
$ ls /path/to/certificatesExample outputrootCA.key ssl-bundle.cert ssl.key custom-ssl-config-bundle-secret.yaml rootCA.pem ssl.cert openssl.cnf rootCA.srl ssl.csr
Configuring custom SSL/TLS certificates by using the command line interface
To enable custom SSL/TLS certificates on your Project Quay deployment, you can copy certificate files to your configuration directory and update the config.yaml file to use HTTPS. You can then restart the registry container to apply the SSL/TLS configuration.
-
You have created a certificate authority and signed the certificate.
-
Copy the certificate file and primary key file to your configuration directory, ensuring they are named
ssl.certandssl.keyrespectively:cp ~/ssl.cert ~/ssl.key /path/to/configuration_directory -
Navigate to the configuration directory by entering the following command:
$ cd /path/to/configuration_directory -
Edit the
config.yamlfile and specify that you want Project Quay to handle SSL/TLS:Exampleconfig.yamlfile# ... SERVER_HOSTNAME: <quay-server.example.com> ... PREFERRED_URL_SCHEME: https # ... -
Optional: Append the contents of the
rootCA.pemfile to the end of thessl.certfile by entering the following command:$ cat rootCA.pem >> ssl.cert -
Stop the
Quaycontainer by entering the following command:$ sudo podman stop <quay_container_name> -
Restart the registry by entering the following command:
$ sudo podman run -d --rm -p 80:8080 -p 443:8443 \ --name=quay \ -v $QUAY/config:/conf/stack:Z \ -v $QUAY/storage:/datastorage:Z \ {productrepo}/{quayimage}:{productminv}
Testing the SSL/TLS configuration
SSL/TLS testing confirms that your Project Quay registry serves encrypted connections after you configure certificates. You can verify the setup from the CLI or a web browser before you add the certificate authority to client trust stores.
Testing the SSL/TLS configuration using the CLI
To test your SSL/TLS configuration from the CLI, you can use podman login against your Project Quay registry endpoint and review the certificate error for a self-signed authority. You can then log in with the --tls-verify=false option before configuring Podman to trust the certificate authority.
-
Enter the following command to attempt to log in to the Project Quay registry with SSL/TLS enabled:
$ sudo podman login quay-server.example.comExample outputError: error authenticating creds for "quay-server.example.com": error pinging docker registry quay-server.example.com: Get "https://quay-server.example.com/v2/": x509: certificate signed by unknown authority -
Because Podman does not trust self-signed certificates, you must use the
--tls-verify=falseoption:$ sudo podman login --tls-verify=false quay-server.example.comExample outputLogin Succeeded!
Install Red Hat Quay in high availability
Prepare hosts, HAProxy, PostgreSQL, Ceph, Redis, and Red Hat Quay nodes for a high availability deployment.
Preparing hosts for a high availability deployment
To prepare for a high availability Project Quay deployment, you need compatible database, object storage, load balancer, and RHEL systems that meet the sizing requirements in this guide.
|
Important
|
The Project Quay configuration tool is unsupported for standalone high availability deployments. Create and maintain the |
|
Note
|
This procedure presents guidance on how to set up a highly available, production-quality deployment of Project Quay. |
Prerequisites
Here are a few things you need to know before you begin the Project Quay high availability deployment:
-
Either Postgres or MySQL can be used to provide the database service. Postgres was chosen here as the database because it includes the features needed to support Clair security scanning. Other options include:
-
Crunchy Data PostgreSQL Operator: Although not supported directly by Red Hat, the Postgres Operator is available from Crunchy Data for use with Project Quay. If you take this route, you should have a support contract with Crunchy Data and work directly with them for usage guidance or issues relating to the operator and their database.
-
If your organization already has a high-availability (HA) database, you can use that database with Project Quay. See the Project Quay Support Policy for details on support for third-party databases and other components.
-
-
Ceph Object Gateway (also called RADOS Gateway) is one example of a product that can provide the object storage needed by Project Quay. If you want your Project Quay setup to do geo-replication, Ceph Object Gateway or other supported object storage is required. For cloud installations, you can use any of the following cloud object storage:
-
Amazon S3 (see Additional resources for details on configuring an S3 bucket policy for Quay)
-
Azure Blob Storage
-
Google Cloud Storage
-
Ceph Object Gateway
-
OpenStack Swift
-
CloudFront + S3
-
NooBaa S3 Storage
-
-
The haproxy server is used in this example, although you can use any proxy service that works for your environment.
-
Number of systems: This procedure uses seven systems (physical or virtual) that are assigned with the following tasks:
-
A: db01: Load balancer and database: Runs the haproxy load balancer and a Postgres database. Note that these components are not themselves highly available, but are used to indicate how you might set up your own load balancer or production database.
-
B: quay01, quay02, quay03: Quay and Redis: Three (or more) systems are assigned to run the Quay and Redis services.
-
C: ceph01, ceph02, ceph03, ceph04, ceph05: Ceph: Three (or more) systems provide the Ceph service, for storage. If you are deploying to a cloud, you can use the cloud storage features described earlier. This procedure employs an additional system for Ansible (ceph05) and one for a Ceph Object Gateway (ceph04).
-
Each system should have the following attributes:
-
Red Hat Enterprise Linux (RHEL) 8: Obtain the latest Red Hat Enterprise Linux 8 server media from the Downloads page and follow the installation instructions available in the Red Hat Enterprise Linux 9 product documentation.
-
Valid Red Hat Subscription: Configure a valid Red Hat Enterprise Linux 8 server subscription.
-
CPUs: Two or more virtual CPUs
-
RAM: 4GB for each A and B system; 8GB for each C system
-
Disk space: About 20GB of disk space for each A and B system (10GB for the operating system and 10GB for docker storage). At least 30GB of disk space for C systems (or more depending on required container storage).
-
Using podman
This document uses podman for creating and deploying containers. If you do not have podman available on your system, you should be able to use the equivalent docker commands. For more information on podman and related technologies, see Additional resources.
|
Note
|
Production quality deployments of Project Quay generally use Podman. Docker has not been tested with Project Quay {producty}, and will be deprecated in a future release. |
Setting up the HAProxy load balancer and the PostgreSQL database
To configure the HAProxy load balancer and PostgreSQL database for Project Quay, you can configure HAProxy front ends, open required ports, and deploy a PostgreSQL container with the pg_trgm extension.
-
You have installed the Podman or Docker CLI.
-
On the first two systems,
q01andq02, install the HAProxy load balancer and the PostgreSQL database. This configures HAProxy as the access point and load balancer for the following services running on other systems:-
Project Quay (ports 80 and 443 on B systems)
-
Redis (port 6379 on B systems)
-
RADOS (port 7480 on C systems)
-
-
Open all HAProxy ports in SELinux and selected HAProxy ports in the firewall:
# setsebool -P haproxy_connect_any=on # firewall-cmd --permanent --zone=public --add-port=6379/tcp --add-port=7480/tcp success # firewall-cmd --reload success
-
Configure the
/etc/haproxy/haproxy.cfgto point to the systems and ports providing the Project Quay, Redis and Ceph RADOS services. The following are examples of defaults and added frontend and backend settings:#--------------------------------------------------------------------- # common defaults that all the 'listen' and 'backend' sections will # use if not designated in their block #--------------------------------------------------------------------- defaults mode tcp log global option httplog option dontlognull option http-server-close option forwardfor except 127.0.0.0/8 option redispatch retries 3 timeout http-request 10s timeout queue 1m timeout connect 10s timeout client 1m timeout server 1m timeout http-keep-alive 10s timeout check 10s maxconn 3000 #--------------------------------------------------------------------- # main frontend which proxys to the backends #--------------------------------------------------------------------- frontend fe_http *:80 default_backend be_http frontend fe_https *:443 default_backend be_https frontend fe_redis *:6379 default_backend be_redis frontend fe_rdgw *:7480 default_backend be_rdgw backend be_http balance roundrobin server quay01 quay01:80 check server quay02 quay02:80 check server quay03 quay03:80 check backend be_https balance roundrobin server quay01 quay01:443 check server quay02 quay02:443 check server quay03 quay03:443 check backend be_rdgw balance roundrobin server ceph01 ceph01:7480 check server ceph02 ceph02:7480 check server ceph03 ceph03:7480 check backend be_redis server quay01 quay01:6379 check inter 1s server quay02 quay02:6379 check inter 1s server quay03 quay03:6379 check inter 1sAfter the new
haproxy.cfgfile is in place, restart the HAProxy service by entering the following command:# systemctl restart haproxy -
Create a folder for the PostgreSQL database by entering the following command:
$ mkdir -p /var/lib/pgsql/data -
Set the following permissions for the
/var/lib/pgsql/datafolder:$ chmod 777 /var/lib/pgsql/data -
Enter the following command to start the PostgreSQL database:
$ sudo podman run -d --name postgresql_database \ -v /var/lib/pgsql/data:/var/lib/pgsql/data:Z \ -e POSTGRESQL_USER=quayuser -e POSTGRESQL_PASSWORD=quaypass \ -e POSTGRESQL_DATABASE=quaydb -p 5432:5432 \ registry.redhat.io/rhel8/postgresql-13:1-109NoteData from the container will be stored on the host system in the
/var/lib/pgsql/datadirectory. -
List the available extensions by entering the following command:
$ sudo podman exec -it postgresql_database /bin/bash -c 'echo "SELECT * FROM pg_available_extensions" | /opt/rh/rh-postgresql96/root/usr/bin/psql'Example outputname | default_version | installed_version | comment -----------+-----------------+-------------------+---------------------------------------- adminpack | 1.0 | | administrative functions for PostgreSQL ... -
Create the
pg_trgmextension by entering the following command:$ sudo podman exec -it postgresql_database /bin/bash -c 'echo "CREATE EXTENSION IF NOT EXISTS pg_trgm;" | /opt/rh/rh-postgresql96/root/usr/bin/psql -d quaydb' -
Confirm that the
pg_trgmhas been created by entering the following command:$ sudo podman exec -it postgresql_database /bin/bash -c 'echo "SELECT * FROM pg_extension" | /opt/rh/rh-postgresql96/root/usr/bin/psql'Example outputextname | extowner | extnamespace | extrelocatable | extversion | extconfig | extcondition ---------+----------+--------------+----------------+------------+-----------+-------------- plpgsql | 10 | 11 | f | 1.0 | | pg_trgm | 10 | 2200 | t | 1.3 | | (2 rows) -
Alter the privileges of the Postgres user
quayuserand grant them thesuperuserrole to give the user unrestricted access to the database:$ sudo podman exec -it postgresql_database /bin/bash -c 'echo "ALTER USER quayuser WITH SUPERUSER;" | /opt/rh/rh-postgresql96/root/usr/bin/psql'Example outputALTER ROLE -
If you have a firewalld service active on your system, run the following commands to make the PostgreSQL port available through the firewall:
# firewall-cmd --permanent --zone=trusted --add-port=5432/tcp# firewall-cmd --reload -
Optional. If you do not have the
postgresCLI package installed, install it by entering the following command:# yum install postgresql -y -
Use the
psqlcommand to test connectivity to the PostgreSQL database.NoteTo verify that you can access the service remotely, run the following command on a remote system.
# psql -h localhost quaydb quayuser
Example outputPassword for user test: psql (9.2.23, server 9.6.5) WARNING: psql version 9.2, server version 9.6. Some psql features might not work. Type "help" for help. test=> \q
Setting up Ceph object storage
To provide object storage for Project Quay, you can install a multi-node Ceph cluster and configure a Ceph Object Gateway for registry image data.
For this Project Quay configuration, we create a three-node Ceph cluster, with several other supporting nodes, as follows:
-
ceph01, ceph02, and ceph03 - Ceph Monitor, Ceph Manager and Ceph OSD nodes
-
ceph04 - Ceph RGW node
-
ceph05 - Ceph Ansible administration node
For details on installing Ceph nodes, see Additional resources.
Once you have set up the Ceph storage cluster, create a Ceph Object Gateway (also referred to as a RADOS gateway). See Additional resources for details.
Installing each Ceph node
To prepare Ceph nodes for a Project Quay deployment, you can verify prerequisites, configure OSD storage, install RHEL, and create an Ansible administration user on each node.
-
Review prerequisites for setting up Ceph nodes in Additional resources. In particular:
-
Decide if you want to use RAID controllers on OSD nodes.
-
Decide if you want a separate cluster network for your Ceph network configuration.
-
-
Prepare OSD storage (ceph01, ceph02, and ceph03 only). Set up the OSD storage on the three OSD nodes (ceph01, ceph02, and ceph03). See OSD Ansible Settings in Additional resources for details on supported storage types that you will enter into your Ansible configuration later. For this example, a single, unformatted block device (
/dev/sdb), that is separate from the operating system, is configured on each of the OSD nodes. If you are installing on metal, you might want to add an extra hard drive to the machine for this purpose. -
Install Red Hat Enterprise Linux Server edition, as described in Additional resources.
-
Register and subscribe each Ceph node as described in Additional resources. Here is how to subscribe to the necessary repos:
# subscription-manager repos --disable=* # subscription-manager repos --enable=rhel-7-server-rpms # subscription-manager repos --enable=rhel-7-server-extras-rpms # subscription-manager repos --enable=rhel-7-server-rhceph-3-mon-rpms # subscription-manager repos --enable=rhel-7-server-rhceph-3-osd-rpms # subscription-manager repos --enable=rhel-7-server-rhceph-3-tools-rpms -
Create an ansible user with root privilege on each node. Choose any name you like. For example:
# USER_NAME=ansibleadmin # useradd $USER_NAME -c "Ansible administrator" # passwd $USER_NAME New password: ********* Retype new password: ********* # cat << EOF >/etc/sudoers.d/admin admin ALL = (root) NOPASSWD:ALL EOF # chmod 0440 /etc/sudoers.d/$USER_NAME
Configuring the Ceph Ansible node (ceph05)
To deploy a Ceph cluster with Ansible, you can configure the ceph05 administration node, prepare inventory files, and run the ceph-ansible playbook against the monitor and OSD nodes.
Log into the Ceph Ansible node (ceph05) and configure it as follows. You will need the ceph01, ceph02, and ceph03 nodes to be running to complete these steps.
-
In the Ansible user’s home directory create a directory to store temporary values created from the ceph-ansible playbook
# USER_NAME=ansibleadmin # sudo su - $USER_NAME [ansibleadmin@ceph05 ~]$ mkdir ~/ceph-ansible-keys -
Enable password-less ssh for the ansible user. Run ssh-keygen on ceph05 (leave passphrase empty), then run and repeat ssh-copy-id to copy the public key to the Ansible user on ceph01, ceph02, and ceph03 systems:
# USER_NAME=ansibleadmin # sudo su - $USER_NAME [ansibleadmin@ceph05 ~]$ ssh-keygen [ansibleadmin@ceph05 ~]$ ssh-copy-id $USER_NAME@ceph01 [ansibleadmin@ceph05 ~]$ ssh-copy-id $USER_NAME@ceph02 [ansibleadmin@ceph05 ~]$ ssh-copy-id $USER_NAME@ceph03 [ansibleadmin@ceph05 ~]$ exit # -
Install the ceph-ansible package:
# yum install ceph-ansible -
Create a symbolic between these two directories:
# ln -s /usr/share/ceph-ansible/group_vars \ /etc/ansible/group_vars -
Create copies of Ceph sample yml files to modify:
# cd /usr/share/ceph-ansible # cp group_vars/all.yml.sample group_vars/all.yml # cp group_vars/osds.yml.sample group_vars/osds.yml # cp site.yml.sample site.yml -
Edit the copied group_vars/all.yml file. See General Ansible Settings in Additional resources for details. For example:
ceph_origin: repository ceph_repository: rhcs ceph_repository_type: cdn ceph_rhcs_version: 3 monitor_interface: eth0 public_network: 192.168.122.0/24Note that your network device and address range may differ.
-
Edit the copied
group_vars/osds.ymlfile. See the OSD Ansible Settings in Additional resources for details. In this example, the second disk device (/dev/sdb) on each OSD node is used for both data and journal storage:osd_scenario: collocated devices: - /dev/sdb dmcrypt: true osd_auto_discovery: false -
Edit the
/etc/ansible/hostsinventory file to identify the Ceph nodes as Ceph monitor, OSD and manager nodes. In this example, the storage devices are identified on each node as well:[mons] ceph01 ceph02 ceph03 [osds] ceph01 devices="[ '/dev/sdb' ]" ceph02 devices="[ '/dev/sdb' ]" ceph03 devices="[ '/dev/sdb' ]" [mgrs] ceph01 devices="[ '/dev/sdb' ]" ceph02 devices="[ '/dev/sdb' ]" ceph03 devices="[ '/dev/sdb' ]" -
Add this line to the
/etc/ansible/ansible.cfgfile, to save the output from each Ansible playbook run into your Ansible user’s home directory:retry_files_save_path = ~/ -
Check that Ansible can reach all the Ceph nodes you configured as your Ansible user:
# USER_NAME=ansibleadmin # sudo su - $USER_NAME [ansibleadmin@ceph05 ~]$ ansible all -m ping ceph01 | SUCCESS => { "changed": false, "ping": "pong" } ceph02 | SUCCESS => { "changed": false, "ping": "pong" } ceph03 | SUCCESS => { "changed": false, "ping": "pong" } [ansibleadmin@ceph05 ~]$ -
Run the ceph-ansible playbook (as your Ansible user):
[ansibleadmin@ceph05 ~]$ cd /usr/share/ceph-ansible/ [ansibleadmin@ceph05 ~]$ ansible-playbook site.ymlAt this point, the Ansible playbook checks your Ceph nodes and configures them for the services you requested. If anything fails, make needed corrections and rerun the command.
-
Log into one of the three Ceph nodes (ceph01, ceph02, or ceph03) and check the health of the Ceph cluster:
# ceph health HEALTH_OK -
On the same node, verify that monitoring is working using rados:
# ceph osd pool create test 8 # echo 'Hello World!' > hello-world.txt # rados --pool test put hello-world hello-world.txt # rados --pool test get hello-world fetch.txt # cat fetch.txt Hello World!
Installing the Ceph Object Gateway
To expose Ceph storage to Project Quay, you can install a Ceph Object Gateway on the RADOS gateway node and connect it to your Ceph cluster.
On the Ansible system (ceph05), configure a Ceph Object Gateway to your Ceph Storage cluster (which will ultimately run on ceph04). See Additional resources for details.
Setting up Redis
To run Redis for Project Quay builder logs and locking, you can deploy the Redis container on each registry node and verify connectivity through the load balancer.
With Red Hat Enterprise Linux 8 server installed on each of the three Project Quay systems (quay01, quay02, and quay03), install and start the Redis service as follows:
-
Run Redis as a container on each of the three quay0* systems:
# mkdir -p /var/lib/redis # chmod 777 /var/lib/redis # sudo podman run -d -p 6379:6379 \ -v /var/lib/redis:/var/lib/redis/data:Z \ registry.redhat.io/rhel8/redis-5 -
Use the
telnetcommand to test connectivity to the redis service. Type MONITOR (to begin monitoring the service) and QUIT to exit:# yum install telnet -y # telnet 192.168.122.99 6379 Trying 192.168.122.99... Connected to 192.168.122.99. Escape character is '^]'. MONITOR +OK +1525703165.754099 [0 172.17.0.1:43848] "PING" QUIT +OK Connection closed by foreign host.NoteFor more information on using
podmanand restarting containers, see "Using Podman."
Configuring Project Quay for high availability
To configure Project Quay for high availability, you can create a config.yaml file that defines database, Redis, storage, and registry settings before starting the registry containers.
-
You completed the load balancer, database, Ceph, and Redis setup procedures in this guide.
-
You generated unique values for
SECRET_KEYandDATABASE_SECRET_KEY. These values must remain consistent across all Project Quay nodes.
-
On the first Project Quay node, for example
quay01, create a directory for the configuration bundle:# mkdir -p /mnt/quay/config -
Create a
config.yamlfile in that directory. The following example shows the minimum fields for a high availability deployment that uses the PostgreSQL database, Redis, and Ceph Object Gateway resources from earlier procedures:AUTHENTICATION_TYPE: Database PREFERRED_URL_SCHEME: https SERVER_HOSTNAME: quay.example.com SECRET_KEY: <secret_key_value> DATABASE_SECRET_KEY: <database_secret_key_value> SETUP_COMPLETE: true DB_URI: postgresql://quayuser:quaypass@db01:5432/quaydb BUILDLOGS_REDIS: host: db01 port: 6379 USER_EVENTS_REDIS: host: db01 port: 6379 DISTRIBUTED_STORAGE_CONFIG: radosGWStorage: - RadosGWStorage - access_key: <access_key> bucket_name: <bucket_name> hostname: db01 is_secure: false port: '7480' secret_key: <secret_key> storage_path: /datastorage/registry DISTRIBUTED_STORAGE_PREFERENCE: - radosGWStorage DISTRIBUTED_STORAGE_DEFAULT_LOCATIONS: [] SUPER_USERS: - quayadminwhere:
SERVER_HOSTNAME-
Specifies the hostname or IP address that clients use to reach the Project Quay service, typically the load balancer front end.
DB_URI-
Specifies the database user, password, host, and database name from "Setting up the HAProxy load balancer and the PostgreSQL database."
BUILDLOGS_REDIS.host-
Specifies the load balancer hostname that exposes Redis on port
6379. USER_EVENTS_REDIS.host-
Specifies the load balancer hostname that exposes Redis on port
6379. DISTRIBUTED_STORAGE_CONFIG.radosGWStorage.hostname-
Specifies the load balancer hostname that exposes the Ceph RADOS gateway on port
7480. For additional RadosGW fields, see "Ceph Object Gateway (RadosGW) storage example." SUPER_USERS-
Specifies an initial superuser account. This field is optional.
-
Configure additional registry settings as needed. The following fields are commonly updated for production high availability deployments:
-
TLS certificates: Place
ssl.certandssl.keyin/mnt/quay/configand setPREFERRED_URL_SCHEME: https. See Using SSL to protect connections to Project Quay.ImportantUsing SSL certificates is recommended for production deployments. If you do not use SSL, configure your container clients to treat the registry as an insecure registry, as described in Test an Insecure Registry.
-
Clair image scanning: Configure security scanner settings before enabling Clair. See Clair Security Scanning.
-
Repository mirroring: Set
FEATURE_REPO_MIRROR: trueand related fields inconfig.yaml. See Enabling repository mirroring for Project Quay. -
Action log storage, authentication, and access control: See Configure Project Quay for the complete list of supported configuration fields.
-
-
Copy the configuration directory, including
config.yamland any TLS certificate files, to each Project Quay node in the cluster, for examplequay02andquay03.
Deploying Project Quay registry nodes
To deploy Project Quay in a high availability cluster, you can start the registry container on each node with the shared config.yaml bundle and verify access through the load balancer.
For a basic setup, you can deploy on a single node. For high availability, deploy three or more nodes, for example quay01, quay02, and quay03.
|
Note
|
The resulting Project Quay service listens on port |
-
On each Project Quay node, confirm that
/mnt/quay/configcontainsconfig.yamland any required TLS certificate files from Configuring Project Quay. -
Deploy Project Quay on the node. After you authenticate to
registry.redhat.io(see Additional resources), run the following command:NoteAdd
-e DEBUGLOG=trueto thepodman runcommand line for theQuaycontainer to enable debug-level logging. Add-e IGNORE_VALIDATION=trueto bypass validation during the startup process.# sudo podman run --restart=always -p 443:8443 -p 80:8080 \ --sysctl net.core.somaxconn=4096 \ --privileged=true \ -v /mnt/quay/config:/conf/stack:Z \ -v /mnt/quay/storage:/datastorage:Z \ -d {productrepo}/{quayimage}:{productminv}NoteCreate
/mnt/quay/storageon each node before running the registry container. Image blobs are stored in Ceph Object Gateway for this high availability example, but Project Quay still uses/datastoragefor thestorage_pathdefined inconfig.yaml. -
Open a browser to the URL of the node running the
Quaycontainer. -
Log in to Project Quay with the superuser account defined in
config.yamland confirm that the registry is working. -
Repeat the deployment on the remaining Project Quay nodes in the cluster.
-
Optional. To add Clair image scanning or repository mirroring, continue with the following sections.
Install Clair for Red Hat Quay
Install Clair for standalone, including ephemeral storage for managed Clair. Clair for Red Hat Quay on OpenShift Container Platform is automatically configured.
Setting up Clair on standalone Project Quay deployments
To configure Clair on a standalone Project Quay deployment, you can deploy a Clair PostgreSQL database, enable security scanning in the configuration tool, and start the Clair container.
-
In your Project Quay installation directory, create a new directory for the Clair database data:
$ mkdir /home/<user-name>/quay-poc/postgres-clairv4 -
Set the appropriate permissions for the
postgres-clairv4file by entering the following command:$ setfacl -m u:26:-wx /home/<user-name>/quay-poc/postgres-clairv4 -
Deploy a Clair PostgreSQL database by entering the following command:
$ sudo podman run -d --name postgresql-clairv4 \ -e POSTGRESQL_USER=clairuser \ -e POSTGRESQL_PASSWORD=clairpass \ -e POSTGRESQL_DATABASE=clair \ -e POSTGRESQL_ADMIN_PASSWORD=adminpass \ -p 5433:5432 \ -v /home/<user-name>/quay-poc/postgres-clairv4:/var/lib/pgsql/data:Z \ registry.redhat.io/rhel8/postgresql-15 -
Install the PostgreSQL
uuid-osspmodule for your Clair deployment:$ sudo podman exec -it postgresql-clairv4 /bin/bash -c 'echo "CREATE EXTENSION IF NOT EXISTS \"uuid-ossp\"" | psql -d clair -U postgres'Example outputCREATE EXTENSIONNoteClair requires the
uuid-osspextension to be added to its PostgreSQL database. For users with proper privileges, Clair automatically adds the extension. If users do not have the proper privileges, the extension must be added before you start Clair.If the extension is not present, the following error is displayed when Clair attempts to start:
ERROR: Please load the "uuid-ossp" extension. (SQLSTATE 42501). -
Stop the
Quaycontainer if the container is running and restart it in configuration mode, loading the existing configuration as a volume:$ sudo podman run --rm -it --name quay_config \ -p 80:8080 -p 443:8443 \ -v $QUAY/config:/conf/stack:Z \ {productrepo}/{quayimage}:{productminv} config secret -
Log in to the configuration tool and click Enable Security Scanning in the Security Scanner section of the UI.
-
Set the HTTP endpoint for Clair using a port that is not already in use on the
quay-serversystem, for example,8081. -
Create a pre-shared key (PSK) using the Generate PSK button.
The following image shows the Security Scanner UI:
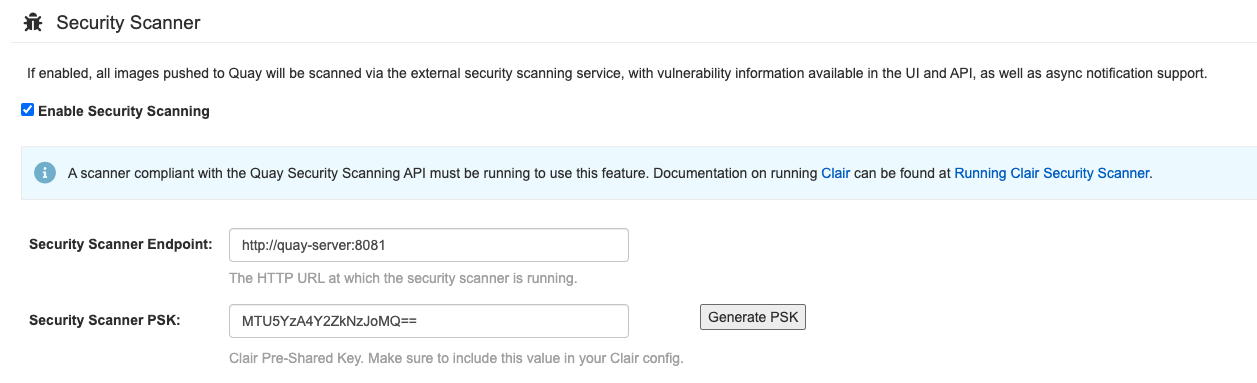
-
Validate and download the
config.yamlfile for Project Quay, and then stop theQuaycontainer that is running the configuration editor. -
Extract the new configuration bundle into your Project Quay installation directory, for example:
$ tar xvf quay-config.tar.gz -d /home/<user-name>/quay-poc/ -
Create a folder for your Clair configuration file, for example:
$ mkdir /etc/opt/clairv4/config/ -
Change into the Clair configuration folder:
$ cd /etc/opt/clairv4/config/ -
Create a Clair configuration file, for example:
http_listen_addr: :8081 introspection_addr: :8088 log_level: debug indexer: connstring: host=quay-server.example.com port=5433 dbname=clair user=clairuser password=clairpass sslmode=disable scanlock_retry: 10 layer_scan_concurrency: 5 migrations: true matcher: connstring: host=quay-server.example.com port=5433 dbname=clair user=clairuser password=clairpass sslmode=disable max_conn_pool: 100 migrations: true indexer_addr: clair-indexer notifier: connstring: host=quay-server.example.com port=5433 dbname=clair user=clairuser password=clairpass sslmode=disable delivery_interval: 1m poll_interval: 5m migrations: true auth: psk: key: "MTU5YzA4Y2ZkNzJoMQ==" iss: ["quay"] # tracing and metrics trace: name: "jaeger" probability: 1 jaeger: agent: endpoint: "localhost:6831" service_name: "clair" metrics: name: "prometheus" -
Start Clair by using the container image, mounting in the configuration from the file you created:
$ sudo podman run -d --name clairv4 \ -p 8081:8081 -p 8088:8088 \ -e CLAIR_CONF=/clair/config.yaml \ -e CLAIR_MODE=combo \ -v /etc/opt/clairv4/config:/clair:Z \ {productrepo}/{clairimage}:{productminv}NoteRunning multiple Clair containers is also possible, but for deployment scenarios beyond a single container the use of a container orchestrator like Kubernetes or OpenShift Container Platform is strongly recommended.
Setting up Clair on OpenShift Container Platform
The Project Quay Operator installs and configures Clair automatically when you deploy Project Quay on OpenShift Container Platform. You can increase Clair scratch storage for large images by configuring ephemeral volume overrides on the clair component.
Configuring ephemeral storage for managed Clair
To increase Clair scratch space for image layer extraction on Project Quay, you can set volumeSize and storageClassName overrides on the managed clair component in the QuayRegistry custom resource.
When you deploy managed Clair, the Operator provisions an ephemeral volume named indexer-layer-storage for temporary image layer extraction during vulnerability scanning. If your registry scans large images, this scratch space can fill and cause Clair pods to fail.
By default, the ephemeral volume requests 20Gi of storage and uses the cluster default storage class. You can override the capacity and storage class without adding new fields to the QuayRegistry CR. The Operator applies these values to the ephemeral volume mounted at /var/tmp.
|
Note
|
These overrides apply to Clair scratch storage at |
-
Edit your
QuayRegistrycustom resource. For example:$ oc edit quayregistry <registry_name> -n <namespace> -
Under
spec.components, addoverrides.volumeSizeand, optionally,overrides.storageClassNameto the managedclaircomponent. For example:spec: components: - kind: clair managed: true overrides: volumeSize: 50Gi storageClassName: fast-ssdWhen no overrides are specified, the Operator preserves the default
20Girequest and does not set a storage class. -
Save the changes and wait for the Operator to reconcile the Clair deployment.
-
Verify that the Clair deployment includes the updated ephemeral volume claim template. Confirm that the
storageandstorageClassNamevalues match your overrides:$ oc get deploy -n <namespace> <registry_name>-clair-app \ -o jsonpath='{.spec.template.spec.volumes[?(@.name=="indexer-layer-storage")].ephemeral.volumeClaimTemplate.spec}{"\n"}'Example output{"accessModes":["ReadWriteOnce"],"resources":{"requests":{"storage":"50Gi"}},"storageClassName":"fast-ssd","volumeMode":"Filesystem"}
Upgrade
Upgrade Red Hat Quay on OpenShift Container Platform Container Platform
Upgrade the Red Hat Quay Operator and QuayRegistry on OpenShift, preserve TLS settings, and apply database migrations safely.
Operator upgrade versioning
The Project Quay Operator uses synchronized versioning: each Operator version deploys a single, matching version of Project Quay and its components. You can use this scheme to plan upgrades and keep components compatible.
|
Note
|
There is no field on the |
Operator Lifecycle Manager
Operator Lifecycle Manager (OLM) installs and upgrades the Project Quay Operator. You can use automatic or manual approval in the Subscription to control when new Operator versions are applied.
|
Warning
|
When the Project Quay Operator is installed by Operator Lifecycle Manager, it might be configured to support automatic or manual upgrades. This option is shown on the OperatorHub page for the Project Quay Operator during installation. It can also be found in the Project Quay Operator |
Upgrading the Project Quay Operator
To upgrade the Project Quay Operator, use the standard OpenShift Container Platform process for installed Operators and follow N-1 minor version paths.
In general, Project Quay supports upgrades from a prior (N-1) minor version only. For example, upgrading directly from Project Quay 3.9 to the latest version of {producty} is not supported. Instead, users would have to upgrade as follows:
-
3.9.z → 3.10.z
-
3.10.z → 3.11.z
-
3.11.z → 3.14.z
-
3.14.z → 3.16.z
-
3.16.z → 3.17.z
-
3.17.z → 3.18.z
-
3.18.z → 5.0.z
This is required to ensure that any necessary database migrations are done correctly and in the right order during the upgrade.
In some cases, Project Quay supports direct, single-step upgrades from prior (N-2, N-3) minor versions. This simplifies the upgrade procedure for customers on older releases. The following upgrade paths are supported for Project Quay {productmin}:
-
3.16.z → {productmin}
-
3.17.z → {productmin}
-
3.18.z → {productmin}
Preserving TLS settings before upgrading Red Hat Quay on OpenShift Container Platform
The Project Quay Operator can inherit the cluster-wide TLS security profile. Before upgrading, review your cluster profile and set SSL_PROTOCOLS and SSL_CIPHERS if you need to preserve your current TLS behavior.
The Operator inherits the cluster-wide TLS security profile from the OpenShift APIServer configuration when neither SSL_PROTOCOLS nor SSL_CIPHERS is set in the configBundleSecret resource.
When the tls component is set to managed, the OpenShift Route already enforces the cluster TLS profile, and no action is required.
When the tls component is set to unmanaged, Project Quay terminates TLS directly and inherits the cluster profile after the upgrade unless you override it in the config bundle. If you have already set both SSL_PROTOCOLS and SSL_CIPHERS, no additional TLS configuration is required before upgrading. Setting only one field disables cluster-profile inheritance for both fields.
-
You have cluster administrator access to review the OpenShift Container Platform
APIServerconfiguration. -
You can edit the
configBundleSecretreferenced by yourQuayRegistrycustom resource (CR).
-
Review the cluster TLS security profile:
$ oc get apiserver cluster -o jsonpath='{.spec.tlsSecurityProfile}{"\n"}' -
If you must preserve your current TLS settings, add
SSL_PROTOCOLSandSSL_CIPHERSto theconfig.yamlfile in yourconfigBundleSecretbefore upgrading. For example:# ... SSL_PROTOCOLS: - TLSv1.2 - TLSv1.3 SSL_CIPHERS: - ECDHE-RSA-AES128-GCM-SHA256 - ECDHE-ECDSA-AES128-GCM-SHA256 - ECDHE-RSA-AES256-GCM-SHA384 - ECDHE-ECDSA-AES256-GCM-SHA384 # Add other required ciphers # ...NoteInclude every cipher suite your clients require. To fully override cluster-profile inheritance, set both
SSL_PROTOCOLSandSSL_CIPHERS. Setting either field disables inheritance for both fields. -
Update the
configBundleSecretwith the modifiedconfig.yamlfile. You can edit the secret in the OpenShift Container Platform web console or recreate it from a local file. For example:$ oc create secret generic <config_bundle_secret_name> \ --from-file config.yaml=./config.yaml \ --dry-run=client -o yaml | oc apply -f - -
Proceed with the Project Quay Operator upgrade. If the cluster TLS profile is acceptable and neither
SSL_PROTOCOLSnorSSL_CIPHERSis set, no additional TLS configuration is required.
Upgrading Project Quay to version {productmin}
To upgrade Project Quay to the next version, change the Operator update channel in the OpenShift Container Platform Web Console and wait for the upgrade pods to complete. You can then verify the database images and access your registry.
-
In the OpenShift Container Platform Web Console, navigate to Operators → Installed Operators.
-
Click on the Project Quay Operator.
-
Navigate to the Subscription tab.
-
Under Subscription details click Update channel.
-
Select stable-5 → Save.
-
Check the progress of the new installation under Upgrade status. Wait until the upgrade status changes to 1 installed before proceeding.
-
In your OpenShift Container Platform cluster, navigate to Workloads → Pods. Existing pods should be terminated, or in the process of being terminated.
-
Wait for the following pods, which are responsible for upgrading the database and alembic migration of existing data, to spin up:
clair-postgres-upgrade,quay-postgres-upgrade, andquay-app-upgrade. -
After the
clair-postgres-upgrade,quay-postgres-upgrade, andquay-app-upgradepods are marked as Completed, the remaining pods for your Project Quay deployment spin up. This takes approximately ten minutes. -
Verify that the
quay-databaseuses thepostgresql-13image, andclair-postgrespods now uses thepostgresql-15image. -
After the
quay-apppod is marked as Running, you can reach your Project Quay registry.
Upgrading to the next minor release version
Z-stream upgrades, for example, 3.13.1 → 3.13.2, for Project Quay use your existing channel and approval strategy. With Automatic approval, the Operator applies new z-stream updates with little or no downtime; with Manual approval, you approve each update first.
Manually approving a pending Operator upgrade
To approve a pending Project Quay Operator upgrade when using Manual approval, open the Subscription tab, review the install plan and resources, and click Approve. You can then monitor the upgrade progress on the Installed Operators page.
The following image shows the Subscription tab in the UI, including the update Channel, the Approval strategy, the Upgrade status and the InstallPlan:
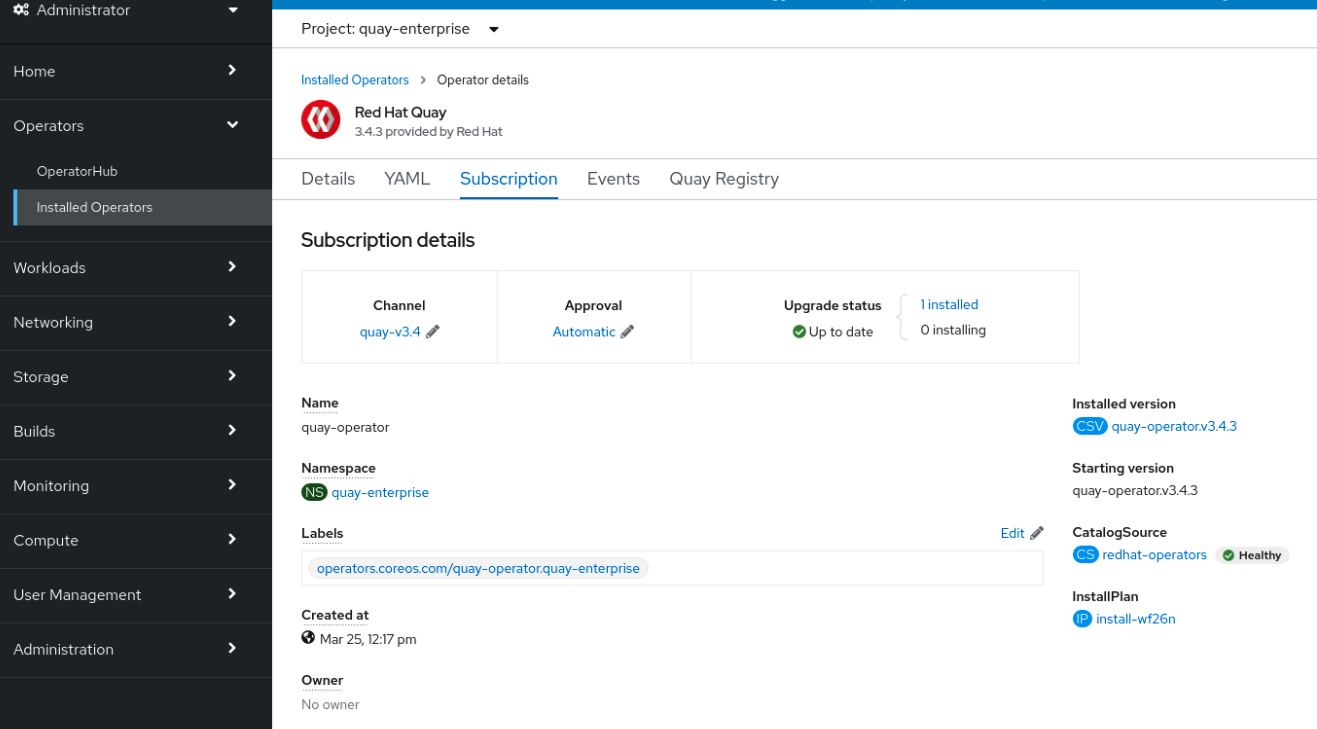
The list of Installed Operators provides a high-level summary of the current Quay installation:

Upgrading a QuayRegistry resource
The Project Quay Operator reconciles QuayRegistry resources and upgrades them when the Operator version differs from the current version. When an upgrade is supported, the Operator applies it and updates status; when not, it returns an error and leaves the QuayRegistry unchanged.
The following logic is used:
-
If
status.currentVersionis unset, reconcile as normal. -
If
status.currentVersionequals the Operator version, reconcile as normal. -
If
status.currentVersiondoes not equal the Operator version, check if it can be upgraded. If it can, perform upgrade tasks and set thestatus.currentVersionto the Operator’s version once complete. If it cannot be upgraded, return an error and leave theQuayRegistryand its deployed Kubernetes objects alone.
Upgrade a standalone Red Hat Quay deployment
Review supported standalone upgrade paths and access the correct Red Hat Quay container images for your target version.
Supported standalone upgrade paths
To upgrade a standalone Project Quay and Clair deployment, follow the procedure for your current version in sequential order. You stop the containers, back up the database and storage, then start the new Clair and Project Quay images.
In general, single-step upgrades from prior (N-2, N-3) minor versions. This helps simplify the upgrade procedure for customers on older releases. The following upgrade paths are supported for Project Quay {productmin}:
-
3.16.z → {productmin}
-
3.17.z → {productmin}
-
3.18.z → {productmin}
Upgrading to {producty} from releases older than those listed above is unsupported. This helps ensure that any necessary database migrations are done correctly and in the right order during the upgrade.
For Operator-based upgrades, see Operator upgrade versioning and the OpenShift Container Platform upgrade procedures in this guide.
Determine your current version and follow the upgrade steps in sequential order, starting with your current version and working up to your desired target version. Upgrade procedures are available for 3.16.z, 3.17.z, and 3.18.z to {productmin}.
For information on features in individual releases, see the Project Quay Release Notes.
The general procedure for a manual upgrade consists of the following steps:
-
Stop the
QuayandClaircontainers. -
Backup the database and image storage (optional but recommended).
-
Start Clair using the new version of the image.
-
Wait until Clair is ready to accept connections before starting the new version of Project Quay.
Accessing images
To access Project Quay and Clair images for standalone upgrades, pull from registry.redhat.io or registry.access.redhat.com and configure authentication as described in Red Hat Container Registry Authentication.
Project Quay images from version 3.4.0 and later are available from registry.redhat.io and registry.access.redhat.com. Configure authentication before pulling images.
Upgrade to {productminv} from 3.18.z
-
Quay: {productrepo}/{quayimage}:{productminv}
-
PostgreSQL: {postgresimage}
-
Redis: {redisimage}
-
Clair-PostgreSQL: {postgresimage}
Upgrade to {productminv} from 3.17.z
-
Quay: {productrepo}/{quayimage}:{productminv}
-
PostgreSQL: {postgresimage}
-
Redis: {redisimage}
-
Clair-PostgreSQL: {postgresimage}
Upgrade to {productminv} from 3.16.z
-
Quay: {productrepo}/{quayimage}:{productminv}
-
PostgreSQL: {postgresimage}
-
Redis: {redisimage}
-
Clair-PostgreSQL: {postgresimage}
Upgrade a geo-replicated Red Hat Quay deployment
Upgrade geo-replicated Red Hat Quay deployments on standalone or Operator installations in the supported order.
Upgrading standalone geo-replication
To upgrade a geo-replication deployment of standalone Project Quay, stop operations on all instances, back up the deployment, then follow the procedure to upgrade each system. Expect intermittent downtime when upgrading to the next y-stream release.
|
Important
|
|
|
Note
|
This procedure assumes that you are running Project Quay services on three (or more) systems. For more information, see Preparing for Project Quay high availability. |
-
You have logged into
registry.redhat.io
-
Obtain a list of all Project Quay instances on each system running a Project Quay instance.
-
Enter the following command on System A to reveal the Project Quay instances:
$ sudo podman psExample outputCONTAINER ID IMAGE COMMAND CREATED STATUS PORTS NAMES ec16ece208c0 registry.redhat.io/quay/quay-rhel8:v{producty-n1} registry 6 minutes ago Up 6 minutes ago 0.0.0.0:80->8080/tcp, 0.0.0.0:443->8443/tcp quay01 -
Enter the following command on System B to reveal the Project Quay instances:
$ sudo podman psExample outputCONTAINER ID IMAGE COMMAND CREATED STATUS PORTS NAMES 7ae0c9a8b37d registry.redhat.io/quay/quay-rhel8:v{producty-n1} registry 5 minutes ago Up 2 seconds ago 0.0.0.0:82->8080/tcp, 0.0.0.0:445->8443/tcp quay02 -
Enter the following command on System C to reveal the Project Quay instances:
$ sudo podman psExample outputCONTAINER ID IMAGE COMMAND CREATED STATUS PORTS NAMES e75c4aebfee9 registry.redhat.io/quay/quay-rhel8:v{producty-n1} registry 4 seconds ago Up 4 seconds ago 0.0.0.0:84->8080/tcp, 0.0.0.0:447->8443/tcp quay03
-
-
Temporarily shut down all Project Quay instances on each system.
-
Enter the following command on System A to shut down the Project Quay instance:
$ sudo podman stop ec16ece208c0 -
Enter the following command on System B to shut down the Project Quay instance:
$ sudo podman stop 7ae0c9a8b37d -
Enter the following command on System C to shut down the Project Quay instance:
$ sudo podman stop e75c4aebfee9
-
-
Obtain the latest Project Quay version, for example, Project Quay {producty}, on each system.
-
Enter the following command on System A to obtain the latest Project Quay version:
$ sudo podman pull registry.redhat.io/quay/quay-rhel8:{productminv} -
Enter the following command on System B to obtain the latest Project Quay version:
$ sudo podman pull registry.redhat.io/quay/quay-rhel8:v{producty} -
Enter the following command on System C to obtain the latest Project Quay version:
$ sudo podman pull registry.redhat.io/quay/quay-rhel8:{productminv}
-
-
On System A of your highly available Project Quay deployment, run the new image version, for example, Project Quay {producty}:
# sudo podman run --restart=always -p 443:8443 -p 80:8080 \ --sysctl net.core.somaxconn=4096 \ --name=quay01 \ -v /mnt/quay/config:/conf/stack:Z \ -v /mnt/quay/storage:/datastorage:Z \ -d registry.redhat.io/quay/quay-rhel8:{productminv} -
Wait for the new Project Quay container to become fully operational on System A. You can check the status of the container by entering the following command:
$ sudo podman psExample outputCONTAINER ID IMAGE COMMAND CREATED STATUS PORTS NAMES 70b9f38c3fb4 registry.redhat.io/quay/quay-rhel8:v{producty} registry 2 seconds ago Up 2 seconds ago 0.0.0.0:82->8080/tcp, 0.0.0.0:445->8443/tcp quay01 -
Optional: Ensure that Project Quay is fully operation by navigating to the Project Quay UI.
-
After ensuring that Project Quay on System A is fully operational, run the new image versions on System B and on System C.
-
On System B of your highly available Project Quay deployment, run the new image version, for example, Project Quay {producty}:
# sudo podman run --restart=always -p 443:8443 -p 80:8080 \ --sysctl net.core.somaxconn=4096 \ --name=quay02 \ -v /mnt/quay/config:/conf/stack:Z \ -v /mnt/quay/storage:/datastorage:Z \ -d registry.redhat.io/quay/quay-rhel8:{productminv} -
On System C of your highly available Project Quay deployment, run the new image version, for example, Project Quay {producty}:
# sudo podman run --restart=always -p 443:8443 -p 80:8080 \ --sysctl net.core.somaxconn=4096 \ --name=quay03 \ -v /mnt/quay/config:/conf/stack:Z \ -v /mnt/quay/storage:/datastorage:Z \ -d registry.redhat.io/quay/quay-rhel8:{productminv}
-
-
You can check the status of the containers on System B and on System C by entering the following command:
$ sudo podman ps
Upgrading Operator geo-replication
To upgrade your geo-replicated Red Hat Quay on OpenShift Container Platform deployment, you must stop operations, scale down secondary systems, upgrade the primary system, then upgrade secondary systems. This ensures a safe upgrade process with minimal downtime across your geo-replicated registry.
|
Important
|
|
The following procedure assumes that you are running the Project Quay registry on three or more systems. For this procedure, three systems named System A, System B, and System C are used. System A serves as the primary system in which the Project Quay Operator is deployed.
-
On System B and System C, scale down your Project Quay registry. This is done by disabling auto scaling and overriding the replica county for Project Quay, mirror workers, and Clair if it is managed. Note that you must keep the Project Quay registry running on System A. Do not update the
quayregistry.yamlfile on System A.Use the following
quayregistry.yamlfile as a reference:apiVersion: quay.redhat.com/v1 kind: QuayRegistry metadata: name: registry namespace: ns spec: components: … - kind: horizontalpodautoscaler managed: false - kind: quay managed: true overrides: replicas: 0 - kind: clair managed: true overrides: replicas: 0 - kind: mirror managed: true overrides: replicas: 0 …where:
managed: false-
Disables auto scaling of
Quay,ClairandMirroringworkers overrides-
Sets the replica count to 0 for components accessing the database and objectstorage
-
Wait for the
registry-quay-app,registry-quay-mirror, andregistry-clair-apppods to disappear. Enter the following command to check their status:oc get pods -n <quay-namespace>Example outputquay-operator.v3.7.1-6f9d859bd-p5ftc 1/1 Running 0 12m quayregistry-clair-postgres-7487f5bd86-xnxpr 1/1 Running 1 (12m ago) 12m quayregistry-quay-app-upgrade-xq2v6 0/1 Completed 0 12m quayregistry-quay-redis-84f888776f-hhgms 1/1 Running 0 12m -
On System A, initiate a Project Quay upgrade to the latest y-stream version. This is a manual process. For more information about upgrading installed Operators, see Upgrading installed Operators. For more information about Project Quay upgrade paths, see Upgrading the Project Quay Operator.
-
After the new Project Quay registry is installed, the necessary upgrades on the cluster are automatically completed. Afterwards, new Project Quay pods are started with the latest y-stream version. Additionally, new
Quaypods are scheduled and started. -
Confirm that the update has properly worked by navigating to the Project Quay UI:
-
In the OpenShift console, navigate to Operators → Installed Operators, and click the Registry Endpoint link.
ImportantDo not execute the following step until the Project Quay UI is available. Do not upgrade the Project Quay registry on System B and on System C until the UI is available on System A.
-
-
Confirm that the update has properly worked on System A, initiate the Project Quay upgrade on System B and on System C. The Operator upgrade results in an upgraded Project Quay installation, and the pods are restarted.
NoteBecause the database schema is correct for the new y-stream installation, the new pods on System B and on System C should quickly start.
-
After updating, revert the changes made in step 1 of this procedure by removing
overridesfor the components. For example:apiVersion: quay.redhat.com/v1 kind: QuayRegistry metadata: name: registry namespace: ns spec: components: … - kind: horizontalpodautoscaler managed: true - kind: quay managed: true - kind: clair managed: true - kind: mirror managed: true …where:
kind: horizontalpodautoscaler::Set this resource toTrueif thehorizontalpodautoscalerresource was set toTruebefore the upgrade procedure, or if you want Project Quay to scale in case of a resource shortage.
Upgrade the Quay Bridge Operator
Change the Quay Bridge Operator update channel to upgrade Red Hat Quay on OpenShift Container Platform integration safely.
Changing the Quay Bridge Operator update channel
To receive the latest Project Quay upgrades and features, you can upgrade the Quay Bridge Operator by changing the update channel in the operator subscription.
-
You have installed Project Quay.
-
You are logged in to OpenShift Container Platform as a cluster administrator.
-
On the OpenShift Container Platform web console, click Operators → Installed Operators → Quay Bridge Operator.
-
Click the Subscription tab.
-
Under Update channel, click stable-3.15 → Save.
Upgrade the Clair PostgreSQL database
Migrate the Clair PostgreSQL database from version 13 to 15 when required by your Red Hat Quay upgrade path.
Migrating the Clair PostgreSQL database from version 13 to 15
To migrate your Clair PostgreSQL database from version 13 to version 15 in Project Quay, you can stop Clair and Quay, run the data migration container, and restart the services.
If you are upgrading Project Quay to version 13, you must migrate your Clair PostgreSQL database version from PostgreSQL version 13 to version 15. This requires bringing down your Clair PostgreSQL 13 database and running a migration script to initiate the process.
|
Important
|
Clair security scans might become temporarily disrupted after the migration procedure has succeeded. |
-
Stop the Project Quay container by entering the following command:
$ sudo podman stop <quay_container_name> -
Stop the Clair container by running the following command:
$ sudo podman stop <clair_container_id> -
Run the following Podman process from SCLOrg’s Data Migration procedure, which allows for data migration from a remote PostgreSQL server:
$ sudo podman run -d --name <clair_migration_postgresql_database> \ -e POSTGRESQL_MIGRATION_REMOTE_HOST=<container_ip_address> \ -e POSTGRESQL_MIGRATION_ADMIN_PASSWORD=remoteAdminP@ssword \ -v </host/data/directory:/var/lib/pgsql/data:Z> \ [ OPTIONAL_CONFIGURATION_VARIABLES ] registry.redhat.io/rhel8/postgresql-15where:
<clair_migration_postgresql_database>-
Specifies a name for your Clair PostgreSQL 15 migration database.
<container_ip_address>-
Specifies your new Clair PostgreSQL 15 database container IP address. Can be obtained by running the following command:
sudo podman inspect -f "{{.NetworkSettings.IPAddress}}" postgresql-quay. </host/data/directory:/var/lib/pgsql/data:Z>-
Specifies a different volume mount point than the one from your initial Clair PostgreSQL 13 deployment. Modify the access control lists for said directory. For example:
$ mkdir -p /host/data/clair-postgresql15-directory$ setfacl -m u:26:-wx /host/data/clair-postgresql15-directoryThis prevents data from being overwritten by the new container.
-
Stop the Clair PostgreSQL 13 container:
$ sudo podman stop <clair_postgresql13_container_name> -
After completing the PostgreSQL migration, run the Clair PostgreSQL 15 container, using the new data volume mount from Step 3, for example,
</host/data/clair-postgresql15-directory:/var/lib/postgresql/data>:$ sudo podman run -d --rm --name <postgresql15-clairv4> \ -e POSTGRESQL_USER=<clair_username> \ -e POSTGRESQL_PASSWORD=<clair_password> \ -e POSTGRESQL_DATABASE=<clair_database_name> \ -e POSTGRESQL_ADMIN_PASSWORD=<admin_password> \ -p 5433:5432 \ -v </host/data/clair-postgresql15-directory:/var/lib/postgresql/data:Z> \ registry.redhat.io/rhel8/postgresql-15 -
Start the Project Quay container by entering the following command:
$ sudo podman run -d --rm -p 80:8080 -p 443:8443 --name=quay \ -v /home/<quay_user>/quay-poc/config:/conf/stack:Z \ -v /home/<quay_user>/quay-poc/storage:/datastorage:Z \ {productrepo}/{quayimage}:{productminv} -
Start the Clair container by entering the following command:
$ sudo podman run -d --name clairv4 \ -p 8081:8081 -p 8088:8088 \ -e CLAIR_CONF=/clair/config.yaml \ -e CLAIR_MODE=combo \ registry.redhat.io/quay/clair-rhel8:{productminv}
Downgrade or roll back Red Hat Quay
Review downgrade and rollback limits before you restore a Project Quay version.
Downgrade and rollback limits
Project Quay only supports rolling back, or downgrading, to previous z-stream versions, for example, 3.12.3 → 3.12.2.
Rolling back to previous y-stream versions ({producty} → {producty-n1}) is not supported. This is because Project Quay updates might contain database schema upgrades that are applied when upgrading to a new version of Project Quay. Database schema upgrades are not considered backwards compatible.
|
Important
|
Downgrading to previous z-streams is neither recommended nor supported by either Operator based deployments or virtual machine based deployments. Downgrading should only be done in extreme circumstances. The decision to rollback your Project Quay deployment must be made in conjunction with the Project Quay support and development teams. For more information, contact Project Quay support. |
Migrate
Migrate a QuayEcosystem deployment to QuayRegistry
Migrate a QuayEcosystem deployment to QuayRegistry, review supported configurations, and revert if needed.
Migrating QuayEcosystem to QuayRegistry
To migrate an existing QuayEcosystem to a QuayRegistry managed by the Project Quay Operator, add the migration label to the QuayEcosystem custom resource and wait for the new QuayRegistry to start. You can then verify the migration and delete the old QuayEcosystem.
-
Add
"quay-operator/migrate": "true"to themetadata.labelsof theQuayEcosystem.$ oc edit quayecosystem <quayecosystem_name>metadata: labels: quay-operator/migrate: "true" -
Wait for a
QuayRegistryCR to be created with the samemetadata.nameas yourQuayEcosystem. TheQuayEcosystemCR is marked with the label"quay-operator/migration-complete": "true". -
After the
status.registryEndpointof the newQuayRegistryis set, access Project Quay and confirm that all data and settings were migrated successfully. -
If everything works correctly, you can delete the
QuayEcosystem. Kubernetes garbage collection cleans up all old resources.
Supported QuayEcosystem configurations for migration
The Project Quay Operator reports errors in its logs and in status.conditions if migrating a QuayEcosystem component fails or is unsupported.
All unmanaged components should migrate successfully because no Kubernetes resources need to be adopted and all the necessary values are already provided in Project Quay’s config.yaml file.
- Database
-
Ephemeral database not supported (
volumeSizefield must be set). - Redis
-
Nothing special needed.
- External Access
-
Only passthrough
Routeaccess is supported for automatic migration. Manual migration required for other methods.-
LoadBalancerwithout custom hostname: After theQuayEcosystemis marked with label"quay-operator/migration-complete": "true", delete themetadata.ownerReferencesfield from existingServicebefore deleting theQuayEcosystemto prevent Kubernetes from garbage collecting theServiceand removing the load balancer. A newServicewill be created withmetadata.nameformat<QuayEcosystem-name>-quay-app. Edit thespec.selectorof the existingServiceto match thespec.selectorof the newServiceso traffic to the old load balancer endpoint will now be directed to the new pods. You are now responsible for the oldService; the Quay Operator will not manage it. -
LoadBalancer/NodePort/Ingresswith custom hostname: A newServiceof typeLoadBalancerwill be created withmetadata.nameformat<QuayEcosystem-name>-quay-app. Change your DNS settings to point to thestatus.loadBalancerendpoint provided by the newService.
-
- Clair
-
Nothing special needed.
- Object Storage
-
QuayEcosystemdid not have a managed object storage component, so object storage will always be marked as unmanaged. Local storage is not supported. - Repository Mirroring
-
Nothing special needed.
Reverting QuayEcosystem migration
To revert to the QuayEcosystem when migration to QuayRegistry fails or causes issues, delete the QuayRegistry and restore the Route to the original Service. You can then use the Project Quay deployment managed by the QuayEcosystem.
|
Note
|
If your |
-
Delete the
QuayRegistryusing either the UI orkubectl:$ kubectl delete -n <namespace> quayregistry <quayecosystem-name> -
If external access was provided using a
Route, change theRouteto point back to the originalServiceusing the UI orkubectl.
Migrate a standalone Red Hat Quay deployment to the Operator
Back up a standalone Red Hat Quay deployment and migrate registry content to Red Hat Quay on OpenShift Container Platform.
Backing up a standalone deployment of Project Quay
To back up a standalone Project Quay deployment before Operator migration, you can copy config.yaml, dump the database, and sync object storage blobs.
-
Back up the
config.yamlof your standalone Project Quay deployment:$ mkdir /tmp/quay-backup $ cp /path/to/Quay/config/directory/config.yaml /tmp/quay-backup -
Create a backup of the database that your standalone Project Quay deployment is using:
$ pg_dump -h DB_HOST -p 5432 -d QUAY_DATABASE_NAME -U QUAY_DATABASE_USER -W -O > /tmp/quay-backup/quay-database-backup.sql -
Install the AWS CLI if you do not have it already.
-
Create an
~/.aws/directory:$ mkdir ~/.aws/ -
Obtain the
access_keyandsecret_keyfrom theconfig.yamlof your standalone deployment:$ grep -i DISTRIBUTED_STORAGE_CONFIG -A10 /tmp/quay-backup/config.yamlExample output:DISTRIBUTED_STORAGE_CONFIG: minio-1: - RadosGWStorage - access_key: ########## bucket_name: quay hostname: 172.24.10.50 is_secure: false port: "9000" secret_key: ########## storage_path: /datastorage/registry -
Store the
access_keyandsecret_keyfrom theconfig.yamlfile in your~/.awsdirectory:$ touch ~/.aws/credentials -
Optional: Check that your
access_keyandsecret_keyare stored:$ cat > ~/.aws/credentials << EOF [default] aws_access_key_id = ACCESS_KEY_FROM_QUAY_CONFIG aws_secret_access_key = SECRET_KEY_FROM_QUAY_CONFIG EOFExample output:aws_access_key_id = ACCESS_KEY_FROM_QUAY_CONFIG aws_secret_access_key = SECRET_KEY_FROM_QUAY_CONFIGNoteIf the AWS CLI does not automatically collect the
access_keyandsecret_keyfrom the~/.aws/credentialsfile, you can configure these by runningaws configureand manually entering the credentials. -
In your
quay-backupdirectory, create abucket_backupdirectory:$ mkdir /tmp/quay-backup/bucket-backup -
Back up all blobs from the S3 storage:
$ aws s3 sync --no-verify-ssl --endpoint-url https://PUBLIC_S3_ENDPOINT:PORT s3://QUAY_BUCKET/ /tmp/quay-backup/bucket-backup/NoteThe
PUBLIC_S3_ENDPOINTcan be read from the Project Quayconfig.yamlfile underhostnamein theDISTRIBUTED_STORAGE_CONFIG. If the endpoint is insecure, usehttpinstead ofhttpsin the endpoint URL.
Using backed up standalone content to migrate to OpenShift Container Platform
To migrate backed-up standalone Project Quay content to OpenShift Container Platform, you can restore the database, apply a custom configuration bundle, and sync blobs to Object Bucket storage.
-
Your standalone Project Quay data, blobs, database, and
config.yamlhave been backed up. -
Project Quay is deployed on OpenShift Container Platform using the Project Quay Operator.
-
A
QuayRegistrywith all components set tomanaged.
|
Note
|
The procedure in this document uses the following namespace: |
-
Scale down the Project Quay Operator:
$ oc scale --replicas=0 deployment quay-operator.v3.6.2 -n openshift-operators -
Scale down the application and mirror deployments:
$ oc scale --replicas=0 deployment QUAY_MAIN_APP_DEPLOYMENT QUAY_MIRROR_DEPLOYMENT -
Copy the database SQL backup to the
QuayPostgreSQL database instance:$ oc cp /tmp/user/quay-backup/quay-database-backup.sql quay-enterprise/quayregistry-quay-database-54956cdd54-p7b2w:/var/lib/pgsql/data/userdata -
Obtain the database password from the Operator-created
config.yamlfile:$ oc get deployment quay-quay-app -o json | jq '.spec.template.spec.volumes[].projected.sources' | grep -i config-secretExample output:"name": "QUAY_CONFIG_SECRET_NAME"$ oc get secret quay-quay-config-secret-9t77hb84tb -o json | jq '.data."config.yaml"' | cut -d '"' -f2 | base64 -d -w0 > /tmp/quay-backup/operator-quay-config-yaml-backup.yaml$ cat /tmp/quay-backup/operator-quay-config-yaml-backup.yaml | grep -i DB_URIExample output:postgresql://QUAY_DATABASE_OWNER:PASSWORD@DATABASE_HOST/QUAY_DATABASE_NAME
-
Execute a shell inside of the database pod:
# oc exec -it quay-postgresql-database-pod -- /bin/bash -
Enter psql:
bash-4.4$ psql -
Drop the database:
postgres=# DROP DATABASE "example-restore-registry-quay-database";Example output:DROP DATABASE
-
Create a new database and set the owner as the same name:
postgres=# CREATE DATABASE "example-restore-registry-quay-database" OWNER "example-restore-registry-quay-database";Example output:CREATE DATABASE
-
Connect to the database:
postgres=# \c "example-restore-registry-quay-database";Example output:You are now connected to database "example-restore-registry-quay-database" as user "postgres". -
Create a
pg_trgmextension of yourQuaydatabase:example-restore-registry-quay-database=# CREATE EXTENSION IF NOT EXISTS pg_trgm ;Example output:CREATE EXTENSION -
Exit the postgres CLI to re-enter bash-4.4:
\q -
Set the password for your PostgreSQL deployment:
bash-4.4$ psql -h localhost -d "QUAY_DATABASE_NAME" -U QUAY_DATABASE_OWNER -W < /var/lib/pgsql/data/userdata/quay-database-backup.sqlExample output:SET SET SET SET SET
-
Exit bash mode:
bash-4.4$ exit -
Create a new configuration bundle for the Project Quay Operator.
$ touch config-bundle.yaml -
In your new
config-bundle.yaml, include all of the information that the registry requires, such as LDAP configuration, keys, and other modifications that your old registry had. Run the following command to move thesecret_keyto yourconfig-bundle.yaml:$ cat /tmp/quay-backup/config.yaml | grep SECRET_KEY > /tmp/quay-backup/config-bundle.yamlNoteYou must manually copy all the LDAP, OIDC, and other information and add it to the
/tmp/quay-backup/config-bundle.yamlfile. -
Create a configuration bundle secret inside of your OpenShift cluster:
$ oc create secret generic new-custom-config-bundle --from-file=config.yaml=/tmp/quay-backup/config-bundle.yaml -
Scale up the
Quaypods:$ oc scale --replicas=1 deployment quayregistry-quay-appExample output:deployment.apps/quayregistry-quay-app scaled -
Scale up the mirror pods:
$ oc scale --replicas=1 deployment quayregistry-quay-mirrorExample output:deployment.apps/quayregistry-quay-mirror scaled -
Patch the
QuayRegistryCRD so that it contains the reference to the new custom configuration bundle:$ oc patch quayregistry QUAY_REGISTRY_NAME --type=merge -p '{"spec":{"configBundleSecret":"new-custom-config-bundle"}}'NoteIf Project Quay returns a
500internal server error, you might have to update thelocationof yourDISTRIBUTED_STORAGE_CONFIGtodefault. -
Create a new AWS
credentials.yamlin your/.aws/directory and include theaccess_keyandsecret_keyfrom the Operator-createdconfig.yamlfile:$ touch credentials.yaml$ grep -i DISTRIBUTED_STORAGE_CONFIG -A10 /tmp/quay-backup/operator-quay-config-yaml-backup.yaml$ cat > ~/.aws/credentials << EOF [default] aws_access_key_id = ACCESS_KEY_FROM_QUAY_CONFIG aws_secret_access_key = SECRET_KEY_FROM_QUAY_CONFIG EOFNoteIf the AWS CLI does not automatically collect the
access_keyandsecret_keyfrom the~/.aws/credentialsfile, you can configure these by runningaws configureand manually entering the credentials. -
Record the NooBaa’s publicly available endpoint:
$ oc get route s3 -n openshift-storage -o yaml -o jsonpath="{.spec.host}{'\n'}" -
Sync the backup data to the NooBaa backend storage:
$ aws s3 sync --no-verify-ssl --endpoint-url https://NOOBAA_PUBLIC_S3_ROUTE /tmp/quay-backup/bucket-backup/* s3://QUAY_DATASTORE_BUCKET_NAME -
Scale the Operator back up to 1 pod:
$ oc scale --replicas=1 deployment quay-operator.v3.6.4 -n openshift-operatorsThe Operator uses the custom configuration bundle provided and reconciles all secrets and deployments. Your new Project Quay deployment on OpenShift Container Platform contains all of the information that the old deployment had. You can pull all images.
Migrate Microsoft Entra ID OIDC from v1.0 to v2.0
Migrate Microsoft Entra ID OIDC from v1.0 to v2.0 using a dual-issuer cutover and multi-issuer configuration.
Dual-issuer cutover from Entra ID v1.0 to v2.0
To migrate from Microsoft Entra ID v1.0 to v2.0 without interrupting clients in Project Quay, you can set the v2.0 discovery endpoint and temporarily list both issuers in OIDC_ISSUERS.
-
Set
OIDC_SERVERto the v2.0 endpoint (https://login.microsoftonline.com/<tenant-id>/v2.0/). -
Add both issuer URLs to
OIDC_ISSUERS:OIDC_ISSUERS: - https://sts.windows.net/<tenant-id>/ - https://login.microsoftonline.com/<tenant-id>/v2.0 -
Update upstream clients to v2.0 tokens.
-
After all clients use v2.0, remove the v1.0 issuer from
OIDC_ISSUERS.
Configuring Microsoft Entra ID v2 and multi-issuer OIDC
To accept Microsoft Entra ID v2.0 tokens and On-Behalf-Of API flows in Project Quay, you can configure multi-issuer and multi-audience settings in your OIDC *_LOGIN_CONFIG block.
This support enables Microsoft Entra ID v2.0 access tokens, dual v1.0 and v2.0 acceptance during migration, and On-Behalf-Of (OBO) API flows used by integrations such as Red Hat Developer Hub (RHDH).
-
You have an Entra ID app registration for Project Quay with a client secret and redirect URIs for your Project Quay hostname.
-
You can edit the Project Quay
config.yamlfile or OperatorconfigBundleSecretresource.
-
In the Azure Portal, open your Project Quay app registration and set
requestedAccessTokenVersionto2in the app manifest. The field might appear asapi.requestedAccessTokenVersion.For OBO flows, expose an API on the Project Quay app registration, for example
api://quay-api, and grant the upstream application permission to that scope. -
Update your
*_LOGIN_CONFIGblock with the v2.0 discovery endpoint and multi-issuer settings. For example:AUTHENTICATION_TYPE: OIDC # ... AZURE_LOGIN_CONFIG: CLIENT_ID: <quay_app_client_id> CLIENT_SECRET: <quay_app_client_secret> OIDC_SERVER: https://login.microsoftonline.com/<tenant-id>/v2.0/ SERVICE_NAME: Microsoft Entra ID OIDC_DISABLE_USER_ENDPOINT: true OIDC_ISSUERS: - https://sts.windows.net/<tenant-id>/ - https://login.microsoftonline.com/<tenant-id>/v2.0 OIDC_AUDIENCES: - <quay_app_client_id> - api://quay-api OIDC_ALLOWED_CLIENTS: - <quay_app_client_id> - <upstream_app_client_id> USE_PKCE: true PKCE_METHOD: "S256" PUBLIC_CLIENT: true # ... -
Restart your Project Quay deployment or reconcile the Operator so the updated configuration is applied.
Note-
Set
OIDC_SERVERto the v2.0 endpoint. The v2.0 JWKS endpoint includes v1.0 signing keys, so one discovery URL supports both token versions. -
If you set
OIDC_ALLOWED_CLIENTS, include your Project Quay application’s ownCLIENT_ID. Direct user logins setazpto the application’s client ID. OmitOIDC_ALLOWED_CLIENTSif you do not need to restrict OBO clients. -
Do not request Microsoft Graph scopes such as
openid profile emailwhen you need tokens with a custom audience. Use application-specific scopes such asapi://quay-api/registry.accessinstead.
-
Administer
Manage user accounts in the registry
Create and delete user accounts by using the Red Hat Quay UI or API.
Creating a user account by using the UI
To create a new user account in Project Quay, you can use the Super User Admin Panel in the UI.
-
You are logged into your Project Quay deployment as a superuser.
-
Log in to your Project Quay repository as the superuser.
-
In the navigation pane, select your account name, and then click Super User Admin Panel.
-
Click the Users icon in the column.
-
Click the Create User button.
-
Enter the new user’s Username and Email address, and then click the Create User button.
-
You are redirected to the Users page, where there is now another Project Quay user.
NoteYou might need to refresh the Users page to show the additional user.
-
On the Users page, click the Options cogwheel associated with the new user. A drop-down menu appears, as shown in the following figure:
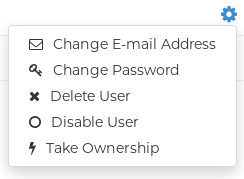
-
Click Change Password.
-
Add the new password, and then click Change User Password.
The new user can now use that username and password to log in using the web UI or through their preferred container client, like Podman.
Creating a user account by using the Project Quay API
To create a user account in Project Quay as a superuser, you can use the Project Quay API.
-
You are logged into your Project Quay deployment as a superuser.
-
You have created an OAuth access token.
-
Enter the following command to create a new user by using the
POST /api/v1/superuser/users/endpoint:$ curl -X POST -H "Authorization: Bearer <bearer_token>" -H "Content-Type: application/json" -d '{ "username": "newuser", "email": "newuser@example.com" }' "https://<quay-server.example.com>/api/v1/superuser/users/"Example output{"username": "newuser", "email": "newuser@example.com", "password": "123456789", "encrypted_password": "<example_encrypted_password>/JKY9pnDcsw="} -
Navigate to your Project Quay registry endpoint, for example,
quay-server.example.comand log in with the username and password generated from the API call. In this scenario, the username isnewuserand the password is123456789. Alternatively, you can log in to the registry with the CLI. For example:$ podman login <quay-server.example.com>Example outputusername: newuser password: 123456789 -
Optional. You can obtain a list of all users, including superusers, by using the
GET /api/v1/superuser/users/endpoint:$ curl -X GET -H "Authorization: Bearer <bearer_token>" "https://<quay-server.example.com>/api/v1/superuser/users/"NoteThe
GET /api/v1/superuser/users/endpoint only returns users and superusers ifAUTHENTICATION_TYPE: Databaseis set in yourconfig.yamlfile. It does not work forLDAPauthentication types.Example output{"users": [{"kind": "user", "name": "quayadmin", "username": "quayadmin", "email": "quay@quay.com", "verified": true, "avatar": {"name": "quayadmin", "hash": "b28d563a6dc76b4431fc7b0524bbff6b810387dac86d9303874871839859c7cc", "color": "#17becf", "kind": "user"}, "super_user": true, "enabled": true}, {"kind": "user", "name": "newuser", "username": "newuser", "email": "newuser@example.com", "verified": true, "avatar": {"name": "newuser", "hash": "f338a2c83bfdde84abe2d3348994d70c34185a234cfbf32f9e323e3578e7e771", "color": "#9edae5", "kind": "user"}, "super_user": false, "enabled": true}]}
Deleting a user by using the UI
To delete a user account from Project Quay, you can use the Super User Admin Panel in the UI.
After you delete the user, any repositories that the user had in their private account become unavailable.
|
Note
|
In some cases, when accessing the Users tab in the Superuser Admin Panel of the Project Quay UI, you might encounter a situation where no users are listed. Instead, a message appears, indicating that Project Quay is configured to use external authentication, and users can only be created in that system. This error occurs for one of two reasons:
When this happens, you must delete the user using the Project Quay API. |
-
You are logged into your Project Quay deployment as a superuser.
-
Log in to your Project Quay repository as the superuser.
-
In the navigation pane, select your account name, and then click Super User Admin Panel.
-
Click the Users icon in the navigation pane.
-
Click the Options cogwheel beside the user to be deleted.
-
Click Delete User, and then confirm deletion by clicking Delete User.
Deleting a user by using the Project Quay API
To delete a user account from Project Quay as a superuser, you can use the Project Quay API.
|
Important
|
After deleting the user, any repositories that this user had in their private account become unavailable. |
-
You are logged into your Project Quay deployment as a superuser.
-
You have created an OAuth access token.
-
Enter the following
DELETE /api/v1/superuser/users/{username}command to delete a user from the command line:$ curl -X DELETE -H "Authorization: Bearer <insert token here>" https://<quay-server.example.com>/api/v1/superuser/users/<username> -
The CLI does not return information when deleting a user from the CLI. To confirm deletion, you can check the Project Quay UI by navigating to Superuser Admin Panel → Users, or by entering the following
GET /api/v1/superuser/users/command. You can then check to see if they are present.NoteThe
GET /api/v1/superuser/users/endpoint only returns users and superusers ifAUTHENTICATION_TYPE: Databaseis set in yourconfig.yamlfile. It does not work forLDAPauthentication types.$ curl -X GET -H "Authorization: Bearer <bearer_token>" "https://<quay-server.example.com>/api/v1/superuser/users/"
Group repositories by team or project
Create and delete organizations and manage organization settings by using the UI or API.
Creating an organization by using the UI
To create an organization in Quay, you can use the UI. You set an organization name and then manage repositories and teams under that namespace.
In context of organizations, the contact email is used for the following purposes:
-
Quota warnings notifications
-
Quota errors notifications
-
Organization account recovery
-
Billing notifications
Use the following procedure to create a new organization by using the UI.
-
Log in to your Project Quay registry.
-
Click Organization in the navigation pane.
-
Click Create Organization.
-
Enter an Organization Name, for example,
testorg. -
Optional: Enter an Email for the organization. If not specified, notifications default to the organization owners.
NoteMultiple organizations can share the same organization email address, such as a team distribution list. By default, the address cannot match a user account email unless
FEATURE_ORG_SHARED_EMAILis enabled. -
Click Create.
Now, your example organization should populate under the Organizations page.
Creating an organization by using the Project Quay API
To create an organization in Project Quay, you can call the organization API endpoint with an OAuth access token.
-
You have created an OAuth access token.
-
Enter the following command to create a new organization by using the
POST /api/v1/organization/endpoint:$ curl -X POST -H "Authorization: Bearer <bearer_token>" -H "Content-Type: application/json" -d '{ "name": "<new_organization_name>" }' "https://<quay-server.example.com>/api/v1/organization/"Example output"Created" -
After creation, you can change organization details, such as adding an email address, with the
PUT /api/v1/organization/{orgname}command. For example:$ curl -X PUT "https://<quay-server.example.com>/api/v1/organization/<orgname>" \ -H "Authorization: Bearer <access_token>" \ -H "Content-Type: application/json" \ -d '{ "email": "<org_email>", "invoice_email": <true/false>, "invoice_email_address": "<billing_email>" }'Example output{"name": "test", "email": "new-contact@test-org.com", "avatar": {"name": "test", "hash": "a15d479002b20f211568fd4419e76686d2b88a4980a5b4c4bc10420776c5f6fe", "color": "#aec7e8", "kind": "user"}, "is_admin": true, "is_member": true, "teams": {"owners": {"name": "owners", "description": "", "role": "admin", "avatar": {"name": "owners", "hash": "6f0e3a8c0eb46e8834b43b03374ece43a030621d92a7437beb48f871e90f8d90", "color": "#c7c7c7", "kind": "team"}, "can_view": true, "repo_count": 0, "member_count": 1, "is_synced": false}}, "ordered_teams": ["owners"], "invoice_email": true, "invoice_email_address": "billing@test-org.com", "tag_expiration_s": 1209600, "is_free_account": true, "quotas": [{"id": 2, "limit_bytes": 10737418240, "limits": [{"id": 1, "type": "Reject", "limit_percent": 90}]}], "quota_report": {"quota_bytes": 0, "configured_quota": 10737418240, "running_backfill": "complete", "backfill_status": "complete"}}
Organization settings
To manage organization settings in Quay, you can use the v2 UI. You can update organization details and related configuration options.
With Quay, some basic organization settings can be adjusted by using the UI. This includes adjusting general settings, such as the e-mail address associated with the organization, and time machine settings, which allows administrators to adjust when a tag is garbage collected after it is permanently deleted.
Use the following procedure to alter your organization settings by using the v2 UI.
-
On the v2 UI, click Organizations.
-
Click the name of the organization that you will create the robot account for, for example,
test-org. -
Click the Settings tab.
-
Optional. Enter or update the organization Email for the organization in the Email field. This email receives automated system alerts including quota warnings, security notifications, and build failures.
NoteMultiple organizations can share the same organization email address. By default, the address cannot match a user account email unless
FEATURE_ORG_SHARED_EMAILis enabled. -
Optional. Set the allotted time for the Time Machine feature to one of the following:
-
A few seconds
-
A day
-
7 days
-
14 days
-
A month
-
-
Click Save.
Deleting an organization by using the UI
To permanently delete an organization in Quay, you can use the v2 UI.
-
On the Organizations page, select the name of the organization you want to delete, for example,
testorg. -
Click the More Actions drop down menu.
-
Click Delete.
NoteOn the Delete page, there is a Search input box. With this box, users can search for specific organizations to ensure that they are properly scheduled for deletion. For example, if a user is deleting 10 organizations and they want to ensure that a specific organization was deleted, they can use the Search input box to confirm said organization is marked for deletion.
-
Confirm that you want to permanently delete the organization by typing confirm in the box.
-
Click Delete.
After deletion, you are returned to the Organizations page.
NoteYou can delete more than one organization at a time by selecting multiple organizations, and then clicking More Actions → Delete.
Deleting an organization by using the Project Quay API
To delete an organization in Project Quay, you can call the organization API endpoint with an OAuth access token.
-
You have created an OAuth access token.
-
Enter the following command to delete an organization by using the
DELETE /api/v1/organization/{orgname}endpoint:$ curl -X DELETE \ -H "Authorization: Bearer <bearer_token>" \ "https://<quay-server.example.com>/api/v1/organization/<organization_name>" -
The CLI does not return information when you delete an organization. To confirm deletion, you can check the Project Quay UI, or you can enter the
GET /api/v1/organization/{orgname}command to see if details are returned for the deleted organization:$ curl -X GET \ -H "Authorization: Bearer <bearer_token>" \ "<quay-server.example.com>/api/v1/organization/<organization_name>"Example output{"detail": "Not Found", "error_message": "Not Found", "error_type": "not_found", "title": "not_found", "type": "http://<quay-server.example.com>/api/v1/error/not_found", "status": 404}
Manage image repositories
Create repositories by using the UI, Podman, Skopeo, or API, and delete repositories when content is no longer needed.
Creating a repository by using the UI
To create an image repository in Quay, you can use the UI. You select a namespace and set a repository name and visibility.
Use the following procedure to create a repository using the Quay UI.
-
Click Repositories on the navigation pane.
-
Click Create Repository.
-
Select a namespace, for example, quayadmin, and then enter a Repository name, for example,
testrepo.ImportantDo not use the following words in your repository name: *
build*trigger*tag*notificationWhen these words are used for repository names, users are unable access the repository, and are unable to permanently delete the repository. Attempting to delete these repositories returns the following error:
Failed to delete repository <repository_name>, HTTP404 - Not Found. -
Click Create.
Now, your example repository should populate under the Repositories page.
-
Optional. Click Settings → Repository visibility → Make private to set the repository to private.
Creating a repository by using Podman
To create a repository in Project Quay, you can push an image with Podman. The push creates the repository if it does not already exist.
If you push an image through the command-line interface (CLI) without first creating a repository on the UI, the created repository is set to Private.
-
You have download and installed the
podmanCLI. -
You have logged into your registry.
-
You have pulled an image, for example, busybox.
-
Tag the image on your local system with the new repository and image name. For example:
-
Push the image to the registry. Following this step, you can use your browser to see the tagged image in your repository.
+ .Example output
Getting image source signatures Copying blob 6b245f040973 done Copying config 22667f5368 done Writing manifest to image destination Storing signatures
Creating a repository by using Skopeo
To create a repository in Project Quay when Podman cannot pull an artifact type, you can use the skopeo copy command to copy the artifact from a source registry.
In some cases, the podman CLI tool is unable to pull certain artifact types, for example, application/x-mlmodel, or other AI/ML artifacts. Attempting to use podman pull with this artifact type results in the following error:
Error: parsing image configuration: unsupported image-specific operation on artifact with type "application/x-mlmodel"As an alternative, you can use skopeo copy to copy an artifact from one location to your Project Quay repository.
-
You have installed the
skopeoCLI. -
You have logged in to a source registry (in this example,
\registry.redhat.io) and have a valid authentication file (~/.docker/config.json). Alternatively, you can provide credentials by using the--src-usernameand--src-passwordparameters when running a command with theskopeoCLI. -
You have logged in to your Project Quay repository.
-
Depending on the size of your AI/ML artifact, you might have to prepare your registry to accept large artifacts.
-
Use the
skopeo copycommand on an artifact to copy the artifact to your Project Quay repository. For example:$ sudo skopeo copy --dest-tls-verify=false --all \ --src-username <source_username> --src-password <source_password> \ --src-authfile ~/.docker/config.json \ --dest-username <username> --dest-password <password> \ docker://registry.redhat.io/rhelai1/granite-8b-code-instruct:1.4-1739210683 \ docker://quay-server.example.com/<namespace>/granite-8b-code-instruct:latestwhere:
--dest-tls-verify=false-
Specifies that SSL/TLS verification for the destination registry is disabled. This parameter is optional.
--all-
Specifies that all image manifests are copied, including multi-architecture images. This parameter is optional.
--src-username/--src-password-
Specifies the source registry credentials. This parameter is optional. If you are not logged into a registry, you can pass in the source registry credentials with these parameters.
--src-authfile-
Specifies the path to your Docker authentication file. Typically located at
~/.docker/config.json. This parameter is optional. --dest-username/--dest-password-
Specifies your Project Quay registry username and password.
docker://registry.redhat.io/…-
Specifies the source image or artifact from the Red Hat container registry. Ensure that you are logged in to the registry and that you can pull the image.
docker://quay-server.example.com/…-
Specifies the URL of your Project Quay repository appended with a namespace and the name of the image.
Example outputGetting image source signatures Checking if image destination supports signatures Copying blob 9538fa2b8ad9 done | Copying blob 491ae95f59a2 done | Copying blob 01196d075d77 done | Copying blob e53a4633c992 done | Copying blob c266e9cfa731 done | Copying blob dae0e701d9b2 done | Copying blob 1e227a2c78d8 done | Copying blob 94ff9338861b done | Copying blob 2f2bba45146f done | Copying blob d3b4df07a0ce done | Copying blob f533a8dbb852 done | Copying config 44136fa355 done | Writing manifest to image destination Storing signatures
-
After you have pushed a machine learning artifact to your Project Quay repository, you can view tag information by using the UI or view model card information by using the UI.
Creating a repository by using the API
To create an image repository in Project Quay, you can use the API.
-
You have Created an OAuth access token.
-
Enter the following command to create a repository using the
POST /api/v1/repositoryendpoint:$ curl -X POST \ -H "Authorization: Bearer <bearer_token>" \ -H "Content-Type: application/json" \ -d '{ "repository": "<new_repository_name>", "visibility": "<private>", "description": "<This is a description of the new repository>." }' \ "https://quay-server.example.com/api/v1/repository"Example output{"namespace": "quayadmin", "name": "<new_repository_name>", "kind": "image"}
Deleting a repository by using the UI
To delete an image repository in Quay, you can use the UI. You remove the repository and its tags from the selected namespace.
-
You have created a repository.
-
On the Repositories page of the v2 UI, check the box of the repository that you want to delete, for example,
quayadmin/busybox. -
Click the Actions drop-down menu.
-
Click Delete.
-
Type confirm in the box, and then click Delete.
After deletion, you are returned to the Repositories page.
Deleting a repository by using the Project Quay API
To delete a repository from Project Quay, you can use the API.
-
You have Created an OAuth access token.
-
Enter the following command to delete a repository using the
DELETE /api/v1/repository/{repository}endpoint:$ curl -X DELETE -H "Authorization: Bearer <bearer_token>" "<quay-server.example.com>/api/v1/repository/<namespace>/<repository_name>" -
The CLI does not return information when deleting a repository from the CLI. To confirm deletion, you can check the Project Quay UI, or you can enter the following
GET /api/v1/repository/{repository}command to see if details are returned for the deleted repository:$ curl -X GET -H "Authorization: Bearer <bearer_token>" "<quay-server.example.com>/api/v1/repository/<namespace>/<repository_name>"Example output
{"detail": "Not Found", "error_message": "Not Found", "error_type": "not_found", "title": "not_found", "type": "http://quay-server.example.com/api/v1/error/not_found", "status": 404}
Manage robot accounts
Create, disable, regenerate, and delete robot accounts and bulk-manage repository access for CI/CD pipelines.
Creating a robot account by using the UI
To automate access to your repositories, you can create a robot account by using the UI. Robot accounts generate credentials that container clients can use to push and pull images without a personal login.
-
On the v2 UI, click Organizations.
-
Click the name of the organization that you create the robot account for, for example,
test-org. -
Click the Robot accounts tab → Create robot account.
-
In the Provide a name for your robot account box, enter a name, for example,
robot1. The name of your Robot Account becomes a combination of your username plus the name of the robot, for example,quayadmin+robot1 -
Optional. The following options are available if desired:
-
Add the robot account to a team.
-
Add the robot account to a repository.
-
Adjust the robot account’s permissions.
-
-
On the Review and finish page, review the information you have provided, then click Review and finish. The following alert appears: Successfully created robot account with robot name: <organization_name> + <robot_name>.
Alternatively, if you tried to create a robot account with the same name as another robot account, you might receive the following error message: Error creating robot account.
-
Optional. You can click Expand or Collapse to reveal descriptive information about the robot account.
-
Optional. You can change permissions of the robot account by clicking the kebab menu → Set repository permissions. The following message appears: Successfully updated repository permission.
-
Optional. You can click the name of your robot account to obtain the following information:
-
Robot Account: Select this obtain the robot account token. You can regenerate the token by clicking Regenerate token now.
-
Kubernetes Secret: Select this to download credentials in the form of a Kubernetes pull secret YAML file.
-
Podman: Select this to copy a full
podman logincommand line that includes the credentials. -
Docker Configuration: Select this to copy a full
docker logincommand line that includes the credentials.
-
Creating a robot account by using the Project Quay API
To automate access to your repositories, you can create a robot account by using the Project Quay API. You can create robot accounts for an organization or for your own user account.
-
You have created an OAuth access token.
-
Enter the following command to create a new robot account for an organization by using the
PUT /api/v1/organization/{orgname}/robots/{robot_shortname}endpoint:$ curl -X PUT -H "Authorization: Bearer <bearer_token>" "https://<quay-server.example.com>/api/v1/organization/<organization_name>/robots/<robot_name>"Example output{"name": "orgname+robot-name", "created": "Fri, 10 May 2024 15:11:00 -0000", "last_accessed": null, "description": "", "token": "<example_secret>", "unstructured_metadata": null} -
Enter the following command to create a new robot account for the current user with the
PUT /api/v1/user/robots/{robot_shortname}endpoint:$ curl -X PUT -H "Authorization: Bearer <bearer_token>" "https://<quay-server.example.com>/api/v1/user/robots/<robot_name>"Example output{"name": "quayadmin+robot-name", "created": "Fri, 10 May 2024 15:24:57 -0000", "last_accessed": null, "description": "", "token": "<example_secret>", "unstructured_metadata": null}
Bulk managing robot account repository access
To grant a robot account access to several repositories at once, you can set its permissions in bulk by using the UI.
-
You have created a robot account.
-
You have created multiple repositories under a single organization.
-
On the Project Quay v2 UI landing page, click Organizations in the navigation pane.
-
On the Organizations page, select the name of the organization that has multiple repositories. The number of repositories under a single organization can be found under the Repo Count column.
-
On your organization’s page, click Robot accounts.
-
For the robot account that you want to add to multiple repositories, click the kebab icon → Set repository permissions.
-
On the Set repository permissions page, check the boxes of the repositories that you want to add the robot account to. For example:
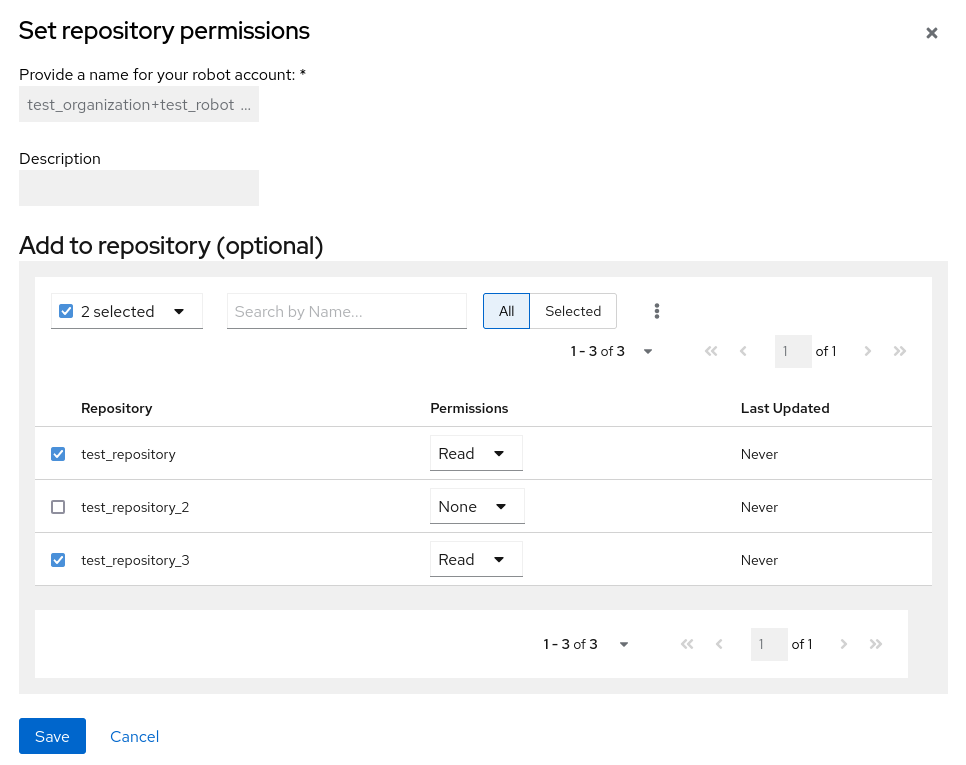
-
Set the permissions for the robot account, for example, None, Read, Write, Admin.
-
Click save. An alert that says Success alert: Successfully updated repository permission appears on the Set repository permissions page, confirming the changes.
-
Return to the Organizations → Robot accounts page. Now, the Repositories column of your robot account shows the number of repositories that the robot account has been added to.
Disabling robot accounts
To prevent users from creating new robot accounts, you can disable robot account creation in your Project Quay configuration file. This setting also blocks robot accounts required for repository mirroring, so review your mirroring setup first.
|
Important
|
Robot accounts are mandatory for repository mirroring. Setting the |
-
You have created multiple robot accounts.
-
Update your
config.yamlfield to add theROBOTS_DISALLOWvariable, for example:ROBOTS_DISALLOW: true -
Restart your Project Quay deployment.
-
Navigate to your Project Quay repository.
-
Click the name of a repository.
-
In the navigation pane, click Robot Accounts.
-
Click Create Robot Account.
-
Enter a name for the robot account, for example,
<organization-name/username>+<robot-name>. -
Click Create robot account to confirm creation. The following message appears:
Cannot create robot account. Robot accounts have been disabled. Please contact your administrator.
-
On the command-line interface (CLI), attempt to log in as one of the robot accounts by entering the following command:
$ podman login -u="<organization-name/username>+<robot-name>" -p="KETJ6VN0WT8YLLNXUJJ4454ZI6TZJ98NV41OE02PC2IQXVXRFQ1EJ36V12345678" <quay-server.example.com>The following error message is returned:
Error: logging into "<quay-server.example.com>": invalid username/password -
You can pass in the
log-level=debugflag to confirm that robot accounts have been deactivated:$ podman login -u="<organization-name/username>+<robot-name>" -p="KETJ6VN0WT8YLLNXUJJ4454ZI6TZJ98NV41OE02PC2IQXVXRFQ1EJ36V12345678" --log-level=debug <quay-server.example.com>... DEBU[0000] error logging into "quay-server.example.com": unable to retrieve auth token: invalid username/password: unauthorized: Robot accounts have been disabled. Please contact your administrator.
Regenerating a robot account token by using the Project Quay API
To replace a compromised or outdated robot account credential, you can regenerate a robot account token by using the Project Quay API for organization or user robots.
-
You have created an OAuth access token.
-
Enter the following command to regenerate a robot account token for an organization by using the
POST /api/v1/organization/{orgname}/robots/{robot_shortname}/regenerateendpoint:$ curl -X POST \ -H "Authorization: Bearer <bearer_token>" \ "<quay-server.example.com>/api/v1/organization/<orgname>/robots/<robot_shortname>/regenerate"Example output{"name": "test-org+test", "created": "Fri, 10 May 2024 17:46:02 -0000", "last_accessed": null, "description": "", "token": "<example_secret>"} -
Enter the following command to regenerate a robot account token for the current user by using the
POST /api/v1/user/robots/{robot_shortname}/regenerateendpoint:$ curl -X POST \ -H "Authorization: Bearer <bearer_token>" \ "<quay-server.example.com>/api/v1/user/robots/<robot_shortname>/regenerate"Example output{"name": "quayadmin+test", "created": "Fri, 10 May 2024 14:12:11 -0000", "last_accessed": null, "description": "", "token": "<example_secret>"}
Deleting a robot account by using the UI
To remove a robot account that you no longer need, you can delete it by using the Project Quay UI.
-
Log into your Project Quay registry:
-
Click the name of the Organization that has the robot account.
-
Click Robot accounts.
-
Check the box of the robot account to be deleted.
-
Click the kebab menu.
-
Click Delete.
-
Type
confirminto the textbox, then click Delete.
Deleting a robot account by using the Project Quay API
To remove a robot account that you no longer need, you can delete it by using the Project Quay API. You can delete robot accounts that belong to an organization or to your own user account.
-
You have created an OAuth access token.
-
Enter the following command to delete a robot account for an organization by using the
DELETE /api/v1/organization/{orgname}/robots/{robot_shortname}endpoint:$ curl -X DELETE \ -H "Authorization: Bearer <bearer_token>" \ "<quay-server.example.com>/api/v1/organization/<organization_name>/robots/<robot_shortname>" -
The CLI does not return information when deleting a robot account with the API. To confirm deletion, you can check the Project Quay UI, or you can enter the following
GET /api/v1/organization/{orgname}/robotscommand to see if details are returned for the robot account:$ curl -X GET -H "Authorization: Bearer <bearer_token>" "https://<quay-server.example.com>/api/v1/organization/<organization_name>/robots"Example output{"robots": []} -
Enter the following command to delete a robot account for the current user with the
DELETE /api/v1/user/robots/{robot_shortname}endpoint:$ curl -X DELETE \ -H "Authorization: Bearer <bearer_token>" \ "<quay-server.example.com>/api/v1/user/robots/<robot_shortname>" -
The CLI does not return information when deleting a robot account for the current user with the API. To confirm deletion, you can check the Project Quay UI, or you can enter the following
GET /api/v1/user/robots/{robot_shortname}command to see if details are returned for the robot account:$ curl -X GET \ -H "Authorization: Bearer <bearer_token>" \ "<quay-server.example.com>/api/v1/user/robots/<robot_shortname>"Example output{"message":"Could not find robot with specified username"}
Scale access control with teams and roles
Create teams, add members, set team roles, and manage repository permissions by using the UI.
Creating a team by using the UI
To create a team in Project Quay, you can use the UI. You add a team under an organization and then assign members and roles.
When you create a team for your organization you can select the team name, choose which repositories to make available to the team, and decide the level of access to the team.
Use the following procedure to create a team for your organization repository.
-
You have created an organization.
-
On the Project Quay v2 UI, click the name of an organization.
-
On your organization’s page, click Teams and membership.
-
Click the Create new team box.
-
In the Create team popup window, provide a name for your new team.
-
Optional. Provide a description for your new team.
-
Click Proceed. A new popup window appears.
-
Optional. Add this team to a repository, and set the permissions to one of the following:
-
None. Team members have no permission to the repository.
-
Read. Team members can view and pull from the repository.
-
Write. Team members can read (pull) from and write (push) to the repository.
-
Admin. Full access to pull from, and push to, the repository, plus the ability to do administrative tasks associated with the repository.
-
-
Optional. Add a team member or robot account. To add a team member, enter the name of their Project Quay account.
-
Review and finish the information, then click Review and Finish. The new team appears under the Teams and membership page.
Managing a team by using the UI
After you create a team in Quay, you can manage members, repository permissions, and team details in the UI. You can also delete a team that you no longer need.
Adding users to a team by using the UI
To add users to a team in Quay, you can use the UI. You invite members so they inherit the team’s repository permissions.
With administrative privileges to an Organization, you can add users and robot accounts to a team. When you add a user, Quay sends an email to that user. The user remains pending until they accept the invitation.
Use the following procedure to add users or robot accounts to a team.
-
On the Project Quay landing page, click the name of your Organization.
-
In the navigation pane, click Teams and Membership.
-
Select the menu kebab of the team that you want to add users or robot accounts to. Then, click Manage team members.
-
Click Add new member.
-
In the textbox, enter information for one of the following:
-
A username from an account on the registry.
-
The email address for a user account on the registry.
-
The name of a robot account. The name must be in the form of <organization_name>+<robot_name>.
NoteRobot Accounts are immediately added to the team. For user accounts, an invitation to join is mailed to the user. Until the user accepts that invitation, the user remains in the INVITED TO JOIN state. After the user accepts the email invitation to join the team, they move from the INVITED TO JOIN list to the MEMBERS list for the Organization.
-
-
Click Add member.
Setting a team role by using the UI
To assign a role to a team within a Quay organization, you can use the UI. Team roles determine a member’s permissions, such as administrative or contributor access.
-
You have created a team.
-
On the Project Quay landing page, click the name of your Organization.
-
In the navigation pane, click Teams and Membership.
-
Select the TEAM ROLE drop-down menu, as shown in the following figure:
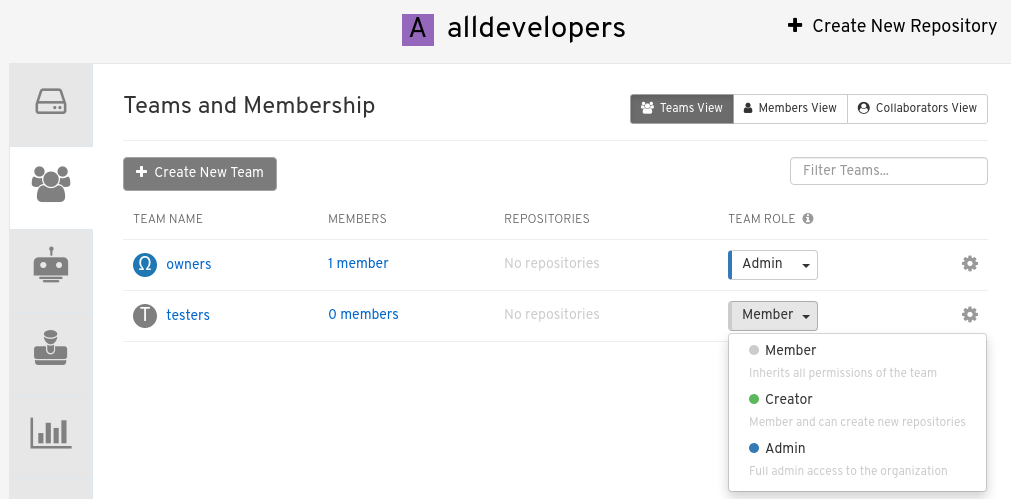
-
For the selected team, choose one of the following roles:
-
Admin. Full administrative access to the organization, including the ability to create teams, add members, and set permissions.
-
Member. Inherits all permissions set for the team.
-
Creator. All member permissions, plus the ability to create new repositories.
-
Managing team members and repository permissions
To manage team members and set repository permissions for a team, you can use the Quay UI. You can add or remove members, and adjust access levels for each repository.
-
On the Teams and membership page of your organization, you can also manage team members and set repository permissions.
-
Click the kebab menu, and select one of the following options:
-
Manage Team Members. On this page, you can view all members, team members, robot accounts, or users who have been invited. You can also add a new team member by clicking Add new member.
-
Set repository permissions. On this page, you can set the repository permissions to one of the following:
-
None. Team members have no permission to the repository.
-
Read. Team members can view and pull from the repository.
-
Write. Team members can read (pull) from and write (push) to the repository.
-
Admin. Full access to pull from, and push to, the repository, plus the ability to do administrative tasks associated with the repository.
-
-
Delete. This popup window allows you to delete the team by clicking Delete.
-
Viewing additional information about a team
To review team details in Quay, you can use the Teams and membership page. You can switch among team, members, and collaborators views.
Use the following procedure to view general information about the team.
-
On the Teams and membership page of your organization, you can click the one of the following options to reveal more information about teams, members, and collaborators:
-
Team View. This menu shows all team names, the number of members, the number of repositories, and the role for each team.
-
Members View. This menu shows all usernames of team members, the teams that they are part of, the repository permissions of the user.
-
Collaborators View. This menu shows repository collaborators. Collaborators are users that do not belong to any team in the organization, but who have direct permissions on one or more repositories belonging to the organization.
-
Manage teams and roles by using the API
Create, update, and delete teams, manage team membership and permissions, and set team roles within an organization by using the Red Hat Quay API.
Creating a team by using the API
To create a team for an organization in Project Quay, you can use the API. You can set the team name, repository access, and permission level.
-
You have created an organization.
-
You have Created an OAuth access token.
-
Enter the following
PUT /api/v1/organization/{orgname}/team/{teamname}command to create a team for your organization:$ curl -k -X PUT -H 'Accept: application/json' -H 'Content-Type: application/json' -H "Authorization: Bearer <bearer_token>" --data '{"role": "creator"}' https://<quay-server.example.com>/api/v1/organization/<organization_name>/team/<team_name>Example output{"name": "example_team", "description": "", "can_view": true, "role": "creator", "avatar": {"name": "example_team", "hash": "dec209fd7312a2284b689d4db3135e2846f27e0f40fa126776a0ce17366bc989", "color": "#e7ba52", "kind": "team"}, "new_team": true}
Managing a team by using the Project Quay API
You can manage teams in Project Quay by using the API. You can view permissions, add or remove members, and delete organization teams.
The following modules show you how to manage a team by using the Project Quay API.
Managing team members and repository permissions by using the API
To add, invite, or remove members of an organization team in Project Quay, you can use the team member API endpoints with an OAuth access token.
-
You have created an OAuth access token.
-
Enter the
PUT /api/v1/organization/{orgname}/team/{teamname}/members/{membername}command to add or invite a member to an existing team:$ curl -X PUT \ -H "Authorization: Bearer <your_access_token>" \ "<quay-server.example.com>/api/v1/organization/<organization_name>/team/<team_name>/members/<member_name>"Example output{"name": "testuser", "kind": "user", "is_robot": false, "avatar": {"name": "testuser", "hash": "d51d17303dc3271ac3266fb332d7df919bab882bbfc7199d2017a4daac8979f0", "color": "#5254a3", "kind": "user"}, "invited": false} -
Enter the
DELETE /api/v1/organization/{orgname}/team/{teamname}/members/{membername}command to remove a member of a team:$ curl -X DELETE \ -H "Authorization: Bearer <your_access_token>" \ "<quay-server.example.com>/api/v1/organization/<organization_name>/team/<team_name>/members/<member_name>"This command does not return output in the CLI. To ensure that a member has been deleted, you can enter the
GET /api/v1/organization/{orgname}/team/{teamname}/memberscommand and ensure that the member is not returned in the output.$ curl -X GET \ -H "Authorization: Bearer <your_access_token>" \ "<quay-server.example.com>/api/v1/organization/<organization_name>/team/<team_name>/members"Example output{"name": "owners", "members": [{"name": "quayadmin", "kind": "user", "is_robot": false, "avatar": {"name": "quayadmin", "hash": "b28d563a6dc76b4431fc7b0524bbff6b810387dac86d9303874871839859c7cc", "color": "#17becf", "kind": "user"}, "invited": false}, {"name": "test-org+test", "kind": "user", "is_robot": true, "avatar": {"name": "test-org+test", "hash": "aa85264436fe9839e7160bf349100a9b71403a5e9ec684d5b5e9571f6c821370", "color": "#8c564b", "kind": "robot"}, "invited": false}], "can_edit": true} -
You can enter the
PUT /api/v1/organization/{orgname}/team/{teamname}/invite/{email}command to invite a user, by email address, to an existing team:$ curl -X PUT \ -H "Authorization: Bearer <your_access_token>" \ "<quay-server.example.com>/api/v1/organization/<organization_name>/team/<team_name>/invite/<email>" -
You can enter the
DELETE /api/v1/organization/{orgname}/team/{teamname}/invite/{email}command to delete the invite of an email address to join a team. For example:$ curl -X DELETE \ -H "Authorization: Bearer <your_access_token>" \ "<quay-server.example.com>/api/v1/organization/<organization_name>/team/<team_name>/invite/<email>"
Setting the role of a team within an organization by using the API
To view repository permissions for a team or set a team’s role in an Project Quay organization, you can use the organization team API endpoints with an OAuth access token.
-
You have created an OAuth access token.
-
Enter the following
GET /api/v1/organization/{orgname}/team/{teamname}/permissionscommand to return a list of repository permissions for the organization’s team. Note that your team must have been added to a repository for this command to return information.$ curl -X GET \ -H "Authorization: Bearer <your_access_token>" \ "<quay-server.example.com>/api/v1/organization/<organization_name>/team/<team_name>/permissions"Example output{"permissions": [{"repository": {"name": "api-repo", "is_public": true}, "role": "admin"}]} -
You can create or update a team within an organization to have a specified role of admin, member, or creator using the
PUT /api/v1/organization/{orgname}/team/{teamname}command. For example:$ curl -X PUT \ -H "Authorization: Bearer <your_access_token>" \ -H "Content-Type: application/json" \ -d '{ "role": "<role>" }' \ "<quay-server.example.com>/api/v1/organization/<organization_name>/team/<team_name>"Example output{"name": "testteam", "description": "", "can_view": true, "role": "creator", "avatar": {"name": "testteam", "hash": "827f8c5762148d7e85402495b126e0a18b9b168170416ed04b49aae551099dc8", "color": "#ff7f0e", "kind": "team"}, "new_team": false}
Deleting a team within an organization by using the API
To delete a team from an organization in Project Quay, you can use the organization team API endpoint with an OAuth access token.
-
You have created an OAuth access token.
-
You can delete a team within an organization by entering the
DELETE /api/v1/organization/{orgname}/team/{teamname}command:$ curl -X DELETE \ -H "Authorization: Bearer <your_access_token>" \ "<quay-server.example.com>/api/v1/organization/<organization_name>/team/<team_name>"This command does not return output in the CLI.
Inspect image tags, labels, and history
View, add, label, and trace image tag history by using the Red Hat Quay UI or API.
Viewing image tag information by using the UI
To review details about an image tag, such as its digest, size, and vulnerabilities, you can open the tag’s Details page in the Project Quay v2 UI. You can also view the tag’s security report and package list from the same page.
-
You have pushed an image tag to a repository.
-
On the v2 UI, click Repositories.
-
Click the name of a repository.
-
Click the name of a tag. You are taken to the Details page of that tag. The page reveals the following information:
-
Name
-
Repository
-
Digest
-
Vulnerabilities
-
Creation
-
Modified
-
Size
-
Labels
-
How to fetch the image tag
-
-
Click Security Report to view the tag’s vulnerabilities. You can expand an advisory column to open up CVE data.
-
Click Packages to view the tag’s packages.
-
Click the name of the repository to return to the Tags page.
Viewing image tag information by using the API
To view image tag details for a repository in Project Quay, you can use the API.
-
You have pushed an image tag to a Project Quay repository.
-
You have Created an OAuth access token.
-
To obtain tag information, you must use the
GET /api/v1/repository/{repository}API endpoint and pass in theincludeTagsparameter. For example:$ curl -X GET \ -H "Authorization: Bearer <bearer_token>" \ -H "Accept: application/json" \ https://<quay-server.example.com>/api/v1/repository/<namespace>/<repository_name>?includeTags=trueExample output{"namespace": "quayadmin", "name": "busybox", "kind": "image", "description": null, "is_public": false, "is_organization": false, "is_starred": false, "status_token": "d8f5e074-690a-46d7-83c8-8d4e3d3d0715", "trust_enabled": false, "tag_expiration_s": 1209600, "is_free_account": true, "state": "NORMAL", "tags": {"example": {"name": "example", "size": 2275314, "last_modified": "Tue, 14 May 2024 14:48:51 -0000", "manifest_digest": "sha256:57583a1b9c0a7509d3417387b4f43acf80d08cdcf5266ac87987be3f8f919d5d"}, "test": {"name": "test", "size": 2275314, "last_modified": "Tue, 14 May 2024 14:04:48 -0000", "manifest_digest": "sha256:57583a1b9c0a7509d3417387b4f43acf80d08cdcf5266ac87987be3f8f919d5d"}}, "can_write": true, "can_admin": true} -
Alternatively, you can use the
GET /api/v1/repository/{repository}/tag/endpoint. For example:$ curl -X GET \ -H "Authorization: Bearer <bearer_token>" \ -H "Accept: application/json" \ https://<quay-server.example.com>/api/v1/repository/<namespace>/<repository_name>/tag/Example output{"tags": [{"name": "test-two", "reversion": true, "start_ts": 1718737153, "manifest_digest": "sha256:57583a1b9c0a7509d3417387b4f43acf80d08cdcf5266ac87987be3f8f919d5d", "is_manifest_list": false, "size": 2275314, "last_modified": "Tue, 18 Jun 2024 18:59:13 -0000"}, {"name": "test-two", "reversion": false, "start_ts": 1718737029, "end_ts": 1718737153, "manifest_digest": "sha256:0cd3dd6236e246b349e63f76ce5f150e7cd5dbf2f2f1f88dbd734430418dbaea", "is_manifest_list": false, "size": 2275317, "last_modified": "Tue, 18 Jun 2024 18:57:09 -0000", "expiration": "Tue, 18 Jun 2024 18:59:13 -0000"}, {"name": "test-two", "reversion": false, "start_ts": 1718737018, "end_ts": 1718737029, "manifest_digest": "sha256:0cd3dd6236e246b349e63f76ce5f150e7cd5dbf2f2f1f88dbd734430418dbaea", "is_manifest_list": false, "size": 2275317, "last_modified": "Tue, 18 Jun 2024 18:56:58 -0000", "expiration": "Tue, 18 Jun 2024 18:57:09 -0000"}, {"name": "sample_tag", "reversion": false, "start_ts": 1718736147, "manifest_digest": "sha256:57583a1b9c0a7509d3417387b4f43acf80d08cdcf5266ac87987be3f8f919d5d", "is_manifest_list": false, "size": 2275314, "last_modified": "Tue, 18 Jun 2024 18:42:27 -0000"}, {"name": "test-two", "reversion": false, "start_ts": 1717680780, "end_ts": 1718737018, "manifest_digest": "sha256:57583a1b9c0a7509d3417387b4f43acf80d08cdcf5266ac87987be3f8f919d5d", "is_manifest_list": false, "size": 2275314, "last_modified": "Thu, 06 Jun 2024 13:33:00 -0000", "expiration": "Tue, 18 Jun 2024 18:56:58 -0000"}, {"name": "tag-test", "reversion": false, "start_ts": 1717680378, "manifest_digest": "sha256:57583a1b9c0a7509d3417387b4f43acf80d08cdcf5266ac87987be3f8f919d5d", "is_manifest_list": false, "size": 2275314, "last_modified": "Thu, 06 Jun 2024 13:26:18 -0000"}, {"name": "example", "reversion": false, "start_ts": 1715698131, "manifest_digest": "sha256:57583a1b9c0a7509d3417387b4f43acf80d08cdcf5266ac87987be3f8f919d5d", "is_manifest_list": false, "size": 2275314, "last_modified": "Tue, 14 May 2024 14:48:51 -0000"}], "page": 1, "has_additional": false}
Adding a new image tag to an image by using the UI
To create an alias for an existing image, you can add a new tag to it from the Repositories page of the Project Quay v2 UI. The new tag points to the same image and appears immediately in the repository’s tag list.
-
On the Project Quay v2 UI dashboard, click Repositories in the navigation pane.
-
Click the name of a repository that has image tags.
-
Click the menu kebab, then click Add new tag.
-
Enter a name for the tag, then, click Create tag.
The new tag is now listed on the Repository Tags page.
Adding a new tag to an image tag to an image by using the API
To add a new tag or restore an older tag on an image in Project Quay, you can use the API.
-
You have Created an OAuth access token.
-
You can change which image a tag points to or create a new tag by using the
PUT /api/v1/repository/{repository}/tag/{tag}command:$ curl -X PUT \ -H "Authorization: Bearer <bearer_token>" \ -H "Content-Type: application/json" \ --data '{ "manifest_digest": "<manifest_digest>" }' \ https://<quay-server.example.com>/api/v1/repository/<namespace>/<repository_name>/tag/<tag>Example output"Updated" -
You can restore a repository tag to its previous image by using the
POST /api/v1/repository/{repository}/tag/{tag}/restorecommand. For example:$ curl -X POST \ -H "Authorization: Bearer <bearer_token>" \ -H "Content-Type: application/json" \ --data '{ "manifest_digest": <manifest_digest> }' \ quay-server.example.com/api/v1/repository/quayadmin/busybox/tag/test/restoreExample output{} -
To see a list of tags after creating a new tag you can use the
GET /api/v1/repository/{repository}/tag/command. For example:$ curl -X GET \ -H "Authorization: Bearer <bearer_token>" \ -H "Accept: application/json" \ https://<quay-server.example.com>/api/v1/repository/<namespace>/<repository_name>/tagExample output{"tags": [{"name": "test", "reversion": false, "start_ts": 1716324069, "manifest_digest": "sha256:57583a1b9c0a7509d3417387b4f43acf80d08cdcf5266ac87987be3f8f919d5d", "is_manifest_list": false, "size": 2275314, "last_modified": "Tue, 21 May 2024 20:41:09 -0000"}, {"name": "example", "reversion": false, "start_ts": 1715698131, "manifest_digest": "sha256:57583a1b9c0a7509d3417387b4f43acf80d08cdcf5266ac87987be3f8f919d5d", "is_manifest_list": false, "size": 2275314, "last_modified": "Tue, 14 May 2024 14:48:51 -0000"}, {"name": "example", "reversion": false, "start_ts": 1715697708, "end_ts": 1715698131, "manifest_digest": "sha256:57583a1b9c0a7509d3417387b4f43acf80d08cdcf5266ac87987be3f8f919d5d", "is_manifest_list": false, "size": 2275314, "last_modified": "Tue, 14 May 2024 14:41:48 -0000", "expiration": "Tue, 14 May 2024 14:48:51 -0000"}, {"name": "test", "reversion": false, "start_ts": 1715695488, "end_ts": 1716324069, "manifest_digest": "sha256:57583a1b9c0a7509d3417387b4f43acf80d08cdcf5266ac87987be3f8f919d5d", "is_manifest_list": false, "size": 2275314, "last_modified": "Tue, 14 May 2024 14:04:48 -0000", "expiration": "Tue, 21 May 2024 20:41:09 -0000"}, {"name": "test", "reversion": false, "start_ts": 1715631517, "end_ts": 1715695488, "manifest_digest": "sha256:57583a1b9c0a7509d3417387b4f43acf80d08cdcf5266ac87987be3f8f919d5d", "is_manifest_list": false, "size": 2275314, "last_modified": "Mon, 13 May 2024 20:18:37 -0000", "expiration": "Tue, 14 May 2024 14:04:48 -0000"}], "page": 1, "has_additional": false}
Adding and managing labels by using the UI
You can add key-value labels to an image tag in the Project Quay v2 UI to record metadata such as a release date or build source. Administrators can add, edit, or remove labels for any tag in a repository.
-
On the v2 UI dashboard, click Repositories in the navigation pane.
-
Click the name of a repository that has image tags.
-
Click the menu kebab for an image and select Edit labels.
-
In the Edit labels window, click Add new label.
-
Enter a label for the image tag using the
key=valueformat, for example,com.example.release-date=2023-11-14.NoteThe following error is returned when failing to use the
key=valueformat:Invalid label format, must be key value separated by =. -
Click the whitespace of the box to add the label.
-
Optional. Add a second label.
-
Click Save labels to save the label to the image tag. The following notification is returned:
Created labels successfully. -
Optional. Click the same image tag’s menu kebab → Edit labels → X on the label to remove it; alternatively, you can edit the text. Click Save labels. The label is now removed or edited.
Adding and managing labels by using the API
To add, list, retrieve, or delete labels on image manifests in Project Quay, you can use the repository manifest labels API endpoints with an OAuth 2 access token.
-
You have created an OAuth access token.
-
Use the
GET /api/v1/repository/{repository}/manifest/{manifestref}command to retrieve the details of a specific manifest in a repository:$ curl -X GET \ -H "Authorization: Bearer <bearer_token>" \ -H "Accept: application/json" \ https://<quay-server.example.com>/api/v1/repository/<repository>/manifest/<manifestref> -
Use the
GET /api/v1/repository/{repository}/manifest/{manifestref}/labelscommand to retrieve a list of labels for a specific manifest:$ curl -X GET \ -H "Authorization: Bearer <bearer_token>" \ -H "Accept: application/json" \ https://<quay-server.example.com>/api/v1/repository/<repository>/manifest/<manifestref>/labelsExample output{"labels": [{"id": "e9f717d2-c1dd-4626-802d-733a029d17ad", "key": "org.opencontainers.image.url", "value": "https://github.com/docker-library/busybox", "source_type": "manifest", "media_type": "text/plain"}, {"id": "2d34ec64-4051-43ad-ae06-d5f81003576a", "key": "org.opencontainers.image.version", "value": "1.36.1-glibc", "source_type": "manifest", "media_type": "text/plain"}]} -
Use the
GET /api/v1/repository/{repository}/manifest/{manifestref}/labels/{labelid}command to obtain information about a specific manifest:$ curl -X GET \ -H "Authorization: Bearer <bearer_token>" \ -H "Accept: application/json" \ https://<quay-server.example.com>/api/v1/repository/<repository>/manifest/<manifestref>/labels/<label_id>Example output{"id": "e9f717d2-c1dd-4626-802d-733a029d17ad", "key": "org.opencontainers.image.url", "value": "https://github.com/docker-library/busybox", "source_type": "manifest", "media_type": "text/plain"} -
Add an additional label to a manifest in a given repository with the
POST /api/v1/repository/{repository}/manifest/{manifestref}/labelscommand. For example:$ curl -X POST \ -H "Authorization: Bearer <bearer_token>" \ -H "Content-Type: application/json" \ --data '{ "key": "<key>", "value": "<value>", "media_type": "<media_type>" }' \ https://<quay-server.example.com>/api/v1/repository/<repository>/manifest/<manifestref>/labelsExample output{"label": {"id": "346593fd-18c8-49db-854f-4cb1fb76ff9c", "key": "example-key", "value": "example-value", "source_type": "api", "media_type": "text/plain"}} -
Delete a label by using the
DELETE /api/v1/repository/{repository}/manifest/{manifestref}/labels/{labelid}command:$ curl -X DELETE \ -H "Authorization: Bearer <bearer_token>" \ https://<quay-server.example.com>/api/v1/repository/<repository>/manifest/<manifestref>/labels/<labelid>This command does not return output in the CLI. You can list labels again to confirm that the label was removed.
Viewing model card information by using the UI
To view model card information for a machine learning artifact in Project Quay, you can open the Model Card tab on the tag Details page in the UI.
Model cards are essentially markdown (.md) files with additional metadata that provide information about a machine learning application. To view model card information, a manifest must have an annotation that is defined in your config.yaml file (for example, application/x-mlmodel) and include a model card stored as a layer in the manifest. When these conditions are met, a Model Card tab appears on the Details page of a tag.
-
You have pushed an artifact of that annotation type, and it includes a model card (
.md) file.
-
Update your
config.yamlfile to include the following information:Example model card YAMLFEATURE_UI_MODELCARD: true UI_MODELCARD_ARTIFACT_TYPE: application/x-mlmodel UI_MODELCARD_ANNOTATION: org.opencontainers.image.description: "Model card metadata" UI_MODELCARD_LAYER_ANNOTATION: org.opencontainers.image.title: README.mdwhere:
FEATURE_UI_MODELCARD-
Specifies that the Model Card image tab in the UI is enabled.
UI_MODELCARD_ARTIFACT_TYPE-
Specifies the model card artifact type. In this example, the artifact type is
application/x-mlmodel. UI_MODELCARD_ANNOTATION-
Specifies that if an image does not have an
artifactTypedefined, this field is checked at the manifest level. If a matching annotation is found, the system then searches for a layer with an annotation matchingUI_MODELCARD_LAYER_ANNOTATION. This field is optional. UI_MODELCARD_LAYER_ANNOTATION-
Specifies that if an image has an
artifactTypedefined and multiple layers, this field is used to locate the specific layer containing the model card. This field is optional.
-
Push an artifact of that annotation type, and one that includes a model card (
.md) file, to your repository. -
On the v2 UI, click Repositories.
-
Click the name of a repository.
-
Click the name of a tag. You are taken to the Details page of that tag.
-
Click ModelCard to view information about the image. For example:
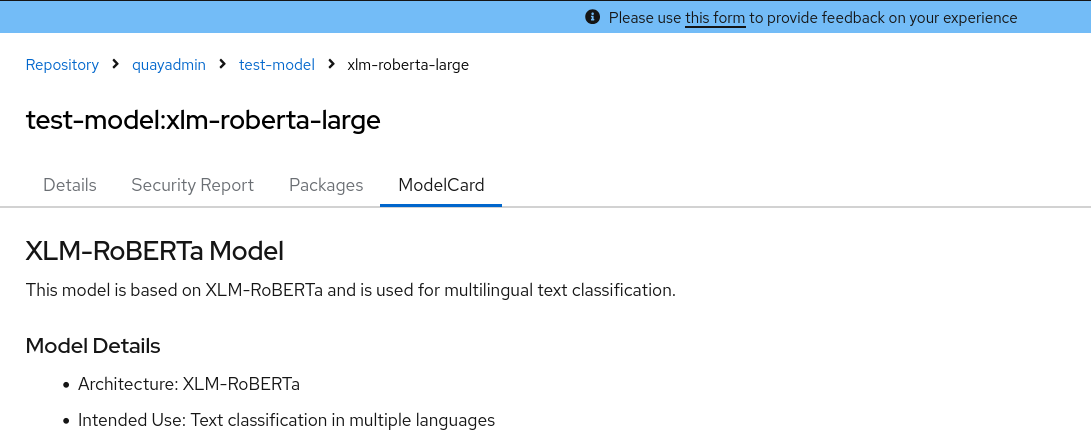
Fetching an image by tag or digest
To fetch an image from Project Quay, you can pull by tag or by digest. Digests provide an immutable reference to a specific image manifest.
-
Navigate to the Tags page of a repository.
-
Under Manifest, click the Fetch Tag icon.
-
When the popup box appears, users are presented with the following options:
-
Podman Pull (by tag)
-
Docker Pull (by tag)
-
Podman Pull (by digest)
-
Docker Pull (by digest)
Selecting any one of the four options returns a command for the respective client that allows users to pull the image.
-
-
Click Copy Command to copy the command, which can be used on the command-line interface (CLI). For example:
= Viewing Project Quay tag history by using the UI
To review changes made to an image over time, you can open its Tag History page in the Project Quay v2 UI. You can search by tag name, filter by date range, and see when each tag was modified.
-
On the Project Quay v2 UI dashboard, click Repositories in the navigation pane.
-
Click the name of a repository that has image tags.
-
Click Tag History. On this page, you can perform the following actions:
-
Search by tag name
-
Select a date range
-
View tag changes
-
View tag modification dates and the time at which they were changed
-
Viewing Project Quay tag history by using the API
To review the history of image tags in a Project Quay repository, you can use the API.
-
You have Created an OAuth access token.
-
Enter the following command to view tag history by using the
GET /api/v1/repository/{repository}/tag/command and passing in one of the following queries:-
onlyActiveTags=<true/false>: Filters to only include active tags.
-
page=<number>: Specifies the page number of results to retrieve.
-
limit=<number>: Limits the number of results per page.
-
specificTag=<tag_name>: Filters the tags to include only the tag with the specified name.
$ curl -X GET \ -H "Authorization: Bearer <bearer_token>" \ -H "Accept: application/json" \ "https://<quay-server.example.com>/api/v1/repository/<namespace>/<repository>/tag/?onlyActiveTags=true&page=1&limit=10"Example output{"tags": [{"name": "test-two", "reversion": false, "start_ts": 1717680780, "manifest_digest": "sha256:57583a1b9c0a7509d3417387b4f43acf80d08cdcf5266ac87987be3f8f919d5d", "is_manifest_list": false, "size": 2275314, "last_modified": "Thu, 06 Jun 2024 13:33:00 -0000"}, {"name": "tag-test", "reversion": false, "start_ts": 1717680378, "manifest_digest": "sha256:57583a1b9c0a7509d3417387b4f43acf80d08cdcf5266ac87987be3f8f919d5d", "is_manifest_list": false, "size": 2275314, "last_modified": "Thu, 06 Jun 2024 13:26:18 -0000"}, {"name": "example", "reversion": false, "start_ts": 1715698131, "manifest_digest": "sha256:57583a1b9c0a7509d3417387b4f43acf80d08cdcf5266ac87987be3f8f919d5d", "is_manifest_list": false, "size": 2275314, "last_modified": "Tue, 14 May 2024 14:48:51 -0000"}], "page": 1, "has_additional": false}
-
-
By using the
specificTag=<tag_name>query, you can filter results for a specific tag. For example:$ curl -X GET -H "Authorization: Bearer <bearer_token>" -H "Accept: application/json" "<quay-server.example.com>/api/v1/repository/quayadmin/busybox/tag/?onlyActiveTags=true&page=1&limit=20&specificTag=test-two"Example output{"tags": [{"name": "test-two", "reversion": true, "start_ts": 1718737153, "manifest_digest": "sha256:57583a1b9c0a7509d3417387b4f43acf80d08cdcf5266ac87987be3f8f919d5d", "is_manifest_list": false, "size": 2275314, "last_modified": "Tue, 18 Jun 2024 18:59:13 -0000"}], "page": 1, "has_additional": false}
Retire image tags on a schedule
Set tag expiration from repositories, Dockerfiles, or annotations, and delete or undo tags by using the UI or API.
Setting tag expirations
You can set image tags in Project Quay to expire at a chosen date and time. Expired tags are deleted from the repository according to your time machine retention settings.
This feature includes the following characteristics:
-
When an image tag expires, it is deleted from the repository. If it is the last tag for a specific image, the image is also set to be deleted.
-
Expiration is set on a per-tag basis. It is not set for a repository as a whole.
-
After a tag is expired or deleted, it is not immediately removed from the registry. This is contingent upon the allotted time designed in the time machine feature, which defines when the tag is permanently deleted, or garbage collected. By default, this value is set at 14 days, however the administrator can adjust this time to one of multiple options. Up until the point that garbage collection occurs, tags changes can be reverted.
Tag expiration can be set up in one of three ways:
-
By setting the
quay.expires-after=label in the Dockerfile when the image is created. This sets a time to expire from when the image is built. This label only works for image manifests. -
By setting the
quay.expires-after=annotation label in the Dockerfile when the image is created.--annotationcan be passed in for both image manifests and image indexes. -
By selecting an expiration date on the UI. For example:
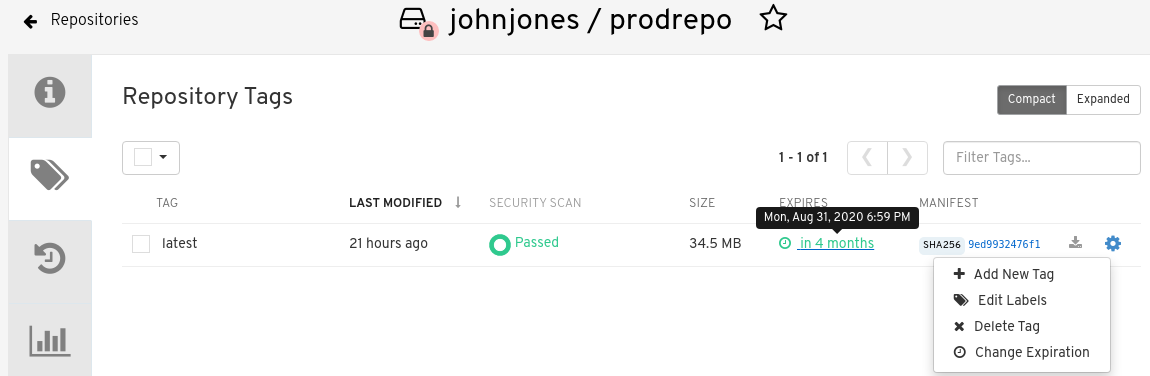
Setting tag expirations can help automate the cleanup of older or unused tags, helping to reduce storage space.
|
Note
|
Immutable tags are excluded from auto-pruning, but they can still expire. To retire a locked production tag, use per-tag expiration instead of an auto-prune policy. |
Setting tag expiration from a repository
To set a tag expiration date in Project Quay, you can use the repository Tags page. You can change expiration for one tag or for multiple tags at once.
-
On the Project Quay v2 UI dashboard, click Repositories in the navigation pane.
-
Click the name of a repository that has image tags.
-
Click the menu kebab for an image and select Change expiration.
-
Optional. Alternatively, you can bulk add expiration dates by clicking the box of multiple tags, and then select Actions → Set expiration.
-
In the Change Tags Expiration window, set an expiration date, specifying the day of the week, month, day of the month, and year. For example,
Wednesday, November 15, 2023. Alternatively, you can click the calendar button and manually select the date. -
Set the time, for example,
2:30 PM. -
Click Change Expiration to confirm the date and time. The following notification is returned:
Successfully set expiration for tag test to Nov 15, 2023, 2:26 PM. -
On the Project Quay v2 UI Tags page, you can see when the tag is set to expire. For example:
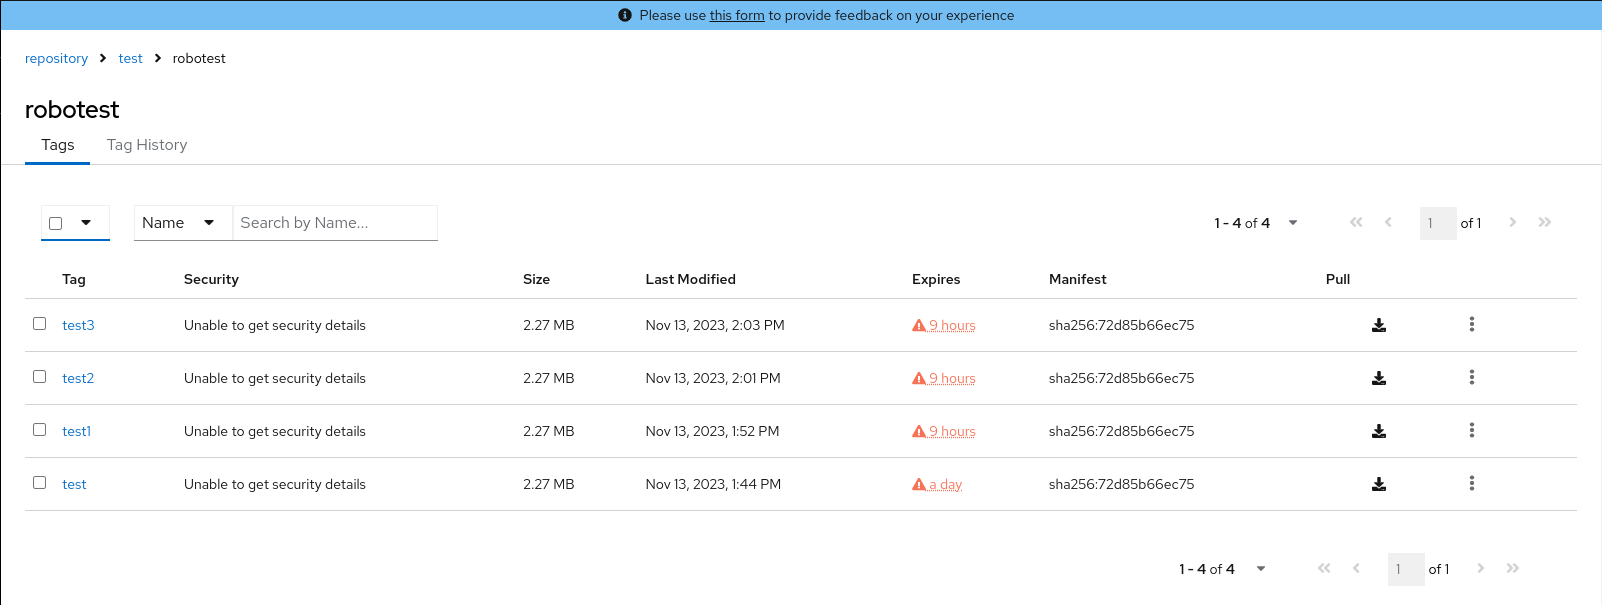
Setting tag expiration from a Dockerfile
To expire an image tag automatically in Project Quay, you can add a quay.expires-after label in a Dockerfile. Expiration starts when you push the image to the registry.
You can add a label, for example, quay.expires-after=20h to an image tag by using the docker label command to cause the tag to automatically expire after the time that is indicated. The following values for hours, days, or weeks are accepted:
-
1h -
2d -
3w
Expiration begins from the time that the image is pushed to the registry.
-
Enter the following
docker labelcommand to add a label to the desired image tag. The label should be in the formatquay.expires-after=20hto indicate that the tag should expire after 20 hours. Replace20hwith the desired expiration time. For example:$ docker label quay.expires-after=20h quay-server.example.com/quayadmin/<image>:<tag>
Setting tag expiration using annotations
To expire an image tag automatically in Project Quay, you can push an image with a quay.expires-after annotation. You can apply the annotation to manifests and indexes.
You can add an annotation, for example, quay.expires-after=20h, by using the --annotation flag when you push an image. The following values for hours, days, or weeks are accepted:
-
1h -
2d -
3w
Expiration begins from the time that the image is pushed to the registry.
|
Note
|
Using the |
-
You have downloaded the
orasCLI.
-
Enter the following
oras push --annotationcommand to add an annotation to the desired image tag. The annotation should be in the formatquay.expires-after=<value>to indicate that the tag should expire the set time. For example:$ oras push --annotation quay.expires-after=<value> \ <quay-server.example.com>/<organization>/<repository>:<tag> \ <file_path>:<media_type>Example output✓ Uploaded hello.txt 12/12 B 100.00% 321ms └─ sha256:74b9e308133afb3bceae961097cb2aa481483869d695ce1414cd2bc7f046027c ✓ Uploaded application/vnd.oci.empty.v1+json 2/2 B 100.00% 328ms └─ sha256:44136fa355b3678a1146ad16f7e8649e94fb4fc21fe77e8310c060f61caaff8a ✓ Uploaded application/vnd.oci.image.manifest.v1+json 620/620 B 100.00% 0s └─ sha256:c370e931b5eca44fd753bd92e6991ed3be70008e8df15078083359409111f8c3 Pushed [registry] quay-server.example.com/fortestuser/busybox:test2 ArtifactType: application/vnd.unknown.artifact.v1 -
Confirm that the expiration date has been applied by checking the Project Quay UI, or by entering the following command:
$ curl -X GET \ -H "Authorization: Bearer <bearer_token>" \ -H "Accept: application/json" \ https://<quay-server.example.com>/api/v1/repository/<namespace>/<repository_name>/tag/?specificTag=<tag>" \Example output{"tags": [{"name": "test2", "reversion": false, "start_ts": 1743706344, "end_ts": 1743778344, "manifest_digest": "sha256:c370e931b5eca44fd753bd92e6991ed3be70008e8df15078083359409111f8c3", "is_manifest_list": false, "size": 12, "last_modified": "Thu, 03 Apr 2025 18:52:24 -0000", "expiration": "Fri, 04 Apr 2025 14:52:24 -0000"}, {"name": "test2", "reversion": false, "start_ts": 1742493776, "end_ts": 1743706344, "manifest_digest": "sha256:d80aa3d7f5f5388cfae543b990d3cd3d47ff51c48ef29ff66102427bf7bc0a88", "is_manifest_list": false, "size": 2266046, "last_modified": "Thu, 20 Mar 2025 18:02:56 -0000", "expiration": "Thu, 03 Apr 2025 18:52:24 -0000"}], "page": 1, "has_additional": false}
Removing tag expiration using annotations
To clear a tag expiration annotation in Project Quay, you can push the image again with quay.expires-after set to never. The latest manifest no longer carries an expiration time.
With the oras CLI tool, you can unset previously established expiration times.
-
You have downloaded the
orasCLI. -
You have pushed an image with the
quay.expires-after=<value>annotation.
-
Enter the following
oras push --annotationcommand to remove an annotation to the desired image tag. The annotation should be in the formatquay.expires-after=never. For example:$ oras push --annotation quay.expires-after=never \ <quay-server.example.com>/<organization>/<repository>:<tag> \ <file_path>:<media_type>Example output✓ Uploaded hello.txt 12/12 B 100.00% 321ms └─ sha256:74b9e308133afb3bceae961097cb2aa481483869d695ce1414cd2bc7f046027c ✓ Uploaded application/vnd.oci.empty.v1+json 2/2 B 100.00% 328ms └─ sha256:44136fa355b3678a1146ad16f7e8649e94fb4fc21fe77e8310c060f61caaff8a ✓ Uploaded application/vnd.oci.image.manifest.v1+json 620/620 B 100.00% 0s └─ sha256:c370e931b5eca44fd753bd92e6991ed3be70008e8df15078083359409111f8c3 Pushed [registry] quay-server.example.com/fortestuser/busybox:test2 ArtifactType: application/vnd.unknown.artifact.v1 -
The latest manifest will no longer have an expiration time. Confirm that the expiration date has been removed by checking the Project Quay UI, or by entering the following command:
{"tags": [{"name": "test2", "reversion": false, "start_ts": 1743708135, "manifest_digest": "sha256:19e3a3501b4125cce9cb6bb26ac9207c325259bef94dc66490b999f93c4c83a9", "is_manifest_list": false, "size": 12, "last_modified": "Thu, 03 Apr 2025 19:22:15 -0000"}, {"name": "test2", "reversion": false, "start_ts": 1743706344, "end_ts": 1743708135}]}Note that no expiration time is listed.
Setting tag expirations by using the API
To set when an image tag expires in Project Quay, you can use the API.
-
You have Created an OAuth access token.
-
You can set when an image a tag expires by using the
PUT /api/v1/repository/{repository}/tag/{tag}command and passing in the expiration field:$ curl -X PUT \ -H "Authorization: Bearer <bearer_token>" \ -H "Content-Type: application/json" \ --data '{ "expiration": "<seconds since epoch>" }' \ https://<quay-server.example.com>/api/v1/repository/<namespace>/<repository_name>/tag/<tag>Example output"Updated"
Deleting an image tag
To remove a specific version of a container image from a repository, you can delete its tag from the Project Quay v2 UI. Depending on your time machine retention settings, you might be able to revert a deleted tag later.
-
On the Repositories page of the v2 UI, click the name of the image you want to delete, for example,
quay/admin/busybox. -
Click the More Actions drop-down menu.
-
Click Delete.
NoteIf desired, you could click Make Public or Make Private.
-
Type confirm in the box, and then click Delete.
-
After deletion, you are returned to the Repositories page.
NoteDeleting an image tag can be reverted based on the amount of time allotted assigned to the time machine feature. For more information, see "Reverting tag changes".
Deleting an image by using the API
To remove an image tag from a Project Quay repository, you can use the API.
-
You have Created an OAuth access token.
-
You can delete an image tag by using the
DELETE /api/v1/repository/{repository}/tag/{tag}command:$ curl -X DELETE \ -H "Authorization: Bearer <bearer_token>" \ https://<quay-server.example.com>/api/v1/repository/<namespace>/<repository_name>/tag/<tag>This command does not return output in the CLI. Continue on to the next step to return a list of tags.
-
To see a list of tags after deleting a tag, you can use the
GET /api/v1/repository/{repository}/tag/command. For example:$ curl -X GET \ -H "Authorization: Bearer <bearer_token>" \ -H "Accept: application/json" \ https://<quay-server.example.com>/api/v1/repository/<namespace>/<repository_name>/tagExample output{"tags": [{"name": "test", "reversion": false, "start_ts": 1716324069, "manifest_digest": "sha256:57583a1b9c0a7509d3417387b4f43acf80d08cdcf5266ac87987be3f8f919d5d", "is_manifest_list": false, "size": 2275314, "last_modified": "Tue, 21 May 2024 20:41:09 -0000"}, {"name": "example", "reversion": false, "start_ts": 1715698131, "manifest_digest": "sha256:57583a1b9c0a7509d3417387b4f43acf80d08cdcf5266ac87987be3f8f919d5d", "is_manifest_list": false, "size": 2275314, "last_modified": "Tue, 14 May 2024 14:48:51 -0000"}, {"name": "example", "reversion": false, "start_ts": 1715697708, "end_ts": 1715698131, "manifest_digest": "sha256:57583a1b9c0a7509d3417387b4f43acf80d08cdcf5266ac87987be3f8f919d5d", "is_manifest_list": false, "size": 2275314, "last_modified": "Tue, 14 May 2024 14:41:48 -0000", "expiration": "Tue, 14 May 2024 14:48:51 -0000"}, {"name": "test", "reversion": false, "start_ts": 1715695488, "end_ts": 1716324069, "manifest_digest": "sha256:57583a1b9c0a7509d3417387b4f43acf80d08cdcf5266ac87987be3f8f919d5d", "is_manifest_list": false, "size": 2275314, "last_modified": "Tue, 14 May 2024 14:04:48 -0000", "expiration": "Tue, 21 May 2024 20:41:09 -0000"}, {"name": "test", "reversion": false, "start_ts": 1715631517, "end_ts": 1715695488, "manifest_digest": "sha256:57583a1b9c0a7509d3417387b4f43acf80d08cdcf5266ac87987be3f8f919d5d", "is_manifest_list": false, "size": 2275314, "last_modified": "Mon, 13 May 2024 20:18:37 -0000", "expiration": "Tue, 14 May 2024 14:04:48 -0000"}], "page": 1, "has_additional": false}
Reverting tag changes by using the UI
To revert tag changes in Project Quay, you can use the UI within the time machine window. You restore a previous tag state before permanent deletion.
-
On the Repositories page of the v2 UI, click the name of the image you want to revert.
-
Click the Tag History tab.
-
Find the point in the timeline at which image tags were changed or removed. Next, click the option under Revert to restore a tag to its image.
Reverting tag changes by using the API
To restore a previous image for a tag in Project Quay, you can use the API.
offers a comprehensive time machine feature that allows older images tags to remain in the repository for set periods of time so that they can revert changes made to tags. This feature allows users to revert tag changes, like tag deletions.
-
You have Created an OAuth access token.
-
You can restore a repository tag to its previous image by using the
POST /api/v1/repository/{repository}/tag/{tag}/restorecommand. For example:$ curl -X POST \ -H "Authorization: Bearer <bearer_token>" \ -H "Content-Type: application/json" \ --data '{ "manifest_digest": <manifest_digest> }' \ quay-server.example.com/api/v1/repository/quayadmin/busybox/tag/test/restoreExample output{} -
To see a list of tags after restoring an old tag you can use the
GET /api/v1/repository/{repository}/tag/command. For example:$ curl -X GET \ -H "Authorization: Bearer <bearer_token>" \ -H "Accept: application/json" \ https://<quay-server.example.com>/api/v1/repository/<namespace>/<repository_name>/tagExample output{"tags": [{"name": "test", "reversion": false, "start_ts": 1716324069, "manifest_digest": "sha256:57583a1b9c0a7509d3417387b4f43acf80d08cdcf5266ac87987be3f8f919d5d", "is_manifest_list": false, "size": 2275314, "last_modified": "Tue, 21 May 2024 20:41:09 -0000"}, {"name": "example", "reversion": false, "start_ts": 1715698131, "manifest_digest": "sha256:57583a1b9c0a7509d3417387b4f43acf80d08cdcf5266ac87987be3f8f919d5d", "is_manifest_list": false, "size": 2275314, "last_modified": "Tue, 14 May 2024 14:48:51 -0000"}, {"name": "example", "reversion": false, "start_ts": 1715697708, "end_ts": 1715698131, "manifest_digest": "sha256:57583a1b9c0a7509d3417387b4f43acf80d08cdcf5266ac87987be3f8f919d5d", "is_manifest_list": false, "size": 2275314, "last_modified": "Tue, 14 May 2024 14:41:48 -0000", "expiration": "Tue, 14 May 2024 14:48:51 -0000"}, {"name": "test", "reversion": false, "start_ts": 1715695488, "end_ts": 1716324069, "manifest_digest": "sha256:57583a1b9c0a7509d3417387b4f43acf80d08cdcf5266ac87987be3f8f919d5d", "is_manifest_list": false, "size": 2275314, "last_modified": "Tue, 14 May 2024 14:04:48 -0000", "expiration": "Tue, 21 May 2024 20:41:09 -0000"}, {"name": "test", "reversion": false, "start_ts": 1715631517, "end_ts": 1715695488, "manifest_digest": "sha256:57583a1b9c0a7509d3417387b4f43acf80d08cdcf5266ac87987be3f8f919d5d", "is_manifest_list": false, "size": 2275314, "last_modified": "Mon, 13 May 2024 20:18:37 -0000", "expiration": "Tue, 14 May 2024 14:04:48 -0000"}], "page": 1, "has_additional": false}
Protect production tags from overwrite
Create, list, update, and delete tag immutability policies by using the Red Hat Quay v2 UI or API.
Immutable tags overview
Immutable tags allow users to lock specific image tags to prevent them from being overwritten, modified, manually deleted, or auto-pruned. Per-tag expiration can still retire an immutable tag.
Immutable tabs help ensure a stable, trusted reference for builds and releases, meeting strict regulatory and compliance requirements. When a tag is marked as immutable, the system blocks tag overwrites, manual or API deletions, and auto-pruning by background workers. Auto-prune exclusion is permanent and is not configurable. Per-tag expiration still applies: an immutable tag can expire and be deleted by expiration, including the quay.expires-after label or annotation, even though auto-prune will never remove it. Manifest labels associated with an immutable tag cannot be changed.
Immutability can be applied to tags in organizations and organization-owned repositories through three methods:
-
Individual Tag Settings: Users with write access can manually toggle the immutable status of a specific tag via the Project Quay v2 UI or the API.
-
Immutability Policies: Administrators can define regex patterns (for example,
release-*) at the organization or repository level. Any tag pushed that matches the pattern is automatically marked as immutable. -
Manifest Labels: Developers can trigger immutability during the build process by including the
quay.immutable=truelabel in their Dockerfile or Containerfile.
|
Note
|
Immutable tags are not available for personal user namespaces. |
Managing tag immutability by using the UI
To prevent a tag from being changed or deleted, you can manage its immutability by using the UI. Use the Tag menu to set or remove immutability for a tag.
-
You have logged into Project Quay.
-
You have set
FEATURE_IMMUTABLE_TAGStoTruein yourconfig.yamlfile.
-
On the Project Quay v2 UI, click Organizations and then the name of the organization where the tag is located.
-
Click the name of the repository where the tag is located.
-
Click Tags in the navigation pane.
-
For the tag that you want to make immutable, click the menu kebab icon and then click Make immutable.
-
Optional: To remove the immutability policy, click the menu kebab icon and then click Remove immutability.
Managing tag immutability by using the Project Quay API
To prevent a tag from being changed or deleted, you can manage its immutability by using the Project Quay API. Use the PUT /api/v1/repository/{repository}/tag/{tag} endpoint to set or remove immutability for a tag.
-
You have logged into Project Quay.
-
You have set
FEATURE_IMMUTABLE_TAGStoTruein yourconfig.yamlfile.
-
Use the
PUT /api/v1/repository/{repository}/tag/{tag}endpoint to set immutability for a tag. For example:$ curl -X PUT \ -H "Authorization: Bearer <bearer_token>" \ -H "Content-Type: application/json" \ --data '{ "immutable": true }' \ https://<quay-server.example.com>/api/v1/repository/<namespace>/<repository_name>/tag/<tag>Example output"Updated" -
Use the
PUT /api/v1/repository/{repository}/tag/{tag}endpoint to remove immutability for a tag. For example:$ curl -X PUT \ -H "Authorization: Bearer <bearer_token>" \ -H "Content-Type: application/json" \ --data '{ "immutable": false }' \ https://<quay-server.example.com>/api/v1/repository/<namespace>/<repository_name>/tag/<tag>Example output"Updated"
Setting immutability policy by using the UI
To protect image tags from overwrite or deletion, you can set an immutability policy for an organization or a repository in {product-title} by using the v2 UI.
-
You have logged into Project Quay.
-
You have set
FEATURE_IMMUTABLE_TAGStoTruein yourconfig.yamlfile.
-
On the Project Quay v2 UI, click Repositories or Organization.
-
Click the name of the repository or organization.
-
Click Settings → Immutability Policies.
-
Click Add policy.
-
Add a tag pattern, for example,
release-*. -
Select a pattern behavior. The following options are available:
-
Tags matching pattern are immutable - With this option, tags that match the pattern will be immutable and cannot be modified or deleted.
-
Tags NOT matching pattern are immutable - With this option, tags that do NOT match the pattern will be immutable and cannot be modified or deleted.
-
-
Click Save.
-
Optional. Update the policy by clicking the Edit (pencil icon) icon.
-
Optional. Delete the policy by clicking the Delete (trash icon) icon.
-
Optional. Add an additional policy by clicking Add policy.
Creating an immutability policy by using the Project Quay API
To protect image tags from overwrite or deletion, you can create an immutability policy for an organization or a repository in Project Quay by using the API. Send a POST request with your bearer token and a JSON body that includes the tag pattern and match rule.
-
You have created an OAuth access token.
-
You have set
FEATURE_IMMUTABLE_TAGStoTruein yourconfig.yamlfile.
-
Create an immutability policy for an organization by using the
POST /api/v1/organization/{orgname}/immutabilitypolicy/endpoint. For example:$ curl -X POST -H "Authorization: Bearer <access_token>" -H "Content-Type: application/json" -d '{"tagPattern": ".*", "tagPatternMatches": true}' http://<quay-server.example.com>/api/v1/organization/<organization_name>/immutabilitypolicy/ -
Create an immutability policy for an organization repository by using the
POST /api/v1/repository/{repository}/immutabilitypolicy/endpoint. For example:$ curl -X POST -H "Authorization: Bearer <access_token>" -H "Content-Type: application/json" -d '{"tagPattern": ".*", "tagPatternMatches": true}' http://<quay-server.example.com>/api/v1/repository/<namespace>/<repository_name>/immutabilitypolicy/Example output{"uuid": "ce2bdcc0-ced2-4a1a-ac36-78a9c1bed8c7"}
Listing an immutability policy by using the Project Quay API
To view or audit which tags are protected, you can list immutability policies for an organization or a repository in Project Quay by using the API. Send GET requests with your bearer token to retrieve all policies or a single policy by UUID.
-
You have created an OAuth access token.
-
You have set
FEATURE_IMMUTABLE_TAGStoTruein yourconfig.yamlfile.
-
Retrieve all immutability policies for an organization by using the
GET /api/v1/organization/{orgname}/immutabilitypolicy/endpoint. For example:$ curl -X GET -H "Authorization: Bearer <access_token>" http://<quay-server.example.com>/api/v1/organization/<organization_name>/immutabilitypolicy/Example output{"policies": [{"uuid": "3aae3390-de53-4b82-a2b7-4da8fe5dbe11", "tagPattern": ".*", "tagPatternMatches": true}]} -
Retrieve all immutability policies for a repository by using the
GET /api/v1/repository/{repository}/immutabilitypolicy/endpoint. For example:$ curl -X GET -H "Authorization: Bearer <access_token>" http://<quay-server.example.com>/api/v1/repository/<namespace>/<repository_name>/immutabilitypolicy/Example output{"policies": [{"uuid": "87f75fb5-d023-4054-87b4-469f37a59638", "tagPattern": ".*", "tagPatternMatches": true}]} -
List information about a specific immutability policy for an organization by using the
GET /api/v1/organization/{orgname}/immutabilitypolicy/{policy_uuid}/endpoint. For example:$ curl -X GET -H "Authorization: Bearer <access_token>" http://<quay-server.example.com>/api/v1/organization/<organization_name>/immutabilitypolicy/<policy_uuid>/Example output{"policies": [{"uuid": "87f75fb5-d023-4054-87b4-469f37a59638", "tagPattern": ".*", "tagPatternMatches": true}]} -
List information about a specific immutability policy for a repository by using the
GET /api/v1/repository/{repository}/immutabilitypolicy/{policy_uuid}/endpoint. For example:$ curl -X GET -H "Authorization: Bearer <access_token>" http://<quay-server.example.com>/api/v1/repository/<namespace>/<repository_name>/immutabilitypolicy/<policy_uuid>/Example output{"uuid": "87f75fb5-d023-4054-87b4-469f37a59638", "tagPattern": ".*", "tagPatternMatches": true}
Updating an immutability policy by using the Project Quay API
To change the tag pattern or match rule of an existing policy, you can update an immutability policy for an organization or a repository in {product-title} by using the API. Send a PUT request with your bearer token and the policy UUID, and a JSON body with the new tag pattern and match rule.
-
You have created an OAuth access token.
-
You have set
FEATURE_IMMUTABLE_TAGStoTruein yourconfig.yamlfile.
-
Update an immutability policy for an organization by using the
PUT /api/v1/organization/{orgname}/immutabilitypolicy/{policy_uuid}/endpoint. For example:curl -X PUT \ -H "Authorization: Bearer <bearer_token>" \ -H "Content-Type: application/json" \ -d '{"tagPattern": ".*", "tagPatternMatches": true}' \ "https://<quay-server.example.com>/api/v1/organization/test/immutabilitypolicy/3aae3390-de53-4b82-a2b7-4da8fe5dbe11" -
Update an immutability policy for a repository by using the
PUT /api/v1/repository/{repository}/immutabilitypolicy/{policy_uuid}/endpoint. For example:$ curl -X PUT -H "Authorization: Bearer <access_token>" -H "Content-Type: application/json" -d '{"tagPattern": ".*", "tagPatternMatches": true}' http://<quay-server.example.com>/api/v1/repository/<repository_name>/<namespace>/immutabilitypolicy/<policy_uuid>/
Deleting an immutability policy by using the Project Quay API
To remove an immutability policy so that tags can be modified or deleted again, you can delete the policy for an organization or a repository in Project Quay by using the API. Send a DELETE request with your bearer token and the policy UUID.
-
You have created an OAuth access token.
-
You have set
FEATURE_IMMUTABLE_TAGStoTruein yourconfig.yamlfile.
-
Delete an immutability policy for an organization by using the
DELETE /api/v1/organization/{orgname}/immutabilitypolicy/{policy_uuid}/endpoint. For example:$ curl -X DELETE -H "Authorization: Bearer <access_token>" http://<quay-server.example.com>/api/v1/organization/<organization_name>/immutabilitypolicy/<policy_uuid>/Example output{"uuid": "3aae3390-de53-4b82-a2b7-4da8fe5dbe11"} -
Delete an immutability policy for a repository by using the
DELETE /api/v1/repository/{repository}/immutabilitypolicy/{policy_uuid}/endpoint. For example:$ curl -X DELETE -H "Authorization: Bearer <access_token>" http://<quay-server.example.com>/api/v1/repository/<namespace>/<repository_name>/immutabilitypolicy/<policy_uuid>/Example output{"uuid": "87f75fb5-d023-4054-87b4-469f37a59638"}
Cap storage per organization
Configure organization storage quotas, system defaults, notifications, and API limits to prevent any tenant from exhausting registry capacity.
Project Quay quota management and enforcement overview
With Project Quay quota management, superusers can track storage consumption and set soft or hard limits for organizations, repositories, or the entire registry.
Project Quay superusers can manage capacity limits in the following ways:
-
Quota reporting: An administrator can track the storage consumption of all organizations. Users can track the storage consumption of their assigned organization.
-
Quota management: An administrator can define soft and hard checks for Project Quay users. Soft checks tell users if the storage consumption of an organization reaches their configured threshold. Hard checks prevent users from pushing to the registry when storage consumption reaches the configured limit.
These features help service owners of a Project Quay registry define service level agreements and support a healthy resource budget.
Quota management limitations
Quota management in Project Quay has limits related to push-time calculation and database-backed maximum sizes. Review these constraints before you set organization quotas.
One limitation of the quota management feature is that calculating resource consumption on the push of an artifact results in the calculation becoming part of the push’s critical path. Without this, usage data might drift.
The maximum storage quota size depends on the selected database:
| Database | Maximum quota size |
|---|---|
Postgres |
8388608 TB |
MySQL |
8388608 TB |
SQL Server |
16777216 TB |
Setting a system-wide default quota
To specify a system-wide default storage quota that is applied to every organization and user, you can use the DEFAULT_SYSTEM_REJECT_QUOTA_BYTES configuration flag.
When the DEFAULT_SYSTEM_REJECT_QUOTA_BYTES field is set, and the quota limit has been met, the system automatically rejects new artifacts. By default, this configuration field is disabled.
If you configure a specific quota for an organization or user, and then delete that quota, the system-wide default quota applies if one has been set. Similarly, if you have configured a specific quota for an organization or user, and then modify the system-wide default quota, the updated system-wide default overrides any specific settings.
The following procedure shows you how to configure a system-wide default quota.
-
Set a system-wide default storage quota by including the
DEFAULT_SYSTEM_REJECT_QUOTA_BYTESfield in yourconfig.yamlfile. For example:# ... DEFAULT_SYSTEM_REJECT_QUOTA_BYTES: 107374182400 # ... -
Restart your Project Quay registry.
Establishing quota for an organization by using the Project Quay UI
To establishing quota for an organization by using the Red Hat Quay UI in Project Quay, you can follow the steps in this procedure.
The following procedure describes how you can report storage consumption and establish storage quota limits for a repository.
-
A superuser account.
-
Enough storage to meet the demands of quota limitations.
-
Set
FEATURE_QUOTA_MANAGEMENT: Truein yourconfig.yamlfile and then restart your registry. For example:# ... FEATURE_QUOTA_MANAGEMENT: True # ... -
Create a new organization or choose an existing one.
-
Log in to the registry as a superuser and navigate to the Manage Organizations tab on the Super User Admin Panel. Click the Options icon of the organization for which you want to create storage quota limits.
-
Click Configure Quota.
-
For Set storage quota, enter the initial quota, for example, 10 MiB. You can then click Apply.
-
Optional: For Quota policy select one of the following Actions. You can then enter a Quota Threshold and click Add Limit.
-
Reject: When this option is selected, any artifact that exceeds the established quota is rejected.
-
Warning: When this option is selected, users are notified of pushed artifacts that exceed the configured quota, however, the artifact successfully pushes.
NoteThe quota threshold percent determines when Project Quay starts warning users that the repository is approaching its assigned storage quota.
-
-
Pull a sample artifact by entering the following command:
$ podman pull busybox -
Tag the sample artifact by entering the following command:
$ podman tag docker.io/library/busybox quay-server.example.com/testorg/busybox:test -
Push the sample artifact to the organization by entering the following command:
$ podman push --tls-verify=false quay-server.example.com/testorg/busybox:test -
Navigate to the Super User Admin Panel on the Project Quay UI, then click Manage Organizations. The Organizations page shows the total proportion of the quota used by the artifact.
-
Optional: Pull a second sample artifact with intentions of exceeding the established quota by entering the following command:
$ podman pull nginx -
Optional: Tag the second artifact by entering the following command:
$ podman tag docker.io/library/nginx quay-server.example.com/testorg/nginx -
Optional: Push the second artifact to the organization by entering the following command:
$ podman push --tls-verify=false quay-server.example.com/testorg/nginxIf the artifact exceeds the defined quota, and you set the Quota policy to Reject, the following error message is returned:
denied: Quota has been exceeded on namespaceIf the artifact exceeds the defined quota, and you set the Quota policy to Warning, no error message is returned, and the image is successfully pushed.
Notifications for both Reject and Warning policies are also returned on the Project Quay UI by clicking the bell icon.
Configuring quota notifications
After you set FEATURE_QUOTA_NOTIFICATIONS to true, you can configure external notification channels to receive alerts when quota thresholds are reached.
-
You have a superuser account so that you can configure the
config.yamlfile. -
You have an account with
org:adminaccess so that you can configure notifications. -
You have administrative privileges for the organization or user namespace.
-
Set
FEATURE_QUOTA_NOTIFICATIONS: truein yourconfig.yamlfile and then restart your registry.# ... FEATURE_QUOTA_NOTIFICATIONS: true # ... -
Configure quota limits for your organization or user namespace. See "Establishing quota for an organization by using the Project Quay UI".
-
In the Project Quay UI, open your organization or user settings page.
-
Click Create Notification.
-
Select one of the following notification events:
-
Quota Warning: Triggers when storage usage crosses a Warning quota limit (
quota_warningevent). -
Quota Error: Triggers when storage usage crosses a Reject quota limit (
quota_errorevent).
-
-
Select one of the following notification methods:
-
Email: Sends a notification to an organization contact email or admin email address.
-
Slack: Sends a notification to a Slack webhook.
-
Webhook: Sends a notification to a custom webhook URL.
-
Quay Notification: Creates an in-app notification in Project Quay.
-
-
Configure the method-specific settings for your chosen notification method.
-
Click the Create Notification button.
-
Verify that the notification shows in the Notifications list for your namespace.
-
If quota thresholds are exceeded, notifications get sent to configured channels. Check the Failures count to verify notification delivery status.
Resetting notification failures
You can resume delivery on a notification channel that has been automatically suspended because of repeated endpoint failures. To do this, reset the failure counter to zero after resolving the underlying connectivity issue.
-
To reset an organization notification failure count to
0, enter a command similar to the following example:$ curl -X POST \ -H "Authorization: Bearer <bearer_token>" \ https://<quay-server.example.com>/api/v1/organization/<orgname>/notifications/<uuid>A successful request returns HTTP
204with an empty body. -
To reset a user namespace notification failure count to
0, enter a command similar to the following example:$ curl -X POST \ -H "Authorization: Bearer <bearer_token>" \ https://<quay-server.example.com>/api/v1/user/namespacenotifications/<uuid>A successful request returns HTTP
204with an empty body.
Deleting quota notifications
To stop tracking storage thresholds or remove an inactive alerting endpoint in Project Quay, you can delete quota notifications from organization or user namespaces.
|
Note
|
Deleting a namespace quota also automatically deletes associated |
-
Delete an organization notification by entering a command similar to the following example:
$ curl -X DELETE \ -H "Authorization: Bearer <bearer_token>" \ https://<quay-server.example.com>/api/v1/organization/<orgname>/notifications/<uuid> -
Delete a user notification by entering a command similar to the following example:
$ curl -X DELETE \ -H "Authorization: Bearer <bearer_token>" \ https://<quay-server.example.com>/api/v1/user/namespacenotifications/<uuid>
-
Verify that the notification was deleted. List notifications with the following command:
$ curl -X GET \ -H "Authorization: Bearer <bearer_token>" \ -H "Accept: application/json" \ https://<quay-server.example.com>/api/v1/organization/<orgname>/notificationsExample output{"notifications": []}
Managing quota limits by using the API
You can use the Project Quay API to check, create, change, or delete organization quota limits when an organization does not yet have a quota configured.
Before you begin, you must have generated an OAuth access token.
Setting quota by using the API
To create, view, or update an organization storage quota in Project Quay, you can call the organization quota API endpoints with an OAuth access token.
-
To set a quota for an organization, you can use the
POST /api/v1/organization/{orgname}/quotaendpoint:$ curl -X POST "https://<quay-server.example.com>/api/v1/organization/<orgname>/quota" \ -H "Authorization: Bearer <access_token>" \ -H "Content-Type: application/json" \ -d '{ "limit_bytes": 10737418240, "limits": "10 Gi" }'Example output:"Created" -
Use the
GET /api/v1/organization/{orgname}/quotacommand to see if your organization already has an established quota:$ curl -k -X GET -H "Authorization: Bearer <token>" -H 'Content-Type: application/json' https://<quay-server.example.com>/api/v1/organization/<organization_name>/quota | jqExample output:[{"id": 1, "limit_bytes": 10737418240, "limit": "10.0 GiB", "default_config": false, "limits": [], "default_config_exists": false}] -
You can use the
PUT /api/v1/organization/{orgname}/quota/{quota_id}command to modify the existing quota limitation. For example:$ curl -X PUT "https://<quay-server.example.com>/api/v1/organization/<orgname>/quota/<quota_id>" \ -H "Authorization: Bearer <access_token>" \ -H "Content-Type: application/json" \ -d '{ "limit_bytes": <limit_in_bytes> }'Example output:{"id": 1, "limit_bytes": 21474836480, "limit": "20.0 GiB", "default_config": false, "limits": [], "default_config_exists": false}
Viewing quota usage by using the API
To view organization and repository storage consumption in Project Quay, you can query the repository list and organization API endpoints.
-
To view storage consumed by repositories in an organization, send a
GETrequest to the/api/v1/repositoryendpoint:$ curl -k -X GET -H "Authorization: Bearer <token>" -H 'Content-Type: application/json' 'https://<quay-server.example.com>/api/v1/repository?last_modified=true&namespace=<organization_name>&popularity=true&public=true' | jqExample output:
{ "repositories": [ { "namespace": "testorg", "name": "ubuntu", "description": null, "is_public": false, "kind": "image", "state": "NORMAL", "quota_report": { "quota_bytes": 27959066, "configured_quota": 104857600 }, "last_modified": 1651225630, "popularity": 0, "is_starred": false } ] } -
To view the quota report for multiple repositories in the organization, send a
GETrequest to the/api/v1/repositoryendpoint:$ curl -k -X GET -H "Authorization: Bearer <token>" -H 'Content-Type: application/json' 'https://<quay-server.example.com>/api/v1/repository?last_modified=true&namespace=<organization_name>&popularity=true&public=true'Example output:
{ "repositories": [ { "namespace": "testorg", "name": "ubuntu", "description": null, "is_public": false, "kind": "image", "state": "NORMAL", "quota_report": { "quota_bytes": 27959066, "configured_quota": 104857600 }, "last_modified": 1651225630, "popularity": 0, "is_starred": false }, { "namespace": "testorg", "name": "nginx", "description": null, "is_public": false, "kind": "image", "state": "NORMAL", "quota_report": { "quota_bytes": 59231659, "configured_quota": 104857600 }, "last_modified": 1651229507, "popularity": 0, "is_starred": false } ] } -
To view quota information in the organization details, send a
GETrequest to the/api/v1/organization/<organization_name>endpoint:$ curl -k -X GET -H "Authorization: Bearer <token>" -H 'Content-Type: application/json' 'https://<quay-server.example.com>/api/v1/organization/<organization_name>' | jqExample output:
{ "name": "testorg", ... "quotas": [ { "id": 1, "limit_bytes": 104857600, "limits": [] } ], "quota_report": { "quota_bytes": 87190725, "configured_quota": 104857600 } }
Enforce quota limits when tenants fill capacity
Set reject and warning limits, calculate total registry size, and permanently delete image tags to enforce quotas and reclaim storage.
Setting reject and warning limits by using the API
To configure reject and warning thresholds for an organization quota in Project Quay, you can post limit definitions to the organization quota limit API endpoint.
-
To set a reject limit, send a
POSTrequest to the/api/v1/organization/<organization_name>/quota/<quota_id>/limitendpoint. For example:$ curl -k -X POST -H "Authorization: Bearer <token>" -H 'Content-Type: application/json' -d '{"type":"Reject","threshold_percent":80}' https://<quay-server.example.com>/api/v1/organization/<organization_name>/quota/1/limit-
To set a warning limit, send a
POSTrequest to the same endpoint. For example:$ curl -k -X POST -H "Authorization: Bearer <token>" -H 'Content-Type: application/json' -d '{"type":"Warning","threshold_percent":50}' https://<quay-server.example.com>/api/v1/organization/<organization_name>/quota/1/limit
-
Viewing reject and warning limits by using the API
To view reject and warning thresholds configured for an organization quota in Project Quay, you can send a GET request to the organization quota API endpoint.
-
View the reject and warning limits by using the
/api/v1/organization/<organization_name>/quotaendpoint. For example:$ curl -k -X GET -H "Authorization: Bearer <token>" -H 'Content-Type: application/json' https://<quay-server.example.com>/api/v1/organization/<organization_name>/quota | jqExample output:[ { "id": 1, "limit_bytes": 104857600, "default_config": false, "limits": [ { "id": 2, "type": "Warning", "limit_percent": 50 }, { "id": 1, "type": "Reject", "limit_percent": 80 } ], "default_config_exists": false } ]
Calculating the total registry size
To calculate the total size of a Project Quay registry, you can run an on-demand calculation from the Super User Admin Panel.
|
Note
|
This feature is done on-demand. Calculating a registry total is database intensive. Use with caution. |
-
You are logged in as a Project Quay superuser.
-
On the Project Quay UI, click your username → Super User Admin Panel.
-
In the navigation pane, click Manage Organizations.
-
Click Calculate → Ok.
-
After a few minutes, depending on the size of your registry, refresh the page. The Total Registry Size is now calculated.
Permanently deleting an image tag
In Project Quay, you can permanently delete an image tag outside of the time machine window when soft deletion is not enough.
|
Important
|
Permanent tag deletion cannot be undone. Use with caution. |
Permanently deleting an image tag using the Project Quay v2 UI
To permanently delete an image tag in Project Quay by using the v2 UI, you can select the tag in a repository and choose Permanently Delete.
-
You have set
FEATURE_UI_V2totruein yourconfig.yamlfile.
-
Ensure that the
PERMANENTLY_DELETE_TAGSandRESET_CHILD_MANIFEST_EXPIRATIONparameters are set totruein yourconfig.yamlfile. For example:PERMANENTLY_DELETE_TAGS: true RESET_CHILD_MANIFEST_EXPIRATION: true -
In the navigation pane, click Repositories.
-
Click the name of the repository, for example, quayadmin/busybox.
-
Select the check box of the image tag that you want to delete, for example, test.
-
Click Actions → Permanently Delete.
ImportantThis action is permanent and cannot be undone.
Enable automatic cleanup of stale tags
Review auto-pruning prerequisites, regular expressions, and pull activity tracking, then enable automatic tag pruning for your registry.
Project Quay auto-pruning overview
Project Quay auto-pruning deletes image tags in organizations and repositories by tag count or age so that owners can stay under storage quotas. You can configure policies at the organization, repository, or registry level.
Project Quay administrators can configure multiple auto-pruning policies on organizations and repositories. Administrators can also configure auto-pruning policies at the registry level so that they apply to all organizations, including newly created organizations.
Currently, two policies are available:
-
Prune images by the number of tags. For this policy, when the actual number of tags exceeds the desired number of tags, the auto-pruner deletes the oldest tags by creation date until the desired number of tags is achieved.
-
Prune image tags by creation date. For this policy, any tags with a creation date older than the given time span, for example, 10 days, are deleted.
After tags are automatically pruned, they go into the Project Quay time machine, or the amount of time after a tag is deleted that the tag is accessible before being garbage collected. The expiration time of an image tag depends on your organization’s settings.
Users can configure multiple policies per namespace or repository through the Project Quay v2 UI. Policies can also be set by using the API endpoints through the command-line interface (CLI).
Prerequisites and limitations for auto-pruning and multiple policies
Review these prerequisites and limitations before you configure Project Quay auto-pruning policies for organizations or repositories.
The following prerequisites and limitations apply to the auto-pruning feature:
-
Auto-pruning is not available when using the Project Quay legacy UI. You must use the v2 UI to create, view, or modify auto-pruning policies.
-
Auto-pruning is only supported in databases that support the
FOR UPDATE SKIP LOCKEDSQL command. -
Auto-pruning is unavailable on mirrored repositories and read-only repositories.
-
Immutable tags are excluded from auto-prune policies and cannot be opted back in. They can still be removed by per-tag expiration, including the
quay.expires-afterlabel or annotation. -
If you are configuring multiple auto-prune policies, rules are processed without particular order, and individual result sets are processed immediately before moving on to the next rule.
-
For example, if an image is already subject to garbage collection by one rule, it cannot be excluded from pruning by another rule.
-
-
If you have both an auto-pruning policy for an organization and a repository, the auto-pruning policies set at the organization level are executed first.
Regular expressions with auto-pruning
You can use regular expressions with organization- and repository-level auto-pruning policies in Project Quay to match a subset of tags for removal.
Consider the following when using regular expressions with the auto-pruning feature:
-
Regular expressions are optional.
-
If a regular expression is not provided, the auto-pruner defaults to pruning all image tags in the organization or the repository. These are user-supplied and must be protected against ReDoS attacks.
-
Registry-wide policies do not currently support regular expressions. Only organization- and repository-level auto-pruning policies support regular expressions.
-
Regular expressions can be configured to prune images that either do, or do not, match the provided regex pattern.
Some of the following procedures provide example auto-pruning policies that use regular expressions that you can use as a reference when creating an auto-prune policy.
Enabling image pull activity tracking
To enable image pull activity tracking in Project Quay, you can set FEATURE_IMAGE_PULL_STATS in your config.yaml file and configure Redis for pull metrics.
-
In your Project Quay
config.yamlfile, setFEATURE_IMAGE_PULL_STATS: true. For example:# ... FEATURE_IMAGE_PULL_STATS: true REDIS_FLUSH_INTERVAL_SECONDS: 30 PULL_METRICS_REDIS: host: <redis_host> password: <redis_password> port: 6379 db: 1 # ...where:
FEATURE_IMAGE_PULL_STATS-
Specifies whether image pull tracking activity is enabled.
REDIS_FLUSH_INTERVAL_SECONDS-
Specifies the time, in seconds, at which the Redis flush worker clears old data. Shorter intervals keep data fresher and help prevent Redis from bloating, while longer intervals reduce flush frequency.
PULL_METRICS_REDIS-
Specifies the connection settings for the Redis database used to store image pull metrics.
-
Restart your Project Quay deployment.
-
Push an image to your registry by entering the following command. Following this step, you can use your browser to see the tagged image in your repository.
$ podman push <quay-server.example.com>/<organization>/<image>:<tag> -
Pull the image from your Project Quay registry by entering the following command:
$ podman pull <quay-server.example.com>/<organization>/<image>:<tag> -
On the Project Quay UI, navigate to Repositories, and then click the name of your repository.
-
Click Tags. The Last Pulled and Pull Count categories show you information about when the image was last pulled, and how many times it has been pulled, respectively. For example:
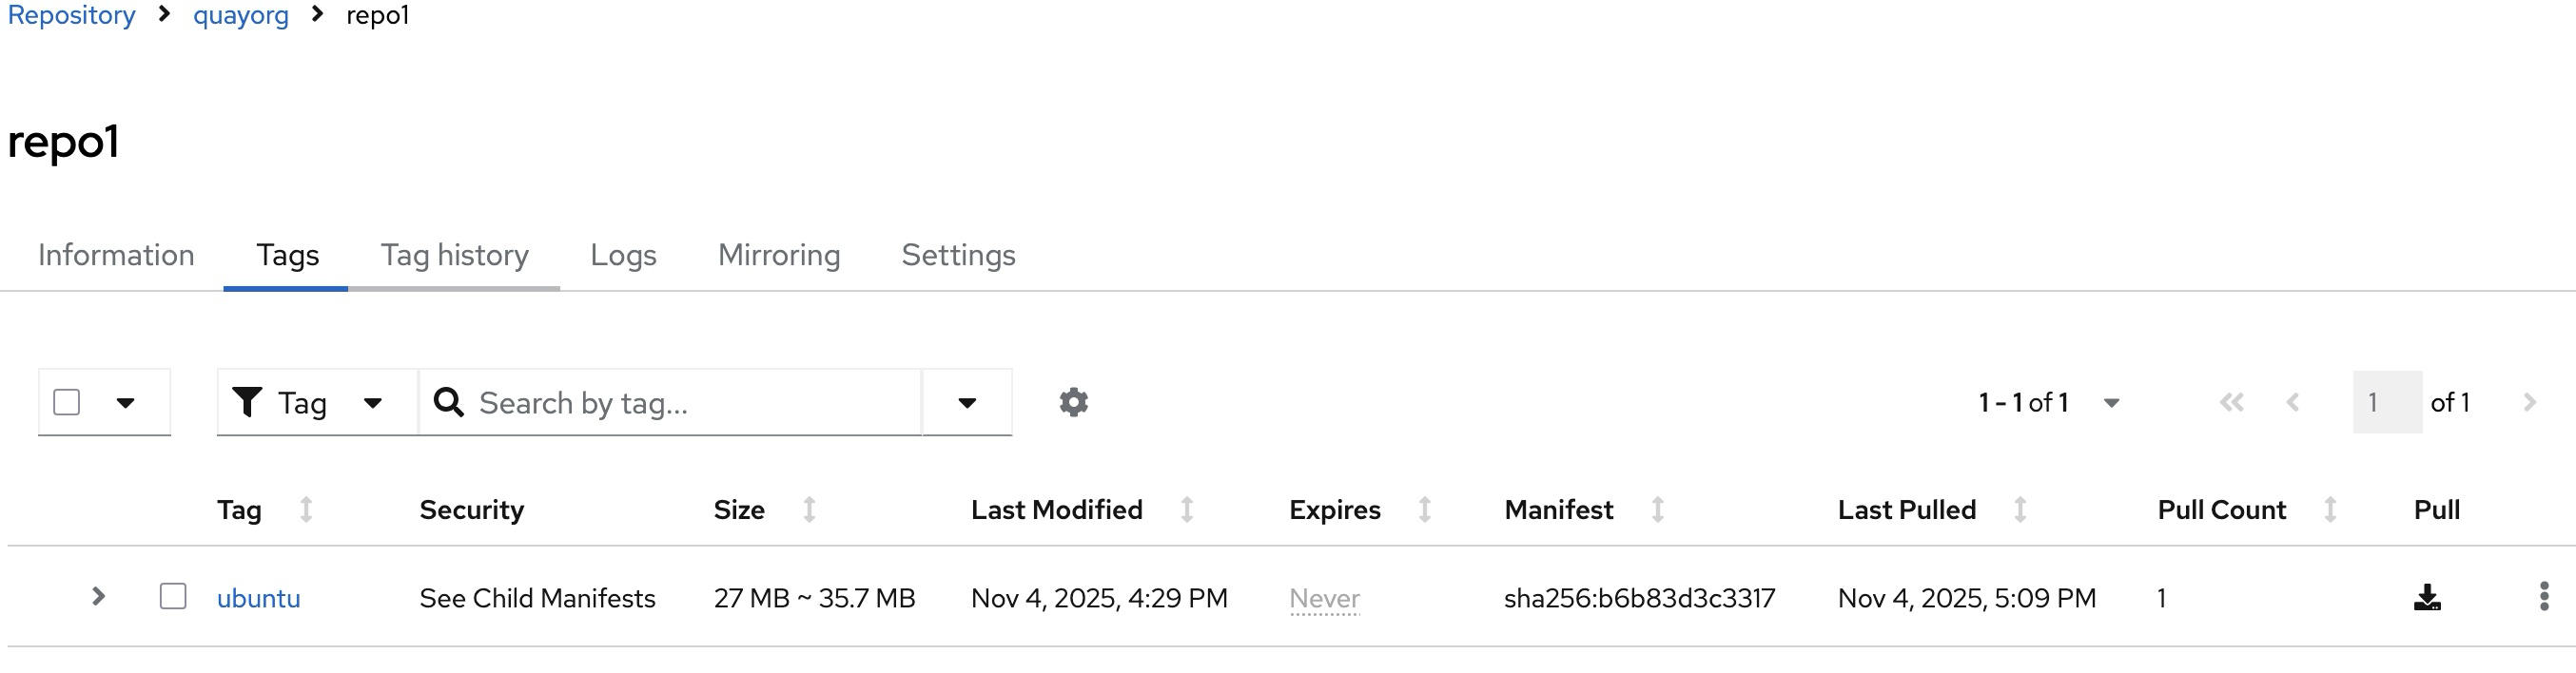
Configuring the Project Quay auto-pruning feature
To enable auto-pruning in Project Quay, you can set FEATURE_AUTO_PRUNE to true in your config.yaml file.
-
You have set
FEATURE_UI_V2totruein yourconfig.yamlfile.
-
In your Project Quay
config.yamlfile, add and set theFEATURE_AUTO_PRUNEenvironment variable totrue. For example:# ... FEATURE_AUTO_PRUNE: true # ...
Set auto-prune policies at the right scope
Create registry-wide, organization, and repository auto-pruning policies by using the Red Hat Quay UI or API.
Creating a registry-wide auto-pruning policy
To apply an auto-prune policy to all organizations in a Project Quay registry, you can configure DEFAULT_NAMESPACE_AUTOPRUNE_POLICY in your config.yaml file.
Registry-wide auto-pruning policies can apply to new and existing organizations. Project Quay administrators enable this feature by adding the DEFAULT_NAMESPACE_AUTOPRUNE_POLICY configuration field with either the number_of_tags or creation_date method. Currently, you cannot enable this feature by using the v2 UI or the API.
-
You have enabled the
FEATURE_AUTO_PRUNEfeature.
-
Update your
config.yamlfile to add theDEFAULT_NAMESPACE_AUTOPRUNE_POLICYconfiguration field:-
To set the policy method to remove the oldest tags by their creation date until the number of tags provided is left, use the
number_of_tagsmethod:# ... DEFAULT_NAMESPACE_AUTOPRUNE_POLICY: method: number_of_tags value: 2 # ...where:
value:: Specifies the number of tags to keep. In this example, two tags remain. -
To set the policy method to remove tags with a creation date older than the provided time span, for example,
5d, use thecreation_datemethod:DEFAULT_NAMESPACE_AUTOPRUNE_POLICY: method: creation_date value: 5d
-
-
Restart your Project Quay deployment.
-
Optional. If you need to tag and push images to test this feature:
-
Tag four sample images that you push to a Project Quay registry. For example:
$ podman tag docker.io/library/busybox <quay-server.example.com>/<quayadmin>/busybox:test$ podman tag docker.io/library/busybox <quay-server.example.com>/<quayadmin>/busybox:test2$ podman tag docker.io/library/busybox <quay-server.example.com>/<quayadmin>/busybox:test3$ podman tag docker.io/library/busybox <quay-server.example.com>/<quayadmin>/busybox:test4 -
Push the four sample images to the registry with auto-pruning enabled by entering the following commands:
$ podman push <quay-server.example.com>/quayadmin/busybox:test$ podman push <quay-server.example.com>/<quayadmin>/busybox:test2$ podman push <quay-server.example.com>/<quayadmin>/busybox:test3$ podman push <quay-server.example.com>/<quayadmin>/busybox:test4
-
-
Check that the registry that you pushed the images to shows four tags.
-
By default, the auto-pruner worker at the registry level runs every 24 hours. After 24 hours, the two oldest image tags are removed, leaving the
test3andtest4tags if you followed these instructions. Check your Project Quay organization to ensure that the two oldest tags were removed.
Creating an auto-prune policy for an organization by using the UI
To create an organization auto-prune policy in Project Quay, you can configure Auto-Prune Policies on the organization Settings page in the v2 UI.
-
You have enabled the
FEATURE_AUTO_PRUNEfeature. -
Your organization has image tags that have been pushed to it.
-
On the Project Quay v2 UI, click Organizations in the navigation pane.
-
Select the name of an organization to which you apply the auto-pruning feature, for example,
test_organization. -
Click Settings.
-
Click Auto-Prune Policies. For example:
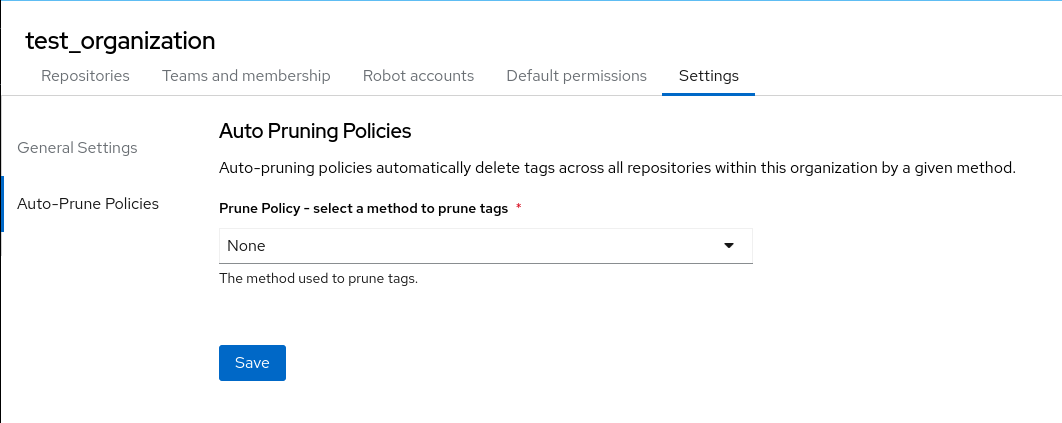
-
Click the drop-down menu and select the desired policy, for example, By number of tags.
-
Select the desired number of tags to keep. By default, this is set at 20 tags. For this example, the number of tags to keep is set at 3.
-
Optional. With the introduction of regular expressions, you are provided the following options to fine-tune your auto-pruning policy:
-
Match: When selecting this option, the auto-pruner prunes all tags that match the given regex pattern.
-
Does not match: When selecting this option, the auto-pruner prunes all tags that do not match the regex pattern.
If you do not select an option, the auto-pruner defaults to pruning all image tags.
For this example, click the Tag pattern box and select match. In the regex box, enter a pattern to match tags against. For example, to automatically prune all
testtags, enter^test.*.
-
-
Optional. You can create a second auto-prune policy by clicking Add Policy and entering the required information.
-
Click Save. A notification that your auto-prune policy has been updated appears.
With this example, the organization is configured to keep the three latest tags that are named
^test.*.
-
Navigate to the Tags page of your Organization’s repository. After a few minutes, the auto-pruner worker removes tags that no longer fit within the established criteria. In this example, it removes the
busybox:testtag, and keeps thebusybox:test2,busybox:test3, andbusybox:test4tag.After tags are automatically pruned, they go into the Project Quay time machine, or the amount of time after a tag is deleted that the tag is accessible before being garbage collected. The expiration time of an image tag depends on your organization’s settings.
Creating an auto-prune policy for an organization namespace by using the Project Quay API
To create, update, view, or delete an organization auto-prune policy in Project Quay, you can use the organization autoprunepolicy API endpoints with an OAuth access token.
-
You have created an OAuth access token.
-
You have logged into Project Quay.
-
Enter the following
POST /api/v1/organization/{orgname}/autoprunepolicy/command to create a new policy that limits the number of tags allowed in an organization:$ curl -X POST -H "Authorization: Bearer <access_token>" -H "Content-Type: application/json" -d '{"method": "number_of_tags", "value": 10}' http://<quay-server.example.com>/api/v1/organization/<organization_name>/autoprunepolicy/Alternatively, you can set tags to expire for a specified time after their creation date:
$ curl -X POST -H "Authorization: Bearer <access_token>" -H "Content-Type: application/json" -d '{ "method": "creation_date", "value": "7d"}' http://<quay-server.example.com>/api/v1/organization/<organization_name>/autoprunepolicy/Example output{"uuid": "73d64f05-d587-42d9-af6d-e726a4a80d6e"} -
Optional. You can add an additional policy to an organization and pass in the
tagPatternandtagPatternMatchesfields to prune only tags that match the given regex pattern. For example:$ curl -X POST \ -H "Authorization: Bearer <bearer_token>" \ -H "Content-Type: application/json" \ -d '{ "method": "creation_date", "value": "7d", "tagPattern": "^v*", "tagPatternMatches": true }' \ "https://<quay-server.example.com>/api/v1/organization/<organization_name>/autoprunepolicy/"where:
tagPatternMatches-
Specifies that the
truevalue prunes tags that match the given regex pattern. In this example, tags that match^v*are pruned.
-
You can update your organization’s auto-prune policy by using the
PUT /api/v1/organization/{orgname}/autoprunepolicy/{policy_uuid}command. For example:$ curl -X PUT -H "Authorization: Bearer <bearer_token>" -H "Content-Type: application/json" -d '{ "method": "creation_date", "value": "4d", "tagPattern": "^v*", "tagPatternMatches": true }' "<quay-server.example.com>/api/v1/organization/<organization_name>/autoprunepolicy/<uuid>"This command does not return output. Continue to the next step.
-
Check your auto-prune policy by entering the following command:
$ curl -X GET -H "Authorization: Bearer <access_token>" http://<quay-server.example.com>/api/v1/organization/<organization_name>/autoprunepolicy/Example output{"policies": [{"uuid": "ebf7448b-93c3-4f14-bf2f-25aa6857c7b0", "method": "creation_date", "value": "4d", "tagPattern": "^v*", "tagPatternMatches": true}, {"uuid": "da4d0ad7-3c2d-4be8-af63-9c51f9a501bc", "method": "number_of_tags", "value": 10, "tagPattern": null, "tagPatternMatches": true}, {"uuid": "17b9fd96-1537-4462-a830-7f53b43f94c2", "method": "creation_date", "value": "7d", "tagPattern": "^v*", "tagPatternMatches": true}]} -
You can delete the auto-prune policy for your organization by entering the following command. Note that deleting the policy requires the UUID.
$ curl -X DELETE -H "Authorization: Bearer <access_token>" http://<quay-server.example.com>/api/v1/organization/<organization_name>/autoprunepolicy/73d64f05-d587-42d9-af6d-e726a4a80d6e
Creating an auto-prune policy for an organization namespace by using an alternate API endpoint
To create, update, view, or delete an organization auto-prune policy in Project Quay, you can use the organization autoprunepolicy API endpoints.
-
You have created an OAuth access token.
-
You have logged into Project Quay.
-
Enter the following
POST /api/v1/organization/<organization_name>/autoprunepolicy/command to create a new policy that limits the number of tags allowed in an organization:$ curl -X POST -H "Authorization: Bearer <access_token>" -H "Content-Type: application/json" -d '{"method": "number_of_tags", "value": 10}' http://<quay-server.example.com>/api/v1/organization/<organization_name>/autoprunepolicy/Alternatively, you can set tags to expire for a specified time after their creation date:
$ curl -X POST -H "Authorization: Bearer <access_token>" -H "Content-Type: application/json" -d '{ "method": "creation_date", "value": "7d"}' http://<quay-server.example.com>/api/v1/organization/<organization_name>/autoprunepolicy/Example output:{"uuid": "73d64f05-d587-42d9-af6d-e726a4a80d6e"} -
Optional. You can add an additional policy to an organization and pass in the
tagPatternandtagPatternMatchesfields to prune only tags that match the given regex pattern. For example:$ curl -X POST \ -H "Authorization: Bearer <bearer_token>" \ -H "Content-Type: application/json" \ -d '{ "method": "creation_date", "value": "7d", "tagPattern": "^v*", "tagPatternMatches": <true> }' \ "https://<quay-server.example.com>/api/v1/organization/<organization_name>/autoprunepolicy/"where:
tagPatternMatches-
Specifies whether tags that match the regex pattern are pruned. Set to
trueto prune matching tags. In this example, tags that match^v*are pruned.Example output:{"uuid": "ebf7448b-93c3-4f14-bf2f-25aa6857c7b0"}
-
You can update your organization’s auto-prune policy by using the
PUT /api/v1/organization/<organization_name>/autoprunepolicy/<policy_uuid>command. For example:$ curl -X PUT -H "Authorization: Bearer <bearer_token>" -H "Content-Type: application/json" -d '{ "method": "creation_date", "value": "4d", "tagPattern": "^v*", "tagPatternMatches": true }' "<quay-server.example.com>/api/v1/organization/<organization_name>/autoprunepolicy/<uuid>"This command does not return output. Continue to the next step.
-
Check your auto-prune policy by entering the following command:
$ curl -X GET -H "Authorization: Bearer <access_token>" http://<quay-server.example.com>/api/v1/organization/<organization_name>/autoprunepolicy/Example output:{"policies": [{"uuid": "ebf7448b-93c3-4f14-bf2f-25aa6857c7b0", "method": "creation_date", "value": "4d", "tagPattern": "^v*", "tagPatternMatches": true}, {"uuid": "da4d0ad7-3c2d-4be8-af63-9c51f9a501bc", "method": "number_of_tags", "value": 10, "tagPattern": null, "tagPatternMatches": true}, {"uuid": "17b9fd96-1537-4462-a830-7f53b43f94c2", "method": "creation_date", "value": "7d", "tagPattern": "^v*", "tagPatternMatches": true}]} -
You can delete the auto-prune policy for your organization by entering the following command. Note that deleting the policy requires the UUID.
$ curl -X DELETE -H "Authorization: Bearer <access_token>" http://<quay-server.example.com>/api/v1/organization/<organization_name>/autoprunepolicy/73d64f05-d587-42d9-af6d-e726a4a80d6e
Creating an auto-prune policy for a namespace for the current user by using the API
To manage auto-prune policies for your own user namespace in Project Quay, you can use the /api/v1/user/autoprunepolicy/ API endpoints.
|
Note
|
The use of |
-
You have created an OAuth access token.
-
You have logged into Project Quay.
-
Enter the following
POSTcommand to create a new policy that limits the number of tags for the current user:$ curl -X POST -H "Authorization: Bearer <access_token>" -H "Content-Type: application/json" -d '{"method": "number_of_tags", "value": 10}' http://<quay-server.example.com>/api/v1/user/autoprunepolicy/Example output{"uuid": "8c03f995-ca6f-4928-b98d-d75ed8c14859"} -
Check your auto-prune policy by entering the following command:
$ curl -X GET -H "Authorization: Bearer <access_token>" http://<quay-server.example.com>/api/v1/user/autoprunepolicy/Alternatively, you can include the UUID:
$ curl -X GET -H "Authorization: Bearer <access_token>" http://<quay-server.example.com>/api/v1/user/autoprunepolicy/8c03f995-ca6f-4928-b98d-d75ed8c14859Example output{"policies": [{"uuid": "8c03f995-ca6f-4928-b98d-d75ed8c14859", "method": "number_of_tags", "value": 10}]} -
You can delete the auto-prune policy by entering the following command. Note that deleting the policy requires the UUID.
$ curl -X DELETE -H "Authorization: Bearer <access_token>" http://<quay-server.example.com>/api/v1/user/autoprunepolicy/8c03f995-ca6f-4928-b98d-d75ed8c14859Example output{"uuid": "8c03f995-ca6f-4928-b98d-d75ed8c14859"}
Creating an auto-prune policy for a repository using the Project Quay v2 UI
To create a repository auto-prune policy in Project Quay, you can configure Repository Auto-Prune Policies on the repository Settings page in the v2 UI.
-
You have enabled the
FEATURE_AUTO_PRUNEfeature. -
You have pushed image tags to your repository.
-
On the Project Quay v2 UI, click Repository in the navigation pane.
-
Select the name of a repository to which you apply the auto-pruning feature, for example,
<organization_name>/<repository_name>. -
Click Settings.
-
Click Repository Auto-Prune Policies.
-
Click the drop-down menu and select the desired policy, for example, By age of tags.
-
Set a time, for example,
5and an interval, for exampleminutesto delete tags older than the specified time frame. For this example, tags older than 5 minutes are marked for deletion. -
Optional. With the introduction of regular expressions, you are provided the following options to fine-tune your auto-pruning policy:
-
Match: When selecting this option, the auto-pruner prunes all tags that match the given regex pattern.
-
Does not match: When selecting this option, the auto-pruner prunes all tags that do not match the regex pattern.
If you do not select an option, the auto-pruner defaults to pruning all image tags.
For this example, click the Tag pattern box and select Does not match. In the regex box, enter a pattern to match tags against. For example, to automatically prune all tags that do not match the
testtag, enter^test.*.
-
-
Optional. You can create a second auto-prune policy by clicking Add Policy and entering the required information.
-
Click Save. A notification that your auto-prune policy has been updated appears.
-
Navigate to the Tags page of your Organization’s repository. With this example, Tags that are older than 5 minutes that do not match the
^test.*regex tag are automatically pruned when the pruner runs.After tags are automatically pruned, they go into the Project Quay time machine, or the amount of time after a tag is deleted that the tag is accessible before being garbage collected. The expiration time of an image tag depends on your organization’s settings.
Creating an auto-prune policy for a repository using the Project Quay API
To create, update, view, or delete a repository auto-prune policy in Project Quay, you can use the repository autoprunepolicy API endpoints.
-
You have created an OAuth access token.
-
You have logged into Project Quay.
-
Enter the following
POST /api/v1/repository/<repository>/autoprunepolicy/command to create a new policy that limits the number of tags allowed in a repository:$ curl -X POST -H "Authorization: Bearer <access_token>" -H "Content-Type: application/json" -d '{"method": "number_of_tags","value": 2}' http://<quay-server.example.com>/api/v1/repository/<organization_name>/<repository_name>/autoprunepolicy/Alternatively, you can set tags to expire for a specified time after their creation date:
$ curl -X POST -H "Authorization: Bearer <access_token>" -H "Content-Type: application/json" -d '{"method": "creation_date", "value": "7d"}' http://<quay-server.example.com>/api/v1/repository/<organization_name>/<repository_name>/autoprunepolicy/Example output{"uuid": "ce2bdcc0-ced2-4a1a-ac36-78a9c1bed8c7"} -
Optional. You can add an additional policy and pass in the
tagPatternandtagPatternMatchesfields to prune only tags that match the given regex pattern. For example:$ curl -X POST \ -H "Authorization: Bearer <access_token>" \ -H "Content-Type: application/json" \ -d '{ "method": "creation_date", "value": "7d", "tagPattern": "^test.", "tagPatternMatches": false }' \ "https://<quay-server.example.com>/api/v1/repository/<organization_name>/<repository_name>/autoprunepolicy/"Where:
tagPatternMatches-
Specifies that the
falsevalue prunes tags that do not match the given regex pattern. In this example, all tags except those that match^test.are pruned.
-
You can update your policy for the repository by using the
PUT /api/v1/repository/<repository>/autoprunepolicy/<policy_uuid>command and passing in the UUID. For example:$ curl -X PUT \ -H "Authorization: Bearer <bearer_token>" \ -H "Content-Type: application/json" \ -d '{ "method": "number_of_tags", "value": "5", "tagPattern": "^test.*", "tagPatternMatches": true }' \ "https://quay-server.example.com/api/v1/repository/<namespace>/<repo_name>/autoprunepolicy/<uuid>"This command does not return output. Continue to the next step to check your auto-prune policy.
-
Check your auto-prune policy by entering the following command:
$ curl -X GET -H "Authorization: Bearer <access_token>" http://<quay-server.example.com>/api/v1/repository/<organization_name>/<repository_name>/autoprunepolicy/Alternatively, you can include the UUID:
$ curl -X GET -H "Authorization: Bearer <access_token>" http://<quay-server.example.com>/api/v1/repository/<organization_name>/<repository_name>/autoprunepolicy/ce2bdcc0-ced2-4a1a-ac36-78a9c1bed8c7Example output{"policies": [{"uuid": "ce2bdcc0-ced2-4a1a-ac36-78a9c1bed8c7", "method": "number_of_tags", "value": 10}]} -
You can delete the auto-prune policy by entering the following command. Note that deleting the policy requires the UUID.
$ curl -X DELETE -H "Authorization: Bearer <access_token>" http://<quay-server.example.com>/api/v1/repository/<organization_name>/<repository_name>/autoprunepolicy/ce2bdcc0-ced2-4a1a-ac36-78a9c1bed8c7Example output{"uuid": "ce2bdcc0-ced2-4a1a-ac36-78a9c1bed8c7"}
Creating an auto-prune policy on a repository for a user with the API
To manage auto-prune policies on another user repository in Project Quay, you can use the repository autoprunepolicy API endpoints when you have admin privileges.
-
You have created an OAuth access token.
-
You have logged into Project Quay.
-
You have
adminprivileges on the repository that you are creating the policy for.
-
Enter the following
POST /api/v1/repository/<user_account>/<user_repository>/autoprunepolicy/command to create a new policy that limits the number of tags for the user:$ curl -X POST -H "Authorization: Bearer <access_token>" -H "Content-Type: application/json" -d '{"method": "number_of_tags","value": 2}' https://<quay-server.example.com>/api/v1/repository/<user_account>/<user_repository>/autoprunepolicy/Example output{"uuid": "7726f79c-cbc7-490e-98dd-becdc6fefce7"} -
Optional. You can add an additional policy for the current user and pass in the
tagPatternandtagPatternMatchesfields to prune only tags that match the given regex pattern. For example:$ curl -X POST \ -H "Authorization: Bearer <bearer_token>" \ -H "Content-Type: application/json" \ -d '{ "method": "creation_date", "value": "7d", "tagPattern": "^v*", "tagPatternMatches": true }' \ "http://<quay-server.example.com>/api/v1/repository/<user_account>/<user_repository>/autoprunepolicy/"Example output{"uuid": "b3797bcd-de72-4b71-9b1e-726dabc971be"} -
You can update your policy for the current user by using the
PUT /api/v1/repository/<user_account>/<user_repository>/autoprunepolicy/<policy_uuid>command. For example:$ curl -X PUT -H "Authorization: Bearer <bearer_token>" -H "Content-Type: application/json" -d '{ "method": "creation_date", "value": "4d", "tagPattern": "^test.", "tagPatternMatches": true }' "https://<quay-server.example.com>/api/v1/repository/<user_account>/<user_repository>/autoprunepolicy/<policy_uuid>"Updating a policy does not return output in the CLI.
-
Check your auto-prune policy by entering the following command:
$ curl -X GET -H "Authorization: Bearer <access_token>" http://<quay-server.example.com>/api/v1/repository/<user_account>/<user_repository>/autoprunepolicy/Alternatively, you can include the UUID:
$ curl -X GET -H "Authorization: Bearer <access_token>" http://<quay-server.example.com>/api/v1/repository/<user_account>/<user_repository>/autoprunepolicy/7726f79c-cbc7-490e-98dd-becdc6fefce7Example output{"uuid": "81ee77ec-496a-4a0a-9241-eca49437d15b", "method": "creation_date", "value": "7d", "tagPattern": "^v*", "tagPatternMatches": true} -
You can delete the auto-prune policy by entering the following command. Note that deleting the policy requires the UUID.
$ curl -X DELETE -H "Authorization: Bearer <access_token>" http://<quay-server.example.com>/api/v1/repository/<user_account>/<user_repository>/autoprunepolicy/<policy_uuid>Example output{"uuid": "7726f79c-cbc7-490e-98dd-becdc6fefce7"}
Reclaim disk space after tags are deleted
Configure and run garbage collection, review quota interactions, and monitor garbage collection metrics to reclaim storage.
Garbage collection in practice
Project Quay runs garbage collection continuously in the background. Namespace and repository workers process queues under a global lock, while tagged-image workers search for inactive or expired tags.
Currently, all garbage collection happens discreetly, and Project Quay does not provide commands to manually run garbage collection. Project Quay provides metrics that track the status of the different garbage collection workers.
For namespace and repository garbage collection, the progress is tracked based on the size of their respective queues. Namespace and repository garbage collection workers require a global lock to work. As a result, and for performance reasons, only one worker runs at a time.
|
Note
|
Project Quay shares blobs between namespaces and repositories in order to conserve disk space. For example, if the same image is pushed 10 times, only one copy of that image is stored. |
Tags can share their layers with different images already stored somewhere in Project Quay. In that case, blobs stay in storage, because deleting shared blobs would make other images unusable.
Blob expiration is independent of the time machine. If you push a tag to Project Quay and the time machine is set to 0 seconds, and then you delete a tag immediately, garbage collection deletes the tag and everything related to that tag, but does not delete the blob storage until the blob expiration time is reached.
Garbage collecting tagged images works differently than garbage collection on namespaces or repositories. Rather than having a queue of items to work with, the garbage collection workers for tagged images actively search for a repository with inactive or expired tags to clean up. Each instance of garbage collection workers grabs a repository lock, which results in one worker per repository.
-
In Project Quay, inactive or expired tags are manifests without tags because the last tag was deleted or it expired. The manifest stores information about how the image is composed and stored in the database for each individual tag. When a tag is deleted and the allotted time from Time Machine has been met, Project Quay garbage collects the blobs that are not connected to any other manifests in the registry. If a particular blob is connected to a manifest, Project Quay preserves that blob in storage and removes only its connection to the manifest that is being deleted.
-
Expired images disappear after the allotted time, but are still stored in Project Quay. The time in which an image is completely deleted, or collected, depends on the Time Machine setting of your organization. The default time for garbage collection is 14 days unless otherwise specified. Until that time, tags can be pointed to an expired or deleted image.
-
For each type of garbage collection, Project Quay provides metrics for the number of rows per table deleted by each garbage collection worker. The following image shows an example of how Project Quay monitors garbage collection with the same metrics:
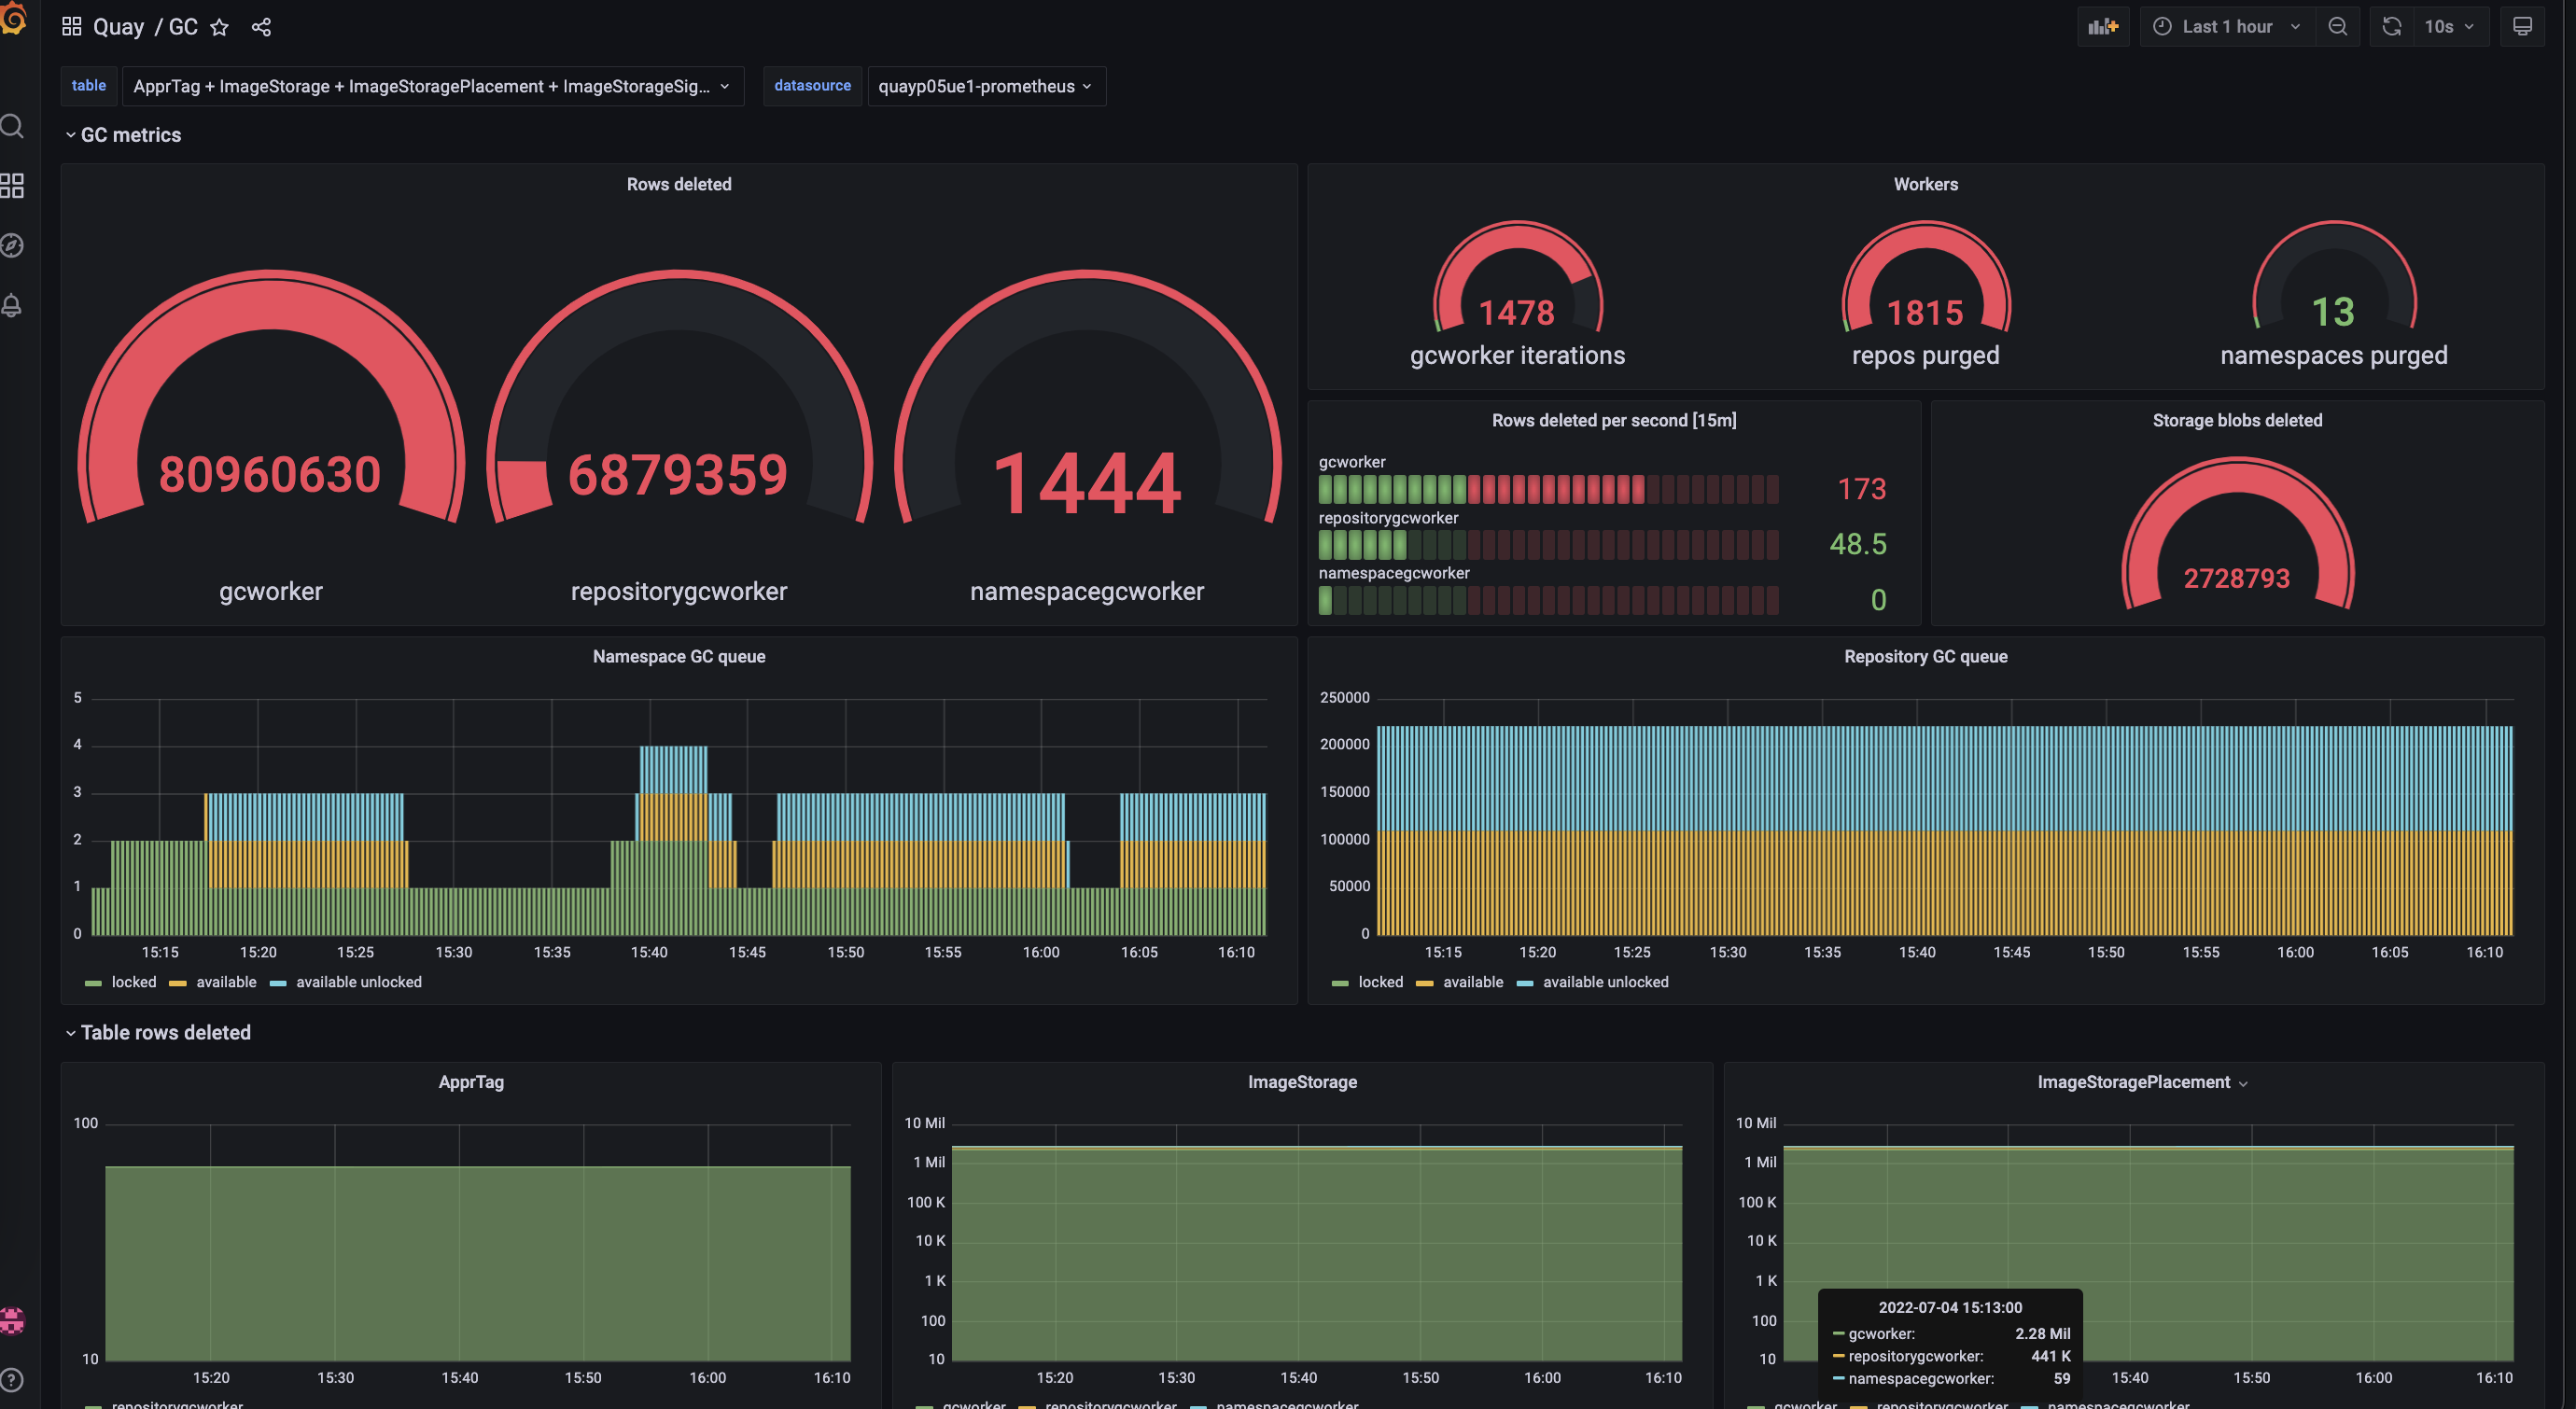
Project Quay does not have a way to track how much space is freed up by garbage collection. Currently, the best indicator of this is by checking how many blobs have been deleted in the provided metrics.
|
Note
|
The |
Garbage collection configuration fields
Use these configuration fields to enable or disable Project Quay garbage collection features and to control how often garbage collection workers run.
| Name | Description | Schema |
|---|---|---|
FEATURE_GARBAGE_COLLECTION |
Whether garbage collection is enabled for image tags. Defaults to |
Boolean |
FEATURE_NAMESPACE_GARBAGE_COLLECTION |
Whether garbage collection is enabled for namespaces. Defaults to |
Boolean |
FEATURE_REPOSITORY_GARBAGE_COLLECTION |
Whether garbage collection is enabled for repositories. Defaults to |
Boolean |
GARBAGE_COLLECTION_FREQUENCY |
The frequency, in seconds, at which the garbage collection worker runs. Affects only garbage collection workers. Defaults to 30 seconds. |
String |
PUSH_TEMP_TAG_EXPIRATION_SEC |
The number of seconds that blobs are not garbage collected after being uploaded. This feature prevents garbage collection from cleaning up blobs that are not referenced yet, but still used as part of an ongoing push. |
String |
TAG_EXPIRATION_OPTIONS |
List of valid tag expiration values. |
String |
DEFAULT_TAG_EXPIRATION |
Tag expiration time for time machine. |
String |
CLEAN_BLOB_UPLOAD_FOLDER |
Automatically cleans stale blobs left over from an S3 multipart upload. By default, blob files older than two days are cleaned up every hour. Default: |
Boolean |
Disabling garbage collection
You can disable Project Quay garbage collection features in config.yaml when you need to control when dangling images, repositories, and blobs are removed.
The garbage collection features for image tags, namespaces, and repositories are stored in the config.yaml file. These features default to true.
In rare cases, you might want to disable garbage collection, for example, to control when garbage collection is performed. You can disable garbage collection by setting the GARBAGE_COLLECTION features to false. When disabled, dangling or untagged images, repositories, namespaces, layers, and manifests are not removed. This might increase the downtime of your environment.
|
Note
|
Project Quay does not provide a command to manually run garbage collection. Instead, disable and then re-enable the garbage collection feature. |
Garbage collection and quota management
With Project Quay quota management, reported storage consumption can differ from disk usage because garbage collection reclaims space after deletion.
Project Quay introduced quota management in 3.7. With quota management, users have the ability to report storage consumption and to contain registry growth by establishing configured storage quota limits.
As of Project Quay 3.7, garbage collection reclaims memory that was allocated to images, repositories, and blobs after deletion. Because the garbage collection feature reclaims memory after deletion, disk usage can differ from the total consumption that quota management reports. No workaround is currently available for this issue.
Checking garbage collection in practice
To verify that Project Quay garbage collection is running, you can review registry logs after you delete an image tag.
-
Enter the following command to ensure that garbage collection is properly working:
$ sudo podman logs <container_id>Example output:gcworker stdout | 2022-11-14 18:46:52,458 [63] [INFO] [apscheduler.executors.default] Job "GarbageCollectionWorker._garbage_collection_repos (trigger: interval[0:00:30], next run at: 2022-11-14 18:47:22 UTC)" executed successfully -
Delete an image tag.
-
Enter the following command to ensure that the tag was deleted:
$ podman logs quay-appExample output:gunicorn-web stdout | 2022-11-14 19:23:44,574 [233] [INFO] [gunicorn.access] 192.168.0.38 - - [14/Nov/2022:19:23:44 +0000] "DELETE /api/v1/repository/quayadmin/busybox/tag/test HTTP/1.0" 204 0 "http://quay-server.example.com/repository/quayadmin/busybox?tab=tags" "Mozilla/5.0 (X11; Linux x86_64; rv:102.0) Gecko/20100101 Firefox/102.0"
Project Quay garbage collection metrics
Use these metrics to track how often Project Quay garbage collection workers run and how many namespaces, repositories, and blobs they remove.
| Metric name | Description |
|---|---|
quay_gc_iterations_total |
Number of iterations by the GCWorker |
quay_gc_namespaces_purged_total |
Number of namespaces purged by the NamespaceGCWorker |
quay_gc_repos_purged_total |
Number of repositories purged by the RepositoryGCWorker or NamespaceGCWorker |
quay_gc_storage_blobs_deleted_total |
Number of storage blobs deleted |
# TYPE quay_gc_iterations_created gauge
quay_gc_iterations_created{host="example-registry-quay-app-6df87f7b66-9tfn6",instance="",job="quay",pid="208",process_name="secscan:application"} 1.6317823190189714e+09
...
# HELP quay_gc_iterations_total number of iterations by the GCWorker
# TYPE quay_gc_iterations_total counter
quay_gc_iterations_total{host="example-registry-quay-app-6df87f7b66-9tfn6",instance="",job="quay",pid="208",process_name="secscan:application"} 0
...
# TYPE quay_gc_namespaces_purged_created gauge
quay_gc_namespaces_purged_created{host="example-registry-quay-app-6df87f7b66-9tfn6",instance="",job="quay",pid="208",process_name="secscan:application"} 1.6317823190189433e+09
...
# HELP quay_gc_namespaces_purged_total number of namespaces purged by the NamespaceGCWorker
# TYPE quay_gc_namespaces_purged_total counter
quay_gc_namespaces_purged_total{host="example-registry-quay-app-6df87f7b66-9tfn6",instance="",job="quay",pid="208",process_name="secscan:application"} 0
....
# TYPE quay_gc_repos_purged_created gauge
quay_gc_repos_purged_created{host="example-registry-quay-app-6df87f7b66-9tfn6",instance="",job="quay",pid="208",process_name="secscan:application"} 1.631782319018925e+09
...
# HELP quay_gc_repos_purged_total number of repositories purged by the RepositoryGCWorker or NamespaceGCWorker
# TYPE quay_gc_repos_purged_total counter
quay_gc_repos_purged_total{host="example-registry-quay-app-6df87f7b66-9tfn6",instance="",job="quay",pid="208",process_name="secscan:application"} 0
...
# TYPE quay_gc_storage_blobs_deleted_created gauge
quay_gc_storage_blobs_deleted_created{host="example-registry-quay-app-6df87f7b66-9tfn6",instance="",job="quay",pid="208",process_name="secscan:application"} 1.6317823190189059e+09
...
# HELP quay_gc_storage_blobs_deleted_total number of storage blobs deleted
# TYPE quay_gc_storage_blobs_deleted_total counter
quay_gc_storage_blobs_deleted_total{host="example-registry-quay-app-6df87f7b66-9tfn6",instance="",job="quay",pid="208",process_name="secscan:application"} 0
...Protect a standalone registry from data loss
Back up and restore standalone Red Hat Quay deployments, including service keys, read-only mode, and database configuration.
Backing up and restoring Project Quay on a standalone deployment
You can back up and restore a standalone Project Quay deployment, including optional read-only mode during maintenance.
Creating service keys for standalone Project Quay
To create service keys for standalone Project Quay read-only mode, you can generate a key pair inside the Quay container or in a local Python virtual environment.
Project Quay uses service keys to communicate with various components. These keys are used to sign completed requests, such as requesting to scan images, login, storage access, and so on.
-
If you are using Red Hat Enterprise Linux (RHEL) 7.x:
-
You have enabled the Red Hat Software Collections List (RHSCL).
-
You have installed Python 3.6.
-
You have downloaded the
virtualenvpackage. -
You have installed the
gitCLI.
-
-
If you are using Red Hat Enterprise Linux (RHEL) 8:
-
You have installed Python 3 on your machine.
-
You have downloaded the
python3-virtualenvpackage. -
You have installed the
gitCLI.
-
-
You have cloned the
quay/quayrepository from GitHub.
-
If your Project Quay registry is readily available, you can generate service keys inside of the
Quayregistry container.-
Enter the following command to generate a key pair inside of the
Quaycontainer:$ podman exec quay python3 tools/generatekeypair.py quay-readonly
-
-
If your Project Quay is not readily available, you must generate your service keys inside of a virtual environment.
-
Change into the directory of your Project Quay deployment and create a virtual environment inside of that directory:
$ cd <$QUAY>/quay && virtualenv -v venv -
Activate the virtual environment by entering the following command:
$ source venv/bin/activate -
Optional. Install the
pipCLI tool if you do not have it installed:$ venv/bin/pip install --upgrade pip -
In your Project Quay directory, create a
requirements-generatekeys.txtfile with the following content:$ cat << EOF > requirements-generatekeys.txt cryptography==3.4.7 pycparser==2.19 pycryptodome==3.9.4 pycryptodomex==3.9.4 pyjwkest==1.4.2 PyJWT==1.7.1 Authlib==1.0.0a2 EOF -
Enter the following command to install the Python dependencies defined in the
requirements-generatekeys.txtfile:$ venv/bin/pip install -r requirements-generatekeys.txt -
Enter the following command to create the necessary service keys:
$ PYTHONPATH=. venv/bin/python /<path_to_cloned_repo>/tools/generatekeypair.py quay-readonlyExample output:Writing public key to quay-readonly.jwk Writing key ID to quay-readonly.kid Writing private key to quay-readonly.pem -
Enter the following command to deactivate the virtual environment:
$ deactivate
-
Adding keys to the PostgreSQL database
To register read-only service keys with Project Quay, you can insert the key and approval records into the PostgreSQL database.
-
You have created the service keys.
-
Enter the following command to enter your Project Quay database environment:
$ podman exec -it postgresql-quay psql -U postgres -d quay -
Display the approval types and associated notes of the
servicekeyapprovalby entering the following command:quay=# select * from servicekeyapproval;Example output:id | approver_id | approval_type | approved_date | notes ----+-------------+----------------------------------+----------------------------+------- 1 | | ServiceKeyApprovalType.AUTOMATIC | 2024-05-07 03:47:48.181347 | 2 | | ServiceKeyApprovalType.AUTOMATIC | 2024-05-07 03:47:55.808087 | 3 | | ServiceKeyApprovalType.AUTOMATIC | 2024-05-07 03:49:04.27095 | 4 | | ServiceKeyApprovalType.AUTOMATIC | 2024-05-07 03:49:05.46235 | 5 | 1 | ServiceKeyApprovalType.SUPERUSER | 2024-05-07 04:05:10.296796 | ... -
Add the service key to your Project Quay database by entering the following query:
quay=# INSERT INTO servicekey (name, service, metadata, kid, jwk, created_date, expiration_date) VALUES ('quay-readonly', 'quay', '{}', '<contents_of_.kid_file>', '<contents_of_.jwk_file>', '<created_date_of_read-only>', '<expiration_date_of_read-only>');Example output:INSERT 0 1 -
Next, add the key approval with the following query:
quay=# INSERT INTO servicekeyapproval ('approval_type', 'approved_date', 'notes') VALUES ("ServiceKeyApprovalType.SUPERUSER", "CURRENT_DATE", <include_notes_here_on_why_this_is_being_added>);Example output:INSERT 0 1 -
Set the
approval_idfield on the created service key row to theidfield from the created service key approval. You can use the followingSELECTstatements to get the necessary IDs:UPDATE servicekey SET approval_id = (SELECT id FROM servicekeyapproval WHERE approval_type = 'ServiceKeyApprovalType.SUPERUSER') WHERE name = 'quay-readonly';UPDATE 1
Configuring read-only mode for standalone Project Quay
To put a standalone Project Quay deployment into read-only mode, you can add the service key files and REGISTRY_STATE settings to your configuration bundle and restart Quay.
After the service keys have been created and added to your PostgreSQL database, you must restart the Quay container on your standalone deployment.
-
You have created the service keys and added them to your PostgreSQL database.
-
Shut down all Project Quay instances on all virtual machines. For example:
$ podman stop <quay_container_name_on_virtual_machine_a>$ podman stop <quay_container_name_on_virtual_machine_b> -
Enter the following command to copy the contents of the
quay-readonly.kidfile and thequay-readonly.pemfile to the directory that holds your Project Quay configuration bundle:$ cp quay-readonly.kid quay-readonly.pem $Quay/config -
Enter the following command to set file permissions on all files in your configuration bundle folder:
$ setfacl -m user:1001:rw $Quay/config/* -
Modify your Project Quay
config.yamlfile and add the following information:# ... REGISTRY_STATE: readonly INSTANCE_SERVICE_KEY_KID_LOCATION: 'conf/stack/quay-readonly.kid' INSTANCE_SERVICE_KEY_LOCATION: 'conf/stack/quay-readonly.pem' # ... -
Distribute the new configuration bundle to all Project Quay instances.
-
Start Project Quay by entering the following command:
$ podman run -d --rm -p 80:8080 -p 443:8443 \ --name=quay-main-app \ -v $QUAY/config:/conf/stack:Z \ -v $QUAY/storage:/datastorage:Z \ {productrepo}/{quayimage}:{productminv} -
After starting Project Quay, a banner inside your instance informs users that Project Quay is running in read-only mode. Pushes should be rejected and a 405 error should be logged. You can test this by running the following command:
$ podman push <quay-server.example.com>/quayadmin/busybox:testExample output:613be09ab3c0: Preparing denied: System is currently read-only. Pulls will succeed but all write operations are currently suspended.With your Project Quay deployment on read-only mode, you can safely manage your registry’s operations and perform such actions as backup and restore.
-
Optional. After you finish with read-only mode, you can return to normal operations by removing the following information from your
config.yamlfile. Then, restart your Project Quay deployment:# ... REGISTRY_STATE: readonly INSTANCE_SERVICE_KEY_KID_LOCATION: 'conf/stack/quay-readonly.kid' INSTANCE_SERVICE_KEY_LOCATION: 'conf/stack/quay-readonly.pem' # ...$ podman restart <container_id>
Updating read-only expiration time
To extend the lifetime of a Project Quay read-only service key, you can update the key expiration date in the PostgreSQL database.
The Project Quay read-only key has an expiration date, and when that date passes the key is deactivated. Before the key expires, you can update its expiration time in the database.
-
Connect to your Project Quay production database by using the methods described earlier.
-
Optional. List service key IDs by running the following query:
SELECT id, name, expiration_date FROM servicekey; -
Update the key expiration by issuing the following query:
quay=# UPDATE servicekey SET expiration_date = 'new-date' WHERE id = servicekey_id;
Backing up Project Quay on standalone deployments
To back up a standalone Project Quay deployment, you can archive configuration files, dump the PostgreSQL database, and sync object storage blobs.
-
Create a temporary backup directory, for example,
quay-backup:$ mkdir /tmp/quay-backup -
The following example command denotes the local directory that the Project Quay was started in, for example,
/opt/quay-install:$ podman run --name quay-app \ -v /opt/quay-install/config:/conf/stack:Z \ -v /opt/quay-install/storage:/datastorage:Z \ {productrepo}/{quayimage}:{productminv}Change into the directory that bind-mounts to
/conf/stackinside of the container, for example,/opt/quay-install, by running the following command:$ cd /opt/quay-install -
Compress the contents of your Project Quay deployment into an archive in the
quay-backupdirectory by entering the following command:$ tar cvf /tmp/quay-backup/quay-backup.tar.gz *Example output:config.yaml config.yaml.bak extra_ca_certs/ extra_ca_certs/ca.crt ssl.cert ssl.key -
Back up the Quay container service by entering the following command:
$ podman inspect quay-app | jq -r '.[0].Config.CreateCommand | .[]' | paste -s -d ' ' - /usr/bin/podman run --name quay-app \ -v /opt/quay-install/config:/conf/stack:Z \ -v /opt/quay-install/storage:/datastorage:Z \ {productrepo}/{quayimage}:{productminv} -
Redirect the contents of your
conf/stack/config.yamlfile to your temporaryquay-config.yamlfile by entering the following command:$ podman exec -it quay cat /conf/stack/config.yaml > /tmp/quay-backup/quay-config.yaml -
Obtain the
DB_URIlocated in your temporaryquay-config.yamlby entering the following command:$ grep DB_URI /tmp/quay-backup/quay-config.yamlExample output:$ postgresql://<username>:test123@172.24.10.50/quay
-
Extract the PostgreSQL contents to your temporary backup directory in a backup
.sqlfile by entering the following command:$ pg_dump -h 172.24.10.50 -p 5432 -d quay -U <username> -W -O > /tmp/quay-backup/quay-backup.sql -
Print the contents of your
DISTRIBUTED_STORAGE_CONFIGby entering the following command:DISTRIBUTED_STORAGE_CONFIG: default: - S3Storage - s3_bucket: <bucket_name> storage_path: /registry s3_access_key: <s3_access_key> s3_secret_key: <s3_secret_key> host: <host_name> s3_region: <region> -
Export the
AWS_ACCESS_KEY_IDby using theaccess_keycredential obtained in Step 7:$ export AWS_ACCESS_KEY_ID=<access_key> -
Export the
AWS_SECRET_ACCESS_KEYby using thesecret_keyobtained in Step 7:$ export AWS_SECRET_ACCESS_KEY=<secret_key> -
Sync the
quaybucket to the/tmp/quay-backup/blob-backup/directory from thehostnameof yourDISTRIBUTED_STORAGE_CONFIG:$ aws s3 sync s3://<bucket_name> /tmp/quay-backup/blob-backup/ --source-region us-east-2Example output:download: s3://<user_name>/registry/sha256/9c/9c3181779a868e09698b567a3c42f3744584ddb1398efe2c4ba569a99b823f7a to registry/sha256/9c/9c3181779a868e09698b567a3c42f3744584ddb1398efe2c4ba569a99b823f7a download: s3://<user_name>/registry/sha256/e9/e9c5463f15f0fd62df3898b36ace8d15386a6813ffb470f332698ecb34af5b0d to registry/sha256/e9/e9c5463f15f0fd62df3898b36ace8d15386a6813ffb470f332698ecb34af5b0d
NoteDelete the
quay-config.yamlfile after syncing thequaybucket because that file contains sensitive information. Thequay-config.yamlfile remains available in thequay-backup.tar.gzarchive.
Restoring Project Quay on standalone deployments
To restore a standalone Project Quay deployment from backup, you can restore configuration files, recreate the PostgreSQL database, and sync blobs to object storage.
-
You have backed up your Project Quay deployment.
-
Create a new directory that bind-mounts to
/conf/stackinside of the Project Quay container:$ mkdir /opt/new-quay-install -
Copy the contents of your temporary backup directory created in the backup procedure to the
new-quay-installdirectory created in Step 1:$ cp /tmp/quay-backup/quay-backup.tar.gz /opt/new-quay-install/ -
Change into the
new-quay-installdirectory by entering the following command:$ cd /opt/new-quay-install/ -
Extract the contents of your Project Quay directory:
$ tar xvf /tmp/quay-backup/quay-backup.tar.gz *Example output:config.yaml config.yaml.bak extra_ca_certs/ extra_ca_certs/ca.crt ssl.cert ssl.key
-
Recall the
DB_URIfrom your backed-upconfig.yamlfile by entering the following command:$ grep DB_URI config.yamlExample output:postgresql://<username>:test123@172.24.10.50/quay -
Run the following command to enter the PostgreSQL database server:
$ sudo postgres -
Enter psql and create a new database in 172.24.10.50 to restore the quay databases, for example,
example_restore_registry_quay_database, by entering the following command:$ psql "host=172.24.10.50 port=5432 dbname=postgres user=<username> password=test123" postgres=> CREATE DATABASE example_restore_registry_quay_database;Example output:CREATE DATABASE
-
Connect to the database by running the following command:
postgres=# \c "example-restore-registry-quay-database";Example output:You are now connected to database "example-restore-registry-quay-database" as user "postgres". -
Create a
pg_trgmextension of your Quay database by running the following command:example_restore_registry_quay_database=> CREATE EXTENSION IF NOT EXISTS pg_trgm;Example output:CREATE EXTENSION -
Exit the postgres CLI by entering the following command:
\q -
Import the database backup to your new database by running the following command:
$ psql "host=172.24.10.50 port=5432 dbname=example_restore_registry_quay_database user=<username> password=test123" -W < /tmp/quay-backup/quay-backup.sqlExample output:SET SET SET SET SET
Update the value of
DB_URIin yourconfig.yamlfrompostgresql://<username>:test123@172.24.10.50/quaytopostgresql://<username>:test123@172.24.10.50/example-restore-registry-quay-databasebefore restarting the Project Quay deployment.NoteThe DB_URI format is
DB_URI postgresql://<login_user_name>:<login_user_password>@<postgresql_host>/<quay_database>. If you are moving from one PostgreSQL server to another PostgreSQL server, update the value of<login_user_name>,<login_user_password>and<postgresql_host>at the same time. -
In the
/opt/new-quay-installdirectory, print the contents of yourDISTRIBUTED_STORAGE_CONFIGbundle:$ cat config.yaml | grep DISTRIBUTED_STORAGE_CONFIG -A10Example output:DISTRIBUTED_STORAGE_CONFIG: default: DISTRIBUTED_STORAGE_CONFIG: default: - S3Storage - s3_bucket: <bucket_name> storage_path: /registry s3_access_key: <s3_access_key> s3_region: <region> s3_secret_key: <s3_secret_key> host: <host_name>NoteYour
DISTRIBUTED_STORAGE_CONFIGin/opt/new-quay-installmust be updated before restarting your Project Quay deployment. -
Export the
AWS_ACCESS_KEY_IDby using theaccess_keycredential obtained in Step 13:$ export AWS_ACCESS_KEY_ID=<access_key> -
Export the
AWS_SECRET_ACCESS_KEYby using thesecret_keyobtained in Step 13:$ export AWS_SECRET_ACCESS_KEY=<secret_key> -
Create a new s3 bucket by entering the following command:
$ aws s3 mb s3://<new_bucket_name> --region us-east-2Example output:$ make_bucket: quay -
Upload all blobs to the new s3 bucket by entering the following command:
$ aws s3 sync --no-verify-ssl \ --endpoint-url <example_endpoint_url> /tmp/quay-backup/blob-backup/. s3://quay/where:
<example_endpoint_url>-
Specifies the Project Quay registry endpoint. The endpoint must be the same before backup and after restore.
Example output:upload: ../../tmp/quay-backup/blob-backup/datastorage/registry/sha256/50/505edb46ea5d32b5cbe275eb766d960842a52ee77ac225e4dc8abb12f409a30d to s3://quay/datastorage/registry/sha256/50/505edb46ea5d32b5cbe275eb766d960842a52ee77ac225e4dc8abb12f409a30d upload: ../../tmp/quay-backup/blob-backup/datastorage/registry/sha256/27/27930dc06c2ee27ac6f543ba0e93640dd21eea458eac47355e8e5989dea087d0 to s3://quay/datastorage/registry/sha256/27/27930dc06c2ee27ac6f543ba0e93640dd21eea458eac47355e8e5989dea087d0 upload: ../../tmp/quay-backup/blob-backup/datastorage/registry/sha256/8c/8c7daf5e20eee45ffe4b36761c4bb6729fb3ee60d4f588f712989939323110ec to s3://quay/datastorage/registry/sha256/8c/8c7daf5e20eee45ffe4b36761c4bb6729fb3ee60d4f588f712989939323110ec ...
-
Before restarting your Project Quay deployment, update the storage settings in your
config.yamlfile:DISTRIBUTED_STORAGE_CONFIG: default: DISTRIBUTED_STORAGE_CONFIG: default: - S3Storage - s3_bucket: <new_bucket_name> storage_path: /registry s3_access_key: <s3_access_key> s3_secret_key: <s3_secret_key> s3_region: <region> host: <host_name>
Protect an Operator-managed registry from data loss
Back up Operator-managed Red Hat Quay on OpenShift Container Platform, including configuration, managed database, and object storage data.
Enabling read-only mode for Red Hat Quay on OpenShift Container Platform
Read-only mode keeps your Red Hat Quay on OpenShift Container Platform registry online during backup and restore by blocking write operations. You can use this mode when scaling down the deployment is unacceptable.
When backing up and restoring, you are required to scale down your Red Hat Quay on OpenShift Container Platform deployment. This results in service unavailability during the backup period which, in some cases, might be unacceptable. Enabling read-only mode ensures service availability during the backup and restore procedure for Red Hat Quay on OpenShift Container Platform deployments.
|
Note
|
In some cases, you cannot enable read-only mode for Project Quay because it requires inserting a service key and other manual configuration changes. As an alternative to read-only mode, Project Quay administrators might consider enabling the This field might be useful in some situations such as when Project Quay administrators want to calculate their registry’s quota and disable image pushing until after calculation has completed. With this method, administrators can avoid putting the whole registry in |
Prerequisites for enabling read-only mode
You must meet the following prerequisites to enable read-only mode for Red Hat Quay on OpenShift Container Platform:
-
If you are using Red Hat Enterprise Linux (RHEL) 7.x:
-
You have enabled the Red Hat Software Collections List (RHSCL).
-
You have installed Python 3.6.
-
You have downloaded the
virtualenvpackage. -
You have installed the
gitCLI.
-
-
If you are using Red Hat Enterprise Linux (RHEL) 8:
-
You have installed Python 3 on your machine.
-
You have downloaded the
python3-virtualenvpackage. -
You have installed the
gitCLI.
-
-
You have cloned the quay/quay repository.
-
You have installed the
ocCLI. -
You have access to the cluster with
cluster-adminprivileges.
Creating service keys for Red Hat Quay on OpenShift Container Platform
To enable Project Quay to communicate with components and sign completed requests such as image scanning and login, you can create service keys. Access the Quay container pod and run the keypair generation script to create the necessary keys.
-
Enter the following command to obtain a list of Project Quay pods:
$ oc get pods -n <namespace>Example outputexample-registry-clair-app-7dc7ff5844-4skw5 0/1 Error 0 70d example-registry-clair-app-7dc7ff5844-nvn4f 1/1 Running 0 31d example-registry-clair-app-7dc7ff5844-x4smw 0/1 ContainerStatusUnknown 6 (70d ago) 70d example-registry-clair-app-7dc7ff5844-xjnvt 1/1 Running 0 60d example-registry-clair-postgres-547d75759-75c49 1/1 Running 0 70d example-registry-quay-app-76c8f55467-52wjz 1/1 Running 0 70d example-registry-quay-app-76c8f55467-hwz4c 1/1 Running 0 70d example-registry-quay-app-upgrade-57ghs 0/1 Completed 1 70d example-registry-quay-database-7c55899f89-hmnm6 1/1 Running 0 70d example-registry-quay-mirror-6cccbd76d-btsnb 1/1 Running 0 70d example-registry-quay-mirror-6cccbd76d-x8g42 1/1 Running 0 70d example-registry-quay-redis-85cbdf96bf-4vk5m 1/1 Running 0 70d -
Open a remote shell session to the
Quaycontainer by entering the following command:$ oc rsh example-registry-quay-app-76c8f55467-52wjz -
Create the necessary service keys by entering the following command:
sh-4.4$ python3 tools/generatekeypair.py quay-readonlyExample outputWriting public key to quay-readonly.jwk Writing key ID to quay-readonly.kid Writing private key to quay-readonly.pem
Configuring read-only mode Red Hat Quay on OpenShift Container Platform
To enable read-only mode in Project Quay and safely manage registry operations such as backup and restore, you can modify the configuration secret and restart the Quay container.
|
Important
|
Deploying Red Hat Quay on OpenShift Container Platform in read-only mode requires you to modify the secrets stored inside of your OpenShift Container Platform cluster. It is highly recommended that you create a backup of the secret prior to making changes to it. |
-
You have created the service keys and added them to your PostgreSQL database.
-
Read the secret name of your Red Hat Quay on OpenShift Container Platform deployment by entering the following command:
$ oc get deployment -o yaml <quay_main_app_deployment_name> -
Use the
base64command to encode thequay-readonly.kidandquay-readonly.pemfiles by entering the following commands:$ base64 -w0 quay-readonly.kidExample outputZjUyNDFm...$ base64 -w0 quay-readonly.pemExample output<example_secret>... -
Obtain the current configuration bundle and secret by entering the following command. Save the output to a file called
config.yaml:$ oc get secret quay-config-secret-name -o json | jq '.data."config.yaml"' | cut -d '"' -f2 | base64 -d -w0 > config.yaml -
Edit the
config.yamlfile and add the following information to enable read-only mode:# ... REGISTRY_STATE: readonly INSTANCE_SERVICE_KEY_KID_LOCATION: 'conf/stack/quay-readonly.kid' INSTANCE_SERVICE_KEY_LOCATION: 'conf/stack/quay-readonly.pem' # ... -
Save the file and
base64encode it by entering the following command:$ base64 -w0 quay-config.yaml -
Scale down the Project Quay Operator pods to
0by entering the following command. This ensures that the Operator does not reconcile the secret after editing it.$ oc scale --replicas=0 deployment quay-operator -n openshift-operators -
Edit the secret to include the new content by entering the following command:
$ oc edit secret quay-config-secret-name -n quay-namespace# ... data: "quay-readonly.kid": "ZjUyNDFm..." "quay-readonly.pem": "<example_secret>..." "config.yaml": "QUNUSU9OX0xPR19..." # ...With your Red Hat Quay on OpenShift Container Platform deployment on read-only mode, you can safely manage your registry’s operations and perform such actions as backup and restore.
Scaling up the Project Quay from a read-only deployment
To exit read-only mode and restore normal operations in Project Quay, you can remove the read-only settings from the config.yaml file and scale the Operator deployment back up.
|
Note
|
Depending on your needs, you might wait to scale up the Project Quay deployment after backing up and restoring your regisry. |
-
Edit the
config.yamlfile and remove the following information:# ... REGISTRY_STATE: readonly INSTANCE_SERVICE_KEY_KID_LOCATION: 'conf/stack/quay-readonly.kid' INSTANCE_SERVICE_KEY_LOCATION: 'conf/stack/quay-readonly.pem' # ... -
Scale the Project Quay Operator back up by entering the following command:
$ oc scale --replicas=1 deployment quay-operator -n openshift-operators
Backing up Red Hat Quay on OpenShift Container Platform
To create backups of your Red Hat Quay on OpenShift Container Platform deployment for disaster recovery, you can back up the configuration, PostgreSQL database, and object storage. Regular backups ensure you can restore your registry to a previous state if needed.
Database backups should be performed regularly using either the supplied tools on the PostgreSQL image or your own backup infrastructure. The Project Quay Operator does not ensure that the PostgreSQL database is backed up.
|
Important
|
PostgreSQL and S3 object storage backups must be taken at the same time to avoid desynchronization. If backups are taken at different times, the database might contain references to storage blobs that are not present in the storage backup, which can cause data inconsistency and restore failures. |
|
Note
|
This procedure covers backing up your Project Quay PostgreSQL database. It does not cover backing up the Clair PostgreSQL database. Backing up the Clair PostgreSQL database is not needed because it can be recreated. If you opt to recreate it from scratch, you wait for the information to be repopulated after all images inside of your Project Quay deployment are scanned. During this downtime, security reports are unavailable. If you are considering backing up the Clair PostgreSQL database, you must consider that its size is dependent upon the number of images stored inside of Project Quay. As a result, the database can be extremely large. |
Prerequisites for backing up Red Hat Quay on OpenShift Container Platform
-
A healthy Project Quay deployment on OpenShift Container Platform using the Project Quay Operator. The status condition
Availableis set toTrue. -
The components
quay,postgresandobjectstorageare set tomanaged: true -
If the component
clairis set tomanaged: truethe componentclairpostgresis also set tomanaged: true(starting with Project Quay v3.7 or later)
|
Note
|
If your deployment contains partially unmanaged database or storage components and you are using external services for PostgreSQL or S3-compatible object storage to run your Project Quay deployment, you must refer to the service provider or vendor documentation to create a backup of the data. You can refer to the tools described in this guide as a starting point on how to backup your external PostgreSQL database or object storage. |
Project Quay configuration backup
To back up your Project Quay configuration for disaster recovery, you can export the QuayRegistry custom resource, back up the managed secret keys, and save the config bundle and config.yaml files. This procedure creates backup files that you can use to restore your registry configuration.
-
To back the
QuayRegistrycustom resource by exporting it, enter the following command:$ oc get quayregistry <quay_registry_name> -n <quay_namespace> -o yaml > quay-registry.yaml -
Edit the resulting
quayregistry.yamland remove the status section and the following metadata fields:metadata.creationTimestamp metadata.finalizers metadata.generation metadata.resourceVersion metadata.uid -
Backup the managed keys secret by entering the following command:
NoteIf you are running a version older than Project Quay 3.7.0, this step can be skipped. Some secrets are automatically generated while deploying Project Quay for the first time. These are stored in a secret called
<quay_registry_name>-quay-registry-managed-secret-keysin the namespace of theQuayRegistryresource.$ oc get secret -n <quay_namespace> <quay_registry_name>-quay-registry-managed-secret-keys -o yaml > managed_secret_keys.yaml -
Edit the resulting
managed_secret_keys.yamlfile and remove the entrymetadata.ownerReferences. Yourmanaged_secret_keys.yamlfile should look similar to the following:apiVersion: v1 kind: Secret type: Opaque metadata: name: <quay_registry_name>-quay-registry-managed-secret-keys namespace: <quay_namespace> data: CONFIG_EDITOR_PW: <redacted> DATABASE_SECRET_KEY: <redacted> DB_ROOT_PW: <redacted> DB_URI: <redacted> SECRET_KEY: <redacted> SECURITY_SCANNER_V4_PSK: <redacted>All information under the
dataproperty should remain the same. -
Redirect the current
Quayconfiguration file by entering the following command:$ oc get secret -n <quay-namespace> $(oc get quayregistry <quay_registry_name> -n <quay_namespace> -o jsonpath='{.spec.configBundleSecret}') -o yaml > config-bundle.yaml -
Backup the
/conf/stack/config.yamlfile mounted inside of theQuaypods:$ oc exec -it quay_pod_name -- cat /conf/stack/config.yaml > quay_config.yaml -
Obtain the
Quaydatabase name:$ oc -n <quay_namespace> rsh $(oc get pod -l app=quay -o NAME -n <quay_namespace> |head -n 1) cat /conf/stack/config.yaml|awk -F"/" '/^DB_URI/ {print $4}'Example outputquayregistry-quay-database
Scaling down the Project Quay deployment
To create a consistent backup of your Project Quay deployment, you must scale down the deployment by disabling auto scaling and setting replica counts to zero. This ensures the registry is in a quiescent state before backing up.
|
Important
|
This step is needed to create a consistent backup of the state of your Project Quay deployment. Do not omit this step, including in setups where PostgreSQL databases and/or S3-compatible object storage are provided by external services (unmanaged by the Project Quay Operator). |
-
Scale down the Project Quay deployment by disabling auto scaling and overriding the replica count for Project Quay, mirror workers, and Clair (if managed). For example:
apiVersion: quay.redhat.com/v1 kind: QuayRegistry metadata: name: registry namespace: ns spec: components: … - kind: horizontalpodautoscaler managed: false - kind: quay managed: true overrides: replicas: 0 - kind: clair managed: true overrides: replicas: 0 - kind: mirror managed: true overrides: replicas: 0 …where:
managed: false-
Disables auto scaling of Quay, Clair and Mirroring workers.
overrides-
Sets the replica count to 0 for components accessing the database and objectstorage.
-
Wait for the
registry-quay-app,registry-quay-mirrorandregistry-clair-apppods (depending on which components you set to be managed by the Project Quay Operator) to disappear. You can check their status by entering the following command:$ oc get pods -n <quay_namespace>Example output:$ oc get podExample outputquay-operator.v3.7.1-6f9d859bd-p5ftc 1/1 Running 0 12m quayregistry-clair-postgres-7487f5bd86-xnxpr 1/1 Running 1 (12m ago) 12m quayregistry-quay-app-upgrade-xq2v6 0/1 Completed 0 12m quayregistry-quay-database-859d5445ff-cqthr 1/1 Running 0 12m quayregistry-quay-redis-84f888776f-hhgms 1/1 Running 0 12m
Backing up the Project Quay managed database
To back up your Project Quay managed database for disaster recovery, you can identify the PostgreSQL pod and use pg_dump to create a backup SQL file. This procedure creates a backup that you can use to restore your database.
|
Note
|
If your Project Quay deployment is configured with external, or unmanged, PostgreSQL database(s), refer to your vendor’s documentation on how to create a consistent backup of these databases. |
-
Identify the Project Quay PostgreSQL pod name by entering the following command:
$ oc get pod -l quay-component=postgres -n <quay_namespace> -o jsonpath='{.items[0].metadata.name}'Example output:quayregistry-quay-database-59f54bb7-58xs7 -
Download a backup database by entering the following command:
$ oc -n <quay_namespace> exec quayregistry-quay-database-59f54bb7-58xs7 -- /usr/bin/pg_dump -C quayregistry-quay-database > backup.sql
Backing up the Project Quay managed object storage
To back up your Project Quay managed object storage for disaster recovery, you can export AWS credentials from secrets and use the aws s3 sync command to copy all blobs to a local directory. This procedure creates a backup of your registry’s object storage data.
The instructions in this section apply to the following configurations:
-
Standalone, multi-cloud object gateway configurations
-
OpenShift Data Foundations storage requires that the Project Quay Operator provisioned an S3 object storage bucket from, through the
ObjectStorageBucketClaimAPI.
-
Decode and export the
AWS_ACCESS_KEY_IDby entering the following command:$ export AWS_ACCESS_KEY_ID=$(oc get secret -l app=noobaa -n <quay-namespace> -o jsonpath='{.items[0].data.AWS_ACCESS_KEY_ID}' |base64 -d) -
Decode and export the
AWS_SECRET_ACCESS_KEY_IDby entering the following command:$ export AWS_SECRET_ACCESS_KEY=$(oc get secret -l app=noobaa -n <quay-namespace> -o jsonpath='{.items[0].data.AWS_SECRET_ACCESS_KEY}' |base64 -d) -
Create a new directory by entering the following command:
$ mkdir blobs -
Copy all blobs to the directory by entering the following command:
$ aws s3 sync --no-verify-ssl --endpoint https://$(oc get route s3 -n openshift-storage -o jsonpath='{.spec.host}') s3://$(oc get cm -l app=noobaa -n <quay-namespace> -o jsonpath='{.items[0].data.BUCKET_NAME}') ./blobs
Restore an Operator-managed registry after failure
Restore Operator-managed Red Hat Quay from backup, including scaling deployments and restoring database and object storage data.
Scaling up the Project Quay deployment
To restore your Project Quay deployment to normal operation after scaling down, you can re-enable auto scaling and remove replica overrides for quay, mirror workers, and Clair. This restores your registry to full capacity after completing backup or maintenance tasks.
-
Scale up the Project Quay deployment by re-enabling auto scaling, if desired, and removing the replica overrides for Quay, mirror workers and Clair as applicable. For example:
apiVersion: quay.redhat.com/v1 kind: QuayRegistry metadata: name: registry namespace: ns spec: components: … - kind: horizontalpodautoscaler managed: true - kind: quay managed: true - kind: clair managed: true - kind: mirror managed: true …where:
spec.components.horizontalpodautoscaler.managed-
Specifies re-enabling auto scaling of Quay, Clair and Mirroring workers again.
spec.components.quay-
Specifies that replica overrides are removed again to scale the Quay components back up.
-
Check the status of the Project Quay deployment by entering the following command:
$ oc wait quayregistry registry --for=condition=Available=true -n <quay_namespace>Example output:apiVersion: quay.redhat.com/v1 kind: QuayRegistry metadata: ... name: registry namespace: <quay-namespace> ... spec: ... status: - lastTransitionTime: '2022-06-20T05:31:17Z' lastUpdateTime: '2022-06-20T17:31:13Z' message: All components reporting as healthy reason: HealthChecksPassing status: 'True' type: Available
Restoring Project Quay
To restore your Project Quay registry when the Operator manages the database, you can restore the configuration, database, and object storage from backups. This procedure restores your registry to a previous state after performing the backup process.
Prerequisites for restoring Project Quay
The following prerequisites are required to restore Project Quay:
-
Project Quay is deployed on OpenShift Container Platform using the Project Quay Operator.
-
A backup of the Project Quay configuration managed by the Project Quay Operator has been created following the instructions in the Backing up Project Quay section.
-
The object storage bucket used by Project Quay has been backed up.
-
The components
quay,postgresandobjectstorageare set tomanaged: true -
If the component
clairis set tomanaged: true, the componentclairpostgresis also set tomanaged: true. -
There is no running Project Quay deployment managed by the Project Quay Operator in the target namespace on your OpenShift Container Platform cluster
|
Note
|
If your deployment contains partially unmanaged database or storage components and you are using external services for PostgreSQL or S3-compatible object storage to run your Project Quay deployment, you must refer to the service provider or vendor documentation to restore their data from a backup prior to restore Project Quay |
Restoring Project Quay from a backup
To restore your Project Quay registry and configuration from a backup, you can restore the configuration bundle, managed secret keys, and QuayRegistry custom resource. This procedure restores your registry to a previous state using backup files created with the backup process.
-
You have backed up your Project Quay registry and configuration.
-
You have the backup files
config-bundle.yaml,managed-secret-keys.yaml, andquay-registry.yaml.
-
Restore the backed up Project Quay configuration by entering the following command:
$ oc create -f ./config-bundle.yamlImportantIf you receive the error
Error from server (AlreadyExists): error when creating "./config-bundle.yaml": secrets "config-bundle-secret" already exists, you must delete your existing resource with$ oc delete Secret config-bundle-secret -n <quay-namespace>and recreate it with$ oc create -f ./config-bundle.yaml. -
Restore the generated keys from the backup by entering the following command:
$ oc create -f ./managed-secret-keys.yaml -
Restore the
QuayRegistrycustom resource by entering the following command:$ oc create -f ./quay-registry.yaml -
Check the status of the Project Quay deployment by entering the following command. Wait for it to be available:
$ oc wait quayregistry registry --for=condition=Available=true -n <quay-namespace>
Scaling down the Project Quay deployment before restore
To scale down your Project Quay deployment, you can disable auto scaling and set replica counts to zero. This reduces resource consumption and stops registry operations temporarily.
-
Scale down the Project Quay deployment by disabling auto scaling and overriding the replica count for Quay, mirror workers and Clair (if managed). For example:
apiVersion: quay.redhat.com/v1 kind: QuayRegistry metadata: name: registry namespace: ns spec: components: … - kind: horizontalpodautoscaler managed: false - kind: quay managed: true overrides: replicas: 0 - kind: clair managed: true overrides: replicas: 0 - kind: mirror managed: true overrides: replicas: 0 …where:
spec.components.horizontalpodautoscaler.managed-
Specifies that the component is not managed by the Project Quay Operator.
spec.components.quay.overrides-
Specifies the replica count for the component.
-
Wait for the
registry-quay-app,registry-quay-mirrorandregistry-clair-apppods (depending on which components you set to be managed by Project Quay Operator) to disappear. You can check their status by running the following command:$ oc get pods -n <quay-namespace>Example output:
registry-quay-config-editor-77847fc4f5-nsbbv 1/1 Running 0 9m1s registry-quay-database-66969cd859-n2ssm 1/1 Running 0 6d1h registry-quay-redis-7cc5f6c977-956g8 1/1 Running 0 5d21h
Restoring your Project Quay database
To restore your Project Quay database from a backup, you can identify the database pod, upload the backup file, drop the existing database, and restore from the backup using psql. This procedure restores your database to a previous state using a backup SQL file.
-
Identify your
Quaydatabase pod by entering the following command:$ oc get pod -l quay-component=postgres -n <quay_namespace> -o jsonpath='{.items[0].metadata.name}'Example output:quayregistry-quay-database-59f54bb7-58xs7
-
Upload the backup by copying it from the local environment and into the pod by entering the following command:
$ oc cp ./backup.sql -n <quay_namespace> registry-quay-database-66969cd859-n2ssm:/tmp/backup.sql
-
Open a remote terminal to the database by entering the following command:
$ oc rsh -n <quay_namespace> registry-quay-database-66969cd859-n2ssm -
Enter psql by entering the following command:
bash-4.4$ psql -
You can list the database by entering the following command:
postgres=# \lExample outputList of databases Name | Owner | Encoding | Collate | Ctype | Access privileges ----------------------------+----------------------------+----------+------------+------------+----------------------- postgres | postgres | UTF8 | en_US.utf8 | en_US.utf8 | quayregistry-quay-database | quayregistry-quay-database | UTF8 | en_US.utf8 | en_US.utf8 | -
Drop the existing database by entering the following command:
postgres=# DROP DATABASE "quayregistry-quay-database";Example outputDROP DATABASE -
Exit the postgres CLI by entering the following command:
\q -
Redirect your PostgreSQL database to your backup database by entering the following command:
sh-4.4$ psql < /tmp/backup.sql -
Exit bash by entering the following command:
sh-4.4$ exit
Restoring the Project Quay object storage data
To restore your Project Quay object storage data from a backup, you can export AWS credentials from secrets and use the aws s3 sync command to upload blobs to your storage bucket. This procedure restores your registry’s object storage data using backup files.
-
Export the
AWS_ACCESS_KEY_IDby entering the following command:$ export AWS_ACCESS_KEY_ID=$(oc get secret -l app=noobaa -n <quay-namespace> -o jsonpath='{.items[0].data.AWS_ACCESS_KEY_ID}' |base64 -d) -
Export the
AWS_SECRET_ACCESS_KEYby entering the following command:$ export AWS_SECRET_ACCESS_KEY=$(oc get secret -l app=noobaa -n <quay-namespace> -o jsonpath='{.items[0].data.AWS_SECRET_ACCESS_KEY}' |base64 -d) -
Upload all blobs to the bucket by running the following command:
$ aws s3 sync --no-verify-ssl --endpoint https://$(oc get route s3 -n openshift-storage -o jsonpath='{.spec.host}') ./blobs s3://$(oc get cm -l app=noobaa -n <quay-namespace> -o jsonpath='{.items[0].data.BUCKET_NAME}')
Scaling up the Project Quay deployment after restore
To scale up your Project Quay deployment, you can re-enable auto scaling and remove replica overrides. This restores your registry to normal operation after scaling down.
-
Scale up the Project Quay deployment by re-enabling auto scaling, if desired, and removing the replica overrides for Quay, mirror workers and Clair as applicable. For example:
apiVersion: quay.redhat.com/v1 kind: QuayRegistry metadata: name: registry namespace: ns spec: components: … - kind: horizontalpodautoscaler managed: true - kind: quay managed: true - kind: clair managed: true - kind: mirror managed: true …where:
spec.components.horizontalpodautoscaler.managed-
Specifies re-enabling auto scaling of Project Quay, Clair and mirroring workers again.
spec.components.quay-
Specifies that replica overrides are removed again to scale the Project Quay components back up.
Perform health checks on deployments
Run a quick health check on a registry by using the instance endpoint. For the full health check reference, see the Observe documentation.
Navigating to a Project Quay health check endpoint
To check the health of your Project Quay instance and view service status, you can navigate to the health/instance endpoint in your browser. The endpoint returns JSON with status_code 200 for healthy or 503 when your deployment has an issue.
-
On your web browser, navigate to
https://{quay-ip-endpoint}/health/instance. -
You are taken to the health instance page, which returns information like the following:
{"data":{"services":{"auth":true,"database":true,"disk_space":true,"registry_gunicorn":true,"service_key":true,"web_gunicorn":true}},"status_code":200}For Project Quay,
"status_code": 200means that the instance is healthy. Conversely, if you receive"status_code": 503, your deployment has an issue.
Change Operator-managed features after deployment
Modify the QuayRegistry custom resource and enable features after deployment on OpenShift Container Platform.
Modifying the QuayRegistry CR after deployment
Modifying the QuayRegistry custom resource (CR) in Project Quay after deployment lets you customize or reconfigure aspects of your Project Quay environment.
Project Quay administrators might modify the QuayRegistry CR for the following reasons:
-
To change component management: Switch components from
managed: truetomanaged: falsein order to bring your own infrastructure. For example, you might setkind: objectstorageto unmanaged to integrate external object storage platforms such as Google Cloud Storage or Nutanix. -
To apply custom configuration: Update or replace the
configBundleSecretto apply new configuration settings, for example, authentication providers, external SSL/TLS settings, feature flags. -
To enable or disable features: Toggle features like repository mirroring, Clair scanning, or horizontal pod autoscaling by modifying the
spec.componentslist. -
To scale the deployment: Adjust environment variables or replica counts for the Quay application.
-
To integrate with external services: Provide configuration for external PostgreSQL, Redis, or Clair databases, and update endpoints or credentials.
Modifying the QuayRegistry CR by using the OpenShift Container Platform web console
To modify the QuayRegistry custom resource in Project Quay, you can use the OpenShift Container Platform web console to change component management settings. You can set managed components to unmanaged and use your own infrastructure.
-
You are logged into OpenShift Container Platform as a user with admin privileges.
-
You have installed the Project Quay Operator.
-
On the OpenShift Container Platform web console, click Operators → Installed Operators.
-
Click Red Hat Quay.
-
Click Quay Registry.
-
Click the name of your Project Quay registry, for example, example-registry.
-
Click YAML.
-
Adjust the
managedfield of the desired component to eitherTrueorFalse. -
Click Save.
NoteSetting a component to unmanaged (
managed: false) might require additional configuration. For more information about setting unmanaged components in theQuayRegistryCR, see Using unmanaged components for dependencies.
Modifying the QuayRegistry CR by using the CLI
To modify the QuayRegistry custom resource in Project Quay, you can use the CLI to change component management settings. You can set managed components to unmanaged and use your own infrastructure.
-
You are logged in to your OpenShift Container Platform cluster as a user with admin privileges.
-
Edit the
QuayRegistryCR by entering the following command:$ oc edit quayregistry <registry_name> -n <namespace> -
Make the desired changes to the
QuayRegistryCR.NoteSetting a component to unmanaged (
managed: false) might require additional configuration. For more information about setting unmanaged components in theQuayRegistryCR, see Using unmanaged components for dependencies. -
Save the changes.
Enabling features after deployment on OpenShift Container Platform
To enable new features for your Project Quay registry after deployment, you can edit the configBundleSecret resource. You can use the OpenShift Container Platform web console or the CLI to make these changes.
|
Note
|
Using the OpenShift Container Platform web console to enable features is generally considered a simpler method. |
Enabling features by using the OpenShift Container Platform web console
To enable features for your Project Quay registry, you can edit the configBundleSecret resource using the OpenShift Container Platform web console. The Operator automatically reconciles changes by restarting Quay-related pods.
-
You have have administrative privileges to the cluster.
-
On the OpenShift Container Platform web console, click Operators → Installed Operators → Red Hat Quay.
-
Click Quay Registry and then the name of your registry.
-
Under Config Bundle Secret, click the name of your secret, for example,
quay-config-bundle. -
On the Secret details page, click Actions → Edit secret.
-
In the Value text box, add the new configuration fields for the features that you want to enable. For a list of all configuration fields, see Configure Project Quay.
-
Click Save. The Project Quay Operator automatically reconciles the changes by restarting all Quay-related pods. After all pods are restarted, the features are enabled.
Modifying the configuration file by using the CLI
To modify the config.yaml file for your Project Quay registry and enable new features, you can download the existing configuration from the configBundleSecret by using the CLI. After making changes, you can re-upload the configBundleSecret resource to apply the changes.
|
Note
|
Modifying the |
-
You are logged in to the OpenShift Container Platform cluster as a user with admin privileges.
-
Describe the
QuayRegistryresource by entering the following command:$ oc describe quayregistry -n <quay_namespace># ... Config Bundle Secret: example-registry-config-bundle-v123x # ... -
Obtain the secret data by entering the following command:
$ oc get secret -n <quay_namespace> <example-registry-config-bundle-v123x> -o jsonpath='{.data}'{ "config.yaml": "RkVBVFVSRV9VU0 ... MDAwMAo=" } -
Decode the data into a YAML file into the current directory by passing in the
>> config.yamlflag. For example:$ echo 'RkVBVFVSRV9VU0 ... MDAwMAo=' | base64 --decode >> config.yaml -
Make the desired changes to your
config.yamlfile, and then save the file asconfig.yaml. -
Create a new
configBundleSecretYAML by entering the following command.$ touch <new_configBundleSecret_name>.yaml -
Create the new
configBundleSecretresource, passing in theconfig.yamlfile` by entering the following command:$ oc -n <namespace> create secret generic <secret_name> \ --from-file=config.yaml=</path/to/config.yaml> \ --dry-run=client -o yaml > <new_configBundleSecret_name>.yamlwhere:
- </path/to/config.yaml>
-
Specifies your base64 decoded
config.yamlfile.
-
Create the
configBundleSecretresource by entering the following command:$ oc create -n <namespace> -f <new_configBundleSecret_name>.yamlsecret/config-bundle created -
Update the
QuayRegistryYAML file to reference the newconfigBundleSecretobject by entering the following command:$ oc patch quayregistry <registry_name> -n <namespace> --type=merge -p '{"spec":{"configBundleSecret":"<new_configBundleSecret_name>"}}'quayregistry.quay.redhat.com/example-registry patched
-
Verify that the
QuayRegistryCR has been updated with the newconfigBundleSecret:$ oc describe quayregistry -n <quay_namespace># ... Config Bundle Secret: <new_configBundleSecret_name> # ...After patching the registry, the Project Quay Operator automatically reconciles the changes.
Keep geo-replicated sites running correctly
Manage geo-replicated sites by enabling storage preferences, running with replication settings, and adding or removing sites on standalone or OpenShift Container Platform deployments.
Geo-replication
Geo-replication connects multiple geographically distributed Project Quay deployments so that clients use them as a single registry. Standalone and Operator-based deployments support geo-replication.
With geo-replication, regions share one database and one Redis instance while each region keeps local object storage. Clients push and pull through a common entrypoint, typically a global load balancer, and blob data replicates asynchronously between storage backends.
Geo-replication storage preference environment variable
Use the QUAY_DISTRIBUTED_STORAGE_PREFERENCE environment variable to set the preferred storage engine for a geo-replicated Project Quay deployment in each region.
Project Quay supports multi-region deployments where multiple instances operate across geographically distributed sites. In these scenarios, each site shares the same configuration and metadata, but storage backends might vary between regions.
To accommodate this, Project Quay allows specifying a preferred storage engine for each deployment using an environment variable. This ensures that while metadata remains synchronized across all regions, each region can use its own optimized storage backend without requiring separate configuration files.
| Variable | Type | Description |
|---|---|---|
QUAY_DISTRIBUTED_STORAGE_PREFERENCE |
String |
The preferred storage engine (by ID in DISTRIBUTED_STORAGE_CONFIG) to use. |
Enabling storage replication for standalone Project Quay
To enable storage replication for a standalone Project Quay deployment, you can configure distributed storage engines in config.yaml and backfill existing image data.
-
Update your
config.yamlfile to include the storage engines to which data is replicated. You must list all storage engines to be used:# ... FEATURE_STORAGE_REPLICATION: true # ... DISTRIBUTED_STORAGE_CONFIG: usstorage: - RHOCSStorage - access_key: <access_key> bucket_name: <example_bucket> hostname: my.noobaa.hostname is_secure: false port: "443" secret_key: <secret_key> storage_path: /datastorage/registry eustorage: - S3Storage - host: s3.amazon.com port: "443" s3_access_key: <access_key> s3_bucket: <example bucket> s3_secret_key: <secret_key> storage_path: /datastorage/registry DISTRIBUTED_STORAGE_DEFAULT_LOCATIONS: [] DISTRIBUTED_STORAGE_PREFERENCE: - usstorage - eustorage # ... -
Optional. If complete replication of all images to all storage engines is required, you can replicate images to the storage engine by manually setting the
DISTRIBUTED_STORAGE_DEFAULT_LOCATIONSfield. This ensures that all images are replicated to that storage engine. For example:# ... DISTRIBUTED_STORAGE_DEFAULT_LOCATIONS: - usstorage - eustorage # ...NoteTo enable per-namespace replication, contact Project Quay support.
-
After adding storage and enabling Replicate to storage engine by default for geo-replication, you must sync existing image data across all storage. To do this, you must execute into the container by running the following command:
$ podman exec -it <container_id> -
To sync the content after adding new storage, enter the following commands:
# scl enable python27 bash# python -m util.backfillreplicationNoteThis is a one time operation to sync content after adding new storage.
Run Project Quay with storage preferences
To run a standalone Project Quay instance with a regional storage preference, you can set the QUAY_DISTRIBUTED_STORAGE_PREFERENCE environment variable when you start the container.
-
Copy the
config.yamlfile to all machines running Project Quay. -
For each machine in each region, add a
QUAY_DISTRIBUTED_STORAGE_PREFERENCEenvironment variable with the preferred storage engine for the region in which the machine is running.For example, for a machine running in Europe with the config directory on the host available from
$QUAY/config:$ sudo podman run -d --rm -p 80:8080 -p 443:8443 \ --name=quay \ -v $QUAY/config:/conf/stack:Z \ -e QUAY_DISTRIBUTED_STORAGE_PREFERENCE=europestorage \ {productrepo}/{quayimage}:{productminv}NoteThe value of the environment variable specified must match the name of a Location ID as defined in the config panel.
-
Restart all Project Quay containers.
Removing a geo-replicated site from your standalone Project Quay deployment
To remove a geo-replicated site from a standalone Project Quay deployment, you can sync blobs between sites, update config.yaml, and run the removelocation utility.
-
You have configured Project Quay geo-replication with at least two sites, for example,
usstorageandeustorage. -
Each site has its own Organization, Repository, and image tags.
-
Sync the blobs between all of your defined sites by running the following command:
$ python -m util.backfillreplicationWarningPrior to removing storage engines from your Project Quay
config.yamlfile, you must ensure that all blobs are synced between all defined sites. Complete this step before proceeding. -
In your Project Quay
config.yamlfile for siteusstorage, remove theDISTRIBUTED_STORAGE_CONFIGentry for theeustoragesite. -
Enter the following command to obtain a list of running containers:
$ podman psExample output:CONTAINER ID IMAGE COMMAND CREATED STATUS PORTS NAMES 92c5321cde38 registry.redhat.io/rhel8/redis-5:1 run-redis 11 days ago Up 11 days ago 0.0.0.0:6379->6379/tcp redis 4e6d1ecd3811 registry.redhat.io/rhel8/postgresql-13:1-109 run-postgresql 33 seconds ago Up 34 seconds ago 0.0.0.0:5432->5432/tcp postgresql-quay d2eadac74fda registry-proxy.engineering.redhat.com/rh-osbs/quay-quay-rhel8:v3.9.0-131 registry 4 seconds ago Up 4 seconds ago 0.0.0.0:80->8080/tcp, 0.0.0.0:443->8443/tcp quay -
Enter the following command to execute a shell inside of the PostgreSQL container:
$ podman exec -it postgresql-quay -- /bin/bash -
Enter psql by running the following command:
bash-4.4$ psql -
Enter the following command to reveal a list of sites in your geo-replicated deployment:
quay=# select * from imagestoragelocation;Example output:id | name ----+------------------- 1 | usstorage 2 | eustorage -
Enter the following command to exit the postgres CLI to re-enter bash-4.4:
\q -
Enter the following command to permanently remove the
eustoragesite:ImportantThe following action cannot be undone. Use with caution.
bash-4.4$ python -m util.removelocation eustorageExample output:WARNING: This is a destructive operation. Are you sure you want to remove eustorage from your storage locations? [y/n] y Deleted placement 30 Deleted placement 31 Deleted placement 32 Deleted placement 33 Deleted location eustorage
Removing a geo-replicated site from your Red Hat Quay on OpenShift Container Platform deployment
To remove a geo-replicated site from a Red Hat Quay on OpenShift Container Platform deployment, you can sync blobs between sites, update storage configuration, and run the removelocation utility.
-
You are logged into OpenShift Container Platform.
-
You have configured Project Quay geo-replication with at least two sites, for example,
usstorageandeustorage. -
Each site has its own Organization, Repository, and image tags.
-
Sync the blobs between all of your defined sites by running the following command:
$ python -m util.backfillreplicationWarningPrior to removing storage engines from your Project Quay
config.yamlfile, you must ensure that all blobs are synced between all defined sites.When running this command, replication jobs are created which are picked up by the replication worker. If blobs need to be replicated, the script returns UUIDs of blobs that are replicated. If you run this command multiple times, and the output from the return script is empty, it does not mean that the replication process is done; it means that no more blobs remain to be queued for replication. Customers should use appropriate judgement before proceeding, as the allotted time replication takes depends on the number of blobs detected.
Alternatively, you could use a third party cloud tool, such as Microsoft Azure, to check the synchronization status.
This step must be completed before proceeding.
-
In your Project Quay
config.yamlfile for siteusstorage, remove theDISTRIBUTED_STORAGE_CONFIGentry for theeustoragesite. -
Identify your Project Quay application pods by entering the following command:
$ oc get pod -n <quay_namespace>Example output:quay390usstorage-quay-app-5779ddc886-2drh2 quay390eustorage-quay-app-66969cd859-n2ssm -
Open an interactive shell session in the
usstoragepod by entering the following command:$ oc rsh quay390usstorage-quay-app-5779ddc886-2drh2 -
Permanently remove the
eustoragesite by entering the following command:ImportantThe following action cannot be undone. Use with caution.
sh-4.4$ python -m util.removelocation eustorageExample output:WARNING: This is a destructive operation. Are you sure you want to remove eustorage from your storage locations? [y/n] y Deleted placement 30 Deleted placement 31 Deleted placement 32 Deleted placement 33 Deleted location eustorage
Manage bootstrap tokens for initial automation setup
Enable programmatic bootstrap, use the bootstrap token for automation, and renew or revoke it as needed.
Programmatic OAuth token provisioning
To create and manage organization application tokens without the UI, you can use programmatic OAuth token provisioning through the REST API. You can also enable a Tech Preview bootstrap token for zero-touch automation.
Organization OAuth applications previously required administrators to create API tokens in the Project Quay UI. With programmatic token provisioning, automation tools can manage the token life cycle.
When FEATURE_PROGRAMMATIC_BOOTSTRAP is enabled, Project Quay also creates a high-privilege bootstrap OAuth token on startup and writes it to a local file or Kubernetes Secret. Use the bootstrap token to create organizations, applications, and narrower-scoped tokens without interactive UI access.
|
Important
|
Programmatic bootstrap token provisioning is a Tech Preview feature in Project Quay {producty}. Tech Preview features are not supported with Red Hat production service-level agreements (SLAs) and might not be functionally complete. Red Hat does not recommend using Tech Preview features in production environments. These features provide early access to upcoming product features, enabling customers to test functionality and provide feedback during the development process. |
Configuring programmatic bootstrap on standalone deployments
To configure filesystem-based bootstrap OAuth token provisioning in a standalone Project Quay deployment, you can set FEATURE_PROGRAMMATIC_BOOTSTRAP and related fields in the config.yaml file, then restart the registry.
-
You have a standalone Project Quay deployment with at least one superuser account created.
-
You can modify the Project Quay
config.yamlfile.
-
Set the following fields in your Project Quay
config.yamlfile:FEATURE_PROGRAMMATIC_BOOTSTRAP: true SUPER_USERS: - quayadmin BOOTSTRAP_TOKEN_OWNER: quayadmin BOOTSTRAP_TOKEN_EXPIRATION: 7776000 BOOTSTRAP_TOKEN_SCOPE: "org:admin repo:admin repo:create repo:read repo:write super:user user:admin user:read" BOOTSTRAP_TOKEN_PATH: /datastorage/bootstrap-token.jsonSet
BOOTSTRAP_TOKEN_PATHto a directory that the Project Quay process can write. In containerized standalone deployments, use a mounted storage path such as/datastorage/bootstrap-token.json. Quote theBOOTSTRAP_TOKEN_SCOPEvalue so YAML does not misparse scopes that contain:. -
Restart Project Quay after you update the configuration.
NoteIf you enable
FEATURE_PROGRAMMATIC_BOOTSTRAPon a deployment that is already running, you must restart Project Quay so the bootstrap token is provisioned and thePOST /api/v1/bootstrap/renewendpoint is registered. A full restart is required; reloading configuration without restarting does not register the bootstrap API endpoints. -
Verify bootstrap provisioning:
-
Check Project Quay startup logs for a
Bootstrap token provisionedmessage. -
Confirm that the bootstrap token file exists at the configured storage location. For example:
$ ls -l <BOOTSTRAP_TOKEN_PATH>
-
Configuring programmatic bootstrap on OpenShift Container Platform
To enable filesystem-independent bootstrap OAuth token provisioning for Red Hat Quay on OpenShift Container Platform, you can add the programmatic bootstrap fields to the configBundleSecret resource.
|
Important
|
Programmatic bootstrap token provisioning is a Tech Preview feature in Project Quay {producty}. Tech Preview features are not supported with Red Hat production service-level agreements (SLAs) and might not be functionally complete. Red Hat does not recommend using Tech Preview features in production environments. These features provide early access to upcoming product features, enabling customers to test functionality and provide feedback during the development process. |
-
You have deployed a Project Quay registry on OpenShift Container Platform by using the Project Quay Operator.
-
You have created at least one superuser account. For more information, see Creating the first user.
-
You can edit the
configBundleSecretresource that is referenced by yourQuayRegistrycustom resource (CR).
-
Retrieve the name of the
configBundleSecretresource:$ oc get quayregistry <quayregistry_name> -n <quay_namespace> \ -o jsonpath='{.spec.configBundleSecret}{"\n"}'Example outputexample-registry-config-bundle-abc12 -
Export the current
config.yamlfile from the secret:$ oc get secret -n <quay_namespace> <config_bundle_secret_name> \ -o jsonpath='{.data.config\.yaml}' | base64 -d > config.yaml -
Edit
config.yamland add the programmatic bootstrap fields. For example:FEATURE_PROGRAMMATIC_BOOTSTRAP: true SUPER_USERS: - quayadmin BOOTSTRAP_TOKEN_OWNER: quayadmin BOOTSTRAP_TOKEN_EXPIRATION: 7776000 BOOTSTRAP_TOKEN_SCOPE: "org:admin repo:admin repo:create repo:read repo:write super:user user:admin user:read"Important-
BOOTSTRAP_TOKEN_OWNERmust be an existing superuser that is also listed underSUPER_USERS. -
Quote the
BOOTSTRAP_TOKEN_SCOPEvalue. Unquoted scope strings that contain:can be misparsed by YAML. -
Do not set
BOOTSTRAP_TOKEN_PATHfor Operator deployments. The Operator stores the token in a Kubernetes Secret. -
You do not need to set
PROGRAMMATIC_TOKEN_K8S_SECRET,PROGRAMMATIC_TOKEN_K8S_KEY, orPROGRAMMATIC_TOKEN_K8S_NAMESPACE. The Operator injects those values and creates the Secret named<quayregistry_name>-bootstrap-token.
-
-
Create a new config bundle secret that includes the updated
config.yamlfile:$ oc create secret generic <new_config_bundle_secret_name> \ --from-file=config.yaml=./config.yaml \ -n <quay_namespace> -
Update the
QuayRegistryCR to reference the new secret:$ oc patch quayregistry <quayregistry_name> -n <quay_namespace> \ --type=merge -p '{"spec":{"configBundleSecret":"<new_config_bundle_secret_name>"}}'The Operator reconciles the change, creates the
<quayregistry_name>-bootstrap-tokenSecret with accompanying Role and RoleBinding resources, mounts the Secret into the Quay application pods, and restarts Quay-related pods. -
Wait for the Quay application pods to become ready:
$ oc get pods -n <quay_namespace> -l quay-component=quay-app -
Verify that the Operator created the bootstrap token Secret:
$ oc get secret <quayregistry_name>-bootstrap-token -n <quay_namespace> -
Read the bootstrap token from the Secret:
$ BOOTSTRAP_TOKEN=$(oc get secret <quayregistry_name>-bootstrap-token -n <quay_namespace> \ -o jsonpath='{.data.token\.json}' | base64 -d | jq -r '.access_token')NoteSecret propagation can take up to 60 seconds after the Quay pods start. If
token.jsonis missing, wait and retry the command. -
Optional. Confirm that Quay startup logs include a bootstrap provisioning message:
$ oc logs -n <quay_namespace> deploy/<quayregistry_name>-quay-app -c quay-app \ | grep -i 'bootstrap token'
Reading the bootstrap token
To obtain the bootstrap OAuth token after Project Quay starts with programmatic bootstrap enabled, you can read the token from the configured local file or Kubernetes Secret.
-
For standalone or virtual machine deployments, read the token from the
BOOTSTRAP_TOKEN_PATHfile:$ BOOTSTRAP_TOKEN=$(jq -r '.access_token' /var/lib/quay/quay-machine-token.json)NoteProject Quay writes the bootstrap token file with
0600permissions owned by the Project Quay process user. If you cannot read the file from the host, read it from inside the Project Quay container instead. For example:$ BOOTSTRAP_TOKEN=$(docker exec quay cat /datastorage/bootstrap-token.json | jq -r '.access_token') -
For Red Hat Quay on OpenShift Container Platform Operator deployments, read the token from the Operator-managed Secret. The Secret name is
<quayregistry_name>-bootstrap-token:$ BOOTSTRAP_TOKEN=$(oc get secret <quayregistry_name>-bootstrap-token -n <quay_namespace> \ -o jsonpath='{.data.token\.json}' | base64 -d | jq -r '.access_token')Example$ BOOTSTRAP_TOKEN=$(oc get secret example-registry-bootstrap-token -n quay-operator \ -o jsonpath='{.data.token\.json}' | base64 -d | jq -r '.access_token')NoteSecret propagation can take up to 60 seconds after renewal or initial provisioning. If the
token.jsonkey is missing, wait for the Quay application pods to finish starting and retry the command.
Using the bootstrap token for zero-touch deployment
To provision Project Quay resources without using the UI, you can use the bootstrap OAuth token as Bearer authentication for organization, application, and token API calls.
-
Export the bootstrap token. For example:
$ export BOOTSTRAP_TOKEN=<bootstrap_token_value> -
Create an organization:
$ curl -H "Authorization: Bearer $BOOTSTRAP_TOKEN" -X POST \ -H "Content-Type: application/json" \ -d '{"name": "myorg", "email": "admin@example.com"}' \ https://<quay-server.example.com>/api/v1/organization/ -
Create an OAuth application in the organization:
$ curl -H "Authorization: Bearer $BOOTSTRAP_TOKEN" -X POST \ -H "Content-Type: application/json" \ -d '{"name": "ci-automation", "description": "CI/CD token source"}' \ https://<quay-server.example.com>/api/v1/organization/myorg/applications -
Create a scoped OAuth API token for the application:
$ curl -H "Authorization: Bearer $BOOTSTRAP_TOKEN" -X POST \ -H "Content-Type: application/json" \ -d '{"name": "ci-job-token", "scope": "repo:read repo:write", "expiration": 2592000}' \ https://<quay-server.example.com>/api/v1/organization/myorg/applications/<client_id>/tokens -
Store the
tokenvalue from the response for your automation workflow. The token secret is returned only in the create response.
Managing OAuth application tokens by using the API
To manage organization application OAuth tokens without using the UI, you can list, create, and revoke tokens through the Project Quay REST API when your token has org:admin scope.
The bootstrap token includes org:admin by default. Scoped tokens that you create for automation must also include org:admin to list, create, or revoke application tokens through these endpoints.
-
List existing tokens for an application:
$ curl -H "Authorization: Bearer <access_token>" -X GET \ https://<quay-server.example.com>/api/v1/organization/myorg/applications/<client_id>/tokens -
Create a token with a custom expiration and scope:
$ curl -H "Authorization: Bearer <access_token>" -X POST \ -H "Content-Type: application/json" \ -d '{"name": "short-lived-token", "scope": "repo:read", "expiration": 3600}' \ https://<quay-server.example.com>/api/v1/organization/myorg/applications/<client_id>/tokens -
Revoke a token by UUID:
$ curl -H "Authorization: Bearer <access_token>" -X DELETE \ https://<quay-server.example.com>/api/v1/organization/myorg/applications/<client_id>/tokens/<token_uuid>
Renewing the bootstrap token
To keep automation running when the bootstrap OAuth token approaches expiry, you can renew it through the Project Quay REST API before the previous token is invalidated.
-
Renew the token by using the bootstrap token as Bearer authentication:
$ curl -H "Authorization: Bearer $BOOTSTRAP_TOKEN" -X POST \ https://<quay-server.example.com>/api/v1/bootstrap/renewThe following example shows a successful response:
{"status": "rotated"} -
Read the new token value from
BOOTSTRAP_TOKEN_PATHor the configured Kubernetes Secret. The previous bootstrap token is invalidated immediately.NoteIf the bootstrap token is already expired, renewal is accepted only from localhost. On Kubernetes and OpenShift Container Platform, use port forwarding to send the renewal request through the local ingress path.
Revoking the bootstrap token
You can revoke the Project Quay bootstrap OAuth token by disabling FEATURE_PROGRAMMATIC_BOOTSTRAP and restarting the registry. Project Quay does not provide a separate API endpoint for instant revocation.
To revoke the bootstrap token, set FEATURE_PROGRAMMATIC_BOOTSTRAP: false and restart Project Quay. Project Quay deletes bootstrap-managed applications and tokens during startup.
Security considerations for programmatic bootstrap
Apply these practices when you use the Project Quay bootstrap OAuth token so that automation remains limited to provisioning and uses narrower-scoped tokens for day-to-day work.
-
Use the bootstrap token only for initial provisioning and token minting. Create narrower-scoped OAuth tokens for CI/CD and day-2 automation.
-
Set
BOOTSTRAP_TOKEN_EXPIRATIONaccording to your security policy. The default is 60 minutes. -
On standalone deployments, the bootstrap token file is written with
0600permissions. Restrict access to the directory that contains the token file. -
On Kubernetes and OpenShift Container Platform, store the bootstrap token in a dedicated Secret with scoped RBAC.
-
Schedule bootstrap token renewal by using
POST /api/v1/bootstrap/renewbefore expiry. -
Monitor Project Quay action logs for bootstrap and OAuth token life cycle events.
Troubleshooting programmatic bootstrap
Use these checks when programmatic bootstrap token provisioning fails in Project Quay, including missing token files, authorization errors, and renewal failures.
If the token file or Secret is empty after startup:
-
Verify that
FEATURE_PROGRAMMATIC_BOOTSTRAPistrue. -
Verify that
BOOTSTRAP_TOKEN_OWNERis set and listed inSUPER_USERS. -
Verify that the bootstrap token owner exists in the Project Quay database.
-
Check Project Quay startup logs for bootstrap provisioning errors.
-
If the bootstrap token file or Secret is still missing after the first restart, restart Project Quay again or run
python3 /quay-registry/boot.pyinside the Project Quay container after confirmingBOOTSTRAP_TOKEN_OWNERexists in the database. -
On Red Hat Quay on OpenShift Container Platform, confirm that the Operator created the
<quayregistry_name>-bootstrap-tokenSecret, Role, and RoleBinding, and that Quay application pods have rolled out with the updatedconfigBundleSecret. An empty Secret before the pods restart is expected; the Quay process writestoken.jsonafter startup. -
Confirm that
BOOTSTRAP_TOKEN_SCOPEis a quoted YAML string. Unquoted scope values that contain:can be misparsed.
If you receive 403 Forbidden when using the bootstrap token:
-
Confirm that the token has not expired.
-
Confirm that bootstrap provisioning was not disabled and the token revoked.
-
Confirm that the target API endpoint is authorized by the bootstrap token scope.
If renewal returns 401 Unauthorized:
-
If the token is expired, send the renewal request from localhost or through a port-forwarded local ingress path.
-
Confirm that you are passing the bootstrap token value, not a different OAuth token.
If rate limiting returns 429 Too Many Requests:
-
Bootstrap and token management endpoints are subject to existing rate limiting when
FEATURE_RATE_LIMITSis enabled. Adjust request frequency or review your rate limit configuration.
Administer the registry as a superuser
Use superuser API endpoints to manage organizations, quotas, build information, service keys, and recovery actions across the deployment.
Managing organizations as a superuser with the Project Quay API
To list, update, or delete organizations in Project Quay, you can use the superuser organization API endpoints.
-
You have created an OAuth access token.
-
You are logged into your Project Quay deployment as a superuser.
-
Use the
GET /api/v1/superuser/organizationsendpoint to list all organizations:$ curl -L -X GET \ -H "Authorization: Bearer <bearer_token>" \ "https://<quay_server>/api/v1/superuser/organizations?name=<organization_name>"Example output{"organizations": [{"name": "fed_test", "email": "fe11fc59-bd09-459a-a21c-b57692d151c9", "avatar": {"name": "fed_test", "hash": "e2ce1fb42ec2e0602362beb64b5ebd1e6ad291b710a0355f9296c16157bef3cb", "color": "#ff7f0e", "kind": "org"}, "quotas": [{"id": 3, "limit_bytes": 10737418240, "limits": []}], "quota_report": {"quota_bytes": 0, "configured_quota": 10737418240, "running_backfill": "complete", "backfill_status": "complete"}}, {"name": "test", "email": "new-contact@test-org.com", "avatar": {"name": "test", "hash": "a15d479002b20f211568fd4419e76686d2b88a4980a5b4c4bc10420776c5f6fe", "color": "#aec7e8", "kind": "org"}, "quotas": [{"id": 2, "limit_bytes": 10737418240, "limits": [{"id": 1, "type": "Reject", "limit_percent": 90}]}], "quota_report": {"quota_bytes": 0, "configured_quota": 10737418240, "running_backfill": "complete", "backfill_status": "complete"}}]} -
Use the
PUT /api/v1/superuser/organizations/{name}endpoint to change or update information for an organization:$ curl -X PUT \ -H "Authorization: Bearer <bearer_token>" \ -H "Content-Type: application/json" \ -d '{ "email": "<contact_email>", "invoice_email": <boolean_value>, "invoice_email_address": "<invoice_email_address>", "tag_expiration_s": <expiration_seconds> }' \ "https://<quay_server>/api/v1/superuser/organizations/<organization_name>"Example output{"name": "test", "email": "new-contact@test-org.com", "avatar": {"name": "test", "hash": "a15d479002b20f211568fd4419e76686d2b88a4980a5b4c4bc10420776c5f6fe", "color": "#aec7e8", "kind": "org"}, "quotas": [{"id": 2, "limit_bytes": 10737418240, "limits": [{"id": 1, "type": "Reject", "limit_percent": 90}]}], "quota_report": {"quota_bytes": 0, "configured_quota": 10737418240, "running_backfill": "complete", "backfill_status": "complete"}} -
Use the
DELETE /api/v1/superuser/organizations/{name}endpoint to delete an organization:$ curl -X DELETE \ -H "Authorization: Bearer <bearer_token>" \ "https://<quay_server>/api/v1/superuser/organizations/<organization_name>"This command does not return output in the CLI.
Listing logs as a superuser with the Project Quay API
To list usage logs or obtain registry size information in Project Quay, you can use the superuser logs and registry size API endpoints.
-
You have created an OAuth access token.
-
You are logged into your Project Quay deployment as a superuser.
-
Use the
GET /api/v1/superuser/logsendpoint to list the usage logs for the current system:$ curl -X GET \ -H "Authorization: Bearer <bearer_token>" \ "https://<quay_server>/api/v1/superuser/logs?starttime=<start_time>&endtime=<end_time>&page=<page_number>&next_page=<next_page_token>"Example output{"start_time": "Mon, 17 Feb 2025 19:29:14 -0000", "end_time": "Wed, 19 Feb 2025 19:29:14 -0000", "logs": [{"kind": "login_success", "metadata": {"type": "quayauth", "useragent": "Mozilla/5.0 (X11; Linux x86_64; rv:134.0) Gecko/20100101 Firefox/134.0"}, "ip": "192.168.1.131", "datetime": "Tue, 18 Feb 2025 19:28:15 -0000", "namespace": {"kind": "user", "name": "quayadmin", "avatar": {"name": "quayadmin", "hash": "6d640d802fe23b93779b987c187a4b7a4d8fbcbd4febe7009bdff58d84498fba", "color": "#f7b6d2", "kind": "user"}}}], "next_page": "gAAAAABntN-KbPJDI0PpcHmWjRCmQTLiCprE_KXiOSidbGZ7Ireu8pVTgGUIstijNhmiLzlAv_S3HOsCrKWnuBmoQYZ3F53Uxg=="} -
Use the
GET /api/v1/superuser/registrysize/endpoint to obtain information about the size of the registry:$ curl -X GET \ -H "Authorization: Bearer <bearer_token>" \ "https://<quay_server>/api/v1/superuser/registrysize/"Example output{"size_bytes": 0, "last_ran": null, "running": false, "queued": false} -
Use the
POST /api/v1/superuser/registrysize/endpoint to define registry size information:$ curl -X POST "https://quay-server.example.com/api/v1/superuser/registrysize/" \ -H "Authorization: Bearer <ACCESS_TOKEN>" \ -H "Content-Type: application/json" \ -d '{ "namespace": "<namespace>", "last_ran": 1700000000, "queued": true, "running": false }'This command does not return output in the CLI.
Managing organization quota with the Project Quay API
To manage storage quota for an organization in Project Quay, you can use the organization quota API endpoints. You can check, create, change, or delete quota limitations.
When an organization is first created, it does not have an established quota.
-
You have generated an OAuth access token.
-
To set a quota for an organization, use the
POST /api/v1/organization/{orgname}/quotaendpoint:$ curl -X POST "https://<quay-server.example.com>/api/v1/organization/<orgname>/quota" \ -H "Authorization: Bearer <access_token>" \ -H "Content-Type: application/json" \ -d '{ "limit_bytes": 10737418240, "limits": "10 Gi" }'Example output"Created" -
Use the
GET /api/v1/organization/{orgname}/quotacommand to return information about the policy, including the ID number, which is required for other organization quota endpoints. For example:$ curl -k -X GET -H "Authorization: Bearer <token>" -H 'Content-Type: application/json' https://example-registry-quay-quay-enterprise.apps.docs.gcp.quaydev.org/api/v1/organization/testorg/quota | jqExample output[{"id": 1, "limit_bytes": 10737418240, "limit": "10.0 GiB", "default_config": false, "limits": [], "default_config_exists": false}]After you obtain the ID number, you can use the
GET /api/v1/organization/{orgname}/quota/{quota_id}command to list the quota policy. For example:$ curl -X GET "https://<quay-server.example.com>/api/v1/organization/<orgname>/quota/<quota_id>" \ -H "Authorization: Bearer <access_token>"Example output{"id": 1, "limit_bytes": 10737418240, "limit": "10.0 GiB", "default_config": false, "limits": [], "default_config_exists": false} -
Use the
PUT /api/v1/organization/{orgname}/quota/{quota_id}command to modify the existing quota limitation. Note that this requires the policy ID. For example:$ curl -X PUT "https://<quay-server.example.com>/api/v1/organization/<orgname>/quota/<quota_id>" \ -H "Authorization: Bearer <access_token>" \ -H "Content-Type: application/json" \ -d '{ "limit_bytes": <limit_in_bytes> }'Example output{"id": 1, "limit_bytes": 21474836480, "limit": "20.0 GiB", "default_config": false, "limits": [], "default_config_exists": false} -
Delete an organization’s quota with the
DELETE /api/v1/organization/{orgname}/quota/{quota_id}command. For example:$ curl -X DELETE "https://<quay-server.example.com>/api/v1/organization/<orgname>/quota/<quota_id>" \ -H "Authorization: Bearer <access_token>"This command does not return output.
Managing organization quota as a superuser with the Project Quay API
To create, view, update, or delete organization quota policies in Project Quay, you can use the superuser organization quota API endpoints.
-
You have created an OAuth access token.
-
You are logged into your Project Quay deployment as a superuser.
-
Use the
POST /api/v1/superuser/organization/{namespace}/quotaAPI endpoint to create a quota policy for an organization:$ curl -X POST "https://quay-server.example.com/api/v1/superuser/organization/<namespace>/quota" \ -H "Authorization: Bearer <ACCESS_TOKEN>" \ -H "Content-Type: application/json" \ -d '{ "limit_bytes": 10737418240 }'Example output"Created" -
Use the
GET /api/v1/superuser/organization/{namespace}/quotaAPI endpoint to obtain information about the policy, including the quota ID:$ curl -X GET "https://quay-server.example.com/api/v1/superuser/organization/<namespace>/quota" \ -H "Authorization: Bearer <ACCESS_TOKEN>"Example output[{"id": 2, "limit_bytes": 10737418240, "limit": "10.0 GiB", "default_config": false, "limits": [{"id": 1, "type": "Reject", "limit_percent": 90}], "default_config_exists": false}] -
Use the
PUT /api/v1/superuser/organization/{namespace}/quota/{quota_id}API endpoint to change the quota policy:$ curl -X PUT "https://quay-server.example.com/api/v1/superuser/organization/<namespace>/quota/<quota_id>" \ -H "Authorization: Bearer <ACCESS_TOKEN>" \ -H "Content-Type: application/json" \ -d '{ "limit_bytes": <NEW_QUOTA_LIMIT> }'Example output{"id": 2, "limit_bytes": 10737418240, "limit": "10.0 GiB", "default_config": false, "limits": [{"id": 1, "type": "Reject", "limit_percent": 90}], "default_config_exists": false} -
Use the
DELETE /api/v1/superuser/organization/{namespace}/quota/{quota_id}API endpoint to delete a quota policy for an organization:$ curl -X DELETE "https://quay-server.example.com/api/v1/superuser/organization/<namespace>/quota/<quota_id>" \ -H "Authorization: Bearer <ACCESS_TOKEN>"This command does not return output in the CLI.
Managing user quota with the Project Quay API
To create, view, update, or delete user quota policies in Project Quay, you can use the superuser user quota API endpoints.
-
You have created an OAuth access token.
-
You are logged into your Project Quay deployment as a superuser.
-
Use the
POST /api/v1/superuser/users/{namespace}/quotaendpoint to create a quota policy for specific users within an organization:$ curl -X POST "https://quay-server.example.com/api/v1/superuser/users/<username>/quota" \ -H "Authorization: Bearer <ACCESS_TOKEN>" \ -H "Content-Type: application/json" \ -d '{ "limit_bytes": <QUOTA_LIMIT> }'Example output"Created" -
Use the
GET /api/v1/superuser/users/{namespace}/quotaendpoint to return a list of a user’s allotted quota:$ curl -X GET "https://quay-server.example.com/api/v1/superuser/users/<username>/quota" \ -H "Authorization: Bearer <ACCESS_TOKEN>"Example output[{"id": 6, "limit_bytes": 10737418240, "limit": "10.0 GiB", "default_config": false, "limits": [], "default_config_exists": false}] -
Use the
PUT /api/v1/superuser/users/{namespace}/quota/{quota_id}endpoint to adjust the user’s policy:$ curl -X PUT "https://quay-server.example.com/api/v1/superuser/users/<username>/quota/<quota_id>" \ -H "Authorization: Bearer <ACCESS_TOKEN>" \ -H "Content-Type: application/json" \ -d '{ "limit_bytes": <NEW_QUOTA_LIMIT> }'Example output{"id": 6, "limit_bytes": 10737418240, "limit": "10.0 GiB", "default_config": false, "limits": [], "default_config_exists": false} -
Use the
DELETE /api/v1/superuser/users/{namespace}/quota/{quota_id}endpoint to delete a user’s policy:$ curl -X DELETE "https://quay-server.example.com/api/v1/superuser/users/<username>/quota/<quota_id>" \ -H "Authorization: Bearer <ACCESS_TOKEN>"This command does not return output in the CLI.
Retrieving build information with the Project Quay API
To retrieve build details, status, and logs as a Project Quay superuser, you can use the superuser build API endpoints.
-
You have created an OAuth access token.
-
You have superuser privileges.
-
Enter the following command to return information about a build by using the
GET /api/v1/superuser/{build_uuid}/buildendpoint:$ curl -X GET "https://quay-server.example.com/api/v1/superuser/<build_uuid>/build" \ -H "Authorization: Bearer <ACCESS_TOKEN>" -
Enter the following command to return the status for builds that you specify by UUID by using the
GET /api/v1/superuser/{build_uuid}/statusendpoint:$ curl -X GET "https://quay-server.example.com/api/v1/superuser/<build_uuid>/status" \ -H "Authorization: Bearer <ACCESS_TOKEN>" -
Enter the following command to return the build logs for a build that you specify by UUID by using the
GET /api/v1/superuser/{build_uuid}/logsendpoint:$ curl -X GET "https://quay-server.example.com/api/v1/superuser/<build_uuid>/logs" \ -H "Authorization: Bearer <ACCESS_TOKEN>"
Managing service keys as a superuser with the Project Quay API
To create, list, approve, update, or delete service keys as a Project Quay superuser, you can use the superuser keys API endpoints.
-
You have created an OAuth access token.
-
You have superuser privileges.
-
Enter the following command to create a service key by using the
POST /api/v1/superuser/keysendpoint:$ curl -X POST \ -H "Authorization: Bearer <bearer_token>" \ -H "Content-Type: application/json" \ -d '{ "service": "<service_name>", "expiration": <unix_timestamp> }' \ "<quay_server>/api/v1/superuser/keys"Example output{"message":""} -
Enter the following command to approve a service key by using the
POST /api/v1/superuser/approvedkeys/{kid}endpoint:$ curl -X POST \ -H "Authorization: Bearer <bearer_token>" \ -H "Content-Type: application/json" \ -d '{ "notes": "<approval_notes>" }' \ "https://<quay_server>/api/v1/superuser/approvedkeys/<kid>"This command does not return output in the CLI.
-
Enter the following command to list service keys by using the
GET /api/v1/superuser/keysendpoint:$ curl -X GET \ -H "Authorization: Bearer <bearer_token>" \ "https://<quay_server>/api/v1/superuser/keys"Example output{"keys":[{"approval":{"approval_type":"ServiceKeyApprovalType.AUTOMATIC","approved_date":"Mon, 20 Jan 2025 14:46:01 GMT","approver":null,"notes":""},"created_date":"Mon, 20 Jan 2025 14:46:01 GMT","expiration_date":"Wed, 05 Feb 2025 22:03:37 GMT","jwk":{"e":"AQAB","kid":"<example>","kty":"RSA","n":"<example>"},"kid":"7fr8soqXGgea8JqjwgItjjJT9GKlt-bMyMCDmvzy6WQ","metadata":{"created_by":"CLI tool"},"name":"http://quay-server.example.com:80","rotation_duration":null,"service":"quay"}]} -
Enter the following command to return a list of service account keys by using the
GET /api/v1/superuser/apptokensendpoint:$ curl -X GET \ "https://quay-server.example.com/api/v1/superuser/apptokens" \ -H "Authorization: Bearer <superuser_access_token>" \ -H "Accept: application/json"Alternatively, you can include the
expiring=trueoption. For example:$ curl -X GET \ "https://quay-server.example.com/api/v1/superuser/apptokens?expiring=true" \ -H "Authorization: Bearer <superuser_access_token>" \ -H "Accept: application/json" -
Enter the following command to retrieve information about a service account by its kid by using the
GET /api/v1/superuser/keys/{kid}endpoint:$ curl -X GET \ -H "Authorization: Bearer <bearer_token>" \ "https://<quay_server>/api/v1/superuser/keys/<kid>"Example output{"approval":{"approval_type":"ServiceKeyApprovalType.AUTOMATIC","approved_date":"Mon, 20 Jan 2025 14:46:01 GMT","approver":null,"notes":""},"created_date":"Mon, 20 Jan 2025 14:46:01 GMT","expiration_date":"Wed, 05 Feb 2025 22:03:37 GMT","jwk":{"e":"AQAB","kid":"7fr8soqXGgea8JqjwgItjjJT9GKlt-bMyMCDmvzy6WQ","kty":"RSA","n":"5iMX7RQ_4F_zdb1qonMsuWUDauCOqEyRpD8L_EhgnwDxrgMHuOlJ4_7sEOrOa3Jkx3QhwIW6LJCP69PR5X0wvz6vmC1DoWEaWv41bAq23Knzj7gUU9-N_fkZPZN9NQwZ-D-Zqg9L1c_cJF93Dy93py8_JswWFDj1FxMaThJmrX68wBwjhF-JLYqgCAGFyezzJ3oTpO-esV9v6R7skfkaqtx_cjLZk_0cKB4VKTtxiy2A8D_5nANTOSSbZLXNh2Vatgh3yrOmnTTNLIs0YO3vFIuylEkczHlln-40UMAzRB3HNspUySyzImO_2yGdrA762LATQrOzJN8E1YKCADx5CQ"},"kid":"7fr8soqXGgea8JqjwgItjjJT9GKlt-bMyMCDmvzy6WQ","metadata":{"created_by":"CLI tool"},"name":"http://quay-server.example.com:80","rotation_duration":null,"service":"quay"} -
Enter the following command to update your service key, such as the metadata, by using the
PUT /api/v1/superuser/keys/{kid}endpoint:$ curl -X PUT \ -H "Authorization: Bearer <bearer_token>" \ -H "Content-Type: application/json" \ -d '{ "name": "<service_key_name>", "metadata": {"<key>": "<value>"}, "expiration": <unix_timestamp> }' \ "https://<quay_server>/api/v1/superuser/keys/<kid>"Example output{"approval":{"approval_type":"ServiceKeyApprovalType.AUTOMATIC","approved_date":"Mon, 20 Jan 2025 14:46:01 GMT","approver":null,"notes":""},"created_date":"Mon, 20 Jan 2025 14:46:01 GMT","expiration_date":"Mon, 03 Mar 2025 10:40:00 GMT","jwk":{"e":"AQAB","kid":"7fr8soqXGgea8JqjwgItjjJT9GKlt-bMyMCDmvzy6WQ","kty":"RSA","n":"5iMX7RQ_4F_zdb1qonMsuWUDauCOqEyRpD8L_EhgnwDxrgMHuOlJ4_7sEOrOa3Jkx3QhwIW6LJCP69PR5X0wvz6vmC1DoWEaWv41bAq23Knzj7gUU9-N_fkZPZN9NQwZ-D-Zqg9L1c_cJF93Dy93py8_JswWFDj1FxMaThJmrX68wBwjhF-JLYqgCAGFyezzJ3oTpO-esV9v6R7skfkaqtx_cjLZk_0cKB4VKTtxiy2A8D_5nANTOSSbZLXNh2Vatgh3yrOmnTTNLIs0YO3vFIuylEkczHlln-40UMAzRB3HNspUySyzImO_2yGdrA762LATQrOzJN8E1YKCADx5CQ"},"kid":"7fr8soqXGgea8JqjwgItjjJT9GKlt-bMyMCDmvzy6WQ","metadata":{"created_by":"CLI tool","environment":"production"},"name":"quay-service-key-updated","rotation_duration":null,"service":"quay"} -
Enter the following command to delete a service key by using the
DELETE /api/v1/superuser/keys/{kid}endpoint:$ curl -X DELETE \ -H "Authorization: Bearer <bearer_token>" \ "https://<quay_server>/api/v1/superuser/keys/<kid>"This command does not return output in the CLI.
Develop
Get your first API workflow running
Learn how OAuth 2.0 tokens work, enable the Red Hat Quay API, and use API endpoints, Swagger, and automation workflows. Before you call authenticated endpoints, create an OAuth 2 access token; see "Manage OAuth access tokens for the Red Hat Quay API".
Introduction to Project Quay OAuth 2.0 tokens
OAuth 2.0 tokens provide secure, standards-based access to the Project Quay API. You can use OAuth 2 access tokens, robot account tokens, and OCI referrers access tokens to authenticate API operations.
Compared to more traditional API tokens, Project Quay OAuth 2 tokens offer the following enhancements:
-
Standards-based security that adheres to the OAuth 2.0 protocol.
-
Revocable access by deleting the application in which the OAuth 2 token exists.
-
Fine-grained access control so that Project Quay administrators can assign specific permissions to tokens.
-
Delegated access so that third-party applications and services can act on behalf of a user.
-
Compatibility with other services, platforms, and integrations.
Project Quay primarily supports two types of tokens: OAuth 2 access tokens and robot account tokens. A third token type, an OCI referrers access token, that is required to list OCI referrers of a manifest under a repository, is also available when warranted.
You can manage organization OAuth 2 access tokens from the API Access Tokens page of an OAuth application. You can create named tokens with optional expiration, review metadata such as scopes and last-used time, and revoke individual tokens without deleting the parent application.
Using the Project Quay API
To invoke Project Quay API endpoints from the CLI, you can pass an OAuth 2 access token in a curl request. You can use GET, PUT, POST, or DELETE methods against the documented endpoints.
After you have created an application and generated an OAuth 2 access token with the desired settings, you can pass in the access token to GET, PUT, POST, or DELETE settings by using the API from the CLI. Generally, a Project Quay API command looks similar to the following example:
$ curl -X GET -H "Authorization: Bearer <your_access_token>" \
https://<quay-server.example.com>/api/v1/<example>/<endpoint>/where:
<your_access_token>-
Specifies the OAuth 2 access token that was generated through the Project Quay UI.
https://<quay-server.example.com>/api/v1/<example>/<endpoint>/-
Specifies your Project Quay deployment and the desired API endpoint.
All Project Quay APIs are documented in the Application Programming Interface (API) chapter. Understanding how they are documented is crucial to successful invocation. Take, for example, the following entry for the createAppToken API endpoint:
*createAppToken*
Create a new app specific token for user.
*POST /api/v1/user/apptoken*
**Authorizations: **oauth2_implicit (**user:admin**)
Request body schema (application/json)
*Path parameters*
Name: **title**
Description: Friendly name to help identify the token.
Schema: string
*Responses*
|HTTP Code|Description |Schema
|201 |Successful creation |
|400 |Bad Request |<<_apierror,ApiError>>
|401 |Session required |<<_apierror,ApiError>>
|403 |Unauthorized access |<<_apierror,ApiError>>
|404 |Not found |<<_apierror,ApiError>>
|===where:
createAppToken-
Specifies the name of the API endpoint.
Create a new app specific token for user.-
Specifies a brief description of the API endpoint.
POST /api/v1/user/apptoken-
Specifies the API endpoint used for invocation.
Authorizations-
Specifies the authorizations required to use the API endpoint.
Path parameters-
Specifies the available paths to be used with the API endpoint. In this example,
titleis the only path to be used with thePOST /api/v1/user/apptokenendpoint. Responses-
Specifies the API responses for this endpoint.
Enabling browser-based API calls in Project Quay
To use Project Quay API access from a browser extension or Swagger UI, you can disable BROWSER_API_CALLS_XHR_ONLY in your config.yaml file.
By default, Project Quay accepts curl requests from the command line. However, if you want to enable API access from a browser extension such as Postman, or a browser interface such as Swagger, you must disable BROWSER_API_CALLS_XHR_ONLY in your config.yaml file.
-
In your Project Quay
config.yamlfile, setBROWSER_API_CALLS_XHR_ONLYtofalse. For example:# ... BROWSER_API_CALLS_XHR_ONLY: false # ... -
Restart your Project Quay deployment.
Accessing Project Quay Swagger UI
To explore and test Project Quay API endpoints interactively, you can run the Swagger UI container against your registry API discovery endpoint.
Project Quay administrators and users can interact with the API by using the Swagger UI, an interactive web interface that compiles executable commands. The Swagger UI can be launched as a container that points to your Project Quay instance’s API discovery endpoint (/api/v1/discovery). After deploying the container, you can access the Swagger UI, which loads the OpenAPI specification for Project Quay from the specified URL. Project Quay administrators and users can explore the available endpoints and their structure.
-
You have set
BROWSER_API_CALLS_XHR_ONLY: falsein yourconfig.yamlfile.
-
Enter the following command to deploy the Swagger UI container, pointing the URL to your Project Quay API discovery endpoint. For example:
$ podman run -p 8080:8080 -e SWAGGER_JSON_URL=<quay-server.example.com> docker.swagger.io/swaggerapi/swagger-uiExample output--- /docker-entrypoint.sh: Launching /docker-entrypoint.d/20-envsubst-on-templates.sh 20-envsubst-on-templates.sh: Running envsubst on /etc/nginx/templates/default.conf.template to /etc/nginx/conf.d/default.conf /docker-entrypoint.sh: Launching /docker-entrypoint.d/30-tune-worker-processes.sh /docker-entrypoint.sh: Launching /docker-entrypoint.d/40-swagger-ui.sh /docker-entrypoint.sh: Configuration complete; ready for start up --- -
Navigate to the
localhostURL. In this example, the URL is http://localhost:8080/. -
Use the Swagger UI to test various API endpoints. For example, to create a new token for a user, you can click the POST /api/v1/user/apptoken endpoint → Try it out → Execute to generate an example
curlcommand.NoteCurrently, server responses cannot be generated. This is because the Swagger UI is not configured to accept bearer tokens. As a result, the following error is returned for each command:
{"error": "CSRF token was invalid or missing."}. As a workaround, you can copy this command into your terminal and manually add your bearer token, for example,-H 'Authorization: Bearer <bearer_token>'.
Automating Project Quay processes by using the API
To automate repetitive Project Quay tasks such as repository management or image pruning, you can call the API from scripts and schedule them with cron.
With the API, Project Quay administrators and users with access to the API can automate repetitive tasks such as repository management or image pruning.
The following example shows you how you might use a Python script and a cron job to automate the deletion of OAuth 2 applications except the administrator’s token. This might be useful if you want to ensure an application associated with an OAuth 2 access token is cycled after a certain period of time.
-
You have access to the Project Quay API, which entails having already created an OAuth 2 access token.
-
You have installed the Python
requestslibrary. -
You have enabled cron jobs on your machine.
-
You have created several organization applications, including one that you do not want to delete.
-
Create a Python script that executes an API command. The following example deletes organization applications by using the
DELETE /api/v1/organization/{orgname}/applications/{client_id}API endpoint.Create the following
example.pyfile:import requests # Hard-coded values API_BASE_URL = "http://<quay-server.example.com>/api/v1" ACCESS_TOKEN = "<access_token>" ORG_NAME = "<organization_name>" def get_all_organization_applications(): url = f"{API_BASE_URL}/organization/{ORG_NAME}/applications" headers = { "Authorization": f"Bearer {ACCESS_TOKEN}" } response = requests.get(url, headers=headers) if response.status_code == 200: try: applications = response.json() # Print the raw response for debugging print("Raw response:", applications) # Adjust parsing logic based on the response structure if isinstance(applications, dict) and 'applications' in applications: applications = applications['applications'] if isinstance(applications, list): print("Organization applications retrieved successfully:") for app in applications: # Updated key from 'title' to 'name' print(f"Name: {app['name']}, Client ID: {app['client_id']}") return applications else: print("Unexpected response format.") return [] except requests.exceptions.JSONDecodeError: print("Error decoding JSON response:", response.text) return [] else: print(f"Failed to retrieve applications. Status code: {response.status_code}, Response: {response.text}") return [] def delete_organization_application(client_id): url = f"{API_BASE_URL}/organization/{ORG_NAME}/applications/{client_id}" headers = { "Authorization": f"Bearer {ACCESS_TOKEN}" } response = requests.delete(url, headers=headers) if response.status_code == 204: print(f"Application {client_id} deleted successfully.") else: print(f"Failed to delete application {client_id}. Status code: {response.status_code}, Response: {response.text}") def main(): applications = get_all_organization_applications() for app in applications: if app['name'] != "<admin_token_app>": # Skip the "admin-token-app" delete_organization_application(app['client_id']) else: print(f"Skipping deletion of application: {app['name']}") # Execute the main function main()where:
import requests-
Specifies that the
requestslibrary is included in your Python code. API_BASE_URL-
Specifies the URL of your registry appended with
/api/v1. ACCESS_TOKEN-
Specifies your OAuth 2 access token.
ORG_NAME-
Specifies the organization that holds the application.
"<admin_token_app>"-
Specifies the name of the application token to remain.
-
Save the script as
prune_applications.py. -
Create a cron job that automatically runs the script:
-
Open the crontab editor by running the following command:
$ crontab -e -
In the editor, add the cron job for running the script. The following example runs the script once per month:
0 0 1 * * sudo python /path/to/prune_images.py >> /var/log/prune_images.log 2>&1
-
Discovering Project Quay API endpoints
To list available Project Quay API endpoints in Swagger format, you can call the discovery endpoint with an OAuth 2 access token.
-
You have created an OAuth 2 access token.
-
Enter the following
GET /api/v1/discoverycommand to list all of the API endpoints available in the Swagger API format:$ curl -X GET "https://<quay-server.example.com>/api/v1/discovery?query=true" \ -H "Authorization: Bearer <access_token>"Example output--- : "Manage the tags of a repository."}, {"name": "team", "description": "Create, list and manage an organization's teams."}, {"name": "trigger", "description": "Create, list and manage build triggers."}, {"name": "user", "description": "Manage the current user."}, {"name": "userfiles", "description": ""}]} ---
Obtaining Project Quay API error details
To retrieve details for a Project Quay API error type, you can call the error endpoint with an OAuth 2 access token and an error code.
-
You have created an OAuth 2 access token.
-
Obtain error details of the API by entering the
GET /api/v1/error/{error_type}endpoint. Note that you must include one of the following error codes:HTTP Code Description 200
Successful invocation
400
Bad Request
401
Session required
403
Unauthorized access
404
Not found
$ curl -X GET "https://<quay-server.example.com>/api/v1/error/<error_type>" \ -H "Authorization: Bearer <access_token>"Example outputcurl: (7) Failed to connect to quay-server.example.com port 443 after 0 ms: Couldn't connect to server
Authenticate applications with OAuth access tokens
Review OAuth 2 access token scopes and security, then create, reassign, revoke, and rotate organization OAuth 2 access tokens. After you have an OAuth 2 access token, you can create user application tokens for Docker, Podman, and other clients.
About OAuth 2 access tokens
OAuth 2 access tokens authenticate users to the Project Quay API for applications that require user identity verification. You create a token for an organization OAuth application and select scopes that authorize API actions.
|
Note
|
Although OAuth 2 tokens authorize actions on API endpoints based on the scopes that you define for the token, Project Quay role-based access control (RBAC) still governs access to the resources. You can create actions on a resource, for example a repository, when you have the proper role (Admin or Creator) for that namespace. This is true even if the API token was granted the |
You can create OAuth 2 access tokens by using the Project Quay UI or by using the organization application token API.
When you create an OAuth 2 token, you can select the following options:
-
Name. A user-defined identifier for the token.
-
Expiration. A lifetime for the token. Use short expirations for scripts and CI systems when practical. Use no expiration only for controlled bootstrap cases.
-
Scopes, which can include the following permissions:
-
Administer Organization. Administration of organizations, including creating robots, creating teams, adjusting team membership, and changing billing settings.
-
Administer Repositories. Administrator access to all repositories to which the granting user has access.
-
Create Repositories. Creation of repositories in namespaces where the granting user can create repositories.
-
View all visible repositories. Viewing and pulling all repositories visible to the granting user.
-
Read/Write to any accessible repositories. Viewing, pushing, and pulling to repositories where the granting user has write access.
-
Super User Access. Administration of the installation, including managing users and organizations from the superuser panel.
-
Administer User. Administration of your account, including creating robots and granting them repository permissions.
-
Read User Information. Reading user information such as username and email address.
-
The API Access Tokens page can show additional columns such as Created By, Expires, and Last Used so that you can audit tokens without deleting the parent application.
|
Important
|
The token secret is shown only when the token is created. Store it securely. Do not share token secrets through insecure channels. |
OAuth 2 access tokens are passed as a Bearer token in the Authorization header of an API call. The API is available from the /api/v1 endpoint of your Project Quay host. For example, https://<quay-server.example.com>/api/v1. You can connect to endpoints through your browser to GET, POST, DELETE, and PUT Project Quay settings by enabling the Swagger UI. Applications that make API calls and use OAuth tokens can access the API, which sends and receives data as JSON.
Organization application OAuth API tokens created through the UI support various expiration values, from 7 days to 10 years. Tokens created by using the organization application token API support custom expiration values in seconds. You can revoke tokens individually by using the API or by deleting the application in which they were created. Deleting an application revokes all tokens created within that application.
Token distributors should be mindful of the permissions that they grant when generating a token on behalf of a user, and should have absolute trust in a user before granting such permissions as Administer organization, Super User Access, and Administer User. Additionally, the access token is only revealed at the time of creation; they cannot be listed from the CLI, nor can they be found on the Project Quay UI. If an access token is lost or forgotten, a new token must be created; a token cannot be recovered.
In practice, Project Quay administrators can create a new OAuth application on the OAuth Applications page of their organization each time they want to create a new OAuth token for a user. This ensures that a single application is not responsible for all OAuth tokens. As a result, if a user’s token is compromised, the administrator can delete the application of the compromised token without disrupting other users whose tokens might be part of the same application.
Older tokens that you created with the previous Generate Token workflow continue to work. In the API Access Tokens list, legacy tokens might appear with a name such as Legacy Token. You can leave them in place, or replace them with named tokens that have explicit expiration policies and then revoke the legacy token.
|
Note
|
Deleting an OAuth application still deletes all tokens that belong to that application. Prefer revoking an individual token from the API Access Tokens page when you only need to invalidate one credential. |
Creating an OAuth 2 access token
To create an OAuth 2 access token for Project Quay API calls, you can generate a named token from an organization OAuth application in the UI.
-
You have logged in to Project Quay as an administrator.
-
You have created an organization.
-
On the Project Quay UI, select your organization.
-
In the navigation pane, click OAuth Applications.
-
Create an application if you do not already have one:
-
Click Create OAuth Application.
-
Enter an application name and any required application details, such as homepage URL, description, avatar e-mail, and redirect/callback URL.
-
Click Create application.
-
-
Click the name of your OAuth application.
-
Click API Access Tokens.
-
Click Generate New Token.
-
Configure the token:
-
Enter a Token name.
-
Set an expiration period, such as 10 years.
-
Optional: Click Assign another user to assign this OAuth token to another user. When prompted, select the desired user.
-
Select the permissions, or scopes, for the token. For example:
-
Administer Organization. This application can administer your organizations, including creating robots, creating teams, adjusting team membership, and changing billing settings. Grant this permission only when you have absolute trust in the requesting application.
-
Administer Repositories. This application has administrator access to all repositories to which the granting user has access.
-
Create Repositories. This application can create repositories in all namespaces where the granting user can create repositories.
-
View all visible repositories. This application can view and pull all repositories visible to the granting user.
-
Read/Write to any accessible repositories. This application can view, push, and pull to all repositories to which the granting user has write access.
-
Super User Access. This application can administer your installation, including managing users, managing organizations, and other features found in the superuser panel. Grant this permission only when you have absolute trust in the requesting application.
-
Administer User. This application can administer your account, including creating robots and granting them permissions to your repositories. Grant this permission only when you have absolute trust in the requesting application.
-
Read User Information. This application can read user information such as username and email address.
-
-
-
Click Generate token.
-
Review the requested permissions, then click Authorize Application. Confirm the authorization when prompted.
ImportantAssign only the scopes that the token holder needs. Treat Administer Organization, Super User Access, and Administer User as high-trust permissions.
-
Copy and store the access token secret.
ImportantThis is the only opportunity to copy the token secret. Project Quay does not show the full secret again after you leave the page.
-
Confirm that the new token appears on the API Access Tokens page for the application. The list can include the token name, creator, scopes, expiration, and last-used information when those columns are available.
-
Optional. Call an API endpoint with the token to confirm that it works. For example:
$ curl -X GET "https://<quay-server.example.com>/api/v1/user/" \ -H "Authorization: Bearer <access_token>"
Managing a user application by using the API
To create, list, or delete a user application token without sharing your password, you can use the Project Quay API. User application tokens work like encrypted username and password credentials for Docker, Podman, or other clients.
Project Quay users can create, list information about, and delete a user application that can be used as an alternative to using your password for Docker, Podman, or other service providers. User application tokens work like your username and password, but are encrypted and do not provide any information to third parties regarding who is accessing Project Quay.
|
Note
|
After creation by using the CLI, the user application token is listed under User Settings of the Project Quay UI. Note that this differs from an application token that is created under user settings, and should be considered a different application entirely. |
-
You have created an OAuth 2 access token.
-
Create a user application by entering the
POST /api/v1/user/apptokenAPI call:$ curl -X POST \ -H "Authorization: Bearer <access_token>" \ -H "Content-Type: application/json" \ -d '{ "title": "MyAppToken" }' \ "http://quay-server.example.com/api/v1/user/apptoken"Example output{"token": {"uuid": "6b5aa827-cee5-4fbe-a434-4b7b8a245ca7", "title": "MyAppToken", "last_accessed": null, "created": "Wed, 08 Jan 2025 19:32:48 -0000", "expiration": null, "token_code": "string"}} -
You can obtain information about your application, including when the application expires, by using the
GET /api/v1/user/apptokencommand. For example:$ curl -X GET \ -H "Authorization: Bearer <access_token>" \ "http://quay-server.example.com/api/v1/user/apptoken"Example output{"tokens": [{"uuid": "6b5aa827-cee5-4fbe-a434-4b7b8a245ca7", "title": "MyAppToken", "last_accessed": null, "created": "Wed, 08 Jan 2025 19:32:48 -0000", "expiration": null}], "only_expiring": null} -
You can obtain information about a specific user application by entering the
GET /api/v1/user/apptoken/{token_uuid}command:$ curl -X GET \ -H "Authorization: Bearer <access_token>" \ "http://quay-server.example.com/api/v1/user/apptoken/<token_uuid>"Example output{"token": {"uuid": "6b5aa827-cee5-4fbe-a434-4b7b8a245ca7", "title": "MyAppToken", "last_accessed": null, "created": "Wed, 08 Jan 2025 19:32:48 -0000", "expiration": null, "token_code": "string"}} -
You can delete or revoke a user application token by using the
DELETE /api/v1/user/apptoken/{token_uuid}endpoint:$ curl -X DELETE \ -H "Authorization: Bearer <access_token>" \ "http://quay-server.example.com/api/v1/user/apptoken/<token_uuid>"This command does not return output in the CLI. You can return a list of tokens by entering one of the aforementioned commands.
Reassigning an OAuth access token
To keep audit logs accurate when another user needs an OAuth API token, you can reassign token creation to that user from an organization OAuth application.
Organization administrators can assign OAuth API tokens to be created by other users with specific permissions. Audit logs then reflect the user who uses the token, even when that user does not have organization administrative permissions to create an OAuth API token.
|
Note
|
This procedure works only on the current Project Quay UI. The Project Quay v2 UI does not currently support this procedure. |
-
You are logged in as a user with organization administrative privileges, which allows you to assign an OAuth API token.
NoteOAuth API tokens are used for authentication and not authorization. For example, the user that you are assigning the OAuth token to must have the
Adminteam role to use administrative API endpoints.
-
Optional. If not already, update your Project Quay
config.yamlfile to include theFEATURE_ASSIGN_OAUTH_TOKEN: truefield:# ... FEATURE_ASSIGN_OAUTH_TOKEN: true # ... -
Optional. Restart your Project Quay registry.
-
Log in to your Project Quay registry as an organization administrator.
-
Click the name of the organization in which you created the OAuth token.
-
In the navigation pane, click OAuth Applications.
-
Click the proper application name.
-
In the navigation pane, click API Access Tokens.
-
Click Generate New Token.
-
Click Assign another user and enter the name of the user who takes over the OAuth token.
-
Check the boxes for the desired permissions that you want the new user to have. For example, if you only want the new user to be able to create repositories, click Create Repositories.
ImportantThe team role within an organization defines permission control and must be configured regardless of the options selected here. For example, the user that you are assigning the OAuth token to must have the
Adminteam role to use administrative API endpoints.Solely checking the Super User Access box does not actually grant the user this permission. Superusers must be configured by using the
config.yamlfile and the box must be checked here. -
Click Assign token. A popup box appears that confirms authorization with the following message and shows you the approved permissions:
This will prompt user <username> to generate a token with the following permissions: repo:create -
Click Assign token in the popup box. You are redirected to a new page that displays the following message:
Token assigned successfully
-
After reassigning an OAuth token, the assigned user must accept the token to receive the bearer token, which is required to use API endpoints. Ask the assigned user to log in to the Project Quay registry.
-
After the assigned user has logged in, ask them to click their username under Users and Organizations.
-
In the navigation pane, ask them to click External Logins And Applications.
-
Under Authorized Applications, ask them to confirm the application by clicking Authorize Application. They are directed to a new page where they must reconfirm by clicking Authorize Application.
-
They are redirected to a new page that reveals their bearer token. Ask them to save this bearer token, because it cannot be viewed again.
Revoking an OAuth 2 access token
To invalidate a compromised or unused OAuth 2 access token, you can revoke the token from the organization OAuth application in the Project Quay UI.
Because OAuth 2 access tokens are created through the OAuth application, they cannot be rotated or renewed. If a token is compromised, revoke it through the Project Quay UI.
-
You have created an OAuth 2 access token.
-
You have permission to manage the OAuth application that owns the token.
-
On the Project Quay UI, click the name of the organization that hosts the application.
-
In the navigation pane, click OAuth Applications.
-
Click the application name that holds the OAuth 2 token that you want to revoke.
-
Click API Access Tokens.
-
Click the menu kebab of the appropriate token and then click Revoke. Confirm that you want to revoke the token by clicking Revoke token.
-
Confirm that the token no longer appears as an active token on the API Access Tokens page.
Rotating a legacy OAuth 2 access token
To replace a legacy long-lived OAuth 2 access token, you can create a named token with an explicit expiration policy and then revoke the legacy token.
Existing legacy tokens continue to work for at least 10 years until you revoke them.
-
You have an organization OAuth application that already has a legacy token.
-
You can update any CI system, script, or client that currently uses the legacy token.
-
On the Project Quay UI, click Organization → OAuth Applications.
-
Click the application name.
-
Click API Access Tokens.
-
Identify the legacy token to replace. Legacy tokens do not have a user-defined name, do not show a creation date, and have an expiration date of 10 years from the date of creation.
-
Click Generate New Token.
-
Configure a replacement token:
-
Enter a Token name.
-
Set an expiration appropriate for the workload, for example 7 days or 10 years.
-
Select the scopes required by the client.
-
-
Click Generate Token, then click Authorize Application and confirm the authorization.
-
Copy the new token secret and store it securely.
-
Update the CI system, script, or client configuration to use the new token.
-
Verify that the client works with the new token.
-
Return to the OAuth Applications page and revoke the legacy token:
-
Click the application name that owns the legacy token.
-
Click the menu kebab icon for the legacy token.
-
Click Revoke. Confirm that you want to revoke the token by clicking Revoke token.
-
OCI referrers OAuth access token
An OCI referrers OAuth access token lists OCI referrers of a manifest under a repository in Project Quay. You obtain the token through basic HTTP authentication against the v2/auth endpoint.
In some cases, depending on the features that your Project Quay deployment is configured to use, you might need an OCI referrers OAuth access token. OCI referrers OAuth access tokens list OCI referrers of a manifest under a repository, and use a curl command to make a GET request to the Project Quay v2/auth endpoint.
You obtain these tokens by using basic HTTP authentication, wherein the user provides a username and password encoded in Base64 to authenticate directly with the v2/auth API endpoint. As such, they are based directly on the user’s credentials and do not follow the same detailed authorization flow as OAuth 2, but still allow a user to authorize API requests.
OCI referrers OAuth access tokens do not offer scope-based permissions and do not expire. They are solely used to list OCI referrers of a manifest under a repository.
Creating an OCI referrers OAuth access token
To list OCI referrers of a manifest under a repository, you can create an OCI referrers OAuth access token by using basic authentication against the Project Quay v2/auth endpoint.
-
Update your
config.yamlfile to include theFEATURE_REFERRERS_API: truefield. For example:# ... FEATURE_REFERRERS_API: true # ... -
Enter the following command to Base64 encode your credentials:
$ echo -n '<username>:<password>' | base64Example outputabcdeWFkbWluOjE5ODlraWROZXQxIQ== -
Enter the following command to use the Base64-encoded string and modify the URL endpoint to your Project Quay server:
$ curl --location '<quay-server.example.com>/v2/auth?service=<quay-server.example.com>&scope=repository:quay/listocireferrs:pull,push' --header 'Authorization: Basic <base64_username:password_encode_token>' -k | jqExample output{ "token": "<example_secret>" }
Authenticate CI/CD with robot account tokens
Create and regenerate robot account tokens for CI/CD pull and push access without interactive user authentication.
Robot account tokens
Robot account tokens are persistent password-type credentials for Docker v2 registry access in Project Quay. You can use them for automation and continuous integration without interactive user authentication.
Robot account tokens are password-type credentials used to access a Project Quay registry by using normal Docker v2 endpoints. The UI labels these credentials as tokens because the password itself is encrypted.
By default, Project Quay robot account tokens do not expire and do not require user interaction, which makes robot accounts ideal for non-interactive use cases.
Robot account tokens are automatically generated at the time of a robot’s creation and are not user-specific; they are connected to the user and organization namespace where they are created. For example, a robot named project_tools+<robot_name> belongs to the project_tools namespace.
Robot account tokens provide access without needing a user’s personal credentials. How the robot account is configured, for example, with one of READ, WRITE, or ADMIN permissions, ultimately defines the actions that the robot account can take.
Because robot account tokens are persistent and do not expire by default, they are ideal for automated workflows that require consistent access to Project Quay without manual renewal. Despite this, you can regenerate robot account tokens by using the UI or by using the proper API endpoint from the CLI. To enhance the security of your Project Quay deployment, administrators should regularly refresh robot account tokens. With the keyless authentication with robot accounts feature, you can exchange robot account tokens for external OIDC tokens so that they last only one hour, which enhances the security of your registry.
When a namespace is deleted, or when the robot account itself is deleted, the tokens are garbage collected when the collector is scheduled to run.
Regenerating a robot account token by using the Project Quay UI
To replace a robot account credential from the Project Quay UI, you can regenerate the robot account token for an organization robot account.
-
You have logged into Project Quay.
-
Click the name of an organization.
-
In the navigation pane, click Robot accounts.
-
Click the name of your robot account, for example, testorg3+test.
-
Click Regenerate token in the popup box.
Regenerating a robot account token by using the Project Quay API
To replace a compromised or outdated robot account credential, you can regenerate a robot account token by using the Project Quay API for organization or user robots.
-
You have created an OAuth access token.
-
Enter the following command to regenerate a robot account token for an organization by using the
POST /api/v1/organization/{orgname}/robots/{robot_shortname}/regenerateendpoint:$ curl -X POST \ -H "Authorization: Bearer <bearer_token>" \ "<quay-server.example.com>/api/v1/organization/<orgname>/robots/<robot_shortname>/regenerate"Example output{"name": "test-org+test", "created": "Fri, 10 May 2024 17:46:02 -0000", "last_accessed": null, "description": "", "token": "<example_secret>"} -
Enter the following command to regenerate a robot account token for the current user by using the
POST /api/v1/user/robots/{robot_shortname}/regenerateendpoint:$ curl -X POST \ -H "Authorization: Bearer <bearer_token>" \ "<quay-server.example.com>/api/v1/user/robots/<robot_shortname>/regenerate"Example output{"name": "quayadmin+test", "created": "Fri, 10 May 2024 14:12:11 -0000", "last_accessed": null, "description": "", "token": "<example_secret>"}
Automate tenancy and quota management with the API
Automate organization management, quota limits, mirroring, and global messages by using the Red Hat Quay API. Organization procedures cover contact email, members, applications, and proxy cache configuration.
Managing current user options by using the Project Quay API
To retrieve account information or star and unstar repositories in Project Quay, you can use the user API endpoints with an OAuth access token.
-
You have created an OAuth access token.
-
Use the
GET /api/v1/user/endpoint to get user information for the authenticated user.$ curl -X GET "https://quay-server.example.com/api/v1/user/" \ -H "Authorization: Bearer <your_access_token>"Example output{"anonymous": false, "username": "quayadmin", "avatar": {"name": "quayadmin", "hash": "6d640d802fe23b93779b987c187a4b7a4d8fbcbd4febe7009bdff58d84498fba", "color": "#f7b6d2", "kind": "user"}, "can_create_repo": true, "is_me": true, "verified": true, "email": "test@gmil.com", "logins": [], "invoice_email": false, "invoice_email_address": null, "preferred_namespace": false, "tag_expiration_s": 1209600, "prompts": [], "company": null, "family_name": null, "given_name": null, "location": null, "is_free_account": true, "has_password_set": true, "quotas": [{"id": 4, "limit_bytes": 2199023255552, "limits": [{"id": 3, "type": "Reject", "limit_percent": 100}]}], "quota_report": {"quota_bytes": 2280675, "configured_quota": 2199023255552, "running_backfill": "complete", "backfill_status": "complete"}, "organizations": [{"name": "test", "avatar": {"name": "test", "hash": "a15d479002b20f211568fd4419e76686d2b88a4980a5b4c4bc10420776c5f6fe", "color": "#aec7e8", "kind": "org"}, "can_create_repo": true, "public": false, "is_org_admin": true, "preferred_namespace": false}, {"name": "sample", "avatar": {"name": "sample", "hash": "ba560c68f1d26e8c6b911ac9b5d10d513e7e43e576cc2baece1b8a46f36a29a5", "color": "#b5cf6b", "kind": "org"}, "can_create_repo": true, "public": false, "is_org_admin": true, "preferred_namespace": false}], "super_user": true} -
Use the
GET /api/v1/users/{username}endpoint to get user information for the specified user.$ curl -X GET "https://quay-server.example.com/api/v1/users/example_user" \ -H "Authorization: Bearer <your_access_token>"Example output{"anonymous": false, "username": "testuser", "avatar": {"name": "testuser", "hash": "f660ab912ec121d1b1e928a0bb4bc61b15f5ad44d5efdc4e1c92a25e99b8e44a", "color": "#6b6ecf", "kind": "user"}, "super_user": false} -
Use the
POST /api/v1/user/starredendpoint to star a repository:$ curl -X POST "https://quay-server.example.com/api/v1/user/starred" \ -H "Authorization: Bearer <your_access_token>" \ -H "Content-Type: application/json" \ -d '{ "namespace": "<namespace>", "repository": "<repository_name>" }'Example output{"namespace": "test", "repository": "testrepo"} -
Use the
GET /api/v1/user/starredendpoint to list all starred repositories:$ curl -X GET "https://quay-server.example.com/api/v1/user/starred?next_page=<next_page_token>" \ -H "Authorization: Bearer <your_access_token>"Example output{"repositories": [{"namespace": "test", "name": "testrepo", "description": "This repository is now under maintenance.", "is_public": true}]} -
Use the
DELETE /api/v1/user/starred/{repository}endpoint to delete a star from a repository:$ curl -X DELETE "https://quay-server.example.com/api/v1/user/starred/namespace/repository-name" \ -H "Authorization: Bearer <your_access_token>"This command does not return output in the CLI.
Managing global messages by using the API
To create, list, or delete global messages in Project Quay, you can use the messages API endpoints with an OAuth 2 access token.
-
You have created an OAuth 2 access token.
-
Create a message by using the
POST /api/v1/messageendpoint:$ curl -X POST "https://<quay-server.example.com>/api/v1/messages" \ -H "Authorization: Bearer <access_token>" \ -H "Content-Type: application/json" \ -d '{ "message": { "content": "Hi", "media_type": "text/plain", "severity": "info" } }'This command does not return output.
-
Use the
GET /api/v1/messagescommand to return the list of global messages:$ curl -X GET "https://<quay-server.example.com>/api/v1/messages" \ -H "Authorization: Bearer <access_token>"Example output{"messages": [{"uuid": "ecababd4-3451-4458-b5db-801684137444", "content": "Hi", "severity": "info", "media_type": "text/plain"}]} -
Delete the global message by using the
DELETE /api/v1/message/{uuid}endpoint:$ curl -X DELETE "https://<quay-server.example.com>/api/v1/message/<uuid>" \ -H "Authorization: Bearer <access_token>"This command does not return output.
Using the API to mirror a repository
To mirror an external repository into Project Quay, you can create and manage a repository mirror configuration through the API. You can also sync, cancel, or update the configuration.
-
You have set
FEATURE_REPO_MIRROR: truein yourconfig.yamlfile.
-
Create a new repository mirror configuration by using the
POST /api/v1/repository/{repository}/mirrorendpoint:$ curl -X POST "https://<quay-server.example.com>/api/v1/repository/<namespace>/<repo>/mirror" \ -H "Authorization: Bearer <access_token>" \ -H "Content-Type: application/json" \ -d '{ "is_enabled": <is_enabled>, "external_reference": "<external_reference>", "external_registry_username": "<external_registry_username>", "external_registry_password": "<external_registry_password>", "sync_start_date": "<sync_start_date>", "sync_interval": <sync_interval>, "robot_username": "<robot_username>", "skopeo_timeout_interval": 600, "root_rule": { "rule": "<rule>", "rule_type": "<rule_type>" } }' -
Return information about the mirror configuration by using the
GET /api/v1/repository/{repository}/mirrorendpoint:$ curl -X GET "https://<quay-server.example.com>/api/v1/repository/<namespace>/<repo>/mirror" \ -H "Authorization: Bearer <access_token>"Example output{"is_enabled": true, "mirror_type": "PULL", "external_reference": "https://quay.io/repository/argoproj/argocd", "external_registry_username": null, "external_registry_config": {}, "sync_interval": 86400, "sync_start_date": "2025-01-15T12:00:00Z", "sync_expiration_date": null, "sync_retries_remaining": 3, "sync_status": "NEVER_RUN", "root_rule": {"rule_kind": "tag_glob_csv", "rule_value": ["*.latest*"]}, "robot_username": "quayadmin+mirror_robot"} -
Sync the repositories by using the
POST /api/v1/repository/{repository}/mirror/sync-nowendpoint. For example:$ curl -X POST "https://<quay-server.example.com>/api/v1/repository/<namespace>/<repo>/mirror/sync-now" \ -H "Authorization: Bearer <access_token>"This command does not return output in the CLI.
-
Cancel the sync with the
POST /api/v1/repository/{repository}/mirror/sync-cancelendpoint. For example:$ curl -X POST "https://<quay-server.example.com>/api/v1/repository/<namespace>/<repo>/mirror/sync-cancel" \ -H "Authorization: Bearer <access_token>"This command does not return output in the CLI.
-
After creating a mirror configuration, make changes with the
PUT /api/v1/repository/{repository}/mirrorcommand. For example, you might choose to disable automatic synchronizations:$ curl -X PUT "https://<quay-server.example.com>/api/v1/repository/<namespace>/<repo>/mirror" \ -H "Authorization: Bearer <access_token>" \ -H "Content-Type: application/json" \ -d '{ "is_enabled": <false>, "external_reference": "<external_reference>", "external_registry_username": "<external_registry_username>", "external_registry_password": "<external_registry_password>", "sync_start_date": "<sync_start_date>", "sync_interval": <sync_interval>, "robot_username": "<robot_username>", "skopeo_timeout_interval": 600, "root_rule": { "rule": "<rule>", "rule_type": "<rule_type>" } }'Where:
"is_enabled": <false>-
Disables automatic synchronization.
Establishing quota with the Project Quay API
Quota policies in Project Quay set storage limits for organizations and users so that you can control registry capacity. You can create, view, update, and delete quota settings through the API.
Managing organization quota with the Project Quay API
To manage storage quota for an organization in Project Quay, you can use the organization quota API endpoints. You can check, create, change, or delete quota limitations.
When an organization is first created, it does not have an established quota.
-
You have generated an OAuth access token.
-
To set a quota for an organization, use the
POST /api/v1/organization/{orgname}/quotaendpoint:$ curl -X POST "https://<quay-server.example.com>/api/v1/organization/<orgname>/quota" \ -H "Authorization: Bearer <access_token>" \ -H "Content-Type: application/json" \ -d '{ "limit_bytes": 10737418240, "limits": "10 Gi" }'Example output"Created" -
Use the
GET /api/v1/organization/{orgname}/quotacommand to return information about the policy, including the ID number, which is required for other organization quota endpoints. For example:$ curl -k -X GET -H "Authorization: Bearer <token>" -H 'Content-Type: application/json' https://example-registry-quay-quay-enterprise.apps.docs.gcp.quaydev.org/api/v1/organization/testorg/quota | jqExample output[{"id": 1, "limit_bytes": 10737418240, "limit": "10.0 GiB", "default_config": false, "limits": [], "default_config_exists": false}]After you obtain the ID number, you can use the
GET /api/v1/organization/{orgname}/quota/{quota_id}command to list the quota policy. For example:$ curl -X GET "https://<quay-server.example.com>/api/v1/organization/<orgname>/quota/<quota_id>" \ -H "Authorization: Bearer <access_token>"Example output{"id": 1, "limit_bytes": 10737418240, "limit": "10.0 GiB", "default_config": false, "limits": [], "default_config_exists": false} -
Use the
PUT /api/v1/organization/{orgname}/quota/{quota_id}command to modify the existing quota limitation. Note that this requires the policy ID. For example:$ curl -X PUT "https://<quay-server.example.com>/api/v1/organization/<orgname>/quota/<quota_id>" \ -H "Authorization: Bearer <access_token>" \ -H "Content-Type: application/json" \ -d '{ "limit_bytes": <limit_in_bytes> }'Example output{"id": 1, "limit_bytes": 21474836480, "limit": "20.0 GiB", "default_config": false, "limits": [], "default_config_exists": false} -
Delete an organization’s quota with the
DELETE /api/v1/organization/{orgname}/quota/{quota_id}command. For example:$ curl -X DELETE "https://<quay-server.example.com>/api/v1/organization/<orgname>/quota/<quota_id>" \ -H "Authorization: Bearer <access_token>"This command does not return output.
Setting quota limits for an organization by using the Project Quay API
To return a warning or deny image pushes when an organization exceeds its quota in Project Quay, you can create, list, update, and delete organization quota limits through the API.
-
Use the
POST /api/v1/organization/{orgname}/quota/{quota_id}/limitcommand to create a quota policy that rejects images if they exceed the allotted quota. For example:$ curl -X POST "https://<quay-server.example.com>/api/v1/organization/<orgname>/quota/<quota_id>/limit" \ -H "Authorization: Bearer <access_token>" \ -H "Content-Type: application/json" \ -d '{ "limit_bytes": 21474836480, "type": "Reject", "threshold_percent": 90 }'where:
type-
Specifies one of
RejectorWarning. threshold_percent-
Specifies the quota threshold, in percent of quota.
Example output"Created"
-
Use the
GET /api/v1/organization/{orgname}/quota/{quota_id}/limitcommand to obtain the ID of the quota limit. For example:$ curl -X GET "https://<quay-server.example.com>/api/v1/organization/<orgname>/quota/<quota_id>/limit" \ -H "Authorization: Bearer <access_token>"Example output[{"id": 2, "type": "Reject", "limit_percent": 90}] -
Update the policy with the
PUT /api/v1/organization/{orgname}/quota/{quota_id}/limit/{limit_id}endpoint. For example:$ curl -X PUT "https://<quay-server.example.com>/api/v1/organization/<orgname>/quota/<quota_id>/limit/<limit_id>" \ -H "Authorization: Bearer <access_token>" \ -H "Content-Type: application/json" \ -d '{ "type": "<type>", "threshold_percent": <threshold_percent> }'Example output{"id": 3, "limit_bytes": 10737418240, "limit": "10.0 GiB", "default_config": false, "limits": [{"id": 2, "type": "Warning", "limit_percent": 80}], "default_config_exists": false} -
Delete the quota limit with the
DELETE /api/v1/organization/{orgname}/quota/{quota_id}/limit/{limit_id}endpoint:$ curl -X DELETE "https://<quay-server.example.com>/api/v1/organization/<orgname>/quota/<quota_id>/limit/<limit_id>" \ -H "Authorization: Bearer <access_token>"This command does not return output.
Obtaining quota limits for the user with the Project Quay API
To view storage quota and limit policies for the logged-in user in Project Quay, you can call the user quota API endpoints.
Quota limits for users must be set on the Project Quay UI. The following APIs return the quota limits for the user that is logged in.
-
Use the
GET /api/v1/user/quotacommand to return information about the quota limitations:$ curl -X GET "https://<quay-server.example.com>/api/v1/user/quota" \ -H "Authorization: Bearer <access_token>"Example output[{"id": 4, "limit_bytes": 2199023255552, "limit": "2.0 TiB", "default_config": false, "limits": [], "default_config_exists": false}] -
After you have received the quota ID, pass it in with the
GET /api/v1/user/quota/{quota_id}endpoint to return information about the limitation:$ curl -X GET "https://<quay-server.example.com>/api/v1/user/quota/{quota_id}" \ -H "Authorization: Bearer <access_token>"Example output{"id": 4, "limit_bytes": 2199023255552, "limit": "2.0 TiB", "default_config": false, "limits": [], "default_config_exists": false} -
View the limitations by using the
GET /api/v1/user/quota/{quota_id}/limitendpoint. For example:$ curl -X GET "https://<quay-server.example.com>/api/v1/user/quota/{quota_id}/limit" \ -H "Authorization: Bearer <access_token>"Example output[{"id": 3, "type": "Reject", "limit_percent": 100}] -
Return additional information about the entire policy by using the
GET /api/v1/user/quota/{quota_id}/limit/{limit_id}endpoint:$ curl -X GET "https://<quay-server.example.com>/api/v1/user/quota/{quota_id}/limit/{limit_id}" \ -H "Authorization: Bearer <access_token>"Example output{"id": 4, "limit_bytes": 2199023255552, "limit": "2.0 TiB", "default_config": false, "limits": [{"id": 3, "type": "Reject", "limit_percent": 100}], "default_config_exists": false}
Managing organizations by using the API
To create and manage organizations in Project Quay, you can use organization API endpoints. You can view organization details, manage members, configure proxy caches, and delete organizations.
Managing organization contact email with the API
Use the organization contact email setting to configure where automated system alerts are sent for an organization. The contact_email field allows multiple organizations to share the same notification address without requiring separate user accounts for each team.
|
Note
|
In the Project Quay web UI, the |
The organization contact_email field has the following properties:
-
Receives namespace-level notifications (such as quota warnings and quota errors), billing and payment alerts (invoices, payment failures), and organization account recovery emails.
-
Can be shared across multiple organizations (useful for team distribution lists).
-
An optional setting; if left empty, notifications default to organization owners.
|
Note
|
When When you set |
|
Note
|
For |
-
You have Created an OAuth access token.
-
You have organization administrator permissions.
-
To retrieve the current email configured for an organization, use the following
GET /api/v1/organization/{orgname}endpoint:$ curl -X GET \ -H "Authorization: Bearer <bearer_token>" \ "https://<quay-server.example.com>/api/v1/organization/engineering"Example response{ "name": "engineering", "email": "team-notifications@example.com", "is_admin": true }When an email address is not configured, the API response returns
"email": "". -
To set the contact email when creating an organization, pass the
contact_emailfield by using thePOST /api/v1/organization/endpoint:$ curl -X POST \ -H "Authorization: Bearer <bearer_token>" \ -H "Content-Type: application/json" \ -d '{"name": "engineering", "contact_email": "team-alerts@example.com"}' \ "https://<quay-server.example.com>/api/v1/organization/" -
To update the contact email for an existing organization, use the
PUT /api/v1/organization/{orgname}endpoint:$ curl -X PUT \ -H "Authorization: Bearer <bearer_token>" \ -H "Content-Type: application/json" \ -d '{"contact_email": "new-team-alerts@example.com"}' \ "https://<quay-server.example.com>/api/v1/organization/engineering" -
To remove the contact email, set
contact_emailtonullor""(empty string). System notifications default to organization owners:$ curl -X PUT \ -H "Authorization: Bearer <bearer_token>" \ -H "Content-Type: application/json" \ -d '{"contact_email": ""}' \ "https://<quay-server.example.com>/api/v1/organization/engineering" -
Multiple organizations can share the same notification address (for example, a team distribution list):
$ curl -X PUT -H "Authorization: Bearer <token>" -H "Content-Type: application/json" \ -d '{"email": "devops-team@example.com"}' \ "https://<quay-server.example.com>/api/v1/organization/engineering"$ curl -X PUT -H "Authorization: Bearer <token>" -H "Content-Type: application/json" \ -d '{"email": "devops-team@example.com"}' \ "https://<quay-server.example.com>/api/v1/organization/qa-team"NoteWith the default setting (
FEATURE_ORG_SHARED_EMAIL: false), attempting to set an organization email to an address already registered to a user account returnsEmail has already been used: <email>.To allow the same email address to be shared across multiple organizations and with at most one user account, set
FEATURE_ORG_SHARED_EMAIL: truein yourconfig.yamlfile.
Retrieving organization member information by using the API
To list organization members and collaborators or remove a member in Project Quay, you can call the organization members API endpoints with an OAuth access token.
-
You have created an OAuth access token.
-
Use the
GET /api/v1/organization/{orgname}/membersendpoint to return a list of organization members:$ curl -X GET "https://<quay-server.example.com>/api/v1/organization/<orgname>/members" \ -H "Authorization: Bearer <access_token>"Example output{"members": [{"name": "quayadmin", "kind": "user", "avatar": {"name": "quayadmin", "hash": "6d640d802fe23b93779b987c187a4b7a4d8fbcbd4febe7009bdff58d84498fba", "color": "#f7b6d2", "kind": "user"}, "teams": [{"name": "owners", "avatar": {"name": "owners", "hash": "6f0e3a8c0eb46e8834b43b03374ece43a030621d92a7437beb48f871e90f8d90", "color": "#c7c7c7", "kind": "team"}}], "repositories": ["testrepo"]}, {"name": "testuser", "kind": "user", "avatar": {"name": "testuser", "hash": "f660ab912ec121d1b1e928a0bb4bc61b15f5ad44d5efdc4e1c92a25e99b8e44a", "color": "#6b6ecf", "kind": "user"}, "teams": [{"name": "owners", "avatar": {"name": "owners", "hash": "6f0e3a8c0eb46e8834b43b03374ece43a030621d92a7437beb48f871e90f8d90", "color": "#c7c7c7", "kind": "team"}}], "repositories": []}]} -
You can use the
GET /api/v1/organization/{orgname}/collaboratorsendpoint to return a list of organization collaborators:$ curl -X GET "https://<quay-server.example.com>/api/v1/organization/{orgname}/collaborators" \ -H "Authorization: Bearer <access_token>"Example output{"collaborators": [user-test]} -
Use the
GET /api/v1/organization/{orgname}/members/{membername}endpoint to obtain more specific information about a user:$ curl -X GET "https://<quay-server.example.com>/api/v1/organization/<orgname>/members/<membername>" \ -H "Authorization: Bearer <access_token>"Example output{"name": "quayadmin", "kind": "user", "avatar": {"name": "quayadmin", "hash": "6d640d802fe23b93779b987c187a4b7a4d8fbcbd4febe7009bdff58d84498fba", "color": "#f7b6d2", "kind": "user"}, "teams": [{"name": "owners", "avatar": {"name": "owners", "hash": "6f0e3a8c0eb46e8834b43b03374ece43a030621d92a7437beb48f871e90f8d90", "color": "#c7c7c7", "kind": "team"}}], "repositories": ["testrepo"]} -
Use the
DELETE /api/v1/organization/{orgname}/members/{membername}endpoint to delete a team member.$ curl -X DELETE "https://<quay-server.example.com>/api/v1/organization/<orgname>/members/<membername>" \ -H "Authorization: Bearer <access_token>"This command does not return output.
Managing an organization application by using the Project Quay API
To create, list, update, or delete organization applications in Project Quay, you can call the organization applications API endpoints with an OAuth access token.
|
Note
|
After you create an organization application in the UI, create and manage OAuth 2 access tokens from the application’s API Access Tokens page. |
-
You have created an OAuth access token.
-
Use the
POST /api/v1/organization/{orgname}/applicationsendpoint to create a new application for your organization. For example:$ curl -X POST "https://<quay-server.example.com>/api/v1/organization/<orgname>/applications" \ -H "Authorization: Bearer <access_token>" \ -H "Content-Type: application/json" \ -d '{ "name": "<app_name>", "redirect_uri": "<redirect_uri>", "application_uri": "<application_uri>", "description": "<app_description>", "avatar_email": "<avatar_email>" }'Example output{"name": "new-application", "description": "", "application_uri": "", "client_id": "<client_id>", "client_secret": "<client_secret>", "redirect_uri": "", "avatar_email": null} -
Use the
GET /api/v1/organization/{orgname}/applicationsendpoint to return a list of all organization applications. For example:$ curl -X GET "https://<quay-server.example.com>/api/v1/organization/<orgname>/applications" \ -H "Authorization: Bearer <access_token>"Example output{"applications": [{"name": "test", "description": "", "application_uri": "", "client_id": "<client_id>", "client_secret": "<client_secret>", "redirect_uri": "", "avatar_email": null}, {"name": "new-token", "description": "", "application_uri": "", "client_id": "<client_id>", "client_secret": "<client_secret>", "redirect_uri": "", "avatar_email": null}, {"name": "second-token", "description": "", "application_uri": "", "client_id": "<client_id>", "client_secret": "<client_secret>", "redirect_uri": "", "avatar_email": null}, {"name": "new-application", "description": "", "application_uri": "", "client_id": "<client_id>", "client_secret": "<client_secret>", "redirect_uri": "", "avatar_email": null}]}You can also return applications for a specific client by using the
GET /api/v1/organization/{orgname}/applications/{client_id}endpoint. For example:$ curl -X GET "https://<quay-server.example.com>/api/v1/organization/<orgname>/applications/<client_id>" \ -H "Authorization: Bearer <access_token>"Example output{"name": "test", "description": "", "application_uri": "", "client_id": "<client_id>", "client_secret": "<client_secret>", "redirect_uri": "", "avatar_email": null} -
After creation, you can update organization applications, for example to add a redirect URI or a new description, by using the
PUT /api/v1/organization/{orgname}/applications/{client_id}endpoint:$ curl -X PUT "https://quay-server.example.com/api/v1/organization/test/applications/12345" \ -H "Authorization: Bearer <access_token>" \ -H "Content-Type: application/json" \ -d '{ "name": "Updated Application Name", "redirect_uri": "https://example.com/oauth/callback", "application_uri": "https://example.com", "description": "Updated description for the application", "avatar_email": "avatar@example.com" }' -
After creation, you can return application information by using the
GET /api/v1/app/{client_id}endpoint:$ curl -X GET "https://<quay-server.example.com>/api/v1/app/<client_id>" \ -H "Authorization: Bearer <access_token>"Example output{"name": "new-application3", "description": "", "uri": "", "avatar": {"name": "new-application3", "hash": "a15d479002b20f211568fd4419e76686d2b88a4980a5b4c4bc10420776c5f6fe", "color": "#aec7e8", "kind": "app"}, "organization": {"name": "test", "email": "new-contact@test-org.com", "avatar": {"name": "test", "hash": "a15d479002b20f211568fd4419e76686d2b88a4980a5b4c4bc10420776c5f6fe", "color": "#aec7e8", "kind": "user"}, "is_admin": true, "is_member": true, "teams": {}, "ordered_teams": [], "invoice_email": true, "invoice_email_address": "billing@test-org.com", "tag_expiration_s": 1209600, "is_free_account": true, "quotas": [{"id": 2, "limit_bytes": 10737418240, "limits": [{"id": 1, "type": "Reject", "limit_percent": 90}]}], "quota_report": {"quota_bytes": 0, "configured_quota": 10737418240, "running_backfill": "complete", "backfill_status": "complete"}}} -
You can delete organization applications with the
DELETE /api/v1/organization/{orgname}/applications/{client_id}endpoint. For example:$ curl -X DELETE "https://<quay-server.example.com>/api/v1/organization/{orgname}/applications/{client_id}" \ -H "Authorization: Bearer <access_token>"This command does not return output.
Configuring a proxy cache for an organization by using the Project Quay API
To create, validate, view, or delete a proxy cache configuration for an organization in Project Quay, you can call the organization proxycache API endpoints with an OAuth access token.
-
You have created an OAuth access token.
-
Use the
POST /api/v1/organization/{orgname}/proxycacheendpoint to create a proxy cache configuration for the organization.$ curl -X POST "https://<quay-server.example.com>/api/v1/organization/<orgname>/proxycache" \ -H "Authorization: Bearer <access_token>" \ -H "Content-Type: application/json" \ -d '{ "upstream_registry": "<upstream_registry>" "upstream_registry_username": "your_robot_account_username" "upstream_registry_password": "your_robot_account_password" }' -
Use the
POST /api/v1/organization/{orgname}/validateproxycacheendpoint to validate the proxy configuration:$ curl -X POST "https://<quay-server.example.com>/api/v1/organization/{orgname}/validateproxycache" \ -H "Authorization: Bearer <access_token>" \ -H "Content-Type: application/json" \ -d '{ "upstream_registry": "<upstream_registry>" "upstream_registry_username": "your_robot_account_username" "upstream_registry_password": "your_robot_account_password" }' -
Use the
GET /api/v1/organization/{orgname}/proxycacheendpoint to obtain information about the proxy cache. For example:$ curl -X GET "https://<quay-server.example.com>/api/v1/organization/{orgname}/proxycache" \ -H "Authorization: Bearer <access_token>"Example output{"upstream_registry": "quay.io", "expiration_s": 86400, "insecure": false} -
Use the
DELETE /api/v1/organization/{orgname}/proxycacheendpoint to delete the proxy cache configuration:$ curl -X DELETE "https://<quay-server.example.com>/api/v1/organization/{orgname}/proxycache" \ -H "Authorization: Bearer <access_token>"Example output"Deleted"
Automate repository and robot account provisioning with the API
Automate repository permissions, auto-prune policies, and robot operations by using the Red Hat Quay API.
Managing repository permissions by using the Project Quay API
To create, view, and delete user and team access on a repository in Project Quay, you can manage repository permissions through the API.
Managing user permissions by using the Project Quay API
To view, change, or remove a user role on a repository in Project Quay, you can call the repository user permissions API endpoints with an OAuth access token.
-
You have created an OAuth access token.
-
Use the
GET /api/v1/repository/{repository}/permissions/user/{username}endpoint to obtain repository permissions for a user. For example:$ curl -X GET \ -H "Authorization: Bearer <access_token>" \ "https://quay-server.example.com/api/v1/repository/<repository_path>/permissions/user/<username>"Example output{"role": "read", "name": "testuser", "is_robot": false, "avatar": {"name": "testuser", "hash": "f660ab912ec121d1b1e928a0bb4bc61b15f5ad44d5efdc4e1c92a25e99b8e44a", "color": "#6b6ecf", "kind": "user"}, "is_org_member": false} -
Return all user permissions with the
GET /api/v1/repository/{repository}/permissions/user/endpoint:$ curl -X GET \ -H "Authorization: Bearer <access_token>" \ "https://quay-server.example.com/api/v1/repository/<namespace>/<repository>/permissions/user/"Example output{"permissions": {"quayadmin": {"role": "admin", "name": "quayadmin", "is_robot": false, "avatar": {"name": "quayadmin", "hash": "6d640d802fe23b93779b987c187a4b7a4d8fbcbd4febe7009bdff58d84498fba", "color": "#f7b6d2", "kind": "user"}, "is_org_member": true}, "test+example": {"role": "admin", "name": "test+example", "is_robot": true, "avatar": {"name": "test+example", "hash": "3b03050c26e900500437beee4f7f2a5855ca7e7c5eab4623a023ee613565a60e", "color": "#a1d99b", "kind": "robot"}, "is_org_member": true}}} -
Alternatively, use the
GET /api/v1/repository/{repository}/permissions/user/{username}/transitiveendpoint to return only the repository permission for the user:$ curl -X GET \ -H "Authorization: Bearer <access_token>" \ "https://quay-server.example.com/api/v1/repository/<repository_path>/permissions/user/<username>/transitive"Example output{"permissions": [{"role": "admin"}]} -
Change the user’s permissions, such as making the user an
admin, by using thePUT /api/v1/repository/{repository}/permissions/user/{username}endpoint. For example:$ curl -X PUT \ -H "Authorization: Bearer <access_token>" \ -H "Content-Type: application/json" \ -d '{"role": "<role>"}' \ "https://quay-server.example.com/api/v1/repository/<repository_path>/permissions/user/<username>"Example output{"role": "admin", "name": "testuser", "is_robot": false, "avatar": {"name": "testuser", "hash": "f660ab912ec121d1b1e928a0bb4bc61b15f5ad44d5efdc4e1c92a25e99b8e44a", "color": "#6b6ecf", "kind": "user"}, "is_org_member": false} -
Delete user permissions by using the
DELETE /api/v1/repository/{repository}/permissions/user/{username}endpoint. For example:$ curl -X DELETE \ -H "Authorization: Bearer <access_token>" \ "https://quay-server.example.com/api/v1/repository/<namespace>/<repository>/permissions/user/<username>"This command does not return output.
Managing team permissions by using the Project Quay API
To view, change, or remove a team role on a repository in Project Quay, you can call the repository team permissions API endpoints with an OAuth access token.
-
You have created an OAuth access token.
-
Return permissions for a specified team by using the
GET /api/v1/repository/{repository}/permissions/team/{teamname}endpoint:$ curl -X GET \ -H "Authorization: Bearer <access_token>" \ "https://quay-server.example.com/api/v1/repository/<namespace>/<repository>/permissions/team/<teamname>"Example output{"role": "write"} -
Return permissions for all teams with the
GET /api/v1/repository/{repository}/permissions/team/endpoint. For example:$ curl -X GET \ -H "Authorization: Bearer <access_token>" \ "https://quay-server.example.com/api/v1/repository/<namespace>/<repository>/permissions/team/"Example output{"permissions": {"ironmanteam": {"role": "read", "name": "ironmanteam", "avatar": {"name": "ironmanteam", "hash": "8045b2361613622183e87f33a7bfc54e100a41bca41094abb64320df29ef458d", "color": "#969696", "kind": "team"}}, "sillyteam": {"role": "read", "name": "sillyteam", "avatar": {"name": "sillyteam", "hash": "f275d39bdee2766d2404e2c6dbff28fe290969242e9fcf1ffb2cde36b83448ff", "color": "#17becf", "kind": "team"}}}} -
Change permissions for a specified team by using the
PUT /api/v1/repository/{repository}/permissions/team/{teamname}command. For example:$ curl -X PUT \ -H "Authorization: Bearer <access_token>" \ -H "Content-Type: application/json" \ -d '{"role": "<role>"}' \ "https://quay-server.example.com/api/v1/repository/<namespace>/<repository>/permissions/team/<teamname>"Example output{"role": "admin", "name": "superteam", "avatar": {"name": "superteam", "hash": "48cb6d114200039fed5c601480653ae7371d5a8849521d4c3bf2418ea013fc0f", "color": "#9467bd", "kind": "team"}} -
Delete team permissions with the
DELETE /api/v1/repository/{repository}/permissions/team/{teamname}command. For example:$ curl -X DELETE \ -H "Authorization: Bearer <access_token>" \ "https://quay-server.example.com/api/v1/repository/<namespace>/<repository>/permissions/team/<teamname>"This command does not return output in the CLI.
Managing auto-prune policies by using the Project Quay API
To create, retrieve, update, and delete auto-prune policies for organizations, repositories, and users in Project Quay, you can use the auto-prune policy API endpoints.
Creating and configuring repositories
To create a repository and manage its visibility, details, and description in Project Quay, you can call the repository API endpoints with an OAuth access token.
-
You have created an OAuth access token.
-
Enter the following command to create a repository by using the
POST /api/v1/repositoryendpoint:$ curl -X POST \ -H "Authorization: Bearer <bearer_token>" \ -H "Content-Type: application/json" \ -d '{ "repository": "<new_repository_name>", "visibility": "<private>", "description": "<This is a description of the new repository>." }' \ "https://quay-server.example.com/api/v1/repository"Example output{"namespace": "quayadmin", "name": "<new_repository_name>", "kind": "image"} -
You can list repositories with the
GET /api/v1/repositoryendpoint. For example:$ curl -X GET \ -H "Authorization: Bearer <ACCESS_TOKEN>" \ "https://quay-server.example.com/api/v1/repository?public=true&starred=false&namespace=<NAMESPACE>"Example output{"repositories": [{"namespace": "quayadmin", "name": "busybox", "description": null, "is_public": false, "kind": "image", "state": "MIRROR", "is_starred": false, "quota_report": {"quota_bytes": 2280675, "configured_quota": 2199023255552}}]} -
Change visibility from public to private with the
POST /api/v1/repository/{repository}/changevisibilityendpoint:$ curl -X POST \ -H "Authorization: Bearer <ACCESS_TOKEN>" \ -H "Content-Type: application/json" \ -d '{ "visibility": "private" }' \ "https://quay-server.example.com/api/v1/repository/<NAMESPACE>/<REPO_NAME>/changevisibility"Example output{"success": true} -
You can check the Project Quay UI, or you can enter the following
GET /api/v1/repository/{repository}command to return details about a repository:$ curl -X GET -H "Authorization: Bearer <bearer_token>" "<quay-server.example.com>/api/v1/repository/<namespace>/<repository_name>"Example output{"detail": "Not Found", "error_message": "Not Found", "error_type": "not_found", "title": "not_found", "type": "http://quay-server.example.com/api/v1/error/not_found", "status": 404} -
Update repository descriptions with the
PUT /api/v1/repository/{repository}endpoint:$ curl -X PUT \ -H "Authorization: Bearer <bearer_token>" \ -H "Content-Type: application/json" \ -d '{ "description": "This is an updated description for the repository." }' \ "https://quay-server.example.com/api/v1/repository/<NAMESPACE>/<REPOSITORY>"Example output{"success": true} -
Enter the following command to delete a repository by using the
DELETE /api/v1/repository/{repository}endpoint:$ curl -X DELETE -H "Authorization: Bearer <bearer_token>" "<quay-server.example.com>/api/v1/repository/<namespace>/<repository_name>"This command does not return output in the CLI.
Creating and configuring robot accounts by using the Project Quay API
To create, retrieve, update, and delete robot accounts for organizations and users in Project Quay, you can use the robot account API endpoints.
Creating a robot account by using the Project Quay API
To automate access to your repositories, you can create a robot account by using the Project Quay API. You can create robot accounts for an organization or for your own user account.
-
You have created an OAuth access token.
-
Enter the following command to create a new robot account for an organization by using the
PUT /api/v1/organization/{orgname}/robots/{robot_shortname}endpoint:$ curl -X PUT -H "Authorization: Bearer <bearer_token>" "https://<quay-server.example.com>/api/v1/organization/<organization_name>/robots/<robot_name>"Example output{"name": "orgname+robot-name", "created": "Fri, 10 May 2024 15:11:00 -0000", "last_accessed": null, "description": "", "token": "<example_secret>", "unstructured_metadata": null} -
Enter the following command to create a new robot account for the current user with the
PUT /api/v1/user/robots/{robot_shortname}endpoint:$ curl -X PUT -H "Authorization: Bearer <bearer_token>" "https://<quay-server.example.com>/api/v1/user/robots/<robot_name>"Example output{"name": "quayadmin+robot-name", "created": "Fri, 10 May 2024 15:24:57 -0000", "last_accessed": null, "description": "", "token": "<example_secret>", "unstructured_metadata": null}
Obtaining robot account information by using the Project Quay API
To review robot account details and permissions for an organization or user in Project Quay, you can call the robot account API endpoints with an OAuth access token.
-
You have created an OAuth access token.
-
Use the
GET /api/v1/organization/{orgname}/robots/{robot_shortname}API endpoint to return information for a robot for an organization:$ curl -X GET \ -H "Authorization: Bearer <bearer_token>" \ "https://quay-server.example.com/api/v1/organization/<ORGNAME>/robots/<ROBOT_SHORTNAME>"Example output{"name": "test+example", "created": "Mon, 25 Nov 2024 16:25:16 -0000", "last_accessed": null, "description": "", "token": "string", "unstructured_metadata": {}} -
Use the
GET /api/v1/organization/{orgname}/robots/{robot_shortname}/permissionsendpoint to return the list of permissions for a specific organization robot:$ curl -X GET \ -H "Authorization: Bearer <bearer_token>" \ "https://quay-server.example.com/api/v1/organization/<ORGNAME>/robots/<ROBOT_SHORTNAME>/permissions"Example output{"permissions": [{"repository": {"name": "testrepo", "is_public": true}, "role": "admin"}]} -
Use the
GET /api/v1/user/robots/{robot_shortname}API endpoint to return the user’s robot with the specified name:$ curl -X GET \ -H "Authorization: Bearer <bearer_token>" \ "https://quay-server.example.com/api/v1/user/robots/<ROBOT_SHORTNAME>"Example output{"name": "quayadmin+mirror_robot", "created": "Wed, 15 Jan 2025 17:22:09 -0000", "last_accessed": null, "description": "", "token": "<token_example>", "unstructured_metadata": {}} -
Use the
GET /api/v1/user/robots/{robot_shortname}/permissionsAPI endpoint to return a list of permissions for the user robot:$ curl -X GET \ -H "Authorization: Bearer <bearer_token>" \ "https://quay-server.example.com/api/v1/user/robots/<ROBOT_SHORTNAME>/permissions"Example output{"permissions": [{"repository": {"name": "busybox", "is_public": false}, "role": "write"}]}
Deleting a robot account by using the Project Quay API
To remove a robot account that you no longer need, you can delete it by using the Project Quay API. You can delete robot accounts that belong to an organization or to your own user account.
-
You have created an OAuth access token.
-
Enter the following command to delete a robot account for an organization by using the
DELETE /api/v1/organization/{orgname}/robots/{robot_shortname}endpoint:$ curl -X DELETE \ -H "Authorization: Bearer <bearer_token>" \ "<quay-server.example.com>/api/v1/organization/<organization_name>/robots/<robot_shortname>" -
The CLI does not return information when deleting a robot account with the API. To confirm deletion, you can check the Project Quay UI, or you can enter the following
GET /api/v1/organization/{orgname}/robotscommand to see if details are returned for the robot account:$ curl -X GET -H "Authorization: Bearer <bearer_token>" "https://<quay-server.example.com>/api/v1/organization/<organization_name>/robots"Example output{"robots": []} -
Enter the following command to delete a robot account for the current user with the
DELETE /api/v1/user/robots/{robot_shortname}endpoint:$ curl -X DELETE \ -H "Authorization: Bearer <bearer_token>" \ "<quay-server.example.com>/api/v1/user/robots/<robot_shortname>" -
The CLI does not return information when deleting a robot account for the current user with the API. To confirm deletion, you can check the Project Quay UI, or you can enter the following
GET /api/v1/user/robots/{robot_shortname}command to see if details are returned for the robot account:$ curl -X GET \ -H "Authorization: Bearer <bearer_token>" \ "<quay-server.example.com>/api/v1/user/robots/<robot_shortname>"Example output{"message":"Could not find robot with specified username"}
Automate tag, team, and search operations with the API
Automate tag management, team operations, and registry search by using the Red Hat Quay API.
Searching against registry context
To find repositories, entities, and other registry resources in Project Quay, you can use the search API endpoints with an OAuth access token.
-
You have created an OAuth access token.
-
Use the
GET /api/v1/find/repositoriesendpoint to get a list of apps and repositories that match the specified query:$ curl -X GET "https://quay-server.example.com/api/v1/find/repositories?query=<repo_name>&page=1&includeUsage=true" \ -H "Authorization: Bearer <bearer_token>"Example output{"results": [], "has_additional": false, "page": 2, "page_size": 10, "start_index": 10} -
Use the
GET /api/v1/find/allendpoint to get a list of entities and resources that match the specified query:$ curl -X GET "https://quay-server.example.com/api/v1/find/all?query=<mysearchterm>" \ -H "Authorization: Bearer <bearer_token>"Example output{"results": [{"kind": "repository", "title": "repo", "namespace": {"title": "user", "kind": "user", "avatar": {"name": "quayadmin", "hash": "6d640d802fe23b93779b987c187a4b7a4d8fbcbd4febe7009bdff58d84498fba", "color": "#f7b6d2", "kind": "user"}, "name": "quayadmin", "score": 1, "href": "/user/quayadmin"}, "name": "busybox", "description": null, "is_public": false, "score": 4.0, "href": "/repository/quayadmin/busybox"}]} -
Use the
GET /api/v1/entities/{prefix}endpoint to get a list of entities that match the specified prefix.$ curl -X GET "https://quay-server.example.com/api/v1/entities/<prefix>?includeOrgs=<true_or_false>&includeTeams=<true_or_false>&namespace=<namespace>" \ -H "Authorization: Bearer <bearer_token>"Example output{"results": [{"name": "quayadmin", "kind": "user", "is_robot": false, "avatar": {"name": "quayadmin", "hash": "6d640d802fe23b93779b987c187a4b7a4d8fbcbd4febe7009bdff58d84498fba", "color": "#f7b6d2", "kind": "user"}}]}
Managing tags with the Project Quay API
To change, restore, list, or delete repository tags in Project Quay, you can use the tag API endpoints with an OAuth access token.
-
You have created an OAuth access token.
-
Use the
PUT /api/v1/repository/{repository}/tag/{tag}endpoint to change which image a tag points to or create a new tag:$ curl -X PUT "https://quay-server.example.com/api/v1/repository/<namespace>/<repo_name>/tag/<tag_name>" \ -H "Authorization: Bearer <ACCESS_TOKEN>" \ -H "Content-Type: application/json" \ -d '{"manifest_digest": "<MANIFEST_DIGEST>"}'Example output"Updated" -
Use the
POST /api/v1/repository/{repository}/tag/{tag}/restoreendpoint to restore a repository tag back to a previous image in the repository:$ curl -X POST "https://quay-server.example.com/api/v1/repository/<namespace>/<repo_name>/tag/<tag_name>/restore" \ -H "Authorization: Bearer <your_access_token>" \ -H "Content-Type: application/json" \ -d '{"manifest_digest": "sha256:<your_manifest_digest>"}'Example output{} -
Use the
GET /api/v1/repository/{repository}/tag/endpoint to obtain a list of repository tags:$ curl -X GET "https://quay-server.example.com/api/v1/repository/<namespace>/<repo_name>/tag/" \ -H "Authorization: Bearer <your_access_token>" \ -H "Content-Type: application/json"Example output{"tags": [{"name": "test", "reversion": true, "start_ts": 1740496373, "manifest_digest": "sha256:d08334991a3dba62307016833083d6433f489ab0f7d36d0a4771a20b4569b2f6", "is_manifest_list": false, "size": 2280303, "last_modified": "Tue, 25 Feb 2025 15:12:53 -0000"}, {"name": "test", "reversion": false, "start_ts": 1740495442, "end_ts": 1740496373, "manifest_digest": "sha256:d08334991a3dba62307016833083d6433f489ab0f7d36d0a4771a20b4569b2f6", "is_manifest_list": false, "size": 2280303, "last_modified": "Tue, 25 Feb 2025 14:57:22 -0000", "expiration": "Tue, 25 Feb 2025 15:12:53 -0000"}, {"name": "test", "reversion": false, "start_ts": 1740495408, "end_ts": 1740495442, "manifest_digest": "sha256:d08334991a3dba62307016833083d6433f489ab0f7d36d0a4771a20b4569b2f6", "is_manifest_list": false, "size": 2280303, "last_modified": "Tue, 25 Feb 2025 14:56:48 -0000", "expiration": "Tue, 25 Feb 2025 14:57:22 -0000"}], "page": 1, "has_additional": false} -
Use the
DELETE /api/v1/repository/{repository}/tag/{tag}endpoint to delete a tag from a repository:$ curl -X DELETE "https://quay-server.example.com/api/v1/repository/<namespace>/<repo_name>/tag/<tag_name>" \ -H "Authorization: Bearer <your_access_token>"This command does not return output in the CLI.
Managing teams by using the API
Organization teams in Project Quay group users for shared repository access. You can manage teams and membership by using the API.
Managing team members and repository permissions by using the API
To add, invite, or remove members of an organization team in Project Quay, you can use the team member API endpoints with an OAuth access token.
-
You have created an OAuth access token.
-
Enter the
PUT /api/v1/organization/{orgname}/team/{teamname}/members/{membername}command to add or invite a member to an existing team:$ curl -X PUT \ -H "Authorization: Bearer <your_access_token>" \ "<quay-server.example.com>/api/v1/organization/<organization_name>/team/<team_name>/members/<member_name>"Example output{"name": "testuser", "kind": "user", "is_robot": false, "avatar": {"name": "testuser", "hash": "d51d17303dc3271ac3266fb332d7df919bab882bbfc7199d2017a4daac8979f0", "color": "#5254a3", "kind": "user"}, "invited": false} -
Enter the
DELETE /api/v1/organization/{orgname}/team/{teamname}/members/{membername}command to remove a member of a team:$ curl -X DELETE \ -H "Authorization: Bearer <your_access_token>" \ "<quay-server.example.com>/api/v1/organization/<organization_name>/team/<team_name>/members/<member_name>"This command does not return output in the CLI. To ensure that a member has been deleted, you can enter the
GET /api/v1/organization/{orgname}/team/{teamname}/memberscommand and ensure that the member is not returned in the output.$ curl -X GET \ -H "Authorization: Bearer <your_access_token>" \ "<quay-server.example.com>/api/v1/organization/<organization_name>/team/<team_name>/members"Example output{"name": "owners", "members": [{"name": "quayadmin", "kind": "user", "is_robot": false, "avatar": {"name": "quayadmin", "hash": "b28d563a6dc76b4431fc7b0524bbff6b810387dac86d9303874871839859c7cc", "color": "#17becf", "kind": "user"}, "invited": false}, {"name": "test-org+test", "kind": "user", "is_robot": true, "avatar": {"name": "test-org+test", "hash": "aa85264436fe9839e7160bf349100a9b71403a5e9ec684d5b5e9571f6c821370", "color": "#8c564b", "kind": "robot"}, "invited": false}], "can_edit": true} -
You can enter the
PUT /api/v1/organization/{orgname}/team/{teamname}/invite/{email}command to invite a user, by email address, to an existing team:$ curl -X PUT \ -H "Authorization: Bearer <your_access_token>" \ "<quay-server.example.com>/api/v1/organization/<organization_name>/team/<team_name>/invite/<email>" -
You can enter the
DELETE /api/v1/organization/{orgname}/team/{teamname}/invite/{email}command to delete the invite of an email address to join a team. For example:$ curl -X DELETE \ -H "Authorization: Bearer <your_access_token>" \ "<quay-server.example.com>/api/v1/organization/<organization_name>/team/<team_name>/invite/<email>"
Setting the role of a team within an organization by using the API
To view repository permissions for a team or set a team’s role in an Project Quay organization, you can use the organization team API endpoints with an OAuth access token.
-
You have created an OAuth access token.
-
Enter the following
GET /api/v1/organization/{orgname}/team/{teamname}/permissionscommand to return a list of repository permissions for the organization’s team. Note that your team must have been added to a repository for this command to return information.$ curl -X GET \ -H "Authorization: Bearer <your_access_token>" \ "<quay-server.example.com>/api/v1/organization/<organization_name>/team/<team_name>/permissions"Example output{"permissions": [{"repository": {"name": "api-repo", "is_public": true}, "role": "admin"}]} -
You can create or update a team within an organization to have a specified role of admin, member, or creator using the
PUT /api/v1/organization/{orgname}/team/{teamname}command. For example:$ curl -X PUT \ -H "Authorization: Bearer <your_access_token>" \ -H "Content-Type: application/json" \ -d '{ "role": "<role>" }' \ "<quay-server.example.com>/api/v1/organization/<organization_name>/team/<team_name>"Example output{"name": "testteam", "description": "", "can_view": true, "role": "creator", "avatar": {"name": "testteam", "hash": "827f8c5762148d7e85402495b126e0a18b9b168170416ed04b49aae551099dc8", "color": "#ff7f0e", "kind": "team"}, "new_team": false}
Deleting a team within an organization by using the API
To delete a team from an organization in Project Quay, you can use the organization team API endpoint with an OAuth access token.
-
You have created an OAuth access token.
-
You can delete a team within an organization by entering the
DELETE /api/v1/organization/{orgname}/team/{teamname}command:$ curl -X DELETE \ -H "Authorization: Bearer <your_access_token>" \ "<quay-server.example.com>/api/v1/organization/<organization_name>/team/<team_name>"This command does not return output in the CLI.
Build images from Dockerfiles in Quay
Build container images from Dockerfiles by using the Red Hat Quay UI or API, including starting builds and creating build triggers.
Container image builds
Project Quay can build container images from Dockerfiles on worker nodes. You can start builds manually or automatically from source-control events so that registry images stay aligned with your code.
Builds are supported on Red Hat Quay on OpenShift Container Platform and Kubernetes. A build manager coordinates build jobs. You can run builders on bare metal nodes or as virtual (unprivileged container) builders, depending on isolation needs and available infrastructure.
When you plan builds, decide whether Project Quay should own image builds in your pipeline or whether an external CI system should push finished images into the registry. If you use Project Quay builds, choose a builder strategy and confirm networking constraints for your cluster.
|
Note
|
Running builds directly in a container on bare metal does not provide the same isolation as virtual machines, but it still provides meaningful process isolation. |
Building container images
The Project Quay builds feature supports building Docker and Podman container images from Dockerfiles. You can create containerized applications by defining build contexts and using base images from public repositories.
supports the ability to build Docker and Podman container images. This functionality is valuable for developers and organizations who rely on container and container orchestration.
Build contexts
When building an image with Docker or Podman, a directory is specified to become the build context. This is true for both manual Builds and Build triggers, because the Build that is created by
is not different than running docker build or podman build on your local machine.
Build contexts are always specified in the subdirectory from the Build setup, and fallback to the root of the Build source if a directory is not specified.
When a build is triggered, Build workers clone the Git repository to the worker machine, and then enter the Build context before conducting a Build.
For Builds based on .tar archives, Build workers extract the archive and enter the Build context. For example:
example
├── .git
├── Dockerfile
├── file
└── subdir
└── DockerfileImagine that the Extracted Build archive is the directory structure got a Github repository called example. If no subdirectory is specified in the Build trigger setup, or when manually starting the Build, the Build operates in the example directory.
If a subdirectory is specified in the Build trigger setup, for example, subdir, only the Dockerfile within it is visible to the Build. This means that you cannot use the ADD command in the Dockerfile to add file, because it is outside of the Build context.
Unlike Docker Hub, the Dockerfile is part of the Build context on
As a result, it must not appear in the .dockerignore file.
Starting a new build
Starting a build creates a container image from a Dockerfile in Project Quay. You can start builds manually by uploading a Dockerfile or automatically by using build triggers.
-
You have navigated to the Builds page of your repository.
-
On the Builds page, click Start New Build.
-
When prompted, click Upload Dockerfile to upload a Dockerfile or an archive that contains a Dockerfile at the root directory.
-
Click Start Build.
Note-
Currently, users cannot specify the Docker build context when manually starting a build.
-
Currently, BitBucket is unsupported on the Project Quay v2 UI.
-
-
You are redirected to the build, which can be viewed in real-time. Wait for the Dockerfile build to be completed and pushed.
-
Optional. you can click Download Logs to download the logs, or Copy Logs to copy the logs.
-
Click the back button to return to the Repository Builds page, where you can view the build history.

Creating a build trigger
To automate container image builds from your Git repositories, you can create a custom Git build trigger in Project Quay. Build triggers automatically build and push images when you push code to your Git repository.
The following steps can be replicated to create a build trigger using Github, Gitlab, or Bitbucket, however, you must configure the credentials for these services in your config.yaml file.
|
Note
|
|
-
Log in to your Project Quay registry.
-
In the navigation pane, click Repositories.
-
Click Create Repository.
-
Click the Builds tab.
-
On the Builds page, click Create Build Trigger.
-
Select the desired platform, for example, Github, Bitbucket, Gitlab, or use a custom Git repository. For this example, click Custom Git Repository Push.
-
Enter a custom Git repository name, for example,
git@github.com:<username>/<repo>.git. Then, click Next. -
When prompted, configure the tagging options by selecting one of, or both of, the following options:
-
Tag manifest with the branch or tag name. When selecting this option, the built manifest the name of the branch or tag for the git commit are tagged.
-
Add
latesttag if on default branch. When selecting this option, the built manifest with latest if the build occurred on the default branch for the repository are tagged.Optionally, you can add a custom tagging template. There are multiple tag templates that you can enter here, including using short SHA IDs, timestamps, author names, committer, and branch names from the commit as tags. For more information, see "Tag naming for build triggers".
After you have configured tagging, click Next.
-
-
When prompted, select the location of the Dockerfile to be built when the trigger is invoked. If the Dockerfile is located at the root of the git repository and named Dockerfile, enter /Dockerfile as the Dockerfile path. Then, click Next.
-
When prompted, select the context for the Docker build. If the Dockerfile is located at the root of the Git repository, enter
/as the build context directory. Then, click Next. -
Optional. Choose an optional robot account. This allows you to pull a private base image during the build process. If you know that a private base image is not used, you can skip this step.
-
Click Next. Check for any verification warnings. If necessary, fix the issues before clicking Finish.
-
You are alerted that the trigger has been successfully activated. Note that using this trigger requires the following actions:
-
You must give the following public key read access to the git repository.
-
You must set your repository to
POSTto the following URL to trigger a build.Save the SSH Public Key, then click Return to <organization_name>/<repository_name>. You are redirected to the Builds page of your repository.
-
-
On the Builds page, you now have a build trigger. For example:

After you have created a custom Git trigger, additional steps are required. Continue on to "Setting up a custom Git trigger".
If you are setting up a build trigger for Github, Gitlab, or Bitbucket, continue on to "Manually triggering a build".
Managing builds by using the Project Quay API
To list, activate, start, update, or delete build triggers in Project Quay, you can use the build trigger API endpoints with an OAuth access token.
-
You have created an OAuth access token.
-
Use the
GET /api/v1/repository/{repository}/trigger/endpoint to list the triggers for the specified repository:$ curl -X GET "https://quay-server.example.com/api/v1/repository/example_namespace/example_repo/trigger/" \ -H "Authorization: Bearer <your_access_token>"Example output{"triggers": [{"id": "32ca5eae-a29f-46c7-8f44-3221ca417c92", "service": "custom-git", "is_active": false, "build_source": null, "repository_url": null, "config": {}, "can_invoke": true, "enabled": true, "disabled_reason": null}]} -
Use the
POST /api/v1/repository/{repository}/trigger/{trigger_uuid}/activateendpoint to activate the specified build trigger.$ curl -X POST "https://quay-server.example.com/api/v1/repository/example_namespace/example_repo/trigger/example-trigger-uuid/activate" \ -H "Authorization: Bearer <your_access_token>" \ -H "Content-Type: application/json" \ -d '{ "config": { "branch": "main" }, "pull_robot": "example+robot" }' -
Use the
POST /api/v1/repository/{repository}/trigger/{trigger_uuid}/startendpoint to manually start the build from the specified trigger:$ curl -X POST "https://quay-server.example.com/api/v1/repository/example_namespace/example_repo/trigger/example-trigger-uuid/start" \ -H "Authorization: Bearer <your_access_token>" \ -H "Content-Type: application/json" \ -d '{ "branch_name": "main", "commit_sha": "abcdef1234567890", "refs": "refs/heads/main" }' -
Use the
GET /api/v1/repository/{repository}/trigger/{trigger_uuid}/buildsendpoint to list the builds started by the specified trigger:$ curl -X GET "https://quay-server.example.com/api/v1/repository/example_namespace/example_repo/trigger/example-trigger-uuid/builds?limit=10" \ -H "Authorization: Bearer <your_access_token>" -
Use the
GET /api/v1/repository/{repository}/trigger/{trigger_uuid}endpoint to get information for the specified build trigger:$ curl -X GET "https://quay-server.example.com/api/v1/repository/example_namespace/example_repo/trigger/example-trigger-uuid" \ -H "Authorization: Bearer <your_access_token>" -
Use the
PUT /api/v1/repository/{repository}/trigger/{trigger_uuid}endpoint to update the specified build trigger:$ curl -X PUT "https://quay-server.example.com/api/v1/repository/example_namespace/example_repo/trigger/example-trigger-uuid" \ -H "Authorization: Bearer <your_access_token>" \ -H "Content-Type: application/json" \ -d '{"enabled": true}' -
Use the
DELETE /api/v1/repository/{repository}/trigger/{trigger_uuid}endpoint to delete the specified build trigger:$ curl -X DELETE "https://quay-server.example.com/api/v1/repository/example_namespace/example_repo/trigger/example-trigger-uuid" \ -H "Authorization: Bearer <your_access_token>"
Start builds automatically from Git
Configure Git, webhook, and GitHub App build triggers, including credentials, SSH keys, and manual build starts.
Setting up a custom Git trigger
To complete the setup of your custom Git build trigger in Project Quay, you must provide read access to the SSH public key and configure a webhook endpoint. These steps enable your Git repository to automatically trigger builds when you push code.
These steps are only required if you are using a custom Git trigger.
Obtaining build trigger credentials
To configure your custom Git trigger, you can obtain the SSH public key and webhook endpoint URL from the Project Quay user interface. These credentials are available on the Builds page of your repository.
-
You have created a custom Git trigger.
-
On the Builds page of your repository, click the menu kebab for your custom Git trigger.
-
Click View Credentials.
-
Save the SSH Public Key and Webhook Endpoint URL.
The key and the URL are available by selecting View Credentials from the Settings, or gear icon.
SSH public key access
SSH public key access in Project Quay enables builder instances to clone Git repositories for custom build triggers. Install the SSH public key that Project Quay generates in your Git server configuration, either by adding it to the authorized_keys file or using Deploy Keys.
Depending on the Git server configuration, you can install the SSH public key that Project Quay generates for a custom Git trigger in several ways.
For example, the Getting Git on a Server documentation describes how to configure a Git server on a Linux-based machine with a focus on managing repositories and access control through SSH. In this procedure, a small server adds the keys to the $HOME/.ssh/authorize_keys folder, which provides access for builders to clone the repository.
For any Git repository management software that is not officially supported, the software usually provides a field to input the key, often labeled as Deploy Keys.
Webhook reference
The webhook reference provides the JSON payload format required to trigger builds in Project Quay. You must POST a JSON payload with commit, ref, and default_branch fields to the webhook URL to automatically start a build.
|
Note
|
This request requires a |
{
"commit": "1c002dd", // required
"ref": "refs/heads/master", // required
"default_branch": "master", // required
"commit_info": { // optional
"url": "gitsoftware.com/repository/commits/1234567", // required
"message": "initial commit", // required
"date": "timestamp", // required
"author": { // optional
"username": "user", // required
"avatar_url": "gravatar.com/user.png", // required
"url": "gitsoftware.com/users/user" // required
},
"committer": { // optional
"username": "user", // required
"avatar_url": "gravatar.com/user.png", // required
"url": "gitsoftware.com/users/user" // required
}
}
}This can typically be accomplished with a post-receive Git hook, however it does depend on your server setup.
Tag naming for build triggers
Tag naming for build triggers in Project Quay lets you create custom tags using templates that include commit information such as SHA, branch name, author, and date.
You can use these templates to automatically tag your built images with meaningful identifiers based on the Git commit that triggered the build.
One option is to include any string of characters assigned as a tag for each built image. Alternatively, you can use the following tag templates on the Configure Tagging section of the build trigger to tag images with information from each commit:
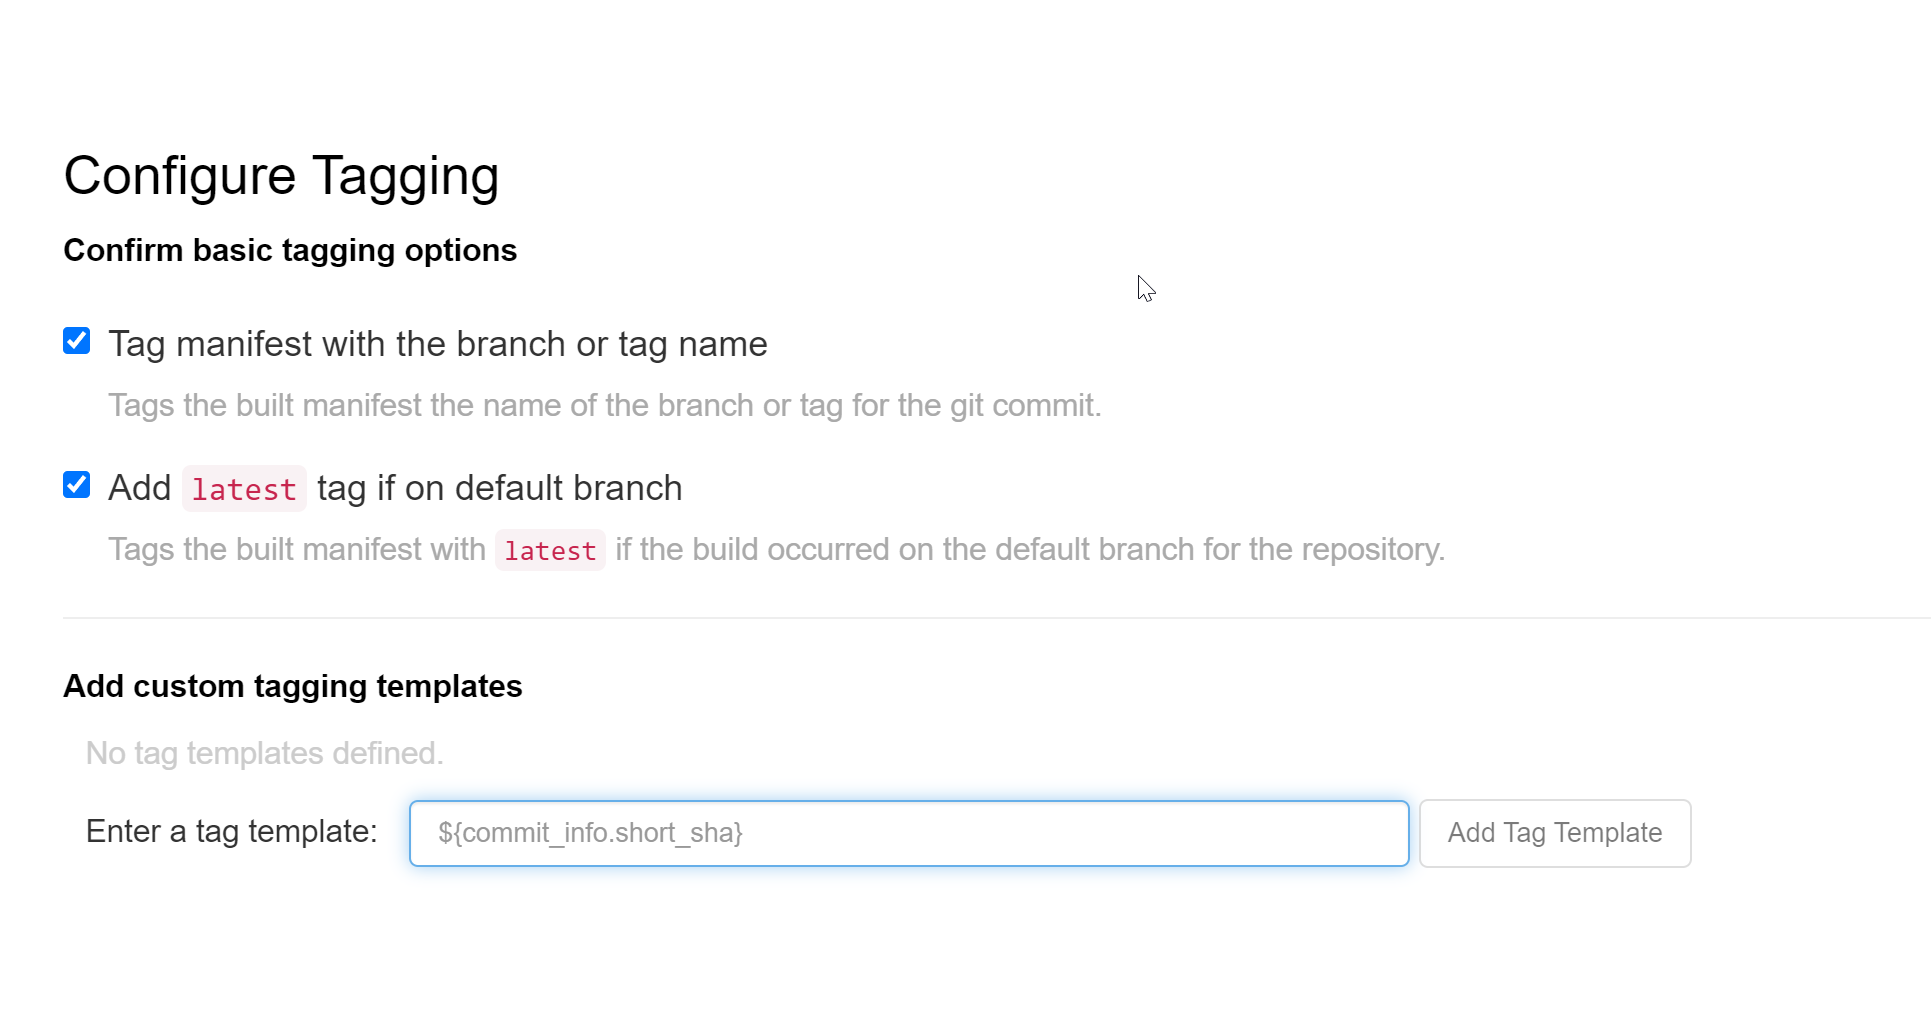
-
${commit}: Full SHA of the issued commit
-
${parsed_ref.branch}: Branch information (if available)
-
${parsed_ref.tag}: Tag information (if available)
-
${parsed_ref.remote}: The remote name
-
${commit_info.date}: Date when the commit was issued
-
${commit_info.author.username}: Username of the author of the commit
-
${commit_info.short_sha}: First 7 characters of the commit SHA
-
${committer.properties.username}: Username of the committer
This list is not complete, but does contain the most useful options for tagging purposes. You can find the complete tag template schema in the Project Quay source repository.
Skipping a source control-triggered build
You can skip source control-triggered builds in Project Quay by adding [skip build] or [build skip] to your commit message. This prevents the build system from automatically building images for commits that do not require new builds.
Manually triggering a build
Manual build triggering in Project Quay lets you start builds on demand without waiting for automatic triggers from source control. You can manually trigger builds from the Builds page by selecting a build trigger and specifying a commit ID.
-
On the Builds page, Start new build.
-
When prompted, select Invoke Build Trigger.
-
Click Run Trigger Now to manually start the process.
-
Enter a commit ID from which to initiate the build, for example,
1c002dd.After the build starts, you can see the build ID on the Repository Builds page.
Creating an OAuth application in GitHub
To enable GitHub integration for automated builds in Project Quay, you can create an OAuth application in GitHub. This allows Project Quay to access GitHub repositories and trigger container image builds when commits or pull requests are made.
-
Log into GitHub Enterprise.
-
In the navigation pane, select your username → Your organizations.
-
In the navigation pane, select Applications → Developer Settings.
-
In the navigation pane, click OAuth Apps → New OAuth App. You are navigated to the following page:
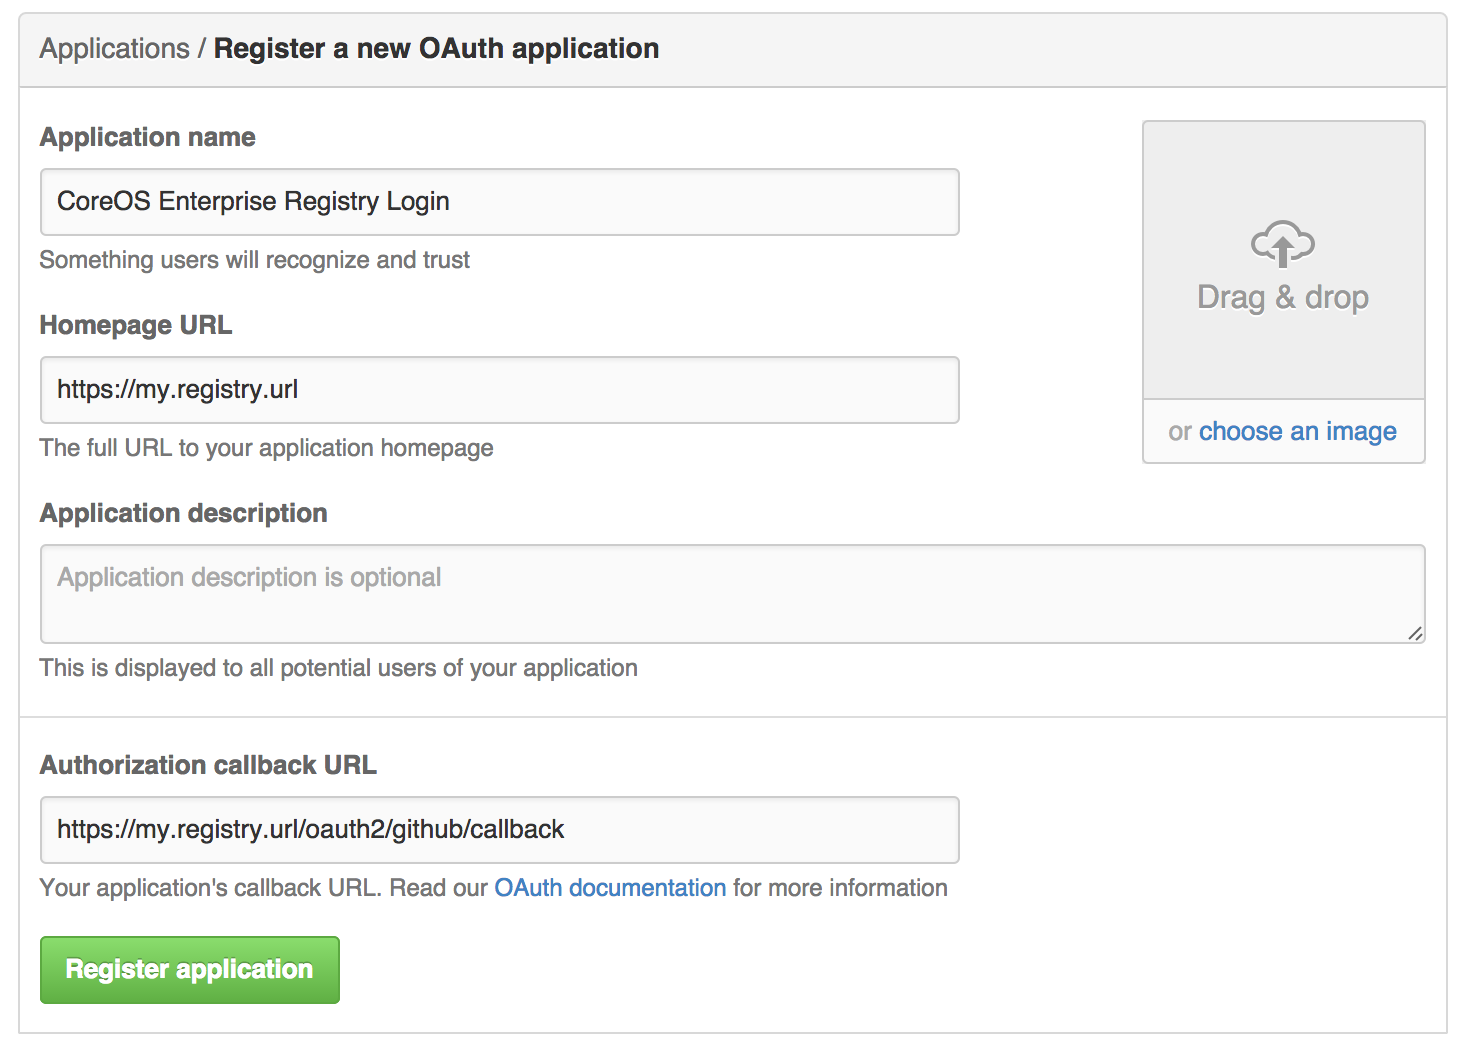
-
Enter a name for the application in the Application name textbox.
-
In the Homepage URL textbox, enter your Project Quay URL.
NoteIf you are using public GitHub, the Homepage URL entered must be accessible by your users. It can still be an internal URL.
-
In the Authorization callback URL, enter https://<RED_HAT_QUAY_URL>/oauth2/github/callback.
-
Click Register application to save your settings.
-
When the new application’s summary is shown, record the Client ID and the Client Secret shown for the new application.
Store Helm charts, OCI artifacts, and signed images in Quay
Push OCI artifacts and Helm charts, attach referrers to image tags, and sign content with Cosign in Red Hat Quay.
Open Container Initiative support
Project Quay supports Open Container Initiative image and distribution formats beyond Docker manifests. You can store Helm charts and other OCI media types in the registry.
In addition to container images, a variety of artifacts have emerged that support not just individual applications, but also the Kubernetes platform as a whole. These range from Open Policy Agent (OPA) policies for security and governance to Helm charts and Operators that aid in application deployment.
is a private container registry that not only stores container images, but also supports an entire ecosystem of tooling to aid in the management of containers. strives to be as compatible as possible with the OCI 1.1 Image and Distribution specifications, and supports common media types like Helm charts (as long as they pushed with a version of Helm that supports OCI) and a variety of arbitrary media types within the manifest or layer components of container images.
In addition to its expanded support for novel media types, ensures compatibility with Docker images, including V2_2 and V2_1 formats. This compatibility with Docker V2_2 and V2_1 images demonstrates commitment to providing a seamless experience for Docker users. Moreover, continues to extend its support for Docker V1 pulls, catering to users who might still rely on this earlier version of Docker images.
Support for OCI artifacts are enabled by default. The following examples show you how to use some media types, which can be used as examples for using other OCI media types.
Helm and OCI prerequisites
Before you use Helm charts with Project Quay, you can install a supported Helm client and trust registry certificates. OCI chart support requires a compatible Helm version.
Helm simplifies how applications are packaged and deployed. Helm uses a packaging format called Charts which contain the Kubernetes resources representing an application. supports Helm charts so long as they are a version supported by OCI.
You can download the most recent version of Helm from the Helm releases page.
Using Helm charts
To use Helm charts with Project Quay, you can push and pull OCI chart artifacts in the registry. You manage charts like other supported OCI media types.
Use the following example to download and push an etherpad chart from the Red Hat Community of Practice (CoP) repository.
-
You have logged into Quay.
-
Add a chart repository by entering the following command:
$ helm repo add redhat-cop https://redhat-cop.github.io/helm-charts -
Enter the following command to update the information of available charts locally from the chart repository:
$ helm repo update -
Enter the following command to pull a chart from a repository:
$ helm pull redhat-cop/etherpad --version=0.0.4 --untar -
Enter the following command to package the chart into a chart archive:
$ helm package ./etherpadExample output
Successfully packaged chart and saved it to: /home/user/linux-amd64/etherpad-0.0.4.tgz -
Log in to Project Quay using
helm registry login:$ helm registry login quay370.apps.quayperf370.perfscale.devcluster.openshift.com -
Push the chart to your repository using the
helm pushcommand:
Annotation parsing
Some OCI media types do not include labels for metadata such as expiration. You can use ORAS annotations with Project Quay to embed that metadata in artifacts.
Tools such as ORAS (OCI Registry as Storage) can now be used to embed information with artifact types to help ensure that images operate properly, for example, to expire.
The following procedure uses ORAS to add an expiration date to an OCI media artifact.
|
Important
|
If you pushed an image with |
-
You have downloaded the
orasCLI. -
You have pushed an OCI media artifact to your Project Quay repository.
-
By default, some OCI media types, like
application/vnd.oci.image.manifest.v1+json, do not use certain labels, like expiration timestamps. You can use a CLI tool like ORAS (oras) to add annotations to OCI media types. For example:$ oras push --annotation "quay.expires-after=2d" \ --annotation "expiration = 2d" \ quay.io/<organization_name>/<repository>/<image_name>:<tag>where:
--annotation "quay.expires-after=2d"-
Specifies that the expiration time is set for 2 days, indicated by
2d. --annotation "expiration = 2d"-
Specifies that the expiration label is added.
Example output✓ Exists application/vnd.oci.empty.v1+json 2/2 B 100.00% 0s └─ sha256:44136fa355b3678a1146ad16f7e8649e94fb4fc21fe77e8310c060f61caaff8a ✓ Uploaded application/vnd.oci.image.manifest.v1+json 561/561 B 100.00% 511ms └─ sha256:9b4f2d43b62534423894d077f0ff0e9e496540ec8b52b568ea8b757fc9e7996b Pushed [registry] quay.io/stevsmit/testorg3/oci-image:v1 ArtifactType: application/vnd.unknown.artifact.v1 Digest: sha256:9b4f2d43b62534423894d077f0ff0e9e496540ec8b52b568ea8b757fc9e7996b
-
Pull the image with
oras. For example:$ oras pull quay.io/<organization_name>/<repository>/<image_name>:<tag> -
Inspect the changes using
oras. For example:$ oras manifest fetch quay.io/<organization_name>/<repository>/<image_name>:<tag>Example output{"schemaVersion":2,"mediaType":"application/vnd.oci.image.manifest.v1+json","artifactType":"application/vnd.unknown.artifact.v1","config":{"mediaType":"application/vnd.oci.empty.v1+json","digest":"sha256:44136fa355b3678a1146ad16f7e8649e94fb4fc21fe77e8310c060f61caaff8a","size":2,"data":"e30="},"layers":[{"mediaType":"application/vnd.oci.empty.v1+json","digest":"sha256:44136fa355b3678a1146ad16f7e8649e94fb4fc21fe77e8310c060f61caaff8a","size":2,"data":"e30="}],"annotations":{"org.opencontainers.image.created":"2024-07-11T15:22:42Z","version ":" 8.11"}}
Attaching referrers to an image tag
To attach referrers to an image tag in Project Quay, you can use the oras CLI with OCI distribution spec 1.1 referrers schemas.
This procedure shows you how to attach referrers to an image tag using different schemas supported by the OCI distribution spec 1.1 using the oras CLI. This is useful for attaching and managing additional metadata like referrers to container images.
-
You have downloaded the
orasCLI. -
You have access to an OCI media artifact.
-
Tag an OCI media artifact by entering the following command:
$ podman tag <myartifact_image> <quay-server.example.com>/<organization_name>/<repository>/<image_name>:<tag> -
Push the artifact to your Project Quay registry. For example:
$ podman push <myartifact_image> <quay-server.example.com>/<organization_name>/<repository>/<image_name>:<tag> -
Enter the following command to attach a manifest using the OCI 1.1 referrers
APIschema withoras:$ oras attach --artifact-type <MIME_type> --distribution-spec v1.1-referrers-api <myartifact_image> \ <quay-server.example.com>/<organization_name>/<repository>/<image_name>:<tag> \ <example_file>.txtExample output-spec v1.1-referrers-api quay.io/testorg3/myartifact-image:v1.0 hi.txt ✓ Exists hi.txt 3/3 B 100.00% 0s └─ sha256:98ea6e4f216f2fb4b69fff9b3a44842c38686ca685f3f55dc48c5d3fb1107be4 ✓ Exists application/vnd.oci.empty.v1+json 2/2 B 100.00% 0s └─ sha256:44136fa355b3678a1146ad16f7e8649e94fb4fc21fe77e8310c060f61caaff8a ✓ Uploaded application/vnd.oci.image.manifest.v1+json 723/723 B 100.00% 677ms └─ sha256:31c38e6adcc59a3cfbd2ef971792aaf124cbde8118e25133e9f9c9c4cd1d00c6 Attached to [registry] quay.io/testorg3/myartifact-image@sha256:db440c57edfad40c682f9186ab1c1075707ce7a6fdda24a89cb8c10eaad424da Digest: sha256:31c38e6adcc59a3cfbd2ef971792aaf124cbde8118e25133e9f9c9c4cd1d00c6 -
Enter the following command to attach a manifest using the OCI 1.1 referrers
tagschema:$ oras attach --artifact-type <MIME_type> --distribution-spec v1.1-referrers-tag \ <myartifact_image> <quay-server.example.com>/<organization_name>/<repository>/<image_name>:<tag> \ <example_file>.txtExample output✓ Exists hi.txt 3/3 B 100.00% 0s └─ sha256:98ea6e4f216f2fb4b69fff9b3a44842c38686ca685f3f55dc48c5d3fb1107be4 ✓ Exists application/vnd.oci.empty.v1+json 2/2 B 100.00% 0s └─ sha256:44136fa355b3678a1146ad16f7e8649e94fb4fc21fe77e8310c060f61caaff8a ✓ Uploaded application/vnd.oci.image.manifest.v1+json 723/723 B 100.00% 465ms └─ sha256:2d4b54201c8b134711ab051389f5ba24c75c2e6b0f0ff157fce8ffdfe104f383 Attached to [registry] quay.io/testorg3/myartifact-image@sha256:db440c57edfad40c682f9186ab1c1075707ce7a6fdda24a89cb8c10eaad424da Digest: sha256:2d4b54201c8b134711ab051389f5ba24c75c2e6b0f0ff157fce8ffdfe104f383 -
Enter the following command to discoverer referrers of the artifact using the
tagschema:$ oras discover --insecure --distribution-spec v1.1-referrers-tag \ <quay-server.example.com>/<organization_name>/<repository>/<image_name>:<tag>Example outputquay.io/testorg3/myartifact-image@sha256:db440c57edfad40c682f9186ab1c1075707ce7a6fdda24a89cb8c10eaad424da └── doc/example └── sha256:2d4b54201c8b134711ab051389f5ba24c75c2e6b0f0ff157fce8ffdfe104f383 -
Enter the following command to discoverer referrers of the artifact using the
APIschema:$ oras discover --distribution-spec v1.1-referrers-api \ <quay-server.example.com>/<organization_name>/<repository>/<image_name>:<tag>Example outputDiscovered 3 artifacts referencing v1.0 Digest: sha256:db440c57edfad40c682f9186ab1c1075707ce7a6fdda24a89cb8c10eaad424da Artifact Type Digest sha256:2d4b54201c8b134711ab051389f5ba24c75c2e6b0f0ff157fce8ffdfe104f383 sha256:22b7e167793808f83db66f7d35fbe0088b34560f34f8ead36019a4cc48fd346b sha256:bb2b7e7c3a58fd9ba60349473b3a746f9fe78995a88cb329fc2fd1fd892ea4e4 -
Optional. You can also discover referrers by using the
/v2/<organization_name>/<repository_name>/referrers/<sha256_digest>endpoint. For this to work, you must generate a v2 API token and setFEATURE_REFERRERS_API: truein yourconfig.yamlfile.-
Update your
config.yamlfile to include theFEATURE_REFERRERS_APIfield. For example:# ... FEATURE_REFERRERS_API: true # ... -
Enter the following command to Base64 encode your credentials:
$ echo -n '<username>:<password>' | base64Example outputabcdeWFkbWluOjE5ODlraWROZXQxIQ== -
Enter the following command to use the base64 encoded token and modify the URL endpoint to your Project Quay server:
$ curl --location '<quay-server.example.com>/v2/auth?service=<quay-server.example.com>&scope=repository:quay/listocireferrs:pull,push' --header 'Authorization: Basic <base64_username:password_encode_token>' -k | jqExample output{ "token": "<example_token_output>..." }
-
-
Enter the following command, using the v2 API token, to list OCI referrers of a manifest under a repository:
$ GET https://<quay-server.example.com>/v2/<organization_name>/<repository_name>/referrers/sha256:0de63ba2d98ab328218a1b6373def69ec0d0e7535866f50589111285f2bf3fb8 --header 'Authorization: Bearer <v2_bearer_token> -k | jqExample output{ "schemaVersion": 2, "mediaType": "application/vnd.oci.image.index.v1+json", "manifests": [ { "mediaType": "application/vnd.oci.image.manifest.v1+json", "digest": "sha256:2d4b54201c8b134711ab051389f5ba24c75c2e6b0f0ff157fce8ffdfe104f383", "size": 793 }, ] }
Cosign OCI support
To sign and verify container images with Cosign in Project Quay, you can install Cosign and authenticate to the registry. Cosign uses ECDSA-P256 signatures and Simple Signing payloads.
Cosign is a tool that can be used to sign and verify container images. It uses the ECDSA-P256 signature algorithm and Red Hat’s Simple Signing payload format to create public keys that are stored in PKIX files. Private keys are stored as encrypted PEM files.
Cosign currently supports the following:
-
Hardware and KMS Signing
-
Bring-your-own PKI
-
OIDC PKI
-
Built-in binary transparency and timestamping service
Use the following procedure to directly install Cosign.
-
You have installed Go version 1.16 or later.
-
Enter the following
gocommand to directly install Cosign:$ go install github.com/sigstore/cosign/cmd/cosign@v1.0.0Example outputgo: downloading github.com/sigstore/cosign v1.0.0 go: downloading github.com/peterbourgon/ff/v3 v3.1.0 -
Generate a key-value pair for Cosign by entering the following command:
$ cosign generate-key-pairExample outputEnter password for private key: Enter again: Private key written to cosign.key Public key written to cosign.pub -
Sign the key-value pair by entering the following command:
$ cosign sign -key cosign.key <quay-server.example.com>/user1/busybox:testExample outputEnter password for private key: Pushing signature to: quay-server.example.com/user1/busybox:sha256-ff13b8f6f289b92ec2913fa57c5dd0a874c3a7f8f149aabee50e3d01546473e3.sigIf you experience an
UNAUTHORIZED: access to the requested resource is not authorizederror when signing, which occurs because Cosign relies on~./docker/config.jsonfor authorization, you might need to execute the following command:$ podman login --authfile ~/.docker/config.json <_quay-server.example.com_or_quay.io_>Example outputUsername: Password: Login Succeeded! -
Enter the following command to see the updated authorization configuration:
$ cat ~/.docker/config.json { "auths": { "quay-server.example.com": { "auth": "cXVheWFkbWluOnBhc3N3b3Jk" } }
Installing and using Cosign
To install Cosign and sign images in Project Quay, you can generate a key pair, sign a tag, and verify the signature. You authenticate to the registry with your existing credentials.
-
You have installed Go version 1.16 or later.
-
You have set
FEATURE_GENERAL_OCI_SUPPORTtoTruein yourconfig.yamlfile.
-
Enter the following
gocommand to directly install Cosign:$ go install github.com/sigstore/cosign/cmd/cosign@v1.0.0Example outputgo: downloading github.com/sigstore/cosign v1.0.0 go: downloading github.com/peterbourgon/ff/v3 v3.1.0 -
Generate a key-value pair for Cosign by entering the following command:
$ cosign generate-key-pairExample outputEnter password for private key: Enter again: Private key written to cosign.key Public key written to cosign.pub -
Sign the key-value pair by entering the following command:
$ cosign sign -key cosign.key <quay-server.example.com>/user1/busybox:testExample outputEnter password for private key: Pushing signature to: quay-server.example.com/user1/busybox:sha256-ff13b8f6f289b92ec2913fa57c5dd0a874c3a7f8f149aabee50e3d01546473e3.sigIf you experience an
UNAUTHORIZED: access to the requested resource is not authorizederror when signing, which occurs because Cosign relies on~./docker/config.jsonfor authorization, you might need to execute the following command:$ podman login --authfile ~/.docker/config.json <quay-server.example.com>Example outputUsername: Password: Login Succeeded! -
Enter the following command to see the updated authorization configuration:
$ cat ~/.docker/config.json { "auths": { "quay-server.example.com": { "auth": "cXVheWFkbWluOnBhc3N3b3Jk" } }
Configure
Apply Red Hat Quay configuration
Learn how Red Hat Quay configuration works across deployment types, including the role of config.yaml and common configuration concepts.
Getting started with Project Quay configuration
Project Quay is a secure artifact registry that can be deployed as a self-managed installation or through the Red Hat Quay on OpenShift Container Platform Operator, and then configured by adjusting settings to meet the needs of your environment.
Each deployment type offers a different approach to configuration and management, but each relies on the same set of configuration parameters to control registry behavior. Common configuration parameters allow administrators to define how their registry interacts with users, storage backends, authentication providers, security policies, and other integrated services.
You can configure Project Quay in one of two ways, depending on your deployment type:
-
On-premises Project Quay: With an on-premises Project Quay deployment, a registry administrator provides a
config.yamlfile that includes all required parameters. For this deployment type, the registry is unable to start without a valid configuration. -
Project Quay Operator: By default, the Project Quay Operator automatically configures your Project Quay deployment by generating the minimal required values and deploying the necessary components for you. After the initial deployment, you can customize your registry’s behavior by modifying the
QuayRegistrycustom resource, or by using the OpenShift Container Platform Web Console.
This guide offers an overview of the following configuration concepts:
-
How to retrieve, inspect, and modify your current configuration for both on-premises and Operator-based Project Quay deployment types.
-
The minimal configuration fields required for startup.
-
An overview of all available Project Quay configuration fields and YAML examples for those fields.
Project Quay configuration disclaimer
Some Project Quay configuration parameters and feature flags are undocumented or not actively supported. Modifying these settings can cause unexpected behavior in your deployment, so you should use them only with caution.
In both self-managed and Operator-based deployments of Project Quay, certain features and configuration parameters are not actively used or implemented. As a result, some feature flags, such as those that enable or disable specific functionality, or configuration parameters that are not explicitly documented or supported by or requested for documentation by Red Hat Support, should only be modified with caution.
Understanding the Project Quay configuration file
The Project Quay config.yaml file defines registry behavior.
The config.yaml file must include all required configuration fields for the registry to start. Project Quay administrators can also define optional parameters that customize their registry, such as authentication parameters, storage parameters, proxy cache parameters, and so on.
The config.yaml file must be written using valid YAML ("YAML Ain’t Markup Language") syntax, and Project Quay cannot start if the file itself contains any formatting errors or missing required fields. Regardless of deployment type, whether on-premises or Red Hat Quay on OpenShift Container Platform with the Operator, the YAML principles stay the same, even if the required configuration fields are slightly different.
The following section outlines basic YAML syntax relevant to creating and editing the Project Quay config.yaml file. For a more complete overview of YAML, see "What is YAML?".
Key-value pairs
Configuration fields within a config.yaml file are written as key-value pairs in the following form:
# ...
EXAMPLE_FIELD_NAME: <value>
# ...The # … comment denotes fields before and after this specific field. Note that by supplying the #, or hash symbol, comments can be provided within the YAML file.
Each line within a config.yaml file contains a field name, followed by a colon, a space, and then an appropriate value that matches with the key. The following example shows you how the AUTHENTICATION_TYPE configuration field must be formatted in your config.yaml file.
AUTHENTICATION_TYPE: Database
# ...AUTHENTICATION_TYPE-
Specifies the authentication engine to use for credential authentication.
In the previous example, the AUTHENTICATION_TYPE is set to Database, however, different deployment types require a different value. The following example shows you how your config.yaml file might look if LDAP, or Lightweight Directory Access Protocol, was used for authentication:
AUTHENTICATION_TYPE: LDAP
# ...Indentation and nesting
Many Project Quay configuration fields require indentation to indicate nested structures. Indentation must be done by using white spaces, or literal space characters; tab characters are not allowed by design. Indentation must be consistent across the file. The following YAML snippet shows you how the BUILDLOGS_REDIS field uses indentation for the required host, password, and port fields:
# ...
BUILDLOGS_REDIS:
host: quay-server.example.com
password: example-password
port: 6379
# ...Lists
In some cases, the Project Quay configuration field relies on lists to define certain values. You format lists by using a hyphen (-) followed by a space. The following example shows you how the SUPER_USERS configuration field uses a list to define superusers:
# ...
SUPER_USERS:
- quayadmin
# ...Quoted values
Some Project Quay configuration fields require the use of quotation marks ("") to properly define a variable. This is generally not required. The following examples shows you how the FOOTER_LINKS configuration field uses quotation marks to define the TERMS_OF_SERVICE_URL, PRIVACY_POLICY_URL, SECURITY_URL, and ABOUT_URL:
FOOTER_LINKS:
"TERMS_OF_SERVICE_URL": "https://www.index.hr"
"PRIVACY_POLICY_URL": "https://www.jutarnji.hr"
"SECURITY_URL": "https://www.bug.hr"
"ABOUT_URL": "https://www.zagreb.hr"Comments
The hash symbol, or #, can be placed at the beginning of a line to add comments or to temporarily disable a configuration field. The configuration parser ignores them, so they do not affect registry behavior. For example:
# ...
# FEATURE_UI_V2: true
# ...In this example, the configuration parser ignores the FEATURE_UI_V2 configuration, meaning that the option to use the v2 UI is disabled. Using the # symbol on a required configuration field results in failure for the registry to start.
Configure a standalone Red Hat Quay deployment
Configure a standalone or on-premises Red Hat Quay deployment using minimal config.yaml examples, post-deployment updates, and procedures to verify, troubleshoot, and read the configuration file.
On-premise Project Quay configuration overview
For on-premise Project Quay deployments, you manage a config.yaml file that Project Quay reads at container startup. You must restart the registry container after you change the file because Project Quay does not reload configuration dynamically.
This chapter provides an overview of the following concepts:
-
The minimal required configuration fields.
-
How to edit and manage your configuration after deployment.
This section applies specifically to on-premise Project Quay deployment types. For information about configuring Red Hat Quay on OpenShift Container Platform, see "Red Hat Quay on OpenShift Container Platform configuration overview".
Minimal required fields for standalone config
The following configuration fields are required to start an on-premises Project Quay deployment. You must include each field in your config.yaml file before the registry can start.
| Field | Type | Description |
|---|---|---|
AUTHENTICATION_TYPE (Required) |
String |
The authentication engine to use for credential authentication. Values: One of |
BUILDLOGS_REDIS (Required) |
Object |
Redis connection details for build logs caching. |
.host (Required) |
String |
The hostname at which Redis is accessible. |
.password |
String |
The password to connect to the Redis instance. |
DATABASE_SECRET_KEY (Required) |
String |
Key used to encrypt sensitive fields within the database. This value should never be changed once set, otherwise all reliant fields, for example, repository mirror username and password configurations, are invalidated. This value is set automatically by the Project Quay Operator for Operator-based deployments. For standalone deployments, administrators can provide their own key using Open SSL or a similar tool. Key length should not exceed 63 characters. |
DB_URI (Required) |
String |
The URI for accessing the database, including any credentials. |
DISTRIBUTED_STORAGE_CONFIG (Required) |
Object |
Configuration for storage engine(s) to use in Project Quay. Each key represents an unique identifier for a storage engine. The value consists of a tuple of (key, value) forming an object describing the storage engine parameters. Default: |
SECRET_KEY (Required) |
String |
Key used to encrypt the session cookie and the CSRF token needed for correct interpretation of the user session. The value should not be changed when set. Should be persistent across all Project Quay instances. If not persistent across all instances, login failures and other errors related to session persistence might occur. |
SERVER_HOSTNAME (Required) |
String |
The URL at which Project Quay is accessible, without the scheme. |
SETUP_COMPLETE (Required) |
Boolean |
This is an artifact left over from earlier versions of the software and currently it must be specified with a value of |
USER_EVENTS_REDIS (Required) |
Object |
Redis connection details for user event handling. |
.host (Required) |
String |
The hostname at which Redis is accessible. |
.port (Required) |
Number |
The port at which Redis is accessible. |
.password |
String |
The password to connect to the Redis instance. |
Minimal configuration file examples
You can use minimal config.yaml file examples to start an on-premises Project Quay registry with local or cloud-based storage. These examples show only the required fields.
This section provides two examples of a minimal configuration file: one example that uses local storage, and another example that uses cloud-based storage with Google Cloud Platform.
Minimal configuration using local storage
A minimal config.yaml for on-premises Project Quay uses local storage for images. Use this example only for proof of concept deployments, not production.
|
Important
|
Only use local storage when deploying a registry for proof of concept purposes. Local storage is not intended for production purposes. When using local storage, you must map the registry to a local directory to the |
AUTHENTICATION_TYPE: Database
BUILDLOGS_REDIS:
host: <quay-server.example.com>
password: <password>
port: <port>
DATABASE_SECRET_KEY: <example_database_secret_key>
DB_URI: postgresql://<username>:<password>@<registry_url>.com:<port>/quay
DISTRIBUTED_STORAGE_CONFIG:
default:
- LocalStorage
- storage_path: /datastorage/registry
SECRET_KEY: <example_secret_key>
SERVER_HOSTNAME: <server_host_name>
SETUP_COMPLETE: true
USER_EVENTS_REDIS:
host: <redis_events_url>
password: <password>
port: <port>Minimal configuration using cloud-based storage
A minimal config.yaml for on-premises Project Quay can use cloud-based object storage such as Google Cloud Platform. Use this pattern when you deploy Project Quay with a supported enterprise storage backend.
In most production environments, Project Quay administrators use cloud or enterprise-grade storage backends provided by supported vendors. The following example shows you how to configure Project Quay to use Google Cloud Platform for image storage. For a complete list of supported storage providers, see "Image storage".
|
Note
|
When using a cloud or enterprise-grade storage backend, additional configuration, such as mapping the registry to a local directory, is not required. |
AUTHENTICATION_TYPE: Database
BUILDLOGS_REDIS:
host: <quay-server.example.com>
password: <password>
port: <port>
DATABASE_SECRET_KEY: <example_database_secret_key>
DB_URI: postgresql://<username>:<password>@<registry_url>.com:<port>/quay
DISTRIBUTED_STORAGE_CONFIG:
default:
- GoogleCloudStorage
- access_key: <access_key>
bucket_name: <bucket_name>
secret_key: <secret_key>
storage_path: /datastorage/registry
DISTRIBUTED_STORAGE_DEFAULT_LOCATIONS: []
DISTRIBUTED_STORAGE_PREFERENCE:
- default
SECRET_KEY: <example_secret_key>
SERVER_HOSTNAME: <server_host_name>
SETUP_COMPLETE: true
USER_EVENTS_REDIS:
host: <redis_events_url>
password: <password>
port: <port>Modifying your configuration file after deployment
To update your on-premises Project Quay configuration after deployment, you can edit the config.yaml file and restart the quay-registry container. You can retrieve the file from the container if you do not have direct access to it.
After deploying a Project Quay registry with an initial config.yaml file, Project Quay administrators can update the configuration file to enable or disable features as needed. This flexibility allows administrators to tailor the registry to fit their specific environment needs, or to meet certain security policies.
|
Note
|
Because the |
The following procedure shows you how to retrieve the config.yaml file from the quay-registry container, how to enable a new feature by adding that feature’s configuration field to the file, and how to restart the quay-registry container using Podman.
-
You have deployed Project Quay.
-
You are a registry administrator.
-
If you have access to the
config.yamlfile:-
Navigate to the directory that is storing the
config.yamlfile. For example:$ cd /home/<username>/<quay-deployment-directory>/config -
Make changes to the
config.yamlfile by adding a new feature flag. The following example enables the v2 UI:# ... FEATURE_UI_V2: true # ... -
Save the changes made to the
config.yamlfile. -
Restart the
quay-registrypod by entering the following command:$ podman restart <container_id>
-
-
If you do not have access to the
config.yamlfile and need to create a new file while keeping the same credentials:-
Retrieve the container ID of your
quay-registrypod by entering the following command:$ podman psExample outputCONTAINER ID IMAGE COMMAND CREATED STATUS PORTS NAMES 5f2297ef53ff registry.redhat.io/rhel8/postgresql-13:1-109 run-postgresql 20 hours ago Up 20 hours 0.0.0.0:5432->5432/tcp postgresql-quay 3b40fb83bead registry.redhat.io/rhel8/redis-5:1 run-redis 20 hours ago Up 20 hours 0.0.0.0:6379->6379/tcp redis 0b4b8fbfca6d registry-proxy.engineering.redhat.com/rh-osbs/quay-quay-rhel8:v3.14.0-14 registry 20 hours ago Up 20 hours 0.0.0.0:80->8080/tcp, 0.0.0.0:443->8443/tcp, 7443/tcp, 9091/tcp, 55443/tcp quay -
Copy the
config.yamlfile from thequay-registrypod to a directory by entering the following command:$ podman cp <container_id>:/quay-registry/conf/stack/config.yaml ./config.yaml -
Make changes to the
config.yamlfile by adding a new feature flag. The following example sets theAUTHENTICATION_TYPEtoLDAP# ... AUTHENTICATION_TYPE: LDAP # ... -
Re-deploy the registry, mounting the
config.yamlfile into thequay-registryconfiguration volume by entering the following command:$ sudo podman run -d --rm -p 80:8080 -p 443:8443 \ --name=quay \ -v /home/<username>/<quay-deployment-directory>/config:/conf/stack:Z \ registry.redhat.io/quay/quay-rhel8:v3.14.0
-
Troubleshooting the configuration file for standalone deployments
To identify configuration errors that prevent your on-premises Project Quay registry from starting, you can deploy the quay-registry container interactively and review the validation output.
Failure to add all of the required configuration field, or to provide the proper information for some parameters, might result in the quay-registry container failing to deploy. Use the following procedure to view and troubleshoot a failed on-premises deployment type.
-
You have created a minimal configuration file.
-
Attempt to deploy the
quay-registrycontainer by entering the following command. Note that this command uses the-it, which shows you debugging information:$ podman run -it --rm -p 80:8080 -p 443:8443 --name=quay -v /home/<username>/<quay-deployment-directory>/config:/conf/stack:Z -v /home/<username>/<quay-deployment-directory>/storage:/datastorage:Z 33f1c3dc86beExample output--- +------------------------+-------+--------+ | LDAP | - | X | +------------------------+-------+--------+ | LDAP_ADMIN_DN is required | X | +-----------------------------------------+ | LDAP_ADMIN_PSSWD is required | X | +-----------------------------------------+ | . . . Connection refused | X | +-----------------------------------------+ ---In this example, the
quay-registrycontainer failed to deploy because improper LDAP credentials were provided.
Reading the configuration file from a standalone deployment by using Podman
To obtain configuration information for your Project Quay deployment and troubleshoot issues, you can use podman cp or podman exec for standalone deployments. You can then update your config.yaml file, search the Red Hat Knowledgebase, or file a support ticket.
-
To obtain configuration information on standalone Project Quay deployments, you can use
podman cporpodman exec.-
To use the
podman copycommand, enter the following commands:$ podman cp <quay_container_id>:/conf/stack/config.yaml /tmp/local_directory/To display this information in your terminal, enter the following command:
$ cat /tmp/local_directory/config.yaml -
To use
podman exec, enter the following commands:$ podman exec -it <quay_container_id> cat /conf/stack/config.yamlExample outputBROWSER_API_CALLS_XHR_ONLY: false ALLOWED_OCI_ARTIFACT_TYPES: application/vnd.oci.image.config.v1+json: - application/vnd.oci.image.layer.v1.tar+zstd application/vnd.sylabs.sif.config.v1+json: - application/vnd.sylabs.sif.layer.v1+tar AUTHENTICATION_TYPE: Database AVATAR_KIND: local BUILDLOGS_REDIS: host: quay-server.example.com password: strongpassword port: 6379 DATABASE_SECRET_KEY: 05ee6382-24a6-43c0-b30f-849c8a0f7260 DB_CONNECTION_ARGS: {} ---
-
Understand Red Hat Quay configuration on OpenShift Container Platform
Learn how the Quay Operator manages registry configuration on OpenShift through the QuayRegistry custom resource, managed and unmanaged components, and the TLS secret reference.
How Operator configuration works
When deploying Red Hat Quay on OpenShift Container Platform, the registry configuration is managed declaratively through two primary mechanisms: the QuayRegistry custom resource (CR) and the configBundleSecret resource. You use these mechanisms to configure and manage your registry deployment.
Understanding the QuayRegistry CR
The QuayRegistry CR is used to determine whether a component is managed, or automatically handled by the Operator, or unmanaged, or provided externally by the user.
By default, the QuayRegistry CR contains the following key fields:
-
configBundleSecret: The name of a Kubernetes Secret containing theconfig.yamlfile which defines additional configuration parameters. -
name: The name of your Project Quay registry. -
namespace: The namespace, or project, in which the registry was created. -
spec.components: A list of components that the Operator automatically manages. Each component entry includes the following fields:-
kind: The name of the component -
managed: A boolean that addresses whether the component lifecycle is handled by the Project Quay Operator. Settingmanaged: trueto a component in theQuayRegistryCR means that the Operator manages the component. -
secretRef: Optional. For thetlscomponent only, references an externalkubernetes.io/tlsSecret whenmanagedisfalse. For more information, see Referencing an external TLS Secret for Red Hat Quay on OpenShift Container Platform.
-
All QuayRegistry components are automatically managed and auto-filled upon reconciliation for visibility unless specified otherwise. The following sections highlight the major QuayRegistry components and provide an example YAML file that shows the default settings.
Managed components
Managed components are Project Quay registry components that the Operator automatically configures and installs. By using managed components, you simplify deployment and reduce manual configuration tasks.
| Field | Type | Description |
|---|---|---|
|
Boolean |
Holds overrides for deployment of Red Hat Quay on OpenShift Container Platform, such as environment variables and number of replicas. This component cannot be set to unmanaged ( |
|
Boolean |
Used for storing registry metadata. Currently, PostgreSQL version 13 is used. |
|
Boolean |
Provides image vulnerability scanning. You can override ephemeral scratch storage for image layer extraction by using |
|
Boolean |
Stores live builder logs and the locking mechanism that is required for garbage collection. You can override CPU and memory resources for this component when it is managed. |
|
Boolean |
Adjusts the number of |
|
Boolean |
Stores image layer blobs. When set to |
|
Boolean |
Provides an external entrypoint to the Project Quay registry from outside of OpenShift Container Platform. |
|
Boolean |
Configures repository mirror workers to support optional repository mirroring. |
|
Boolean |
Features include a Grafana dashboard, access to individual metrics, and notifications for frequently restarting |
|
Boolean |
Configures whether SSL/TLS is automatically handled. When |
|
Boolean |
Configures a managed Clair database. This is a separate database than the PostgreSQL database that is used to deploy Project Quay. |
The following example shows you the default configuration for the QuayRegistry custom resource provided by the Project Quay Operator. It is available on the OpenShift Container Platform web console.
apiVersion: quay.redhat.com/v1
kind: QuayRegistry
metadata:
name: <example_registry>
namespace: <namespace>
spec:
configBundleSecret: config-bundle-secret
components:
- kind: quay
managed: true
- kind: postgres
managed: true
- kind: clair
managed: true
- kind: redis
managed: true
- kind: horizontalpodautoscaler
managed: true
- kind: objectstorage
managed: true
- kind: route
managed: true
- kind: mirror
managed: true
- kind: monitoring
managed: true
- kind: tls
managed: true
- kind: clairpostgres
managed: trueDisabling the monitoring component
Disabling the monitoring component sets the monitoring component to unmanaged in the QuayRegistry custom resource. You must disable monitoring when you install the Project Quay Operator in a single namespace, or you can disable it in multi-namespace installations to use your own monitoring stack.
|
Note
|
Monitoring cannot be enabled when the Project Quay Operator is installed in a single namespace. You might also disable monitoring in multi-namespace deployments if you use an external Prometheus or Grafana instance, want to reduce resource overhead, or require custom observability integration. |
apiVersion: quay.redhat.com/v1
kind: QuayRegistry
metadata:
name: example-registry
namespace: quay-enterprise
spec:
components:
- kind: monitoring
managed: falseDisabling the mirroring component
Repository mirroring in Project Quay allows you to automatically synchronize container images from remote registries into your local Project Quay instance. The Project Quay Operator deploys a separate mirroring worker component that handles these synchronization tasks.
You can disable the managed mirroring component by setting it to managed: false in the QuayRegistry custom resource.
|
Note
|
Disabling managed mirroring means that the Operator does not deploy or reconcile any mirroring pods. You are responsible for creating, scheduling, and maintaining mirroring jobs manually. For most production deployments, leaving mirroring as |
apiVersion: quay.redhat.com/v1
kind: QuayRegistry
metadata:
name: example-registry
namespace: quay-enterprise
spec:
components:
- kind: mirroring
managed: falseUsing unmanaged components for dependencies
Unmanaged components are Project Quay dependencies such as PostgreSQL, Redis, or object storage that you deploy and maintain outside of the Operator’s control. You use unmanaged components to integrate existing infrastructure or meet specific configuration requirements.
|
Note
|
If you are using an unmanaged PostgreSQL database, and the version is PostgreSQL 10, it is highly recommended that you upgrade to PostgreSQL 13. PostgreSQL 10 had its final release on November 10, 2022 and is no longer supported. For more information, see the PostgreSQL Versioning Policy. |
For more information about configuring unmanaged components, see "Configure Red Hat Quay database and Redis backends", "Object storage backend configuration fields", "Configure networking for Red Hat Quay", and "Tune Operator autoscaling and component resources".
Referencing an external TLS Secret for Red Hat Quay on OpenShift Container Platform
Reference an external kubernetes.io/tls Secret from the tls component of the QuayRegistry custom resource (CR) to enable automated certificate rotation from sources such as cert-manager, HashiCorp Vault, or manual Secret updates.
With this approach, the Project Quay Operator uses the certificate and private key from the referenced Secret instead of embedding ssl.cert and ssl.key files in the configBundleSecret resource.
When you use an external TLS Secret, set spec.components[kind: tls].managed to false and specify secretRef. The Operator watches the referenced Secret and performs a rolling restart of Project Quay pods when the certificate data changes.
|
Important
|
|
-
You have deployed the Project Quay Operator and a
QuayRegistryCR. -
You have a TLS Secret of type
kubernetes.io/tlsin the same namespace as theQuayRegistry, withtls.crtandtls.keydata keys. -
The certificate and private key are valid (format, key match, chain, and hostname).
-
Create a TLS Secret in the registry namespace, for example:
apiVersion: v1 kind: Secret metadata: name: my-quay-tls namespace: <namespace> type: kubernetes.io/tls data: tls.crt: <base64_encoded_certificate> tls.key: <base64_encoded_private_key> -
Set the
tlscomponent to unmanaged and reference the Secret by entering the following command:$ oc patch quayregistry <registry_name> -n <namespace> --type=merge -p '{"spec":{"components":[{"kind":"tls","managed":false,"secretRef":{"name":"my-quay-tls"}}]}}' -
Verify that the
QuayRegistryCR contains the expected configuration:$ oc get quayregistry <registry_name> -n <namespace> -o yamlExample outputspec: components: - kind: tls managed: false secretRef: name: my-quay-tls -
Wait for the Operator to reconcile the registry. When certificate data in the referenced Secret changes, the Operator triggers a rolling restart of Project Quay pods to load the updated certificate.
-
Verify that TLS from the external Secret is ready by entering the following command. When the TLS component is healthy, the
ComponentTLSReadycondition reportsstatus: "True".$ oc wait quayregistry <registry_name> -n <namespace> --for=condition=ComponentTLSReady=True --timeout=300sYou can also review all component conditions in the OpenShift Container Platform web console on the QuayRegistry details page, or by entering
oc get quayregistry <registry_name> -n <namespace> -o yamland checkingstatus.conditions.
Modify Red Hat Quay configuration on OpenShift Container Platform
Apply configuration changes to a deployed Quay Operator registry by updating the QuayRegistry CR and the config bundle Secret, and retrieve current configuration from the CLI.
Modifying the QuayRegistry CR after deployment
Modifying the QuayRegistry custom resource (CR) in Project Quay after deployment lets you customize or reconfigure aspects of your Project Quay environment.
Project Quay administrators might modify the QuayRegistry CR for the following reasons:
-
To change component management: Switch components from
managed: truetomanaged: falsein order to bring your own infrastructure. For example, you might setkind: objectstorageto unmanaged to integrate external object storage platforms such as Google Cloud Storage or Nutanix. -
To apply custom configuration: Update or replace the
configBundleSecretto apply new configuration settings, for example, authentication providers, external SSL/TLS settings, feature flags. -
To enable or disable features: Toggle features like repository mirroring, Clair scanning, or horizontal pod autoscaling by modifying the
spec.componentslist. -
To scale the deployment: Adjust environment variables or replica counts for the Quay application.
-
To integrate with external services: Provide configuration for external PostgreSQL, Redis, or Clair databases, and update endpoints or credentials.
Modifying the QuayRegistry CR by using the OpenShift Container Platform web console
To modify the QuayRegistry custom resource in Project Quay, you can use the OpenShift Container Platform web console to change component management settings. You can set managed components to unmanaged and use your own infrastructure.
-
You are logged into OpenShift Container Platform as a user with admin privileges.
-
You have installed the Project Quay Operator.
-
On the OpenShift Container Platform web console, click Operators → Installed Operators.
-
Click Red Hat Quay.
-
Click Quay Registry.
-
Click the name of your Project Quay registry, for example, example-registry.
-
Click YAML.
-
Adjust the
managedfield of the desired component to eitherTrueorFalse. -
Click Save.
NoteSetting a component to unmanaged (
managed: false) might require additional configuration. For more information about setting unmanaged components in theQuayRegistryCR, see Using unmanaged components for dependencies.
Modifying the QuayRegistry CR by using the CLI
To modify the QuayRegistry custom resource in Project Quay, you can use the CLI to change component management settings. You can set managed components to unmanaged and use your own infrastructure.
-
You are logged in to your OpenShift Container Platform cluster as a user with admin privileges.
-
Edit the
QuayRegistryCR by entering the following command:$ oc edit quayregistry <registry_name> -n <namespace> -
Make the desired changes to the
QuayRegistryCR.NoteSetting a component to unmanaged (
managed: false) might require additional configuration. For more information about setting unmanaged components in theQuayRegistryCR, see Using unmanaged components for dependencies. -
Save the changes.
Understanding the configBundleSecret resource
The configBundleSecret resource is a Kubernetes Secret that stores the config.yaml file for Project Quay. You use this secret to configure authentication backends, feature flags, TLS settings, and other registry parameters that the Operator merges with managed component settings.
Project Quay administrators might update this secret for the following reasons:
-
Enable a new authentication method
-
Add custom SSL/TLS certificates
-
Enable features
-
Modify security scanning settings
If this field is omitted, the Project Quay Operator automatically generates a configuration secret based on default values and managed component settings. If you provide this field, Project Quay uses the config.yaml contents as the base configuration and merges them with values from managed components to form the final configuration, which is mounted into the quay application pods.
Modifying the configuration file by using the OpenShift Container Platform web console
To modify the config.yaml file stored in the configBundleSecret, you can use the OpenShift Container Platform web console to edit the secret and add configuration key-value pairs.
-
You are logged in to the OpenShift Container Platform cluster as a user with admin privileges.
-
On the OpenShift Container Platform web console, click Operators → Installed Operators → Red Hat Quay.
-
Click Quay Registry.
-
Click the name of your Project Quay registry, for example, example-registry.
-
On the QuayRegistry details page, click the name of your Config Bundle Secret, for example, example-registry-config-bundle.
-
Click Actions → Edit Secret.
-
In the Value box, add the desired key/value pair. For example, to add a superuser to your Red Hat Quay on OpenShift Container Platform deployment, add the following reference:
SUPER_USERS: - quayadmin -
Click Save.
NoteYou must base64 encode any updated
config.yamlfile before placing it in the Secret. Ensure the Secret name matches the value specified inspec.configBundleSecretresource. Once the Secret is updated, the Operator detects the change and automatically rolls out updates to the Project Quay pods.For detailed steps, see "Updating configuration secrets through the Project Quay UI."
-
Verify that the changes have been accepted:
-
On the OpenShift Container Platform web console, click Operators → Installed Operators → Red Hat Quay.
-
Click Quay Registry.
-
Click the name of your Project Quay registry, for example, example-registry.
-
Click Events. If successful, the following message is displayed:
All objects created/updated successfully
-
Modifying the configuration file by using the CLI
To modify the config.yaml file for your Project Quay registry and enable new features, you can download the existing configuration from the configBundleSecret by using the CLI. After making changes, you can re-upload the configBundleSecret resource to apply the changes.
|
Note
|
Modifying the |
-
You are logged in to the OpenShift Container Platform cluster as a user with admin privileges.
-
Describe the
QuayRegistryresource by entering the following command:$ oc describe quayregistry -n <quay_namespace># ... Config Bundle Secret: example-registry-config-bundle-v123x # ... -
Obtain the secret data by entering the following command:
$ oc get secret -n <quay_namespace> <example-registry-config-bundle-v123x> -o jsonpath='{.data}'{ "config.yaml": "RkVBVFVSRV9VU0 ... MDAwMAo=" } -
Decode the data into a YAML file into the current directory by passing in the
>> config.yamlflag. For example:$ echo 'RkVBVFVSRV9VU0 ... MDAwMAo=' | base64 --decode >> config.yaml -
Make the desired changes to your
config.yamlfile, and then save the file asconfig.yaml. -
Create a new
configBundleSecretYAML by entering the following command.$ touch <new_configBundleSecret_name>.yaml -
Create the new
configBundleSecretresource, passing in theconfig.yamlfile` by entering the following command:$ oc -n <namespace> create secret generic <secret_name> \ --from-file=config.yaml=</path/to/config.yaml> \ --dry-run=client -o yaml > <new_configBundleSecret_name>.yamlwhere:
- </path/to/config.yaml>
-
Specifies your base64 decoded
config.yamlfile.
-
Create the
configBundleSecretresource by entering the following command:$ oc create -n <namespace> -f <new_configBundleSecret_name>.yamlsecret/config-bundle created -
Update the
QuayRegistryYAML file to reference the newconfigBundleSecretobject by entering the following command:$ oc patch quayregistry <registry_name> -n <namespace> --type=merge -p '{"spec":{"configBundleSecret":"<new_configBundleSecret_name>"}}'quayregistry.quay.redhat.com/example-registry patched
-
Verify that the
QuayRegistryCR has been updated with the newconfigBundleSecret:$ oc describe quayregistry -n <quay_namespace># ... Config Bundle Secret: <new_configBundleSecret_name> # ...After patching the registry, the Project Quay Operator automatically reconciles the changes.
Reading the configuration file from an Operator deployment by using the OpenShift CLI
To obtain configuration information for your Project Quay deployment and troubleshoot issues, you can use oc exec, oc cp, or oc rsync for Operator deployments. Use these options to update your config.yaml file, search the Red Hat Knowledgebase, or file a support ticket.
-
To obtain configuration information on Project Quay Operator deployments, you can use
oc exec,oc cp, oroc rsync.-
To use the
oc execcommand, enter the following command:$ oc exec -it <quay_pod_name> -- cat /conf/stack/config.yamlThis command returns your
config.yamlfile directly to your terminal. -
To use the
oc copycommand, enter the following commands:$ oc cp <quay_pod_name>:/conf/stack/config.yaml /tmp/config.yamlTo display this information in your terminal, enter the following command:
$ cat /tmp/config.yaml -
To use the
oc rsynccommand, enter the following commands:oc rsync <quay_pod_name>:/conf/stack/ /tmp/local_directory/To display this information in your terminal, enter the following command:
$ cat /tmp/local_directory/config.yamlExample outputDISTRIBUTED_STORAGE_CONFIG: local_us: - RHOCSStorage - access_key: redacted bucket_name: lht-quay-datastore-68fff7b8-1b5e-46aa-8110-c4b7ead781f5 hostname: s3.openshift-storage.svc.cluster.local is_secure: true port: 443 secret_key: redacted storage_path: /datastorage/registry DISTRIBUTED_STORAGE_DEFAULT_LOCATIONS: - local_us DISTRIBUTED_STORAGE_PREFERENCE: - local_us
-
Retrieve Red Hat Quay configuration with the API
Retrieve active Red Hat Quay configuration settings by using the superuser API.
Retrieving active configuration settings by using the API
To retrieve Project Quay configuration settings from the command line, you can enable FEATURE_SUPERUSER_CONFIGDUMP and call the v1/superuser/config API endpoint with a superuser OAuth 2 access token.
As a Project Quay superuser, you can return all Flask configuration fields that are set, which you can use to show proof of compliance for various security policies, such as PCI-DSS 4.0.
-
You have set
FEATURE_SUPERUSER_CONFIGDUMP: truein yourconfig.yamlfile. -
You have assigned the superuser role to a user in your
config.yamlfile. -
You have generated an OAuth 2 access token for the superuser.
-
Retrieve configuration settings by using the
v1/superuser/configAPI endpoint. For example:$ curl -X GET -H "Authorization: Bearer <bearer_token>" "http://<quay-server.example.com>/api/v1/superuser/config" | jq -r .configExample output... "TEAM_RESYNC_STALE_TIME": "30m", "UI_DELAY_AFTER_WRITE_SECONDS": 3, "UI_MODELCARD_ANNOTATION": {}, "UI_MODELCARD_ARTIFACT_TYPE": "application/x-mlmodel", "UI_MODELCARD_LAYER_ANNOTATION": { "org.opencontainers.image.title": "README.md" } ... -
You can pass in one of
.config,.env,.warning, or.schemato return specific information. For example:$ curl -X GET -H "Authorization: Bearer <bearer_token>" "http://<quay-server.example.com>/api/v1/superuser/config" | jq -r .warningExample output... "BILLING_TYPE": "FakeStripe", "BUILDLOGS_OPTIONS": [], "BUILD_MANAGER": null, "CDN_SPECIFIC_NAMESPACES": [], "CHANNEL_COLORS": [ ] ...
Configure database and Redis backends
Configure Project Quay to use an external PostgreSQL database and a Redis instance. This job covers unmanaged database setup, external PostgreSQL integration, and unmanaged Redis configuration.
Using an external PostgreSQL database
Using an external PostgreSQL database with Project Quay lets you manage your own database infrastructure instead of using the Operator-managed database. You must ensure that required configuration and extensions, such as pg_trgm, are in place before deployment.
If you use the Operator-managed PostgreSQL database and require encryption in transit, you can enable TLS on the postgres component without switching to an external database. For more information, see "TLS encryption for Operator-managed PostgreSQL".
|
Important
|
Do not share the same PostgreSQL database between Project Quay and Clair deployments. Each service must use its own database instance. Sharing databases with other workloads is also not supported, because connection-intensive components such as Project Quay and Clair can quickly exceed PostgreSQL’s connection limits. Connection poolers such as pgBouncer are not supported with Project Quay or Clair. |
When managing your own PostgreSQL database for use with Project Quay, the following best practices are recommended:
-
pg_trgmextension: Thepg_trgmextension must be enabled on the database for a successful deployment. -
Backups: Perform regular database backups using PostgreSQL-native tools or your existing backup infrastructure. The Project Quay Operator does not manage database backups.
-
Restores: When restoring a backup, ensure that all Project Quay pods are stopped before beginning the restore process.
-
Storage sizing: When using the Operator-managed PostgreSQL database, the default storage allocation is 50 GiB. For external databases, you must ensure sufficient storage capacity for your environment, as the Operator does not handle volume resizing.
-
Monitoring: Monitor disk usage, connection limits, and query performance to prevent outages caused by resource exhaustion.
Configuring an external PostgreSQL connection
To integrate an existing PostgreSQL database with your Project Quay registry, you can set the postgres component to unmanaged and configure the DB_URI in the configBundleSecret. This lets you leverage your current database infrastructure instead of using the Operator-managed database.
|
Note
|
The following procedure uses the OpenShift Container Platform web console to configure the Project Quay registry to use an external PostgreSQL database. For most users, use the web console is simpler. This procedure can also be done by using the |
-
On the OpenShift Container Platform web console, click Operators → Installed Operators.
-
Click Red Hat Quay.
-
Click Quay Registry.
-
Click the name of your Project Quay registry, for example, example-registry.
-
Click YAML.
-
Set the
postgresfield of theQuayRegistryCR tomanaged: false. For example:- kind: postgres managed: false -
Click Save.
-
Click Details → the name of your
Config Bundle Secretresource. -
On the Secret Details page, click Actions → Edit Secret.
-
Add the
DB_URIfield to yourconfig.yamlfile. For example:DB_URI: postgresql://test-quay-database:postgres@test-quay-database:5432/test-quay-database -
Optional: Add additional database configuration fields, such as
DB_CONNECTION_ARGSor SSL/TLS connection arguments. For more information, see Database connection arguments. -
Click Save.
Configuring an external Redis connection
Manage your own Redis infrastructure by using an external Redis database with Project Quay.
To integrate an existing Redis database with your Project Quay registry, you can set the redis component to unmanaged and configure BUILDLOGS_REDIS and USER_EVENTS_REDIS in the configBundleSecret resource.
|
Important
|
Do not share the same Redis instance between Project Quay and Clair deployments. Each service must use its own dedicated Redis instance. Sharing Redis with other workloads is not supported, because connection-intensive components such as Project Quay and Clair can quickly exhaust available Redis connections and degrade performance. |
-
In the OpenShift Container Platform web console, navigate to Operators → Installed Operators.
-
Click Red Hat Quay.
-
Click QuayRegistry.
-
Click the name of your Project Quay registry, for example, example-registry.
-
Click YAML.
-
Set the
rediscomponent to unmanaged by adding the following entry underspec.components:- kind: redis managed: false -
Click Save.
-
Click Details → the name of your
Config Bundle Secretresource. -
On the Secret details page, click Actions → Edit Secret.
-
In the
config.yamlsection, add entries for your external Redis instance. For example:BUILDLOGS_REDIS: host: redis.example.com port: 6379 ssl: false USER_EVENTS_REDIS: host: redis.example.com port: 6379 ssl: falseImportantIf both the
BUILDLOGS_REDISandUSER_EVENTS_REDISfields reference the same Redis deployment, ensure that your Redis service can handle the combined connection load. For large or high-throughput registries, use separate Redis databases or clusters for these components. -
Optional: Add additional database configuration fields, such as
DB_CONNECTION_ARGSor SSL/TLS connection arguments. For more information, see Redis configuration fields. -
Click Save.
Configure AWS STS for object storage
Configure AWS Security Token Service (STS) for Amazon S3 object storage on standalone Red Hat Quay deployments.
Configuring Project Quay to use AWS STS
To configure Project Quay to use AWS STS for Amazon S3 storage, you can update the DISTRIBUTED_STORAGE_CONFIG block in your config.yaml file and restart the registry.
-
Update your
config.yamlfile for Project Quay to include the following information:# ... DISTRIBUTED_STORAGE_CONFIG: default: - STSS3Storage - sts_role_arn: <role_arn> s3_bucket: <s3_bucket_name> storage_path: <storage_path> s3_region: <region> sts_user_access_key: <s3_user_access_key> sts_user_secret_key: <s3_user_secret_key> # ...where:
sts_role_arn-
Specifies the unique Amazon Resource Name (ARN) required when configuring AWS STS.
s3_bucket-
Specifies the name of your S3 bucket.
storage_path-
Specifies the storage path for data. Usually
/datastorage. s3_region-
Specifies the Amazon Web Services region. Defaults to
us-east-1. sts_user_access_key-
Specifies the generated AWS S3 user access key required when configuring AWS STS.
sts_user_secret_key-
Specifies the generated AWS S3 user secret key required when configuring AWS STS.
-
Restart your Project Quay deployment.
-
Tag a sample image, for example,
busybox, that you push to the repository. For example:$ podman tag docker.io/library/busybox <quay-server.example.com>/<organization_name>/busybox:test -
Push the sample image by running the following command:
$ podman push <quay-server.example.com>/<organization_name>/busybox:test -
Verify that the push was successful by navigating to the Organization that you pushed the image to in your Project Quay registry → Tags.
-
Navigate to the Amazon Web Services (AWS) console and locate your S3 bucket.
-
Click the name of your S3 bucket.
-
On the Objects page, click datastorage/.
-
On the datastorage/ page, the following resources should appear:
-
sha256/
-
uploads/
These resources indicate that the push was successful, and that AWS STS is properly configured.
-
Configure network access for Red Hat Quay
Configure IPv6 and dual-stack networking for standalone Project Quay deployments, and manage custom ingress, routes, and SSL/TLS for Operator deployments on OpenShift Container Platform.
IPv6 and dual-stack deployments
You can deploy standalone Project Quay on IPv6-only or dual-stack (IPv4 and IPv6) networks. Set FEATURE_LISTEN_IP_VERSION in your config.yaml file to enable the protocol family that your environment supports.
Some storage backends have known limitations on IPv6-only networks.
Enabling the IPv6 protocol family
To enable IPv6 support on your standalone Project Quay deployment, you can set FEATURE_LISTEN_IP_VERSION to IPv6 in your config.yaml file and restart the registry.
|
Warning
|
If your environment is configured for IPv4, but the |
-
Your host and container software platform (Docker, Podman) must be configured to support IPv6.
-
In your deployment’s
config.yamlfile, add theFEATURE_LISTEN_IP_VERSIONparameter and set it toIPv6, for example:FEATURE_GOOGLE_LOGIN: false FEATURE_INVITE_ONLY_USER_CREATION: false FEATURE_LISTEN_IP_VERSION: IPv6 FEATURE_MAILING: false FEATURE_NONSUPERUSER_TEAM_SYNCING_SETUP: false -
Start, or restart, your Project Quay deployment.
-
Check that your deployment is listening to IPv6 by entering the following command:
$ curl <quay_endpoint>/health/instanceExample output{"data":{"services":{"auth":true,"database":true,"disk_space":true,"registry_gunicorn":true,"service_key":true,"web_gunicorn":true}},"status_code":200}
-
After you enable IPv6 in your deployment’s
config.yamlfile, you can use all Project Quay features as usual when your environment is configured for IPv6 and is not affected by known IPv6 limitations.
Enabling the dual-stack protocol family
To enable dual-stack (IPv4 and IPv6) support on your standalone Project Quay deployment, you can set FEATURE_LISTEN_IP_VERSION to dual-stack in your config.yaml file and restart the registry.
-
Your host and container software platform (Docker, Podman) must be configured to support IPv6.
-
In your deployment’s
config.yamlfile, add theFEATURE_LISTEN_IP_VERSIONparameter and set it todual-stack, for example:FEATURE_GOOGLE_LOGIN: false FEATURE_INVITE_ONLY_USER_CREATION: false FEATURE_LISTEN_IP_VERSION: dual-stack FEATURE_MAILING: false FEATURE_NONSUPERUSER_TEAM_SYNCING_SETUP: false -
Start, or restart, your Project Quay deployment.
-
Check that your deployment is listening on both channels by entering the following commands:
-
For IPv4, enter the following command:
$ curl --ipv4 <quay_endpoint>Example output{"data":{"services":{"auth":true,"database":true,"disk_space":true,"registry_gunicorn":true,"service_key":true,"web_gunicorn":true}},"status_code":200} -
For IPv6, enter the following command:
$ curl --ipv6 <quay_endpoint>Example output{"data":{"services":{"auth":true,"database":true,"disk_space":true,"registry_gunicorn":true,"service_key":true,"web_gunicorn":true}},"status_code":200}
-
-
After you enable dual-stack in your deployment’s
config.yamlfile, you can use all Project Quay features as usual when your environment is configured for dual-stack.
IPv6 and dual-stack limitations
On IPv6 single-stack environments, Azure Blob Storage and Amazon S3 CloudFront endpoints that do not support IPv6 prevent those storage configurations from working with Project Quay.
-
Currently, attempting to configure your Project Quay deployment with the common Azure Blob Storage configuration does not work on IPv6 single-stack environments. Because the endpoint of Azure Blob Storage does not support IPv6, no workaround exists for this issue.
-
Currently, attempting to configure your Project Quay deployment with Amazon S3 CloudFront does not work on IPv6 single-stack environments. Because the endpoint of Amazon S3 CloudFront does not support IPv6, no workaround exists for this issue.
Configure custom ingress
You can configure custom ingress for Project Quay by disabling the Operator-managed route component and managing your own routes or ingress controllers.
Managing your own routes or ingress controllers is useful when your environment requires a custom SSL/TLS setup, specific DNS naming conventions, or when Project Quay is deployed behind a load balancer or proxy that handles TLS termination.
The Project Quay Operator separates route management from SSL/TLS configuration by introducing a distinct tls component. You can therefore manage each independently, depending on whether Project Quay or the cluster should handle TLS termination. For more information about using SSL/TLS certificates with your deployment, see "Securing Project Quay".
|
Note
|
If you disable the managed |
Disabling the Route component
To prevent the Project Quay Operator from creating a route, you can set the route component to unmanaged in the QuayRegistry custom resource. You must then configure SSL/TLS handling in your config.yaml file.
-
In your
quayregistry.yamlfile, set theroutecomponent asmanaged: false:apiVersion: quay.redhat.com/v1 kind: QuayRegistry metadata: name: example-registry namespace: quay-enterprise spec: components: - kind: route managed: false -
In your
config.yamlfile, configure Project Quay to handle SSL/TLS. For example:# ... EXTERNAL_TLS_TERMINATION: false SERVER_HOSTNAME: example-registry-quay-quay-enterprise.apps.user1.example.com PREFERRED_URL_SCHEME: https # ...If the configuration is incomplete, the following error might appear:
{ "reason":"ConfigInvalid", "message":"required component `route` marked as unmanaged, but `configBundleSecret` is missing necessary fields" }
Configure SSL/TLS and routes
Configuring SSL/TLS and routes for Project Quay lets you control how TLS termination and route management work together. The tls component provides support for OpenShift Container Platform edge termination routes and enables independent control of route management and TLS certificate handling.
EXTERNAL_TLS_TERMINATION: true is the default, opinionated setting, which assumes the cluster manages TLS termination.
|
Note
|
|
Multiple valid configurations are possible, as shown in the following table:
| Option | Route | TLS | Certs provided | Result |
|---|---|---|---|---|
My own load balancer handles TLS |
Managed |
Managed |
No |
Edge route using default cluster wildcard certificate |
Project Quay handles TLS |
Managed |
Unmanaged |
Yes |
Passthrough route with certificates mounted in the Project Quay pod |
Project Quay handles TLS |
Unmanaged |
Unmanaged |
Yes |
Certificates set inside the Project Quay pod; user must manually create a route |
Configure IPv6 for Quay proof of concept
Configure certificates, Podman trust, and dual-stack networking for an IPv6 or dual-stack proof of concept Red Hat Quay deployment.
Testing the SSL/TLS configuration using a browser
To test your SSL/TLS configuration in a browser, you can open your Project Quay registry endpoint and review the connection warnings for a self-signed certificate. Expected browser warnings confirm that TLS is active before you trust the certificate authority on clients.
-
Navigate to your Project Quay registry endpoint, for example,
https://quay-server.example.com. If configured correctly, the browser warns of the potential risk: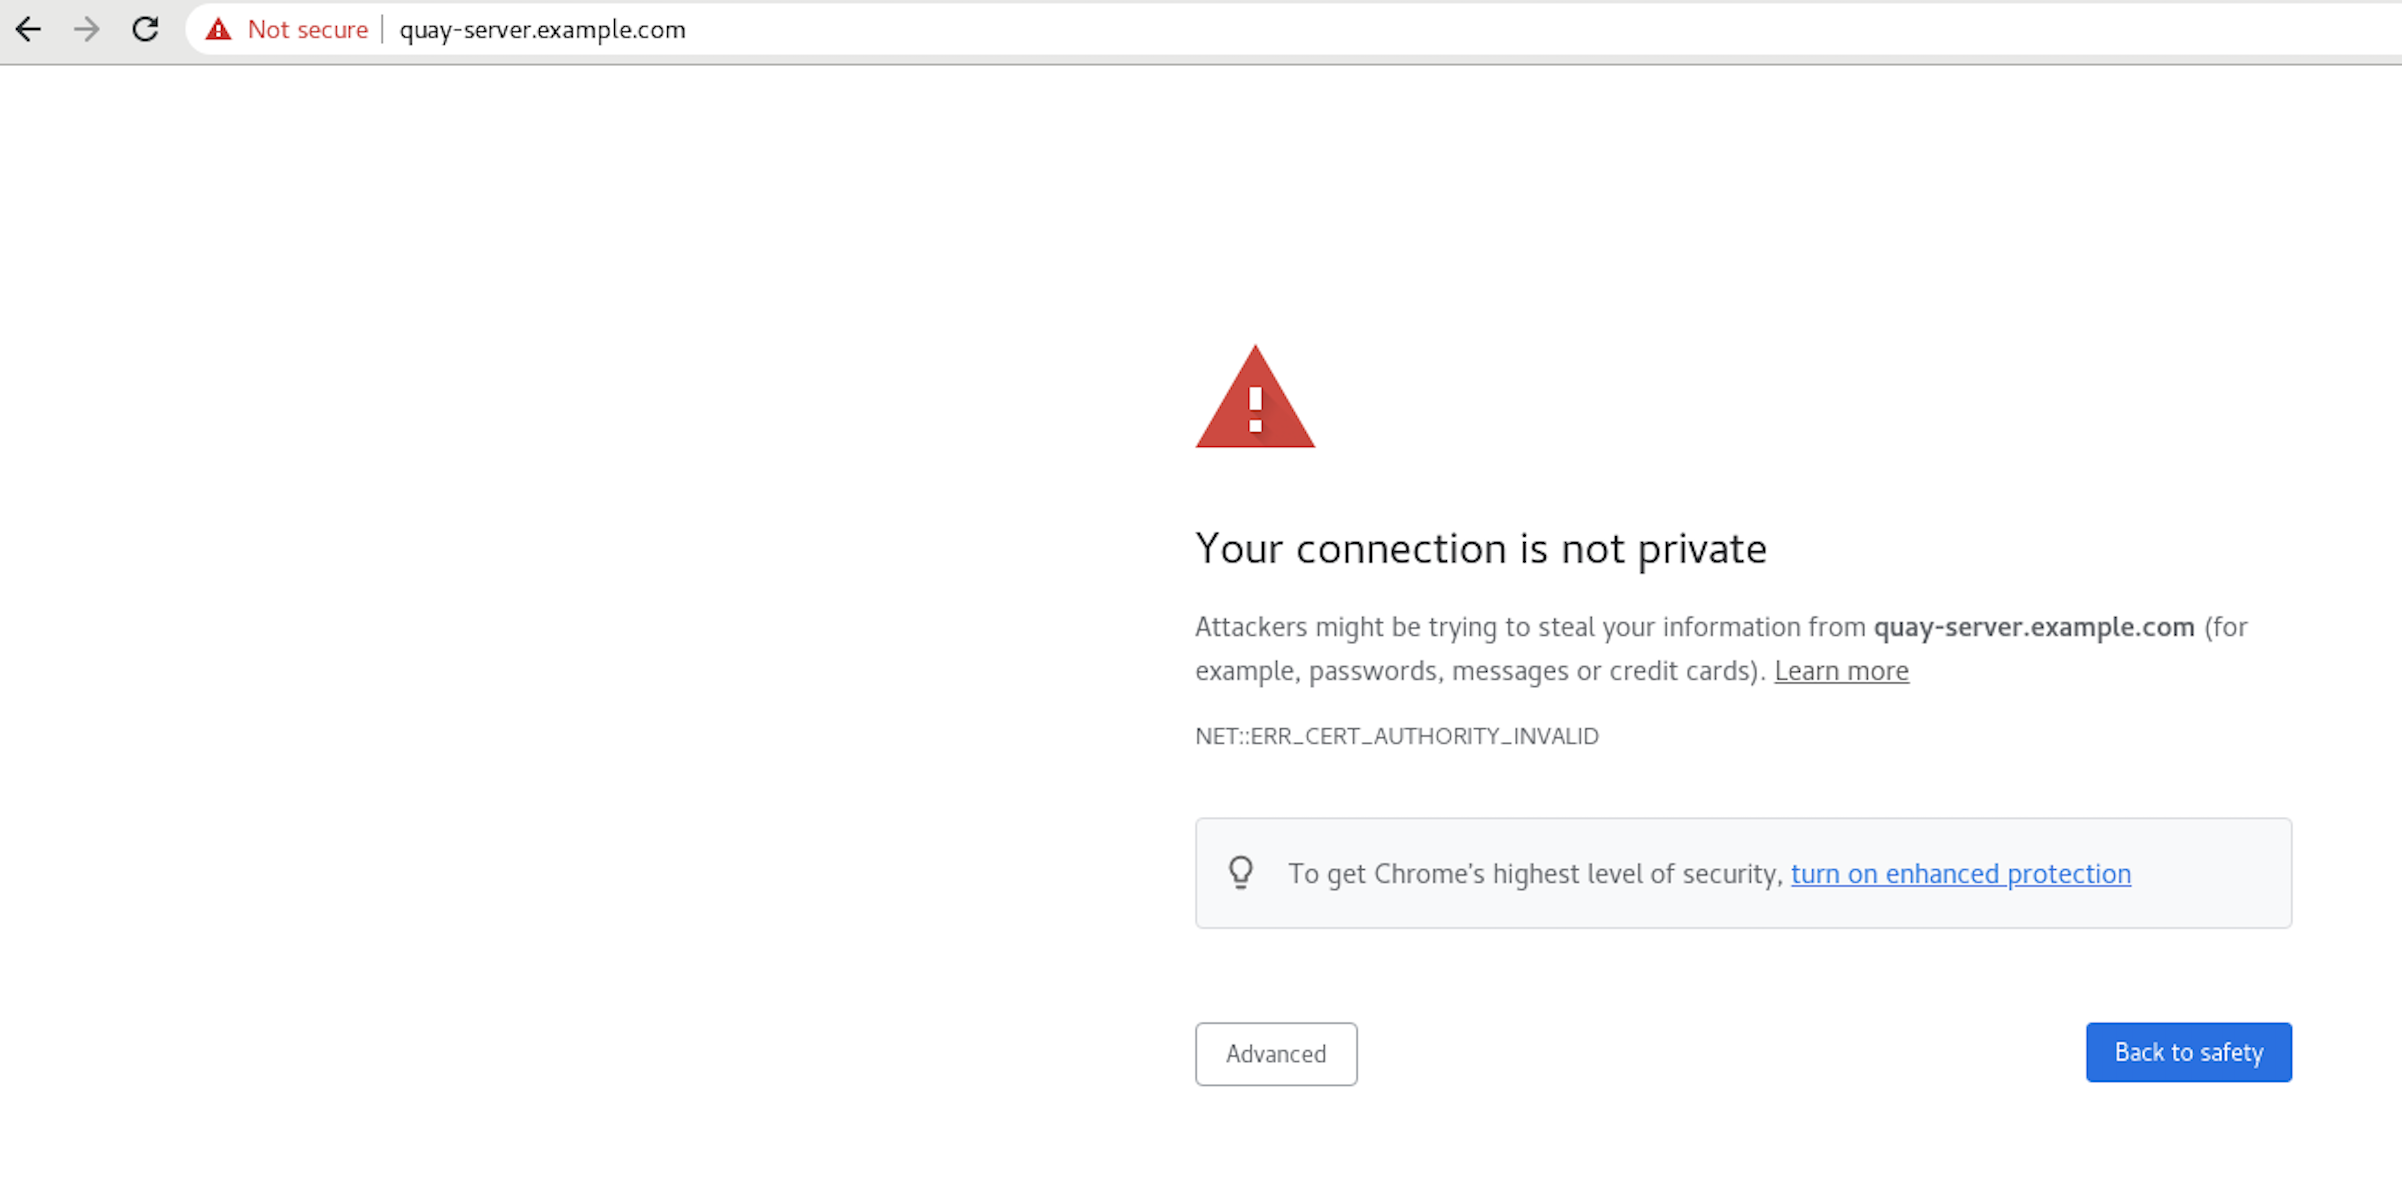
-
Proceed to the log in screen. The browser notifies you that the connection is not secure. For example:
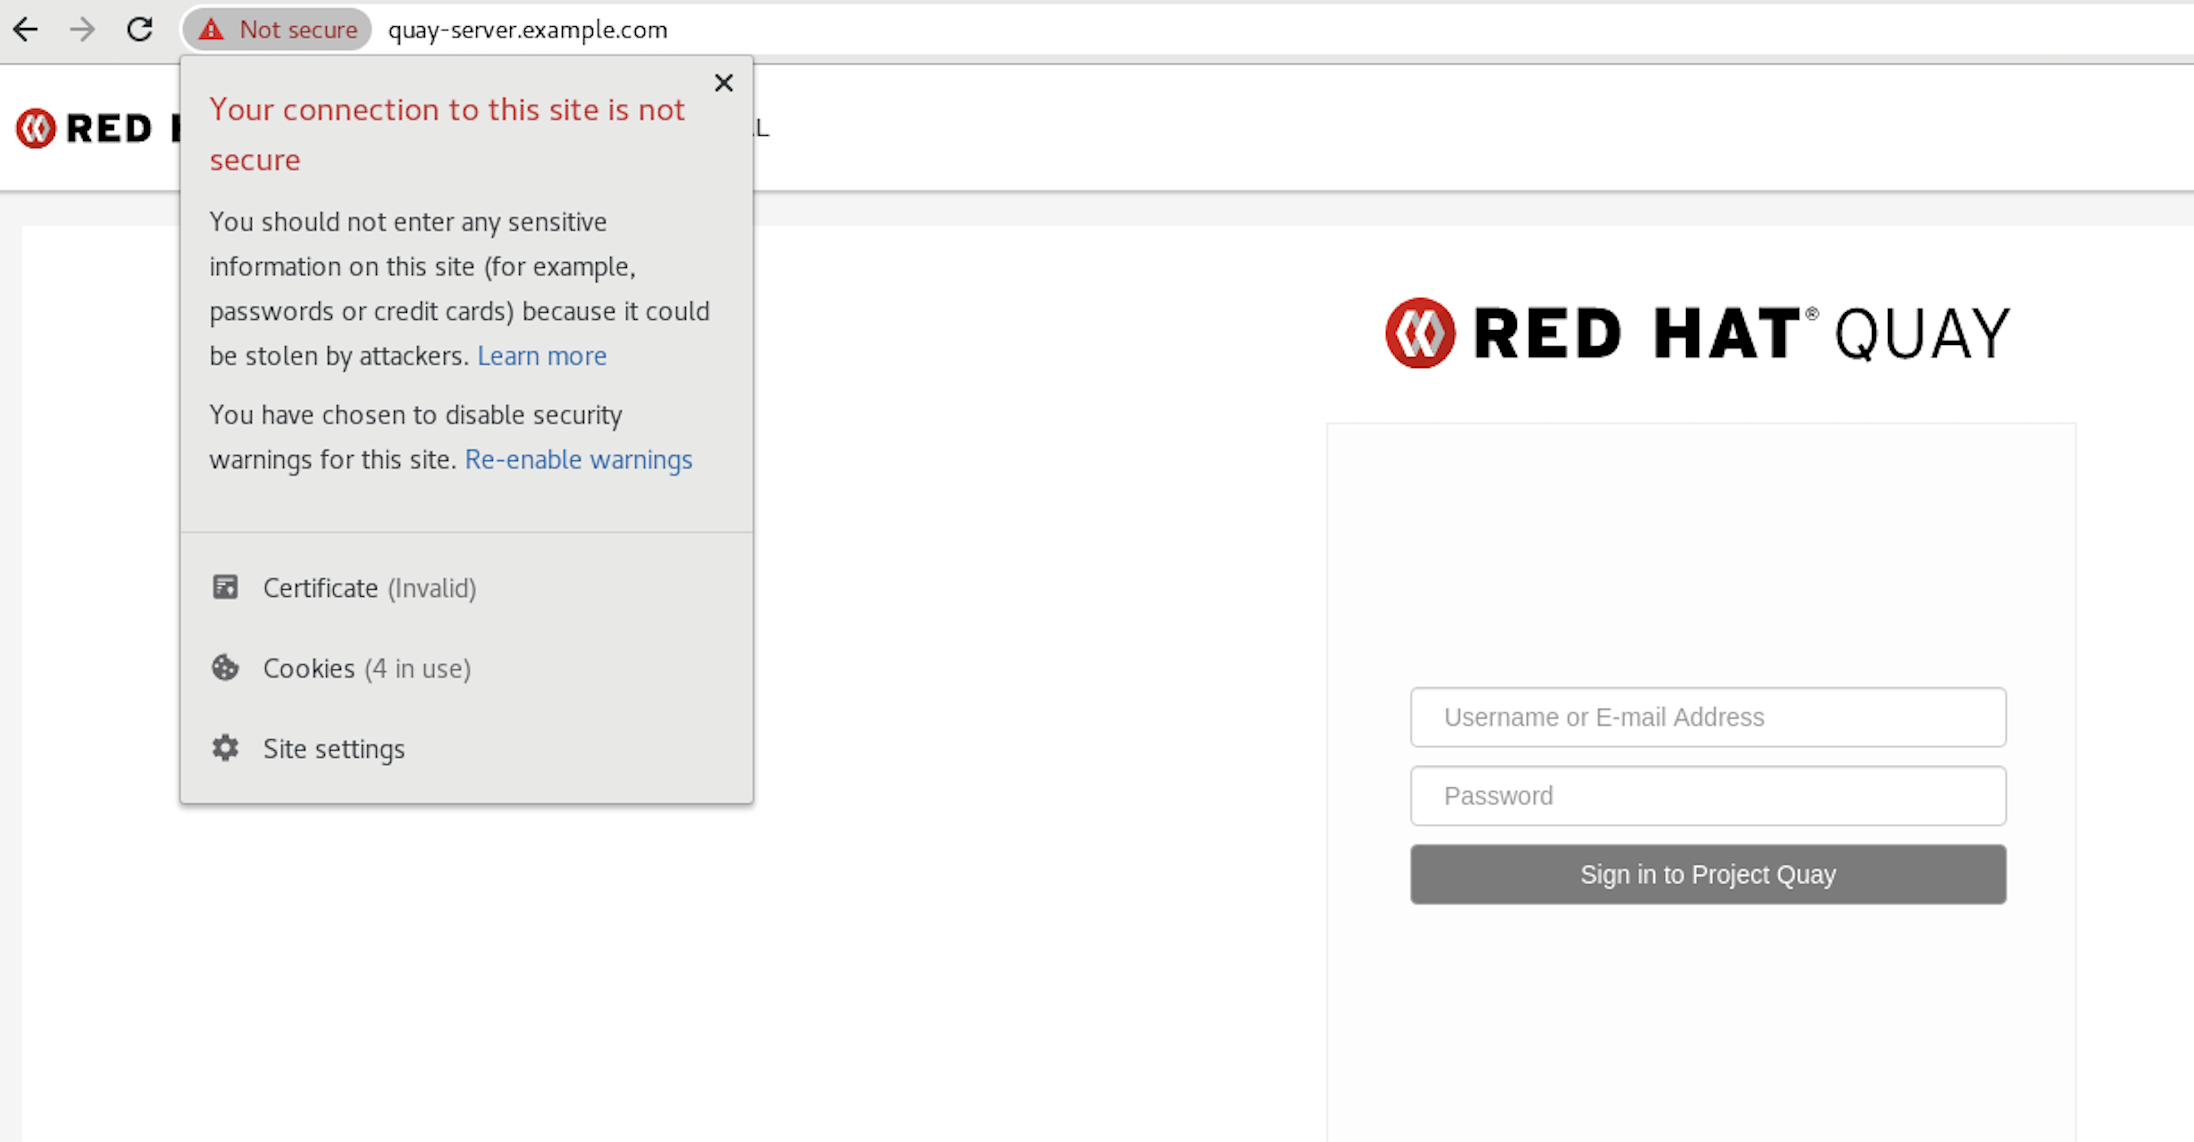
In the following section, you configure Podman to trust the root Certificate Authority.
Configuring Podman to trust the Certificate Authority
To configure Podman to trust your self-signed certificate authority for Project Quay, you can copy the root CA to the hostname-specific certificate directory under /etc/containers/certs.d/ or /etc/docker/certs.d/.
.Procedure
-
Copy the root CA file to one of
/etc/containers/certs.d/or/etc/docker/certs.d/. Use the exact path determined by the server hostname, and name the fileca.crt:$ sudo cp rootCA.pem /etc/containers/certs.d/quay-server.example.com/ca.crt -
Verify that you no longer need to use the
--tls-verify=falseoption when logging in to your Project Quay registry:$ sudo podman login quay-server.example.comExample outputLogin Succeeded!
Configuring the system to trust the certificate authority
To trust your self-signed certificate authority, you can add the root CA to the system-wide trust store and update certificate configuration. You can verify trust with the trust list command before browsing your Project Quay registry over HTTPS.
-
Enter the following command to copy the
rootCA.pemfile to the consolidated system-wide trust store:$ sudo cp rootCA.pem /etc/pki/ca-trust/source/anchors/ -
Enter the following command to update the system-wide trust store configuration:
$ sudo update-ca-trust extract -
Optional. You can use the
trust listcommand to ensure that theQuayserver has been configured:$ trust list | grep quay label: quay-server.example.comNow, when you browse to the registry at
https://quay-server.example.com, the lock icon shows that the connection is secure: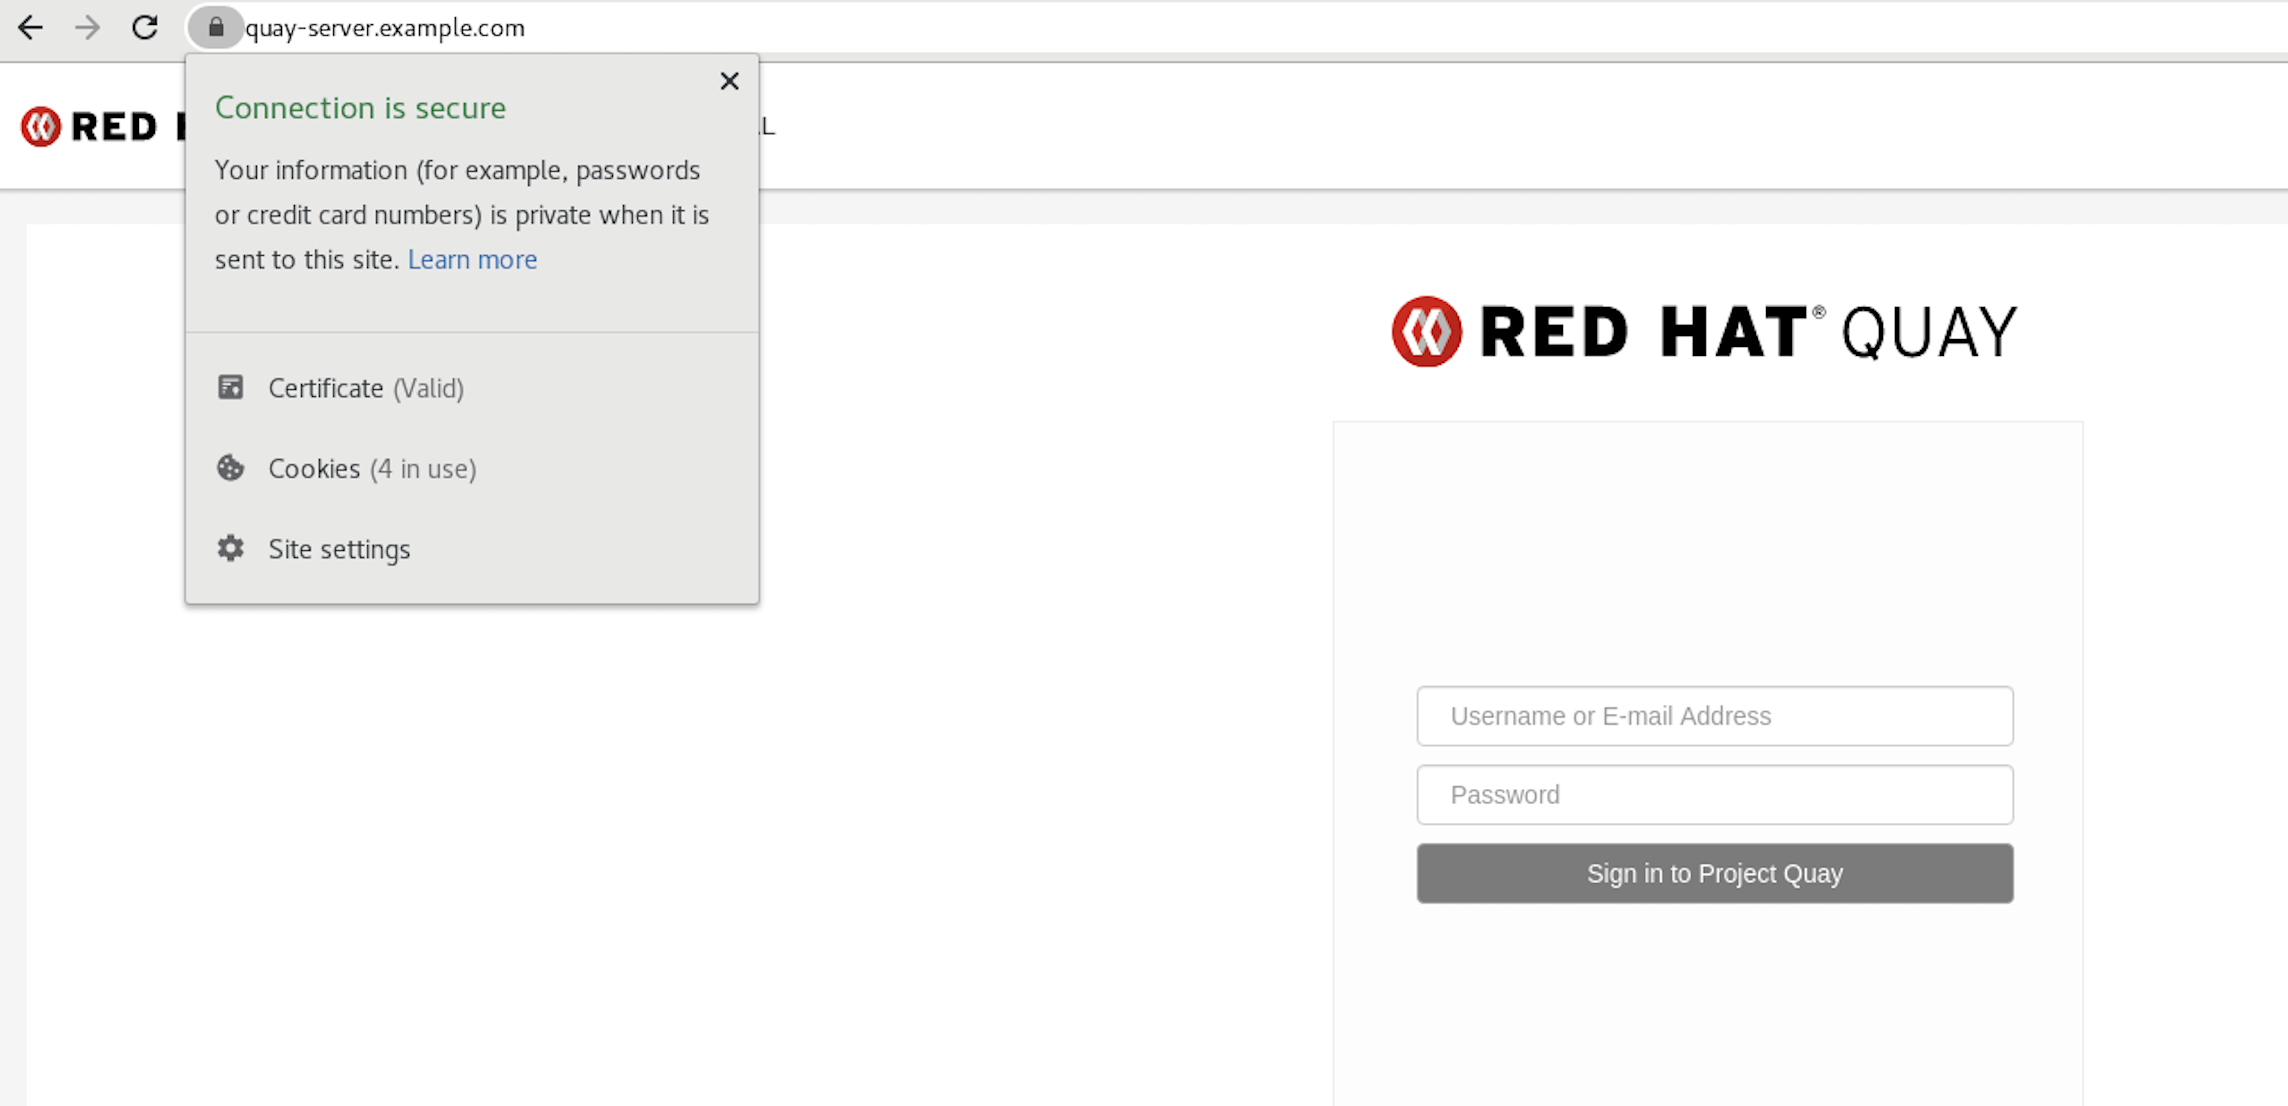
-
To remove the
rootCA.pemfile from system-wide trust, delete the file and update the configuration:$ sudo rm /etc/pki/ca-trust/source/anchors/rootCA.pem$ sudo update-ca-trust extract$ trust list | grep quay
Configuring the Podman CNI to use IPv6
You can configure the Podman Container Network Interface for IPv4 and IPv6 to run a local Project Quay instance over IPv6 for development or testing. By default, the root user Podman network uses IPv4 only.
In some cases, you might want to run a local instance of Project Quay to use IPv6. This setup is common for development or testing purposes.
Creating a dual-stack container network
To run a local Project Quay instance over IPv6, you can create a new Podman container network with IPv6 enabled instead of changing the default root network. New containers on this network are natively dual-stack.
-
Unless the default container network must use both IPv4 and IPv6, create a new dual-stack container network. As a root user, create a new container network that is dual-stack by running the following command:
# podman network create ip-dual-stack --ipv6With this command, new containers use this network are a natively dual-stack.
Deploying a local instance of Project Quay in IPv6
To deploy a local Project Quay instance over IPv6, you can set FEATURE_LISTEN_IP_VERSION in config.yaml and start the registry container with explicit IPv6 port mappings.
After you have created a new dual-stack container network, you can deploy a local instance of Project Quay.
-
You have configured Redis, your PostgreSQL database, local image storage, and creating a
config.yamlfile with the desired settings.
-
In your Project Quay
config.yamlfile, set theFEATURE_LISTEN_IP_VERSIONfield toIPv6. For example:# ... FEATURE_LISTEN_IP_VERSION: dual-stack # ... -
Enter the following command to start the
Quayregistry container, specifying the appropriate volumes for configuration data and local storage for image data. Note that if you are using dual-stack, you must specify explicit IPv6 port mapping when starting the container.$ sudo podman run -d --rm -p "[::]:80:8080" -p "[::]:443:8443" \ --name=quay \ -v $QUAY/config:/conf/stack:Z \ -v $QUAY/storage:/datastorage:Z \ {productrepo}/{quayimage}:{productminv}
Configure Elasticsearch and Splunk action log storage
Configure action log storage in Elasticsearch or Splunk, including Splunk installation prerequisites, bearer token generation, Project Quay configuration, and log verification.
Action log storage backends (Elasticsearch and Splunk)
By default, usage logs are stored in the Project Quay database and exposed through the web UI on organization and repository levels.
Appropriate administrative privileges are required to see log entries. For deployments with a large amount of logged operations, you can store the usage logs in Elasticsearch and Splunk instead of the Project Quay database backend.
Configure action log storage for Elasticsearch
To store Project Quay action logs in Elasticsearch, you can update the LOGS_MODEL settings in your config.yaml file and restart the registry. Usage logs remain available in the web UI for repositories and organizations.
|
Note
|
To configure action log storage for Elasticsearch, you must provide your own Elasticsearch stack; Project Quay does not include Elasticsearch as a customizable component. |
-
Obtain an Elasticsearch account.
-
Update your Project Quay
config.yamlfile to include the following information:# ... LOGS_MODEL: elasticsearch LOGS_MODEL_CONFIG: producer: elasticsearch elasticsearch_config: host: http://<host.elasticsearch.example>:<port> port: 9200 access_key: <access_key> secret_key: <secret_key> use_ssl: True index_prefix: <logentry> aws_region: <us-east-1> # ...where:
LOGS_MODEL-
Specifies the method for handling log data.
LOGS_MODEL_CONFIG.producer-
Specifies either Elasticsearch or Kinesis to direct logs to an intermediate Kinesis stream on AWS. You need to configure your own pipeline to send logs from Kinesis to Elasticsearch, for example, Logstash.
LOGS_MODEL_CONFIG.elasticsearch_config.host-
Specifies the hostname or IP address of the system providing the Elasticsearch service.
LOGS_MODEL_CONFIG.elasticsearch_config.port-
Specifies the port number providing the Elasticsearch service on the host you just entered. Note that the port must be accessible from all systems running the Project Quay registry. The default is TCP port
9200. LOGS_MODEL_CONFIG.elasticsearch_config.access_key-
Specifies the access key needed to gain access to the Elasticsearch service, if required.
LOGS_MODEL_CONFIG.elasticsearch_config.secret_key-
Specifies the secret key needed to gain access to the Elasticsearch service, if required.
LOGS_MODEL_CONFIG.elasticsearch_config.use_ssl-
Specifies whether to use SSL/TLS for Elasticsearch. Defaults to
True. LOGS_MODEL_CONFIG.elasticsearch_config.index_prefix-
Specifies a prefix to attach to log entries.
LOGS_MODEL_CONFIG.elasticsearch_config.aws_region-
Specifies the AWS region if you are running on AWS. Otherwise, leave it blank.
-
Optional. If you are using Kinesis as your logs producer, you must include the following fields in your
config.yamlfile:kinesis_stream_config: stream_name: <kinesis_stream_name> access_key: <aws_access_key> secret_key: <aws_secret_key> aws_region: <aws_region>where:
kinesis_stream_config.stream_name-
Specifies the name of the Kinesis stream.
kinesis_stream_config.access_key-
Specifies the name of the AWS access key needed to gain access to the Kinesis stream, if required.
kinesis_stream_config.secret_key-
Specifies the name of the AWS secret key needed to gain access to the Kinesis stream, if required.
kinesis_stream_config.aws_region-
Specifies the Amazon Web Services (AWS) region.
-
Save your
config.yamlfile and restart your Project Quay deployment.
Configure action log storage for Splunk
Splunk is an alternative to Elasticsearch for storing and analyzing Project Quay action logs. You can forward logs directly to Splunk or to the Splunk HTTP Event Collector (HEC) during or after deployment.
Installing and creating a username for Splunk
To prepare Splunk for Project Quay action log storage, you can install Splunk Enterprise and create an administrator username and password.
-
Create a Splunk account by navigating to Splunk and entering the required credentials.
-
Navigate to the Splunk Enterprise Free Trial page, select your platform and installation package, and then click Download Now.
-
Install the Splunk software on your machine. When prompted, create a username, for example,
splunk_adminand password. -
After creating a username and password, a localhost URL will be provided for your Splunk deployment, for example,
http://<sample_url>.remote.csb:8000/. Open the URL in your preferred browser. -
Log in with the username and password you created during installation. You are directed to the Splunk UI.
Generating a Splunk bearer token
You can generate a Splunk bearer token for Project Quay action log forwarding by using the Splunk UI or the CLI.
To create a Splunk bearer token for Project Quay from the Splunk UI, you can enable token authentication and create a new token.
-
You have installed Splunk and created a username.
-
On the Splunk UI, navigate to Settings → Tokens.
-
Click Enable Token Authentication.
-
Ensure that Token Authentication is enabled by clicking Token Settings and selecting Token Authentication if necessary.
-
Optional: Set the expiration time for your token. This defaults at 30 days.
-
Click Save.
-
Click New Token.
-
Enter information for User and Audience.
-
Optional: Set the Expiration and Not Before information.
-
Click Create. Your token appears in the Token box. Copy the token immediately.
ImportantIf you close out of the box before copying the token, you must create a new token. The token in its entirety is not available after closing the New Token window.
To create a Splunk bearer token for Project Quay from the CLI, you can enable token authentication and request a token with curl.
-
You have installed Splunk and created a username.
-
In your CLI, enter the following
CURLcommand to enable token authentication, passing in your Splunk username and password:$ curl -k -u <username>:<password> -X POST <scheme>://<host>:<port>/services/admin/token-auth/tokens_auth -d disabled=false -
Create a token by entering the following
CURLcommand, passing in your Splunk username and password.$ curl -k -u <username>:<password> -X POST <scheme>://<host>:<port>/services/authorization/tokens?output_mode=json --data name=<username> --data audience=Users --data-urlencode expires_on=+30d -
Save the generated bearer token.
To forward Project Quay action logs to Splunk through the HTTP Event Collector (HEC), you can generate an HEC ingest token in the Splunk web UI or by using the Splunk REST API.
|
Note
|
Splunk HEC tokens are ingest-only and cannot search. |
-
You have installed Splunk and created a username.
-
To create an HEC token using the Splunk web UI:
-
Log in to the Splunk via the web UI.
-
Click Settings → Data Inputs → HTTP Event Collector.
-
Click New Token.
-
Name the token, for example,
quay-hec, and select the target index, for example,quay_logs. -
Click Submit and copy the token value.
-
-
To create an HEC token using the Splunk REST API:
-
Enable HEC by entering the following command:
$ curl -k -u <username>:<password> \ https://<splunk.example.com>:8089/servicesNS/admin/splunk_httpinput/data/inputs/http/http \ -d "disabled=0" -
Create an HEC token by entering the following command:
$ curl -k -u <username>:<password> \ "https://<splunk.example.com>:8089/servicesNS/admin/splunk_httpinput/data/inputs/http?output_mode=json" \ -d "name=quay-hec" -d "index=quay_logs"Example output:{"entry":[{"content":{"token":"<your_bearer_token>"}}]}
-
Configuring Project Quay to use Splunk
To send Project Quay action logs to Splunk or the Splunk HTTP Event Collector (HEC), you can add the Splunk settings to your config.yaml file and restart the registry.
-
You have installed Splunk and created a username.
-
You have generated a Splunk bearer token.
-
Configure Project Quay to use Splunk or the Splunk HTTP Event Collector (HEC).
-
If opting to use Splunk, open your Project Quay
config.yamlfile and add the following configuration fields:# ... LOGS_MODEL: splunk LOGS_MODEL_CONFIG: producer: splunk splunk_config: host: http://<user_name>.remote.csb port: 8089 bearer_token: <bearer_token> url_scheme: <http/https> verify_ssl: False index_prefix: <splunk_log_index_name> ssl_ca_path: <location_to_ssl-ca-cert.pem> search_timeout: 60 max_results: 10000 export_batch_size: 5000 # ...where:
LOGS_MODEL_CONFIG.splunk_config.host-
Specifies the Splunk cluster endpoint.
LOGS_MODEL_CONFIG.splunk_config.port-
Specifies the Splunk management cluster endpoint port. Differs from the Splunk GUI hosted port. Can be found on the Splunk UI under Settings → Server Settings → General Settings.
LOGS_MODEL_CONFIG.splunk_config.bearer_token-
Specifies the generated bearer token for Splunk.
LOGS_MODEL_CONFIG.splunk_config.url_scheme-
Specifies the URL scheme for access the Splunk service. If Splunk is configured to use TLS/SSL, this must be
https. LOGS_MODEL_CONFIG.splunk_config.verify_ssl-
Specifies whether to enable TLS/SSL. Defaults to
True. LOGS_MODEL_CONFIG.splunk_config.index_prefix-
Specifies the Splunk index prefix. Can be a new, or used, index. Can be created from the Splunk UI.
LOGS_MODEL_CONFIG.splunk_config.ssl_ca_path-
Specifies the relative container path to a single
.pemfile containing a certificate authority (CA) for TLS/SSL validation. LOGS_MODEL_CONFIG.splunk_config.search_timeout-
Specifies the timeout for Splunk search queries in seconds. Increase for slow Splunk clusters or complex queries.
LOGS_MODEL_CONFIG.splunk_config.max_results-
Specifies the maximum number of results to return per search query. Larger values require more memory.
LOGS_MODEL_CONFIG.splunk_config.export_batch_size-
Specifies the batch size for log export operations.
-
If opting to use Splunk HEC, open your Project Quay
config.yamlfile and add the following configuration fields:# ... LOGS_MODEL: splunk LOGS_MODEL_CONFIG: producer: splunk_hec splunk_hec_config: host: prd-p-aaaaaq.splunkcloud.com port: 8088 hec_token: 12345678-1234-1234-1234-1234567890ab url_scheme: https verify_ssl: False index: quay splunk_host: quay-dev splunk_sourcetype: quay_logs timeout: 10 search_token: <bearer_token> search_host: <splunk.example.com> search_port: 8089 search_timeout: 60 max_results: 10000 export_batch_size: 5000 # ...where:
LOGS_MODEL_CONFIG.producer-
Specifies
splunk_hecwhen configuring Splunk HEC. LOGS_MODEL_CONFIG.splunk_hec_config-
Specifies the logs model configuration for Splunk HTTP Event Collector action logs configuration.
LOGS_MODEL_CONFIG.splunk_hec_config.host-
Specifies the Splunk cluster endpoint.
LOGS_MODEL_CONFIG.splunk_hec_config.port-
Specifies the Splunk management cluster endpoint port.
LOGS_MODEL_CONFIG.splunk_hec_config.hec_token-
Specifies the HEC token for Splunk.
LOGS_MODEL_CONFIG.splunk_hec_config.url_scheme-
Specifies the URL scheme for access the Splunk service. If Splunk is behind SSL/TLS, must be
https. LOGS_MODEL_CONFIG.splunk_hec_config.verify_ssl-
Specifies whether to enable (
true) or disable (false) SSL/TLS verification for HTTPS connections. LOGS_MODEL_CONFIG.splunk_hec_config.index-
Specifies the Splunk index to use.
LOGS_MODEL_CONFIG.splunk_hec_config.splunk_host-
Specifies the host name to log this event.
LOGS_MODEL_CONFIG.splunk_hec_config.splunk_sourcetype-
Specifies the name of the Splunk
sourcetypeto use. LOGS_MODEL_CONFIG.splunk_hec_config.timeout-
Specifies the timeout in seconds for HTTP requests to the Splunk HEC endpoint. Prevents requests from hanging indefinitely when Splunk is unresponsive.
LOGS_MODEL_CONFIG.splunk_hec_config.search_token-
Specifies an optional bearer token for the Splunk search API. Required because HEC tokens are ingest-only and cannot search.
LOGS_MODEL_CONFIG.splunk_hec_config.search_host-
Specifies the Splunk management host for the search API. Defaults to the HEC host if not specified.
LOGS_MODEL_CONFIG.splunk_hec_config.search_port-
Specifies the Splunk management port for the search API. Defaults to
8089if not specified. LOGS_MODEL_CONFIG.splunk_hec_config.search_timeout-
Specifies the timeout for Splunk search queries in seconds. Increase for slow Splunk clusters or complex queries.
LOGS_MODEL_CONFIG.splunk_hec_config.max_results-
Specifies the maximum number of results to return per search query. Larger values require more memory.
LOGS_MODEL_CONFIG.splunk_hec_config.export_batch_size-
Specifies the batch size for log export operations.
-
-
If you are configuring
ssl_ca_path, you must configure the SSL/TLS certificate so that Project Quay trusts it.-
If you are using a standalone deployment of Project Quay, SSL/TLS certificates can be provided by placing the certificate file inside of the
extra_ca_certsdirectory, or inside of the relative container path and specified byssl_ca_path. -
If you are using the Project Quay Operator, create a config bundle secret, including the certificate authority (CA) of the Splunk server. For example:
$ oc create secret generic --from-file config.yaml=./config_390.yaml --from-file extra_ca_cert_splunkserver.crt=./splunkserver.crt config-bundle-secretSpecify the
conf/stack/extra_ca_certs/splunkserver.crtfile in yourconfig.yaml. For example:# ... LOGS_MODEL: splunk LOGS_MODEL_CONFIG: producer: splunk splunk_config: host: ec2-12-345-67-891.us-east-2.compute.amazonaws.com port: 8089 bearer_token: eyJra url_scheme: https verify_ssl: true index_prefix: quay123456 ssl_ca_path: conf/stack/splunkserver.crt # ...
-
Creating an action log
To verify that Project Quay is forwarding action logs to Splunk, you can create a robot account in an organization and search the Splunk index for the forwarded JSON log entries.
-
You have installed Splunk and created a username.
-
You have generated a Splunk bearer token.
-
You have configured your Project Quay
config.yamlfile to enable Splunk.
-
Log in to your Project Quay deployment.
-
Click on the name of the organization that you use to create an action log for Splunk.
-
In the navigation pane, click Robot Accounts → Create Robot Account.
-
When prompted, enter a name for the robot account, for example
splunkrobotaccount, then click Create robot account. -
On your browser, open the Splunk UI.
-
Click Search and Reporting.
-
In the search bar, enter the name of your index, for example,
<splunk_log_index_name>and press Enter.The search results populate on the Splunk UI. Logs are forwarded in JSON format. A response might look similar to the following:
{ "log_data": { "kind": "authentication", "account": "quayuser123", "performer": "John Doe", "repository": "projectQuay", "ip": "192.168.1.100", "metadata_json": {...}, "datetime": "2024-02-06T12:30:45Z" } }where:
kind-
Specifies the type of log event. In this example,
authenticationindicates that the log entry relates to an authentication event. account-
Specifies the user account involved in the event.
performer-
Specifies the individual who performed the action.
repository-
Specifies the repository associated with the event.
ip-
Specifies the IP address from which the action was performed.
metadata_json-
Specifies additional metadata related to the event, when present.
datetime-
Specifies the timestamp of when the event occurred.
Configure notifications for registry events
Configure repository event notifications by using the web UI or API, set up quota and image expiration alerts, route email through organization contact addresses, and review repository event payload formats.
Notifications overview
Notifications in Project Quay alert you about repository events such as pushes, builds, and image expiry. You can configure delivery methods for users, teams, or organizations.
Notification entries appear on the repository Events and Notifications page and in the global Notifications panel. Delivery methods include email, webhook POST, Flowdock, HipChat, and Slack.
Creating notifications by using the UI
To alert users to repository events such as pushes or build failures, you can create a notification from the Settings page in the Project Quay v2 UI. You select an event trigger and a delivery method, such as email or Slack.
-
You have created a repository.
-
You have administrative privileges for the repository.
-
In the navigation pane, click Settings.
-
In the Events and Notifications category, click Create Notification to add a new notification for a repository event. The Create notification popup box appears.
-
On the Create repository popup box, click the When this event occurs box to select an event. You can select a notification for the following types of events:
-
Push to Repository
-
Image build failed
-
Image build queued
-
Image build started
-
Image build success
-
Image build cancelled
-
Image expiry trigger
-
-
After you have selected the event type, select the notification method. The following methods are supported:
-
Quay Notification
-
E-mail Notification
-
Webhook POST
-
Flowdock Team Notification
-
HipChat Room Notification
-
Slack Notification
Depending on the method that you choose, you must include additional information. For example, if you select E-mail, you are required to include an e-mail address and an optional notification title.
-
-
After selecting an event and notification method, click Create Notification.
Creating an image expiration notification
To create an image expiration notification in Project Quay, you can use the v2 UI or the API. You set how many days before expiry to send the alert.
Triggers can work in conjunction with the auto-pruning feature. You can also create this notification by using the createRepoNotification API endpoint.
-
FEATURE_GARBAGE_COLLECTION: trueis set in yourconfig.yamlfile. -
Optional.
FEATURE_AUTO_PRUNE: trueis set in yourconfig.yamlfile.
-
On the Project Quay v2 UI, click Repositories.
-
Select the name of a repository.
-
Click Settings → Events and notifications.
-
Click Create notification. The Create notification popup box appears.
-
Click the Select event… box, then click Image expiry trigger.
-
In the When the image is due to expiry in days box, enter the number of days before the image’s expiration when you want to receive an alert. For example, use
1for 1 day. -
In the Select method… box, click one of the following:
-
E-mail
-
Webhook POST
-
Flowdock Team Notification
-
HipChat Room Notification
-
Slack Notification
-
-
Depending on which method you chose, include the necessary data. For example, if you chose Webhook POST, include the
Webhook URL. -
Optional. Provide a POST JSON body template.
-
Optional. Provide a Title for your notification.
-
Click Submit. You are returned to the Events and notifications page, and the notification now appears.
-
Optional. You can set the
NOTIFICATION_TASK_RUN_MINIMUM_INTERVAL_MINUTESvariable in your config.yaml file. with this field set, if there are any expiring images notifications will be sent automatically. By default, this is set to300, or 5 hours, however it can be adjusted as warranted.NOTIFICATION_TASK_RUN_MINIMUM_INTERVAL_MINUTES: 300where:
NOTIFICATION_TASK_RUN_MINIMUM_INTERVAL_MINUTES-
Specifies that by default, this field is set to
300, or 5 hours.
-
Click the menu kebab → Test Notification. The following message is returned:
Test Notification Queued A test version of this notification has been queued and should appear shortly -
Depending on which method you chose, check your e-mail, webhook address, Slack channel, and so on. The information sent should look similar to the following example:
{ "repository": "sample_org/busybox", "namespace": "sample_org", "name": "busybox", "docker_url": "quay-server.example.com/sample_org/busybox", "homepage": "http://quay-server.example.com/repository/sample_org/busybox", "tags": [ "latest", "v1" ], "expiring_in": "1 days" }
Creating notifications by using the API
To create, test, reset, or delete repository notifications in Project Quay, you can use the repository notification API endpoints.
-
You have created a repository.
-
You have administrative privileges for the repository.
-
You have created an OAuth access token.
-
Enter the following
POST /api/v1/repository/{repository}/notificationcommand to create a notification on your repository:$ curl -X POST \ -H "Authorization: Bearer <bearer_token>" \ -H "Content-Type: application/json" \ --data '{ "event": "<event>", "method": "<method>", "config": { "<config_key>": "<config_value>" }, "eventConfig": { "<eventConfig_key>": "<eventConfig_value>" } }' \ https://<quay-server.example.com>/api/v1/repository/<namespace>/<repository_name>/notification/This command does not return output in the CLI. Instead, you can enter the following
GET /api/v1/repository/{repository}/notification/{uuid}command to obtain information about the repository notification:{"uuid": "240662ea-597b-499d-98bb-2b57e73408d6", "title": null, "event": "repo_push", "method": "quay_notification", "config": {"target": {"name": "quayadmin", "kind": "user", "is_robot": false, "avatar": {"name": "quayadmin", "hash": "b28d563a6dc76b4431fc7b0524bbff6b810387dac86d9303874871839859c7cc", "color": "#17becf", "kind": "user"}}}, "event_config": {}, "number_of_failures": 0} -
You can test your repository notification by entering the following
POST /api/v1/repository/{repository}/notification/{uuid}/testcommand:$ curl -X POST \ -H "Authorization: Bearer <bearer_token>" \ https://<quay-server.example.com>/api/v1/repository/<repository>/notification/<uuid>/testExample output{} -
You can reset repository notification failures to 0 by entering the following
POST /api/v1/repository/{repository}/notification/{uuid}command:$ curl -X POST \ -H "Authorization: Bearer <bearer_token>" \ https://<quay-server.example.com>/api/v1/repository/<repository>/notification/<uuid> -
Enter the following
DELETE /api/v1/repository/{repository}/notification/{uuid}command to delete a repository notification:$ curl -X DELETE \ -H "Authorization: Bearer <bearer_token>" \ https://<quay-server.example.com>/api/v1/repository/<namespace>/<repository_name>/notification/<uuid>This command does not return output in the CLI. Instead, you can enter the following
GET /api/v1/repository/{repository}/notification/command to retrieve a list of all notifications:$ curl -X GET -H "Authorization: Bearer <bearer_token>" -H "Accept: application/json" https://<quay-server.example.com>/api/v1/repository/<namespace>/<repository_name>/notificationExample output{"notifications": []}
Creating quota notifications by using the API
To create quota warning or error notifications for organization and user namespaces in Project Quay, you can use the API. Warning limits trigger quota_warning events and reject limits trigger quota_error events.
Warning-type quota limits trigger quota_warning notifications. Reject-type quota limits trigger quota_error notifications. For organization email notifications, "config": {} is valid because recipients are resolved server-side (organization contact email, or organization administrators if unset). User email notifications are sent to the user account email address.
Project Quay throttles repeated alerts for the same namespace and threshold by using QUOTA_NOTIFICATION_COOLDOWN_SECONDS (default: 86400 / 24 hours). If usage drops below a threshold and later crosses it again, the notification can re-fire. Deleting a quota also removes associated quota_warning and quota_error notification rules for that namespace.
-
You have created an OAuth access token.
-
FEATURE_QUOTA_MANAGEMENTis enabled in your Project Quay configuration. -
FEATURE_QUOTA_NOTIFICATIONSis enabled in your Project Quay configuration. -
Optional: You have established quota limits for your organization or user namespace. You can create notification rules before setting quota limits. Notifications trigger automatically after quotas are configured and thresholds are crossed.
-
You have administrative privileges for the namespace.
-
To create an organization quota notification, enter a command similar to the following example:
$ curl -X POST \ -H "Authorization: Bearer <bearer_token>" \ -H "Content-Type: application/json" \ --data '{ "event": "quota_warning", "method": "email", "config": {}, "eventConfig": {} }' \ https://<quay-server.example.com>/api/v1/organization/<orgname>/notificationsExample output{ "uuid": "a1b2c3d4-e5f6-7890-abcd-ef1234567890", "title": null, "event": "quota_warning", "method": "email", "config": {}, "event_config": {}, "number_of_failures": 0 } -
Optional: You can create a quota error notification by changing the event type. To complete this task, run a command similar to the following example:
$ curl -X POST \ -H "Authorization: Bearer <bearer_token>" \ -H "Content-Type: application/json" \ --data '{ "event": "quota_error", "method": "slack", "config": { "url": "https://hooks.slack.com/services/YOUR/SLACK/WEBHOOK" }, "eventConfig": {} }' \ https://<quay-server.example.com>/api/v1/organization/<orgname>/notifications -
To create a user namespace quota notification, enter a command similar to the following example:
$ curl -X POST \ -H "Authorization: Bearer <bearer_token>" \ -H "Content-Type: application/json" \ --data '{ "event": "quota_warning", "method": "email", "config": {}, "eventConfig": {} }' \ https://<quay-server.example.com>/api/v1/user/namespacenotifications
Configuring email routing with organization contact email
To route quota notification emails to a shared organization contact address in Project Quay, you can set the organization contact email with the API. You can list and test notifications for organizations and user namespaces.
-
Set the organization contact email by entering a command similar to the following example:
$ curl -X PUT \ -H "Authorization: Bearer <bearer_token>" \ -H "Content-Type: application/json" \ --data '{ "email": "ops-team@example.com" }' \ https://<quay-server.example.com>/api/v1/organization/<orgname>NoteSetting the organization contact email requires organization administrator permissions (
org:adminscope). If a contact email is not set, quota notifications default to sending to organization administrator email addresses. -
List all notifications for an organization by entering a command similar to the following example:
$ curl -X GET \ -H "Authorization: Bearer <bearer_token>" \ -H "Accept: application/json" \ https://<quay-server.example.com>/api/v1/organization/<orgname>/notificationsExample output{ "notifications": [ { "uuid": "a1b2c3d4-e5f6-7890-abcd-ef1234567890", "title": null, "event": "quota_warning", "method": "email", "config": {}, "event_config": {}, "number_of_failures": 0 } ] } -
List all notifications for your user namespace by entering a command similar to the following example:
$ curl -X GET \ -H "Authorization: Bearer <bearer_token>" \ -H "Accept: application/json" \ https://<quay-server.example.com>/api/v1/user/namespacenotifications -
To test a notification, enter a command similar to the following example:
$ curl -X POST \ -H "Authorization: Bearer <bearer_token>" \ https://<quay-server.example.com>/api/v1/organization/<orgname>/notifications/<uuid>/testExample output{}NoteFor email notifications, if an organization contact email is set, the test notification is routed to that address. Otherwise, email notifications default to organization administrators. For Slack, webhook, and other methods, routing follows the notification
config.
Repository events description
Repository events in Project Quay describe the triggers that can generate notifications. You can use these event types when you configure alerts.
Repository Push
A successful push of one or more images was made to the repository:
{
"name": "repository",
"repository": "dgangaia/test",
"namespace": "dgangaia",
"docker_url": "quay.io/dgangaia/test",
"homepage": "https://quay.io/repository/dgangaia/repository",
"updated_tags": [
"latest"
]
}
Dockerfile Build Queued
The following example is a response from a Dockerfile Build that has been queued into the Build system.
|
Note
|
Responses can differ based on the use of optional attributes. |
{
"build_id": "296ec063-5f86-4706-a469-f0a400bf9df2",
"trigger_kind": "github", //Optional
"name": "test",
"repository": "dgangaia/test",
"namespace": "dgangaia",
"docker_url": "quay.io/dgangaia/test",
"trigger_id": "38b6e180-9521-4ff7-9844-acf371340b9e", //Optional
"docker_tags": [
"master",
"latest"
],
"repo": "test",
"trigger_metadata": {
"default_branch": "master",
"commit": "b7f7d2b948aacbe844ee465122a85a9368b2b735",
"ref": "refs/heads/master",
"git_url": "git@github.com:dgangaia/test.git",
"commit_info": { //Optional
"url": "https://github.com/dgangaia/test/commit/b7f7d2b948aacbe844ee465122a85a9368b2b735",
"date": "2019-03-06T12:48:24+11:00",
"message": "adding 5",
"author": { //Optional
"username": "dgangaia",
"url": "https://github.com/dgangaia", //Optional
"avatar_url": "https://avatars1.githubusercontent.com/u/43594254?v=4" //Optional
},
"committer": {
"username": "web-flow",
"url": "https://github.com/web-flow",
"avatar_url": "https://avatars3.githubusercontent.com/u/19864447?v=4"
}
}
},
"is_manual": false,
"manual_user": null,
"homepage": "https://quay.io/repository/dgangaia/test/build/296ec063-5f86-4706-a469-f0a400bf9df2"
}
Dockerfile Build started
The following example is a response from a Dockerfile Build that has been queued into the Build system.
|
Note
|
Responses can differ based on the use of optional attributes. |
{
"build_id": "a8cc247a-a662-4fee-8dcb-7d7e822b71ba",
"trigger_kind": "github", //Optional
"name": "test",
"repository": "dgangaia/test",
"namespace": "dgangaia",
"docker_url": "quay.io/dgangaia/test",
"trigger_id": "38b6e180-9521-4ff7-9844-acf371340b9e", //Optional
"docker_tags": [
"master",
"latest"
],
"build_name": "50bc599",
"trigger_metadata": { //Optional
"commit": "50bc5996d4587fd4b2d8edc4af652d4cec293c42",
"ref": "refs/heads/master",
"default_branch": "master",
"git_url": "git@github.com:dgangaia/test.git",
"commit_info": { //Optional
"url": "https://github.com/dgangaia/test/commit/50bc5996d4587fd4b2d8edc4af652d4cec293c42",
"date": "2019-03-06T14:10:14+11:00",
"message": "test build",
"committer": { //Optional
"username": "web-flow",
"url": "https://github.com/web-flow", //Optional
"avatar_url": "https://avatars3.githubusercontent.com/u/19864447?v=4" //Optional
},
"author": { //Optional
"username": "dgangaia",
"url": "https://github.com/dgangaia", //Optional
"avatar_url": "https://avatars1.githubusercontent.com/u/43594254?v=4" //Optional
}
}
},
"homepage": "https://quay.io/repository/dgangaia/test/build/a8cc247a-a662-4fee-8dcb-7d7e822b71ba"
}
Dockerfile Build successfully completed
The following example is a response from a Dockerfile Build that has been successfully completed by the Build system.
|
Note
|
This event occurs simultaneously with a Repository Push event for the built image or images. |
{
"build_id": "296ec063-5f86-4706-a469-f0a400bf9df2",
"trigger_kind": "github", //Optional
"name": "test",
"repository": "dgangaia/test",
"namespace": "dgangaia",
"docker_url": "quay.io/dgangaia/test",
"trigger_id": "38b6e180-9521-4ff7-9844-acf371340b9e", //Optional
"docker_tags": [
"master",
"latest"
],
"build_name": "b7f7d2b",
"image_id": "sha256:0339f178f26ae24930e9ad32751d6839015109eabdf1c25b3b0f2abf8934f6cb",
"trigger_metadata": {
"commit": "b7f7d2b948aacbe844ee465122a85a9368b2b735",
"ref": "refs/heads/master",
"default_branch": "master",
"git_url": "git@github.com:dgangaia/test.git",
"commit_info": { //Optional
"url": "https://github.com/dgangaia/test/commit/b7f7d2b948aacbe844ee465122a85a9368b2b735",
"date": "2019-03-06T12:48:24+11:00",
"message": "adding 5",
"committer": { //Optional
"username": "web-flow",
"url": "https://github.com/web-flow", //Optional
"avatar_url": "https://avatars3.githubusercontent.com/u/19864447?v=4" //Optional
},
"author": { //Optional
"username": "dgangaia",
"url": "https://github.com/dgangaia", //Optional
"avatar_url": "https://avatars1.githubusercontent.com/u/43594254?v=4" //Optional
}
}
},
"homepage": "https://quay.io/repository/dgangaia/test/build/296ec063-5f86-4706-a469-f0a400bf9df2",
"manifest_digests": [
"quay.io/dgangaia/test@sha256:2a7af5265344cc3704d5d47c4604b1efcbd227a7a6a6ff73d6e4e08a27fd7d99",
"quay.io/dgangaia/test@sha256:569e7db1a867069835e8e97d50c96eccafde65f08ea3e0d5debaf16e2545d9d1"
]
}
Dockerfile Build failed
The following example is a response from a Dockerfile Build that has failed.
{
"build_id": "5346a21d-3434-4764-85be-5be1296f293c",
"trigger_kind": "github", //Optional
"name": "test",
"repository": "dgangaia/test",
"docker_url": "quay.io/dgangaia/test",
"error_message": "Could not find or parse Dockerfile: unknown instruction: GIT",
"namespace": "dgangaia",
"trigger_id": "38b6e180-9521-4ff7-9844-acf371340b9e", //Optional
"docker_tags": [
"master",
"latest"
],
"build_name": "6ae9a86",
"trigger_metadata": { //Optional
"commit": "6ae9a86930fc73dd07b02e4c5bf63ee60be180ad",
"ref": "refs/heads/master",
"default_branch": "master",
"git_url": "git@github.com:dgangaia/test.git",
"commit_info": { //Optional
"url": "https://github.com/dgangaia/test/commit/6ae9a86930fc73dd07b02e4c5bf63ee60be180ad",
"date": "2019-03-06T14:18:16+11:00",
"message": "failed build test",
"committer": { //Optional
"username": "web-flow",
"url": "https://github.com/web-flow", //Optional
"avatar_url": "https://avatars3.githubusercontent.com/u/19864447?v=4" //Optional
},
"author": { //Optional
"username": "dgangaia",
"url": "https://github.com/dgangaia", //Optional
"avatar_url": "https://avatars1.githubusercontent.com/u/43594254?v=4" //Optional
}
}
},
"homepage": "https://quay.io/repository/dgangaia/test/build/5346a21d-3434-4764-85be-5be1296f293c"
}
Dockerfile Build cancelled
The following example is a response from a Dockerfile Build that has been cancelled.
{
"build_id": "cbd534c5-f1c0-4816-b4e3-55446b851e70",
"trigger_kind": "github",
"name": "test",
"repository": "dgangaia/test",
"namespace": "dgangaia",
"docker_url": "quay.io/dgangaia/test",
"trigger_id": "38b6e180-9521-4ff7-9844-acf371340b9e",
"docker_tags": [
"master",
"latest"
],
"build_name": "cbce83c",
"trigger_metadata": {
"commit": "cbce83c04bfb59734fc42a83aab738704ba7ec41",
"ref": "refs/heads/master",
"default_branch": "master",
"git_url": "git@github.com:dgangaia/test.git",
"commit_info": {
"url": "https://github.com/dgangaia/test/commit/cbce83c04bfb59734fc42a83aab738704ba7ec41",
"date": "2019-03-06T14:27:53+11:00",
"message": "testing cancel build",
"committer": {
"username": "web-flow",
"url": "https://github.com/web-flow",
"avatar_url": "https://avatars3.githubusercontent.com/u/19864447?v=4"
},
"author": {
"username": "dgangaia",
"url": "https://github.com/dgangaia",
"avatar_url": "https://avatars1.githubusercontent.com/u/43594254?v=4"
}
}
},
"homepage": "https://quay.io/repository/dgangaia/test/build/cbd534c5-f1c0-4816-b4e3-55446b851e70"
}
Configure build worker environments
Configure TLS, bare metal, and virtual build worker environments for Project Quay on OpenShift Container Platform, including managed-route constraints, optional EC2 builder fallback, and object storage prerequisites for virtual builds.
Configuring the OpenShift Container Platform TLS component for builds
To enable the builds feature with unmanaged TLS in Project Quay, you can add the builder route name to the Subject Alternative Name (SAN) field in your SSL/TLS certificate configuration.
The tls component of the QuayRegistry custom resource definition (CRD) allows you to control whether SSL/TLS are managed by the Project Quay Operator, or self managed. In its current state, Project Quay does not support the builds feature, or the builder workers, when the tls component is managed by the Project Quay Operator.
When setting the tls component to unmanaged, you must supply your own ssl.cert and ssl.key files. Additionally, if you want your cluster to support builders, or the worker nodes that are responsible for building images, you must add both the Quay route and the builder route name to the SAN list in the certificate. Alternatively, however, you could use a wildcard.
-
You have set the
tlscomponent tounmanagedand uploaded custom SSL/TLS certificates to the Project Quay Operator. For more information, see SSL and TLS for Project Quay.
-
In the configuration file that defines your SSL/TLS certificate parameters, for example,
openssl.cnf, add the following information to the certificate’s Subject Alternative Name (SAN) field. For example:# ... [alt_names] <quay_registry_name>-quay-builder-<namespace>.<domain-name>:443 # ...For example:
# ... [alt_names] example-registry-quay-builder-quay-enterprise.apps.cluster-new.gcp.quaydev.org:443 # ...
Bare metal builds
Bare metal builds run Project Quay build workers on physical Red Hat Quay on OpenShift Container Platform or Kubernetes nodes so you can use existing hardware capacity for Dockerfile builds.
Use bare metal builds when you want builders on dedicated worker nodes and can accept container-level isolation rather than a full virtual machine per build. Plan for labeled worker nodes that can schedule build pods, a builder service account with the required permissions, and network access from builders to the build manager and to your Git sources.
Configure bare metal builder infrastructure when you are ready to implement builds; planning focuses on node capacity, isolation tradeoffs, and whether bare metal or virtual builders better match your security model.
Configuring bare metal builds for Red Hat Quay on OpenShift Container Platform
To configure bare metal builds for Red Hat Quay on OpenShift Container Platform with Project Quay, you can create a build project, configure service accounts, and update your configuration file.
|
Note
|
If you are using the Project Quay Operator on OpenShift Container Platform with a managed |
-
You have an OpenShift Container Platform cluster provisioned with the Project Quay Operator running.
-
You have set the
tlscomponent tounmanagedand uploaded custom SSL/TLS certificates to the Project Quay Operator. For more information, see SSL and TLS for Project Quay. -
You are logged into OpenShift Container Platform as a cluster administrator.
-
Enter the following command to create a project where Builds will be run, for example,
bare-metal-builder:$ oc new-project bare-metal-builder -
Create a new
ServiceAccountin thebare-metal-buildernamespace by entering the following command:$ oc create sa -n bare-metal-builder quay-builder -
Enter the following command to grant a user the
editrole within thebare-metal-buildernamespace:$ oc policy add-role-to-user -n bare-metal-builder edit system:serviceaccount:bare-metal-builder:quay-builder -
Enter the following command to retrieve a token associated with the
quay-builderservice account in thebare-metal-buildernamespace. This token is used to authenticate and interact with the OpenShift Container Platform cluster’s API server.-
If your OpenShift Container Platform cluster is version 4.11+, enter the following command:
oc create token quay-builder -n bare-metal-builder --duration 24h -
If your OpenShift Container Platform cluster is earlier than version 4.11, for example, version 4.10, enter the following command:
$ oc sa get-token -n bare-metal-builder quay-builder
-
-
Identify the URL for the OpenShift Container Platform cluster’s API server. This can be found in the OpenShift Container Platform web console.
-
Identify a worker node label to be used when scheduling build jobs. Because build pods must run on bare metal worker nodes, typically these are identified with specific labels.
Check with your cluster administrator to determine exactly which node label should be used.
-
Obtain the Kube API Server’s certificate authority (CA) to add to Project Quay’s extra certificates.
-
On OpenShift Container Platform versions 4.15+, enter the following commands to obtain the name of the secret containing the CA:
$ oc extract cm/kube-root-ca.crt -n openshift-apiserver$ mv ca.crt build_cluster.crt -
On OpenShift Container Platform versions earlier than 4.15, for example, 4.14, enter the following command:
$ oc get sa openshift-apiserver-sa --namespace=openshift-apiserver -o json | jq '.secrets[] | select(.name | contains("openshift-apiserver-sa-token"))'.name -
Obtain the
ca.crtkey value from the secret in the OpenShift Container Platform Web Console. The value begins with "-----BEGIN CERTIFICATE-----"`. -
Import the CA to Project Quay. Ensure that the name of this file matches the
K8S_API_TLS_CAfield used in Step 9.
-
-
Create the following
SecurityContextConstraintsresource for theServiceAccount:apiVersion: security.openshift.io/v1 kind: SecurityContextConstraints metadata: name: quay-builder priority: null readOnlyRootFilesystem: false requiredDropCapabilities: null runAsUser: type: RunAsAny seLinuxContext: type: RunAsAny seccompProfiles: - '*' supplementalGroups: type: RunAsAny volumes: - '*' allowHostDirVolumePlugin: true allowHostIPC: true allowHostNetwork: true allowHostPID: true allowHostPorts: true allowPrivilegeEscalation: true allowPrivilegedContainer: true allowedCapabilities: - '*' allowedUnsafeSysctls: - '*' defaultAddCapabilities: null fsGroup: type: RunAsAny --- apiVersion: rbac.authorization.k8s.io/v1 kind: Role metadata: name: quay-builder-scc namespace: bare-metal-builder rules: - apiGroups: - security.openshift.io resourceNames: - quay-builder resources: - securitycontextconstraints verbs: - use --- apiVersion: rbac.authorization.k8s.io/v1 kind: RoleBinding metadata: name: quay-builder-scc namespace: bare-metal-builder subjects: - kind: ServiceAccount name: quay-builder roleRef: apiGroup: rbac.authorization.k8s.io kind: Role name: quay-builder-scc -
Update the
config.yamlfile of your Red Hat Quay on OpenShift Container Platform deployment to include an appropriate bare metal builds configuration by using the OpenShift Container Platform web console.-
Click Operators → Installed Operators → Red Hat Quay → Quay Registry.
-
Click the name of your registry, for example, example-registry.
-
Under Config Bundle Secret, click the name of your configuration bundle, for example, extra-ca-certificate-config-bundle-secret.
-
Click Actions → Edit Secret.
-
Add the following information to your Project Quay
config.yamlfile, replacing each value with information that is relevant to your specific installation:FEATURE_USER_INITIALIZE: true BROWSER_API_CALLS_XHR_ONLY: false SUPER_USERS: - <superusername> FEATURE_USER_CREATION: false FEATURE_QUOTA_MANAGEMENT: true FEATURE_BUILD_SUPPORT: True BUILDMAN_HOSTNAME: ${BUILDMAN_HOSTNAME}:443 BUILD_MANAGER: - ephemeral - ALLOWED_WORKER_COUNT: 10 ORCHESTRATOR_PREFIX: buildman/production/ ORCHESTRATOR: REDIS_HOST: <sample_redis_hostname> REDIS_PASSWORD: "" REDIS_SSL: false REDIS_SKIP_KEYSPACE_EVENT_SETUP: false EXECUTORS: - EXECUTOR: kubernetes BUILDER_NAMESPACE: <sample_builder_namespace> K8S_API_SERVER: <sample_k8s_api_server> K8S_API_TLS_CA: <sample_crt_file> VOLUME_SIZE: 8G KUBERNETES_DISTRIBUTION: openshift CONTAINER_MEMORY_LIMITS: 1G CONTAINER_CPU_LIMITS: 300m CONTAINER_MEMORY_REQUEST: 1G CONTAINER_CPU_REQUEST: 300m NODE_SELECTOR_LABEL_KEY: beta.kubernetes.io/instance-type NODE_SELECTOR_LABEL_VALUE: n1-standard-4 CONTAINER_RUNTIME: podman SERVICE_ACCOUNT_NAME: <sample_service_account_name> SERVICE_ACCOUNT_TOKEN: <sample_account_token> QUAY_USERNAME: <quay_username> QUAY_PASSWORD: <quay_password> WORKER_IMAGE: <registry>/quay-quay-builder WORKER_TAG: <some_tag> BUILDER_VM_CONTAINER_IMAGE: registry.redhat.io/quay/quay-builder-qemu-rhcos-rhel8:v3.9.10-4 SETUP_TIME: 180 MINIMUM_RETRY_THRESHOLD: 0 SSH_AUTHORIZED_KEYS: - <ssh-rsa 12345 someuser@email.com> - <ssh-rsa 67890 someuser2@email.com> HTTP_PROXY: <http://10.0.0.1:80> HTTPS_PROXY: <http://10.0.0.1:80> NO_PROXY: <hostname.example.com>where:
BUILDMAN_HOSTNAME-
Specifies the hostname of the Project Quay registry. Obtain this by running the following command:
$ oc get route quayregistry-quay-builder -n ${QUAY_PROJECT} -o jsonpath='{.spec.host}'. BUILD_MANAGER.ORCHESTRATOR.REDIS_HOST-
Specifies the hostname for your Redis service.
BUILD_MANAGER.EXECUTORS.BUILDER_NAMESPACE-
Specifies the name of your bare metal builds namespace. This example used
bare-metal-builder. BUILD_MANAGER.EXECUTORS.K8S_API_SERVER-
Specifies the
K8S_API_SERVERis obtained by running$ oc cluster-info. BUILD_MANAGER.EXECUTORS.K8S_API_TLS_CA-
Specifies the name of your custom CA cert, for example,
K8S_API_TLS_CA: /conf/stack/extra_ca_certs/build-cluster.crt. BUILD_MANAGER.EXECUTORS.CONTAINER_MEMORY_LIMITS-
Specifies the memory limit for your container. Defaults to
5120Miif left unspecified. BUILD_MANAGER.EXECUTORS.CONTAINER_CPU_LIMITS-
Specifies the CPU limit for your container. Defaults to
1000mif left unspecified. BUILD_MANAGER.EXECUTORS.CONTAINER_MEMORY_REQUEST-
Specifies the memory request for your container. Defaults to
3968Miif left unspecified. BUILD_MANAGER.EXECUTORS.CONTAINER_CPU_REQUEST-
Specifies the CPU request for your container. Defaults to
500mif left unspecified. BUILD_MANAGER.EXECUTORS.SERVICE_ACCOUNT_TOKEN-
Specifies the token for your service account. Obtain this by running
$ oc create sa. BUILD_MANAGER.EXECUTORS.SSH_AUTHORIZED_KEYS-
Specifies the SSH authorized keys for your build environment. This key, or keys, should correspond to the private key that an admin or developer will use to SSH into the build worker for debugging purposes. This key can be obtained by establishing an SSH connection to the remote host using a specific SSH key and port. For example:
$ ssh -i /path/to/ssh/key/set/in/ssh_authorized_keys -p 9999 core@localhost.
-
-
Restart your Project Quay registry to enable the builds feature.
Builds limitations with managed routes
Project Quay builds have networking constraints when Red Hat Quay on OpenShift Container Platform uses managed routes. Plan for these constraints so build workers can reach the build manager.
OpenShift Container Platform routes typically serve traffic on a single port. Because builds use gRPC, the Operator creates a dedicated Route that directs that traffic to the build manager.
When you plan builds on OpenShift Container Platform, account for the following:
-
OpenShift ingress must support HTTP/2 for the gRPC protocol used by the build manager.
-
The build manager needs the build cluster CA certificate in the Project Quay configuration so workers can establish a secure connection.
-
Build jobs must resolve the build manager hostname. Custom subdomains require DNS that points to the OpenShift router.
See "Configuring Project Quay builds for managed routes" for implementation steps.
Configuring Project Quay builds for managed routes
To use Project Quay builds with managed routes and custom hostnames, you can configure DNS records and update your registry configuration. This enables gRPC communication between build executors and the build manager.
-
The Project Quay Operator is installed and a
QuayRegistryexists. -
Your
kubectlorocCLI tool is configured for the target cluster.
-
Enable HTTP/2 ingress on your OpenShift Container Platform cluster to support gRPC.
-
Retrieve the host address of the generated build-manager route:
$ kubectl get -n <namespace> route <quayregistry-name>-quay-builder -o jsonpath={.status.ingress[0].host} -
Create a CNAME record with your DNS provider that points your custom hostname (for example,
builder-registry.example.com) to the route host retrieved in the previous step. -
Update the
Secretreferenced byspec.configBundleSecretin yourQuayRegistryto include the build cluster CA certificate. The key must be namedextra_ca_cert_build_cluster.cert. -
Add the
BUILDMAN_HOSTNAMEfield to yourconfig.yamland include the port number:BUILDMAN_HOSTNAME: builder-registry.example.com:443 BUILD_MANAGER: - ephemeral ALLOWED_WORKER_COUNT: 1 ...
Virtual builds
Virtual builds in Project Quay run build workers in unprivileged containers on Red Hat Quay on OpenShift Container Platform. This approach provides process isolation without requiring a dedicated virtual machine for each build.
With virtual builds, the build manager creates a Kubernetes Job that starts a pod from the builder image. That image includes the builder binary and Podman. The pod runs unprivileged; the builder builds the image and reports status to the build manager.
Virtual builds limitations
The following limitations apply to virtual builds:
-
Running virtual builds in an unprivileged context might cause some Dockerfile commands that worked under a previous build strategy to fail. Changing build strategy can also affect build performance and reliability.
-
Running virtual builds directly in a container does not provide the same isolation as virtual machines. Changing the build environment might cause builds that previously succeeded to fail.
Configuring virtual builds for Red Hat Quay on OpenShift Container Platform
To configure virtual builds for Red Hat Quay on OpenShift Container Platform with Project Quay, you can create a build project, configure service accounts, and update your configuration file.
|
Note
|
|
-
You have an OpenShift Container Platform cluster provisioned with the Project Quay Operator running.
-
You have set the
tlscomponent tounmanagedand uploaded custom SSL/TLS certificates to the Project Quay Operator. For more information, see SSL and TLS for Project Quay. -
You have configured the OpenShift Container Platform TLS component for builds.
-
You are logged into OpenShift Container Platform as a cluster administrator.
-
Create a new project where your virtual builders will be run, for example,
virtual-builders, by running the following command:$ oc new-project virtual-builders -
Create a
ServiceAccountin the project that will be used to run builds by entering the following command:$ oc create sa -n virtual-builders quay-builderExample outputserviceaccount/quay-builder created -
Provide the created service account with editing permissions so that it can run a build:
$ oc adm policy -n virtual-builders add-role-to-user edit system:serviceaccount:virtual-builders:quay-builderExample outputclusterrole.rbac.authorization.k8s.io/edit added: "system:serviceaccount:virtual-builders:quay-builder" -
Grant the builder worker
anyuid sccpermissions by entering the following command. This requires cluster administrator privileges, which is required because builders must run as the Podman user for unprivileged or rootless builds to work.$ oc adm policy -n virtual-builders add-scc-to-user anyuid -z quay-builderExample outputclusterrole.rbac.authorization.k8s.io/system:openshift:scc:anyuid added: "quay-builder" -
Obtain the token for the builder service account by entering the following command:
$ oc create token quay-builder -n virtual-buildersNoteWhen the token expires you will need to request a new token. Optionally, you can also add a custom expiration. For example, specify
--duration 20160mto retain the token for two weeks.Example output<sample_account_token>... -
Determine the builder route by entering the following command:
$ oc get route -n quay-enterpriseExample outputNAME: example-registry-quay-builder HOST/PORT: example-registry-quay-builder-quay-enterprise.apps.stevsmit-cluster-new.gcp.quaydev.org PATH: SERVICES: example-registry-quay-app PORT: grpc TERMINATION: passthrough/Redirect WILDCARD: None -
Generate a self-signed SSL/TLS certificate with the
.crtextension by entering the following command:$ oc extract cm/kube-root-ca.crt -n openshift-apiserverExample outputca.crt -
Rename the
ca.crtfile tobuild-cluster.crtby entering the following command:$ mv ca.crt build-cluster.crt -
Update the
config.yamlfile of your Red Hat Quay on OpenShift Container Platform deployment to include an appropriate virtual builds configuration by using the OpenShift Container Platform web console.-
Click Operators → Installed Operators → Red Hat Quay → Quay Registry.
-
Click the name of your registry, for example, example-registry.
-
Under Config Bundle Secret, click the name of your configuration bundle, for example, extra-ca-certificate-config-bundle-secret.
-
Click Actions → Edit Secret.
-
Add an appropriate virtual builds configuration using the following as a reference:
FEATURE_USER_INITIALIZE: true BROWSER_API_CALLS_XHR_ONLY: false SUPER_USERS: - <superusername> FEATURE_USER_CREATION: false FEATURE_QUOTA_MANAGEMENT: true FEATURE_BUILD_SUPPORT: True BUILDMAN_HOSTNAME: <sample_build_route> BUILD_MANAGER: - ephemeral - ALLOWED_WORKER_COUNT: 1 ORCHESTRATOR_PREFIX: buildman/production/ JOB_REGISTRATION_TIMEOUT: 3600 ORCHESTRATOR: REDIS_HOST: <sample_redis_hostname> REDIS_PASSWORD: "" REDIS_SSL: false REDIS_SKIP_KEYSPACE_EVENT_SETUP: false EXECUTORS: - EXECUTOR: kubernetesPodman NAME: openshift BUILDER_NAMESPACE: <sample_builder_namespace> SETUP_TIME: 180 MINIMUM_RETRY_THRESHOLD: 0 BUILDER_CONTAINER_IMAGE: quay.io/projectquay/quay-builder:{producty} # Kubernetes resource options K8S_API_SERVER: <sample_k8s_api_server> K8S_API_TLS_CA: <sample_crt_file> VOLUME_SIZE: 8G KUBERNETES_DISTRIBUTION: openshift CONTAINER_MEMORY_LIMITS: 1G CONTAINER_CPU_LIMITS: 300m CONTAINER_MEMORY_REQUEST: 1G CONTAINER_CPU_REQUEST: 300m NODE_SELECTOR_LABEL_KEY: "" NODE_SELECTOR_LABEL_VALUE: "" SERVICE_ACCOUNT_NAME: <sample_service_account_name> SERVICE_ACCOUNT_TOKEN: <sample_account_token> HTTP_PROXY: <http://10.0.0.1:80> HTTPS_PROXY: <http://10.0.0.1:80> NO_PROXY: <hostname.example.com>where:
BUILDMAN_HOSTNAME-
Specifies that the build route is obtained by running
$ oc get route -nwith the namespace of your Red Hat Quay on OpenShift Container Platform deployment. A port must be provided at the end of the route, and it should use the following format:[quayregistry-cr-name]-quay-builder-[ocp-namespace].[ocp-domain-name]:443. BUILD_MANAGER.JOB_REGISTRATION_TIMEOUT-
Specifies that you might receive the following error when set too low:
failed to register job to build manager: rpc error: code = Unauthenticated desc = Invalid build token: Signature has expired. This parameter should be set to at least240. BUILD_MANAGER.ORCHESTRATOR.REDIS_HOST-
Specifies that you must update this field accordingly if your Redis host has a password or SSL/TLS certificates.
BUILD_MANAGER.EXECUTORS.BUILDER_NAMESPACE-
Specifies the name of your virtual builds namespace. This example used
virtual-builders. BUILD_MANAGER.EXECUTORS.K8S_API_SERVER-
Specifies the value obtained by running
$ oc cluster-info. BUILD_MANAGER.EXECUTORS.K8S_API_TLS_CA-
Specifies that you must manually create and add your custom CA cert, for example,
K8S_API_TLS_CA: /conf/stack/extra_ca_certs/build-cluster.crt. BUILD_MANAGER.EXECUTORS.CONTAINER_MEMORY_LIMITS-
Specifies the memory limit. Defaults to
5120Miif left unspecified. BUILD_MANAGER.EXECUTORS.CONTAINER_CPU_LIMITS-
Specifies that for virtual builds, you must ensure that there are enough resources in your cluster. Defaults to
1000mif left unspecified. BUILD_MANAGER.EXECUTORS.CONTAINER_MEMORY_REQUEST-
Specifies the memory request. Defaults to
3968Miif left unspecified. BUILD_MANAGER.EXECUTORS.CONTAINER_CPU_REQUEST-
Specifies the CPU request. Defaults to
500mif left unspecified. BUILD_MANAGER.EXECUTORS.SERVICE_ACCOUNT_TOKEN-
Specifies the token obtained when running
$ oc create sa.
Example virtual builds configurationFEATURE_USER_INITIALIZE: true BROWSER_API_CALLS_XHR_ONLY: false SUPER_USERS: - quayadmin FEATURE_USER_CREATION: false FEATURE_QUOTA_MANAGEMENT: true FEATURE_BUILD_SUPPORT: True BUILDMAN_HOSTNAME: example-registry-quay-builder-quay-enterprise.apps.docs.quayteam.org:443 BUILD_MANAGER: - ephemeral - ALLOWED_WORKER_COUNT: 1 ORCHESTRATOR_PREFIX: buildman/production/ JOB_REGISTRATION_TIMEOUT: 3600 ORCHESTRATOR: REDIS_HOST: example-registry-quay-redis REDIS_PASSWORD: "" REDIS_SSL: false REDIS_SKIP_KEYSPACE_EVENT_SETUP: false EXECUTORS: - EXECUTOR: kubernetesPodman NAME: openshift BUILDER_NAMESPACE: virtual-builders SETUP_TIME: 180 MINIMUM_RETRY_THRESHOLD: 0 BUILDER_CONTAINER_IMAGE: quay.io/projectquay/quay-builder:{producty} # Kubernetes resource options K8S_API_SERVER: api.docs.quayteam.org:6443 K8S_API_TLS_CA: /conf/stack/extra_ca_certs/build-cluster.crt VOLUME_SIZE: 8G KUBERNETES_DISTRIBUTION: openshift CONTAINER_MEMORY_LIMITS: 1G CONTAINER_CPU_LIMITS: 300m CONTAINER_MEMORY_REQUEST: 1G CONTAINER_CPU_REQUEST: 300m NODE_SELECTOR_LABEL_KEY: "" NODE_SELECTOR_LABEL_VALUE: "" SERVICE_ACCOUNT_NAME: quay-builder SERVICE_ACCOUNT_TOKEN: "<sample_account_token>" HTTP_PROXY: <http://10.0.0.1:80> HTTPS_PROXY: <http://10.0.0.1:80> NO_PROXY: <hostname.example.com> -
Click Save on the Edit Secret page.
-
-
Restart your Red Hat Quay on OpenShift Container Platform registry with the new configuration.
Modifying your AWS S3 storage bucket
To enable builds with AWS S3 storage in Project Quay, you can configure cross-origin resource sharing (CORS) settings in your S3 bucket. This allows build workers to access and store build artifacts in your S3 bucket.
-
Log in to your AWS console at s3.console.aws.com.
-
In the search bar, search for
S3and then click S3. -
Click the name of your bucket, for example,
myawsbucket. -
Click the Permissions tab.
-
Under Cross-origin resource sharing (CORS), include the following parameters:
[ { "AllowedHeaders": [ "Authorization" ], "AllowedMethods": [ "GET" ], "AllowedOrigins": [ "*" ], "ExposeHeaders": [], "MaxAgeSeconds": 3000 }, { "AllowedHeaders": [ "Content-Type", "x-amz-acl", "origin" ], "AllowedMethods": [ "PUT" ], "AllowedOrigins": [ "*" ], "ExposeHeaders": [], "MaxAgeSeconds": 3000 } ]
Modifying your Google Cloud Platform object bucket
To enable virtual builds with Google Cloud Platform storage in Project Quay, you can configure cross-origin resource sharing (CORS) settings in your GCP bucket. This allows build workers to upload Dockerfiles and access build artifacts.
|
Note
|
Currently, modifying your Google Cloud Platform object bucket is not supported on IBM Power and IBM Z. |
-
Use the following reference to create a JSON file for your specific CORS needs. For example:
$ cat gcp_cors.jsonExample output[ { "origin": ["*"], "method": ["GET"], "responseHeader": ["Authorization"], "maxAgeSeconds": 3600 }, { "origin": ["*"], "method": ["PUT"], "responseHeader": [ "Content-Type", "x-goog-acl", "origin"], "maxAgeSeconds": 3600 } ] -
Enter the following command to update your GCP storage bucket:
$ gcloud storage buckets update gs://<bucket_name> --cors-file=./gcp_cors.jsonExample outputUpdating Completed 1 -
You can display the updated CORS configuration of your GCP bucket by running the following command:
$ gcloud storage buckets describe gs://<bucket_name> --format="default(cors)"Example outputcors: - maxAgeSeconds: 3600 method: - GET origin: - '*' responseHeader: - Authorization - maxAgeSeconds: 3600 method: - PUT origin: - '*' responseHeader: - Content-Type - x-goog-acl - origin
Configure the Clair database and custom settings
Configure unmanaged or Operator-managed Clair databases and supply custom clair-config.yaml settings for external databases, SSL/TLS certificates, and managed Clair deployments.
Unmanaged Clair configuration
Unmanaged Clair configuration lets you run a custom Clair deployment or use an external Clair database with the Project Quay Operator. You can use this option for geo-replicated environments or highly available databases outside your cluster.
Running a custom Clair configuration with an unmanaged Clair database
To use an external Clair database with the Project Quay Operator, you can set the clairpostgres component to unmanaged in your QuayRegistry custom resource.
|
Important
|
You must not use the same externally managed PostgreSQL database for both Project Quay and Clair deployments. Your PostgreSQL database must also not be shared with other workloads, as it might exhaust the natural connection limit on the PostgreSQL side when connection-intensive workloads, like Project Quay or Clair, contend for resources. Additionally, pgBouncer is not supported with Project Quay or Clair, so pgBouncer is not an option to resolve this issue. |
-
In the Quay Operator, set the
clairpostgrescomponent of theQuayRegistrycustom resource tomanaged: false:apiVersion: quay.redhat.com/v1 kind: QuayRegistry metadata: name: quay370 spec: configBundleSecret: config-bundle-secret components: - kind: objectstorage managed: false - kind: route managed: true - kind: tls managed: false - kind: clairpostgres managed: false
Configuring a custom Clair database with an unmanaged Clair database
To configure a custom Clair database with SSL/TLS certificates on Project Quay, you can create a Quay configuration bundle secret that includes the clair-config.yaml file.
|
Note
|
The following procedure configures Clair with SSL/TLS certificates. |
-
Create a Quay configuration bundle secret that includes the
clair-config.yamlby entering the following command:$ oc create secret generic --from-file config.yaml=./config.yaml --from-file extra_ca_cert_rds-ca-2019-root.pem=./rds-ca-2019-root.pem --from-file clair-config.yaml=./clair-config.yaml --from-file ssl.cert=./ssl.cert --from-file ssl.key=./ssl.key config-bundle-secretExample Clairconfig.yamlfileindexer: connstring: host=quay-server.example.com port=5432 dbname=quay user=quayrdsdb password=quayrdsdb sslrootcert=/run/certs/rds-ca-2019-root.pem sslmode=verify-ca layer_scan_concurrency: 6 migrations: true scanlock_retry: 11 log_level: debug matcher: connstring: host=quay-server.example.com port=5432 dbname=quay user=quayrdsdb password=quayrdsdb sslrootcert=/run/certs/rds-ca-2019-root.pem sslmode=verify-ca migrations: true metrics: name: prometheus notifier: connstring: host=quay-server.example.com port=5432 dbname=quay user=quayrdsdb password=quayrdsdb sslrootcert=/run/certs/rds-ca-2019-root.pem sslmode=verify-ca migrations: trueNote-
The database certificate is mounted under
/run/certs/rds-ca-2019-root.pemon the Clair application pod in theclair-config.yaml. It must be specified when configuring yourclair-config.yaml.
-
-
Add the
clair-config.yamlfile to your bundle secret, for example:apiVersion: v1 kind: Secret metadata: name: config-bundle-secret namespace: quay-enterprise data: config.yaml: <base64 encoded Quay config> clair-config.yaml: <base64 encoded Clair config> extra_ca_cert_<name>: <base64 encoded ca cert> ssl.crt: <base64 encoded SSL certificate> ssl.key: <base64 encoded SSL private key>NoteWhen updated, the provided
clair-config.yamlfile is mounted into the Clair pod. Any fields not provided are automatically populated with defaults using the Clair configuration module. -
You can check the status of your Clair pod by clicking the commit in the Build History page, or by running
oc get pods -n <namespace>. For example:$ oc get pods -n <namespace>Example outputNAME READY STATUS RESTARTS AGE f192fe4a-c802-4275-bcce-d2031e635126-9l2b5-25lg2 1/1 Running 0 7s
Running a custom Clair configuration with a managed Clair database
You can customize Clair settings while the Project Quay Operator manages the Clair database. Use this approach to disable updater resources or configure Clair for disconnected environments.
|
Note
|
|
Setting a Clair database to managed
To have the Project Quay Operator manage your Clair database, you can set the clairpostgres component to managed in your QuayRegistry custom resource.
-
In the Quay Operator, set the
clairpostgrescomponent of theQuayRegistrycustom resource tomanaged: true:apiVersion: quay.redhat.com/v1 kind: QuayRegistry metadata: name: quay370 spec: configBundleSecret: config-bundle-secret components: - kind: objectstorage managed: false - kind: route managed: true - kind: tls managed: false - kind: clairpostgres managed: true
Configuring a custom Clair database with a managed Clair configuration
To supply a custom clair-config.yaml while the Operator manages Clair on Project Quay, you can create a Quay configuration bundle secret that includes your Clair configuration file.
-
Create a Quay configuration bundle secret that includes the
clair-config.yamlby entering the following command:$ oc create secret generic --from-file config.yaml=./config.yaml --from-file extra_ca_cert_rds-ca-2019-root.pem=./rds-ca-2019-root.pem --from-file clair-config.yaml=./clair-config.yaml config-bundle-secretExample Clairconfig.yamlfileindexer: connstring: host=quay-server.example.com port=5432 dbname=quay user=quayrdsdb password=quayrdsdb sslmode=disable layer_scan_concurrency: 6 migrations: true scanlock_retry: 11 log_level: debug matcher: connstring: host=quay-server.example.com port=5432 dbname=quay user=quayrdsdb password=quayrdsdb sslmode=disable migrations: true metrics: name: prometheus notifier: connstring: host=quay-server.example.com port=5432 dbname=quay user=quayrdsdb password=quayrdsdb sslmode=disable migrations: trueNoteThe database certificate is mounted under
/run/certs/rds-ca-2019-root.pemon the Clair application pod in theclair-config.yaml. It must be specified when configuring yourclair-config.yaml. -
Add the
clair-config.yamlfile to your bundle secret, for example:apiVersion: v1 kind: Secret metadata: name: config-bundle-secret namespace: quay-enterprise data: config.yaml: <base64 encoded Quay config> clair-config.yaml: <base64 encoded Clair config>NoteWhen updated, the provided
clair-config.yamlfile is mounted into the Clair pod. Any fields not provided are automatically populated with defaults using the Clair configuration module. -
You can check the status of your Clair pod by clicking the commit in the Build History page, or by running
oc get pods -n <namespace>. For example:$ oc get pods -n <namespace>Example outputNAME READY STATUS RESTARTS AGE f192fe4a-c802-4275-bcce-d2031e635126-9l2b5-25lg2 1/1 Running 0 7s
Configure Clair updaters and disconnected scanning
Configure Clair updater sets and advanced per-updater settings, disable automatic updaters for disconnected deployments, and set up offline vulnerability data transfer and CPE mapping.
Clair updaters
Clair uses Go packages called updaters to fetch and parse vulnerability databases. You can control which databases Clair imports and how often vulnerability data is updated in Project Quay.
Updaters are usually paired with a matcher to interpret if, and how, any vulnerability is related to a package. Administrators might want to update the vulnerability database less frequently, or not import vulnerabilities from databases that they know are not used.
Selecting updater sets for full Red Hat Enterprise Linux (RHEL) coverage
You can select Clair updater sets to cover vulnerabilities in Red Hat Enterprise Linux (RHEL). Use the rhel, rhcc, clair.cvss, and osv updater sets for full coverage.
For full coverage of vulnerabilities in Red Hat Enterprise Linux (RHEL), you must use the following updater sets:
-
rhel. This updater ensures that you have the latest information on the vulnerabilities that affect RHEL. -
rhcc. This updater keeps track of vulnerabilities related to Red Hat’s container images. -
clair.cvss. This updater offers a comprehensive view of the severity and risk assessment of vulnerabilities by providing Common Vulnerabilities and Exposures (CVE) scores. -
osv. This updater focuses on tracking vulnerabilities in open-source software components. This updater is recommended due to how common the use of Java and Go are in RHEL products.
#...
updaters:
sets:
- rhel
- rhcc
- clair.cvss
- osv
#...Advanced updater configuration
In some cases, users might want to configure updaters for specific behavior, for example, if you want to allowlist specific ecosystems for the Open Source Vulnerabilities (OSV) updaters.
Advanced updater configuration might be useful for proxy deployments or air-gapped deployments. Configuration for specific updaters in these scenarios can be passed by putting a key underneath the config environment variable of the updaters object. Users should examine their Clair logs to double-check names.
The following YAML snippets detail the various settings available to some Clair updaters.
|
Important
|
For most users, advanced updater configuration is unnecessary. |
Configuring the alpine updater
#...
updaters:
sets:
- alpine
config:
alpine:
url: https://secdb.alpinelinux.org/
#...Configuring the debian updater
#...
updaters:
sets:
- debian
config:
debian:
mirror_url: https://deb.debian.org/
json_url: https://security-tracker.debian.org/tracker/data/json
#...Configuring the clair.cvss updater
#...
updaters:
config:
clair.cvss:
url: https://nvd.nist.gov/feeds/json/cve/1.1/
#...Configuring the oracle updater
#...
updaters:
sets:
- oracle
config:
oracle-2023-updater:
url:
- https://linux.oracle.com/security/oval/com.oracle.elsa-2023.xml.bz2
oracle-2022-updater:
url:
- https://linux.oracle.com/security/oval/com.oracle.elsa-2022.xml.bz2
#...Configuring the photon updater
#...
updaters:
sets:
- photon
config:
photon:
url: https://packages.vmware.com/photon/photon_oval_definitions/
#...Configuring the rhel updater
#...
updaters:
sets:
- rhel
config:
rhel:
url: https://access.redhat.com/security/data/oval/v2/PULP_MANIFEST
ignore_unpatched: true
#...ignore_unpatched is a Boolean that indicates whether to include information about vulnerabilities that do not have corresponding patches or updates available.
Configuring the rhcc updater
#...
updaters:
sets:
- rhcc
config:
rhcc:
url: https://access.redhat.com/security/data/metrics/cvemap.xml
#...Configuring the suse updater
#...
updaters:
sets:
- suse
config:
suse:
url: https://support.novell.com/security/oval/
#...Configuring the ubuntu updater
#...
updaters:
config:
ubuntu:
url: https://api.launchpad.net/1.0/
name: ubuntu
force:
- name: focal
version: 20.04
#...where:
updaters.config.ubuntu.force-
Specifies the inclusion of specific distribution and version details in the resulting UpdaterSet, regardless of their status in the API response. Useful when you want to ensure that particular distributions and versions are consistently included in your updater configuration.
updaters.config.ubuntu.force.name-
Specifies the distribution name that you want to force to be included in the UpdaterSet.
updaters.config.ubuntu.force.version-
Specifies the version of the distribution you want to force into the UpdaterSet.
Configuring the osv updater
#...
updaters:
sets:
- osv
config:
osv:
url: https://osv-vulnerabilities.storage.googleapis.com/
allowlist:
- npm
- pypi
#...allowlist is the list of ecosystems to allow. When left unset, all ecosystems are allowed. Must be lowercase.
Disabling the Clair Updater component
You can disable the Clair updater component when you run Project Quay in a disconnected environment. Set matcher.disable_updaters to true in the Clair configuration.
In the following example, Clair updaters are disabled:
#...
matcher:
disable_updaters: true
#...Configuring updaters
You can configure Clair updaters by using the updaters.sets key in clair-config.yaml. Use the following examples to select one or more updater sets for your Project Quay deployment.
|
Important
|
|
- Configuring Clair for multiple updaters
-
.Multiple specific updaters
#...
updaters:
sets:
- alpine
- aws
- osv
#...- Configuring Clair for Alpine
-
.Alpine config.yaml example
#...
updaters:
sets:
- alpine
#...- Configuring Clair for AWS
-
.AWS config.yaml example
#...
updaters:
sets:
- aws
#...- Configuring Clair for Debian
-
.Debian config.yaml example
#...
updaters:
sets:
- debian
#...- Configuring Clair for Clair CVSS
-
.Clair CVSS config.yaml example
#...
updaters:
sets:
- clair.cvss
#...- Configuring Clair for Oracle
-
.Oracle config.yaml example
#...
updaters:
sets:
- oracle
#...- Configuring Clair for Photon
-
.Photon config.yaml example
#...
updaters:
sets:
- photon
#...- Configuring Clair for SUSE
-
.SUSE config.yaml example
#...
updaters:
sets:
- suse
#...- Configuring Clair for Ubuntu
-
.Ubuntu config.yaml example
#...
updaters:
sets:
- ubuntu
#...- Configuring Clair for OSV
-
.OSV config.yaml example
#...
updaters:
sets:
- osv
#...Clair in disconnected environments
Clair supports disconnected Project Quay deployments that have no direct internet access. You can use the clairctl tool to transfer vulnerability database updates from an open host so Clair can scan images offline.
Clair uses a set of components called updaters to handle the fetching and parsing of data from various vulnerability databases. By default, updaters pull vulnerability data directly from the internet and work for immediate use.
|
Note
|
Currently, Clair enrichment data is CVSS data. Enrichment data is currently unsupported in disconnected environments. |
Setting up Clair in a disconnected OpenShift Container Platform cluster
To install the clairctl command-line utility on a disconnected OpenShift Container Platform cluster, you can copy the binary from a running Clair pod and make it executable.
-
Install the
clairctlprogram for a Clair deployment in an OpenShift Container Platform cluster by entering the following command:$ oc -n quay-enterprise exec example-registry-clair-app-64dd48f866-6ptgw -- cat /usr/bin/clairctl > clairctl -
Set the permissions of the
clairctlfile so that it can be executed and run by the user, for example:$ chmod u+x ./clairctl
Setting up a self-managed deployment of Clair for a disconnected OpenShift Container Platform cluster
To install the clairctl command-line utility for a self-managed Clair deployment on OpenShift Container Platform, you can copy the binary from a Clair container with Podman and make it executable.
-
Install the
clairctlprogram for a self-managed Clair deployment by using thepodman cpcommand, for example:$ sudo podman cp clairv4:/usr/bin/clairctl ./clairctl -
Set the permissions of the
clairctlfile so that it can be executed and run by the user, for example:$ chmod u+x ./clairctl
Common Product Enumeration mapping in Clair
Clair uses Common Product Enumeration (CPE) mapping files to map RPM packages to security data for Red Hat Enterprise Linux (RHEL) container images. Accurate vulnerability reports depend on these mapping files being available to the Clair scanner.
The scanner requires the CPE file to be present and accessible to process RPM packages properly. If these files are missing or inaccessible, RPM packages installed in the container image are skipped during the scanning process.
By default, the Clair indexer includes the repos2cpe and names2repos data files within the Clair container. This allows you to reference local paths such as /data/repository-to-cpe.json without additional external configuration.
|
Important
|
While Red Hat Product Security updates CPE files regularly, the versions bundled within the Clair container are only updated during Project Quay releases. This can lead to temporary discrepancies between the latest security data and the versions bundled with your current installation. |
CPE mapping configuration reference
Common Product Enumeration (CPE) mapping configuration defines the fields and file paths used by Clair to associate packages with standardized product identifiers.
| CPE Type | Link to JSON mapping file |
|---|---|
|
|
|
indexer:
scanner:
repo:
rhel-repository-scanner:
repo2cpe_mapping_file: /data/repository-to-cpe.json
package:
rhel_containerscanner:
name2repos_mapping_file: /data/container-name-repos-map.jsonwhere:
repo2cpe_mapping_file-
Specifies the path to the JSON file mapping Red Hat repositories to CPEs.
name2repos_mapping_file-
Specifies the path to the JSON file mapping container names to repositories.
Secure
Configure SSL/TLS for standalone Red Hat Quay
Create a certificate authority, configure custom SSL/TLS certificates, and configure Podman and system trust for standalone Red Hat Quay.
Creating a Certificate Authority
To secure your Project Quay deployment with self-signed certificates, you can create a root certificate authority and generate a server certificate for your registry hostname. You can use OpenSSL to create the CA key, signing request, and certificate files.
-
Generate the root CA key by entering the following command:
$ openssl genrsa -out rootCA.key 2048 -
Generate the root CA certificate by entering the following command:
$ openssl req -x509 -new -nodes -key rootCA.key -sha256 -days 1024 -out rootCA.pem -
Enter the information to incorporate into your certificate request, including the server hostname, for example:
Country Name (2 letter code) [XX]:IE State or Province Name (full name) []:GALWAY Locality Name (eg, city) [Default City]:GALWAY Organization Name (eg, company) [Default Company Ltd]:QUAY Organizational Unit Name (eg, section) []:DOCS Common Name (eg, your name or your server's hostname) []:quay-server.example.com -
Generate the server key by entering the following command:
$ openssl genrsa -out ssl.key 2048 -
Generate a signing request by entering the following command:
$ openssl req -new -key ssl.key -out ssl.csr -
Enter the information to incorporate into your certificate request, including the server hostname, for example:
Country Name (2 letter code) [XX]:IE State or Province Name (full name) []:GALWAY Locality Name (eg, city) [Default City]:GALWAY Organization Name (eg, company) [Default Company Ltd]:QUAY Organizational Unit Name (eg, section) []:DOCS Common Name (eg, your name or your server's hostname) []:quay-server.example.com Email Address []: -
Create a configuration file
openssl.cnf, specifying the server hostname, for example:Exampleopenssl.cnffile[req] req_extensions = v3_req distinguished_name = req_distinguished_name [req_distinguished_name] [ v3_req ] basicConstraints = CA:FALSE keyUsage = nonRepudiation, digitalSignature, keyEncipherment subjectAltName = @alt_names [alt_names] DNS.1 = <quay-server.example.com> IP.1 = 192.168.1.112 -
Use the configuration file to generate the certificate
ssl.cert:$ openssl x509 -req -in ssl.csr -CA rootCA.pem -CAkey rootCA.key -CAcreateserial -out ssl.cert -days 356 -extensions v3_req -extfile openssl.cnf -
Confirm your created certificates and files by entering the following command:
$ ls /path/to/certificatesExample outputrootCA.key ssl-bundle.cert ssl.key custom-ssl-config-bundle-secret.yaml rootCA.pem ssl.cert openssl.cnf rootCA.srl ssl.csr
Configuring custom SSL/TLS certificates by using the command line interface
To enable custom SSL/TLS certificates on your Project Quay deployment, you can copy certificate files to your configuration directory and update the config.yaml file to use HTTPS. You can then restart the registry container to apply the SSL/TLS configuration.
-
You have created a certificate authority and signed the certificate.
-
Copy the certificate file and primary key file to your configuration directory, ensuring they are named
ssl.certandssl.keyrespectively:cp ~/ssl.cert ~/ssl.key /path/to/configuration_directory -
Navigate to the configuration directory by entering the following command:
$ cd /path/to/configuration_directory -
Edit the
config.yamlfile and specify that you want Project Quay to handle SSL/TLS:Exampleconfig.yamlfile# ... SERVER_HOSTNAME: <quay-server.example.com> ... PREFERRED_URL_SCHEME: https # ... -
Optional: Append the contents of the
rootCA.pemfile to the end of thessl.certfile by entering the following command:$ cat rootCA.pem >> ssl.cert -
Stop the
Quaycontainer by entering the following command:$ sudo podman stop <quay_container_name> -
Restart the registry by entering the following command:
$ sudo podman run -d --rm -p 80:8080 -p 443:8443 \ --name=quay \ -v $QUAY/config:/conf/stack:Z \ -v $QUAY/storage:/datastorage:Z \ {productrepo}/{quayimage}:{productminv}
Configuring Podman to trust the Certificate Authority
To configure Podman to trust your self-signed certificate authority for Project Quay, you can copy the root CA to the hostname-specific certificate directory under /etc/containers/certs.d/ or /etc/docker/certs.d/.
.Procedure
-
Copy the root CA file to one of
/etc/containers/certs.d/or/etc/docker/certs.d/. Use the exact path determined by the server hostname, and name the fileca.crt:$ sudo cp rootCA.pem /etc/containers/certs.d/quay-server.example.com/ca.crt -
Verify that you no longer need to use the
--tls-verify=falseoption when logging in to your Project Quay registry:$ sudo podman login quay-server.example.comExample outputLogin Succeeded!
Configuring the system to trust the certificate authority
To trust your self-signed certificate authority, you can add the root CA to the system-wide trust store and update certificate configuration. You can verify trust with the trust list command before browsing your Project Quay registry over HTTPS.
-
Enter the following command to copy the
rootCA.pemfile to the consolidated system-wide trust store:$ sudo cp rootCA.pem /etc/pki/ca-trust/source/anchors/ -
Enter the following command to update the system-wide trust store configuration:
$ sudo update-ca-trust extract -
Optional. You can use the
trust listcommand to ensure that theQuayserver has been configured:$ trust list | grep quay label: quay-server.example.comNow, when you browse to the registry at
https://quay-server.example.com, the lock icon shows that the connection is secure: -
To remove the
rootCA.pemfile from system-wide trust, delete the file and update the configuration:$ sudo rm /etc/pki/ca-trust/source/anchors/rootCA.pem$ sudo update-ca-trust extract$ trust list | grep quay
Configure SSL/TLS for Red Hat Quay on OpenShift Container Platform
Configure custom SSL/TLS certificates for Operator-managed Red Hat Quay, preserve TLS settings across upgrades, and use cert-manager with external secrets.
Configuring custom SSL/TLS certificates for Red Hat Quay on OpenShift Container Platform
When you deploy Red Hat Quay on OpenShift Container Platform, the Operator can use OpenShift Container Platform Certificate Authority certificates or custom SSL/TLS certificates in the config bundle.
Configuring custom certificates can be done before or after initial deployment by updating the configBundleSecret and setting the tls component to unmanaged (managed: false). By default, when Project Quay is deployed on OpenShift Container Platform, the tls component of the QuayRegistry custom resource definition (CRD) is set to managed (managed: true). As a result, OpenShift Container Platform’s Certificate Authority is used to create HTTPS endpoints and to rotate SSL/TLS certificates.
You can configure custom SSL/TLS certificates before or after the initial deployment of Red Hat Quay on OpenShift Container Platform. This process involves creating or updating the configBundleSecret resource within the QuayRegistry YAML file to integrate your custom certificates and setting the tls component to unmanaged.
|
Important
|
When configuring custom SSL/TLS certificates for Project Quay, administrators are responsible for certificate rotation. |
The following procedures enable you to apply custom SSL/TLS certificates to ensure secure communication and meet specific security requirements for your Red Hat Quay on OpenShift Container Platform deployment. These steps assumed you have already created a Certificate Authority (CA) bundle or an ssl.key, and an ssl.cert. The procedure then shows you how to integrate those files into your Red Hat Quay on OpenShift Container Platform deployment, which ensures that your registry operates with the specified security settings and conforms to your organization’s SSL/TLS policies.
|
Note
|
|
OpenShift Container Platform cluster TLS security profile inheritance
To align Project Quay with the OpenShift Container Platform TLS security policy, the Project Quay Operator can apply the cluster-wide tlsSecurityProfile to the registry and mirror workers.
The Operator reads the tlsSecurityProfile from the OpenShift Container Platform APIServer cluster resource and applies the corresponding SSL_PROTOCOLS and SSL_CIPHERS settings without requiring manual configuration.
How TLS profile inheritance works
The Operator reads spec.tlsSecurityProfile from the APIServer cluster resource and translates the profile into Project Quay SSL_PROTOCOLS and SSL_CIPHERS values in the generated config.yaml. Supported profile types are Old, Intermediate, Modern, and Custom. If the cluster has no profile set, the Operator defaults to the Intermediate profile (TLS 1.2 and TLS 1.3).
To fully override cluster-profile inheritance, set both SSL_PROTOCOLS and SSL_CIPHERS in the configBundleSecret. Setting either field disables inheritance for both fields. On Kubernetes clusters without the config.openshift.io API, the Operator does not inject TLS settings and Project Quay uses its built-in defaults.
Managed TLS and unmanaged TLS
How the cluster TLS security profile applies depends on whether the Operator or Project Quay terminates TLS:
-
When the
tlscomponent is set tomanaged, the OpenShift Container Platform Route enforces the cluster TLS profile. No additional TLS protocol or cipher configuration is required in the config bundle. -
When the
tlscomponent is set tounmanaged, Project Quay terminates TLS directly. When neitherSSL_PROTOCOLSnorSSL_CIPHERSis set in the config bundle, Project Quay inherits the cluster TLS security profile.
Preserving TLS settings before upgrading Red Hat Quay on OpenShift Container Platform
The Project Quay Operator can inherit the cluster-wide TLS security profile. Before upgrading, review your cluster profile and set SSL_PROTOCOLS and SSL_CIPHERS if you need to preserve your current TLS behavior.
The Operator inherits the cluster-wide TLS security profile from the OpenShift APIServer configuration when neither SSL_PROTOCOLS nor SSL_CIPHERS is set in the configBundleSecret resource.
When the tls component is set to managed, the OpenShift Route already enforces the cluster TLS profile, and no action is required.
When the tls component is set to unmanaged, Project Quay terminates TLS directly and inherits the cluster profile after the upgrade unless you override it in the config bundle. If you have already set both SSL_PROTOCOLS and SSL_CIPHERS, no additional TLS configuration is required before upgrading. Setting only one field disables cluster-profile inheritance for both fields.
-
You have cluster administrator access to review the OpenShift Container Platform
APIServerconfiguration. -
You can edit the
configBundleSecretreferenced by yourQuayRegistrycustom resource (CR).
-
Review the cluster TLS security profile:
$ oc get apiserver cluster -o jsonpath='{.spec.tlsSecurityProfile}{"\n"}' -
If you must preserve your current TLS settings, add
SSL_PROTOCOLSandSSL_CIPHERSto theconfig.yamlfile in yourconfigBundleSecretbefore upgrading. For example:# ... SSL_PROTOCOLS: - TLSv1.2 - TLSv1.3 SSL_CIPHERS: - ECDHE-RSA-AES128-GCM-SHA256 - ECDHE-ECDSA-AES128-GCM-SHA256 - ECDHE-RSA-AES256-GCM-SHA384 - ECDHE-ECDSA-AES256-GCM-SHA384 # Add other required ciphers # ...NoteInclude every cipher suite your clients require. To fully override cluster-profile inheritance, set both
SSL_PROTOCOLSandSSL_CIPHERS. Setting either field disables inheritance for both fields. -
Update the
configBundleSecretwith the modifiedconfig.yamlfile. You can edit the secret in the OpenShift Container Platform web console or recreate it from a local file. For example:$ oc create secret generic <config_bundle_secret_name> \ --from-file config.yaml=./config.yaml \ --dry-run=client -o yaml | oc apply -f - -
Proceed with the Project Quay Operator upgrade. If the cluster TLS profile is acceptable and neither
SSL_PROTOCOLSnorSSL_CIPHERSis set, no additional TLS configuration is required.
Creating a custom SSL/TLS configBundleSecret resource
To upload custom SSL/TLS certificates to Red Hat Quay on OpenShift Container Platform, you can create a configBundleSecret resource that includes your ssl.cert and ssl.key files and reference it from the QuayRegistry custom resource.
-
You have base64 decoded the original config bundle into a
config.yamlfile. For more information, see Downloading the existing configuration. -
You have generated custom SSL certificates and keys.
-
Create a new YAML file, for example,
custom-ssl-config-bundle-secret.yaml:$ touch custom-ssl-config-bundle-secret.yaml -
Create the
custom-ssl-config-bundle-secretresource.-
Create the resource by entering the following command:
$ oc -n <namespace> create secret generic custom-ssl-config-bundle-secret \ --from-file=config.yaml=</path/to/config.yaml> \ --from-file=ssl.cert=</path/to/ssl.cert> \ --from-file=extra_ca_cert_<name-of-certificate>.crt=ca-certificate-bundle.crt \ --from-file=ssl.key=</path/to/ssl.key> \ --dry-run=client -o yaml > custom-ssl-config-bundle-secret.yamlwhere:
--from-file=config.yaml=</path/to/config.yaml>-
Specifies your base64 decoded
config.yamlfile. --from-file=ssl.cert=</path/to/ssl.cert>-
Specifies your
ssl.certfile. --from-file=extra_ca_cert_<name-of-certificate>.crt=ca-certificate-bundle.crt-
Specifies an additional CA PEM using a Secret key that starts with
extra_ca_cert_(for example,--from-file=extra_ca_cert_<name-of-certificate>.crt=ca-certificate-bundle.crt). The Project Quay Operator writes these files underconf/stack/extra_ca_certs/in the deployed bundle. For LDAP, OIDC, or other integrations that need custom CAs, supply the PEMs this way and useconf/stack/extra_ca_certs/<file>inconfig.yamlwhen a field such asssl_ca_pathrequires an explicit path. This parameter is optional. --from-file=ssl.key=</path/to/ssl.key>-
Specifies your
ssl.keyfile.
-
-
Optional. You can check the content of the
custom-ssl-config-bundle-secret.yamlfile by entering the following command:$ cat custom-ssl-config-bundle-secret.yamlExample outputapiVersion: v1 data: config.yaml: QUxMT1dfUFVMTFNfV0lUSE9VVF9TVFJJQ1RfTE9HR0lORzogZmFsc2UKQVVUSEVOVElDQVRJT05fVFlQRTogRGF0YWJhc2UKREVGQVVMVF9UQUdfRVhQSVJBVElPTjogMncKRElTVFJJQlVURURfU1R... ssl.cert: LS0tLS1CRUdJTiBDRVJUSUZJQ0FURS0tLS0tCk1JSUVYakNDQTBhZ0F3SUJBZ0lVTUFBRk1YVWlWVHNoMGxNTWI3U1l0eFV5eTJjd0RRWUpLb1pJaHZjTkFRRUwKQlFBd2dZZ3hDekFKQmdOVkJBWVR... extra_ca_cert_<name-of-certificate>:LS0tLS1CRUdJTiBDRVJUSUZJQ0FURS0tLS0tCk1JSUVYakNDQTBhZ0F3SUJBZ0lVTUFBRk1YVWlWVHNoMGxNTWI3U1l0eFV5eTJjd0RRWUpLb1pJaHZjTkFRRUwKQlFBd2dZZ3hDe... ssl.key: LS0tLS1CRUdJTiBQUklWQVRFIEtFWS0tLS0tCk1JSUV2UUlCQURBTkJna3Foa2lHOXcwQkFRRUZBQVNDQktjd2dnU2pBZ0VBQW9JQkFRQ2c0VWxZOVV1SVJPY1oKcFhpZk9MVEdqaS9neUxQMlpiMXQ... kind: Secret metadata: creationTimestamp: null name: custom-ssl-config-bundle-secret namespace: <namespace> -
Create the
configBundleSecretresource by entering the following command:$ oc create -n <namespace> -f custom-ssl-config-bundle-secret.yamlExample outputsecret/custom-ssl-config-bundle-secret created -
Update the
QuayRegistryYAML file to reference thecustom-ssl-config-bundle-secretobject by entering the following command:$ oc patch quayregistry <registry_name> -n <namespace> --type=merge -p '{"spec":{"configBundleSecret":"custom-ssl-config-bundle-secret"}}'Example outputquayregistry.quay.redhat.com/example-registry patched -
Set the
tlscomponent of theQuayRegistryYAML toFalseby entering the following command:$ oc patch quayregistry <registry_name> -n <namespace> --type=merge -p '{"spec":{"components":[{"kind":"tls","managed":false}]}}'Example outputquayregistry.quay.redhat.com/example-registry patched -
Ensure that your
QuayRegistryYAML file has been updated to use the custom SSLconfigBundleSecretresource, and that your andtlsresource is set toFalseby entering the following command:$ oc get quayregistry <registry_name> -n <namespace> -o yamlExample output# ... configBundleSecret: custom-ssl-config-bundle-secret # ... spec: components: - kind: tls managed: false # ...
-
Confirm a TLS connection to the server and port by entering the following command:
$ openssl s_client -connect <quay-server.example.com>:443Example output# ... SSL-Session: Protocol : TLSv1.3 Cipher : TLS_AES_256_GCM_SHA384 Session-ID: 0E995850DC3A8EB1A838E2FF06CE56DBA81BD8443E7FA05895FBD6FBDE9FE737 Session-ID-ctx: Resumption PSK: 1EA68F33C65A0F0FA2655BF9C1FE906152C6E3FEEE3AEB6B1B99BA7C41F06077989352C58E07CD2FBDC363FA8A542975 PSK identity: None PSK identity hint: None SRP username: None TLS session ticket lifetime hint: 7200 (seconds) # ...
Referencing an external TLS Secret for Red Hat Quay on OpenShift Container Platform
Reference an external kubernetes.io/tls Secret from the tls component of the QuayRegistry custom resource (CR) to enable automated certificate rotation from sources such as cert-manager, HashiCorp Vault, or manual Secret updates.
With this approach, the Project Quay Operator uses the certificate and private key from the referenced Secret instead of embedding ssl.cert and ssl.key files in the configBundleSecret resource.
When you use an external TLS Secret, set spec.components[kind: tls].managed to false and specify secretRef. The Operator watches the referenced Secret and performs a rolling restart of Project Quay pods when the certificate data changes.
|
Important
|
|
-
You have deployed the Project Quay Operator and a
QuayRegistryCR. -
You have a TLS Secret of type
kubernetes.io/tlsin the same namespace as theQuayRegistry, withtls.crtandtls.keydata keys. -
The certificate and private key are valid (format, key match, chain, and hostname).
-
Create a TLS Secret in the registry namespace, for example:
apiVersion: v1 kind: Secret metadata: name: my-quay-tls namespace: <namespace> type: kubernetes.io/tls data: tls.crt: <base64_encoded_certificate> tls.key: <base64_encoded_private_key> -
Set the
tlscomponent to unmanaged and reference the Secret by entering the following command:$ oc patch quayregistry <registry_name> -n <namespace> --type=merge -p '{"spec":{"components":[{"kind":"tls","managed":false,"secretRef":{"name":"my-quay-tls"}}]}}' -
Verify that the
QuayRegistryCR contains the expected configuration:$ oc get quayregistry <registry_name> -n <namespace> -o yamlExample outputspec: components: - kind: tls managed: false secretRef: name: my-quay-tls -
Wait for the Operator to reconcile the registry. When certificate data in the referenced Secret changes, the Operator triggers a rolling restart of Project Quay pods to load the updated certificate.
-
Verify that TLS from the external Secret is ready by entering the following command. When the TLS component is healthy, the
ComponentTLSReadycondition reportsstatus: "True".$ oc wait quayregistry <registry_name> -n <namespace> --for=condition=ComponentTLSReady=True --timeout=300sYou can also review all component conditions in the OpenShift Container Platform web console on the QuayRegistry details page, or by entering
oc get quayregistry <registry_name> -n <namespace> -o yamland checkingstatus.conditions.
Using cert-manager with an external TLS Secret
You can install cert-manager on your cluster, issue a certificate into a kubernetes.io/tls Secret, and reference that Secret from the tls component of your QuayRegistry CR. When cert-manager renews the certificate, the Project Quay Operator detects the updated Secret and rolls out updated pods.
-
You have installed cert-manager on the cluster. For more information, see the cert-manager documentation.
-
You have a
ClusterIssuerorIssuerthat can issue certificates for your registry hostname. -
You know the hostname clients use to reach the registry. After deployment, this hostname is often available in
status.registryEndpointon theQuayRegistryCR.
-
Create a
ClusterIssuerCR, for example a self-signed issuer for testing:apiVersion: cert-manager.io/v1 kind: ClusterIssuer metadata: name: selfsigned-issuer spec: selfSigned: {} -
Create a
CertificateCR that writes to the Secret referenced by yourQuayRegistrysecretRef. SetdnsNamesto the registry route hostname, for example the host instatus.registryEndpoint:apiVersion: cert-manager.io/v1 kind: Certificate metadata: name: quay-tls namespace: <namespace> spec: secretName: quay-tls duration: 2160h renewBefore: 360h issuerRef: name: selfsigned-issuer kind: ClusterIssuer dnsNames: - <quay_route_hostname> -
Configure the
QuayRegistryCR to reference the Secret. For example:apiVersion: quay.redhat.com/v1 kind: QuayRegistry metadata: name: <registry_name> namespace: <namespace> spec: components: - kind: tls managed: false secretRef: name: quay-tls -
Wait for cert-manager to populate the TLS Secret. Then, confirm that the Operator has reconciled the registry by running the following command:
$ oc wait quayregistry <registry_name> -n <namespace> --for=condition=ComponentTLSReady=True --timeout=300s -
Optional. Force certificate renewal to verify that rotation triggers a rollout. This requires the cert-manager command-line plugin:
$ oc cert-manager renew quay-tls -n <namespace>After renewal, wait again for
ComponentTLSReady=Trueand confirm that Project Quay pods were replaced. -
Optional. Delete the TLS Secret by running the following command:
$ oc delete secret quay-tls -n <namespace>
Secure database connections with TLS
Configure certificate-based TLS between Red Hat Quay and PostgreSQL, including Operator-managed database TLS settings.
Certificate-based authentication between Project Quay and SQL
You can configure certificate-based authentication between Project Quay and SQL databases such as PostgreSQL and GCP CloudSQL by supplying client-side SSL/TLS certificates. This approach verifies the server certificate against a trusted Certificate Authority and supports automated deployments.
TLS encryption for Operator-managed PostgreSQL
You can enable TLS encryption for Operator-managed PostgreSQL databases used by Project Quay and Clair. Configure TLS through the overrides.tls fields on the postgres and clairpostgres components in the QuayRegistry custom resource.
|
Important
|
This feature configures transport encryption for Operator-managed PostgreSQL connections. It is distinct from the managed |
When TLS is enabled, the Operator configures PostgreSQL to accept encrypted connections and mounts the TLS certificates on the database pod. TLS is opt-in. Existing deployments continue to use unencrypted database connections until you explicitly enable it.
|
Note
|
After you enable TLS, confirm that PostgreSQL reports |
You can enable TLS independently for the postgres and clairpostgres components.
Certificate options
| Option | Description |
|---|---|
OpenShift Container Platform Service CA (default on OpenShift Container Platform) |
When you set |
Operator-generated self-signed certificates |
On Kubernetes clusters without the OpenShift Container Platform Service CA, the Operator generates ECDSA P-256 certificates with a 10-year validity period when no |
User-provided or cert-manager certificates |
Reference a Secret containing |
|
Note
|
This feature does not provide mutual TLS (mTLS) or automatic certificate rotation. To integrate with enterprise PKI or automate rotation, use |
Enabling TLS for Operator-managed PostgreSQL
To encrypt database traffic for Operator-managed PostgreSQL used by Project Quay and Clair, you can set overrides.tls.enabled: true on the postgres and clairpostgres components in the QuayRegistry custom resource.
-
The
postgresand/orclairpostgrescomponents that you want to protect are set tomanaged: true. -
You have access to edit the
QuayRegistrycustom resource in your registry namespace.
-
Edit your
QuayRegistrycustom resource. For example:$ oc edit quayregistry <registry_name> -n <namespace> -
Under
spec.components, addoverrides.tls.enabled: trueto the managed PostgreSQL components. For example:spec: components: - kind: postgres managed: true overrides: tls: enabled: true - kind: clairpostgres managed: true overrides: tls: enabled: true -
Save the changes and wait for the Operator to reconcile the registry.
NoteOn OpenShift Container Platform, the Operator might briefly report
RolloutBlockedwhile it waits for the Service CA to create the serving certificate Secret. Reconciliation retries until the Secret is available. -
Verify that PostgreSQL has SSL enabled:
$ oc exec -n <namespace> deploy/<registry_name>-quay-database -c postgres -- \ bash -lc 'psql -U "$POSTGRESQL_USER" -d "$POSTGRESQL_DATABASE" -tAc "SHOW ssl;"'The command should return
on. For Clair, run the same check against the Clair PostgreSQL deployment when that component is managed. -
Verify that the
QuayRegistrystatus shows a healthy deployment and thatRolloutBlockedis not stuck in an error state. -
Optional: Confirm client TLS sessions with the following command:
$ oc exec -n <namespace> deploy/<registry_name>-quay-database -c postgres -- \ bash -lc 'psql -U "$POSTGRESQL_USER" -d "$POSTGRESQL_DATABASE" -tAc "SELECT count(*) FROM pg_stat_ssl s JOIN pg_stat_activity a ON s.pid = a.pid WHERE s.ssl = true AND a.client_addr IS NOT NULL;"'A count greater than
0indicates active TLS client connections. If the count remains0, PostgreSQL still has TLS enabled on the server, but clients might not yet be connecting with SSL. Check the registry database URI or connection arguments for ansslmodevalue such asverify-full, and review Operator Events for certificate or CA errors.
Providing custom TLS certificates
To use your own certificates instead of Operator-generated or Service CA certificates, create a Secret and reference it from the component override.
-
TLS is enabled on the target component (
overrides.tls.enabled: true). -
You have a Secret containing PEM-encoded
ca.crt,tls.crt, andtls.keyentries. -
Your TLS certificate includes Subject Alternative Name (SAN) entries that match the PostgreSQL Service DNS names. For the
postgrescomponent, include the following names:<registry_name>-quay-database <registry_name>-quay-database.<namespace> <registry_name>-quay-database.<namespace>.svc <registry_name>-quay-database.<namespace>.svc.cluster.local localhostFor the
clairpostgrescomponent, include the following names:<registry_name>-clair-postgres <registry_name>-clair-postgres.<namespace> <registry_name>-clair-postgres.<namespace>.svc <registry_name>-clair-postgres.<namespace>.svc.cluster.local localhost
-
Create a Secret in the same namespace as your
QuayRegistrycustom resource. For example:apiVersion: v1 kind: Secret metadata: name: <postgres_or_clairpostgres_name>-tls namespace: <namespace> type: Opaque stringData: ca.crt: | -----BEGIN CERTIFICATE----- ... -----END CERTIFICATE----- tls.crt: | -----BEGIN CERTIFICATE----- ... -----END CERTIFICATE----- tls.key: | -----BEGIN EC PRIVATE KEY----- ... -----END EC PRIVATE KEY----- -
Reference the Secret from the PostgreSQL component override:
- kind: postgres managed: true overrides: tls: enabled: true secretRef: name: <postgres_or_clairpostgres_name>-tls -
Save the
QuayRegistryand wait for reconciliation.
-
Connect to the Project Quay PostgreSQL pod and check that SSL is enabled:
$ oc exec -n <namespace> deploy/<registry>-quay-database -c postgres -- bash -lc 'psql -U "$POSTGRESQL_USER" -d "$POSTGRESQL_DATABASE" -tAc "SHOW ssl;"'The command should return
on. -
Optional: Confirm that client connections use SSL:
$ oc exec -n <namespace> deploy/<registry_name>-quay-database -c postgres -- \ bash -lc 'psql -U "$POSTGRESQL_USER" -d "$POSTGRESQL_DATABASE" -tAc "SELECT count(*) FROM pg_stat_ssl s JOIN pg_stat_activity a ON s.pid = a.pid WHERE s.ssl = true AND a.client_addr IS NOT NULL;"'A count greater than
0indicates active TLS client connections. If the count remains0, PostgreSQL still has TLS enabled on the server, but clients might not yet be connecting with SSL. Check the registry database URI or connection arguments for ansslmodevalue such asverify-full, and review Operator Events for certificate or CA errors.
Disabling TLS
You can disable TLS on an existing deployment without data loss by removing or setting overrides.tls.enabled to false on the affected components. The Operator removes TLS configuration from PostgreSQL and restores unencrypted connection strings.
-
Edit the
QuayRegistrycustom resource. -
Set
overrides.tls.enabled: falseor remove theoverrides.tlsblock from thepostgresand/orclairpostgrescomponents. -
Save the changes and wait for the Operator to reconcile the registry.
Configuring certificate-based authentication with SQL
To connect Project Quay to an SQL database with client-side certificates, you can create a configBundleSecret that includes TLS certificate files and update DB_CONNECTION_ARGS and DB_URI in the config.yaml file.
This procedure uses CloudSQL as an example and also applies to PostgreSQL and other supported databases.
-
You have generated custom Certificate Authorities (CAs) and your SSL/TLS certificates and keys are available in
PEMformat that will be used to generate an SSL connection with your CloudSQL database. For more information, see SSL and TLS for Project Quay. -
You have
base64 decodedthe original config bundle into aconfig.yamlfile. For more information, see Downloading the existing configuration. -
You are using an externally managed PostgreSQL or CloudSQL database. For more information, see Using and existing PostgreSQL database with the
DB_URIvariable set. -
Your externally managed PostgreSQL or CloudSQL database is configured for SSL/TLS.
-
The
postgrescomponent of yourQuayRegistryCRD is set tomanaged: false, and your CloudSQL database is set with theDB_URIconfiguration variable. The following procedure usespostgresql://<cloudsql_username>:<dbpassword>@<database_host>:<port>/<database_name>.
-
After you have generated the CAs and SSL/TLS certificates and keys for your CloudSQL database and ensured that they are in
.pemformat, test the SSL connection to your CloudSQL server:-
Initiate a connection to your CloudSQL server by entering the following command:
$ psql "sslmode=verify-ca sslrootcert=<ssl_server_certificate_authority>.pem sslcert=<ssl_client_certificate>.pem sslkey=<ssl_client_key>.pem hostaddr=<database_host> port=<5432> user=<cloudsql_username> dbname=<cloudsql_database_name>"
-
-
In your Project Quay directory, create a new YAML file, for example,
quay-config-bundle.yaml, by running the following command:$ touch quay-config-bundle.yaml -
Create a
postgresql-client-certsresource by entering the following command:$ oc -n <quay_namespace> create secret generic postgresql-client-certs \ --from-file config.yaml=<path/to/config.yaml> \ --from-file=tls.crt=<path/to/ssl_client_certificate.pem> \ --from-file=tls.key=<path/to/ssl_client_key.pem> \ --from-file=ca.crt=<path/to/ssl_server_certificate.pem>where:
config.yaml=<path/to/config.yaml>-
Specifies your base64 decoded
config.yamlfile. tls.crt=<path/to/ssl_client_certificate.pem>-
Specifies your SSL certificate in
.pemformat. tls.key=<path/to/ssl_client_key.pem>-
Specifies your SSL key in
.pemformat. ca.crt=<path/to/ssl_server_certificate.pem>-
Specifies your SSL root CA in
.pemformat.
-
Edit your
`quay-config-bundle.yamlfile to include the following database connection settings:Important-
The information included in the
DB_CONNECTION_ARGSvariable, for example,sslmode,sslrootcert,sslcert, andsslkeymust match the information appended to theDB_URIvariable. Failure to match might result in a failed connection. -
You cannot specify custom filenames or paths. Certificate file paths for
sslrootcert,sslcert, andsslkeyare hardcoded defaults and mounted into theQuaypod from the Kubernetes secret. You must adhere to the following naming conventions or it will result in a failed connection.
DB_CONNECTION_ARGS: autorollback: true sslmode: verify-ca sslrootcert: /.postgresql/root.crt sslcert: /.postgresql/postgresql.crt sslkey: /.postgresql/postgresql.key threadlocals: true DB_URI: postgresql://<dbusername>:<dbpassword>@<database_host>:<port>/<database_name>?sslmode=verify-full&sslrootcert=/.postgresql/root.crt&sslcert=/.postgresql/postgresql.crt&sslkey=/.postgresql/postgresql.keywhere:
DB_CONNECTION_ARGS.sslmode-
Specifies
verify-ca, which ensures that the database connection uses SSL/TLS and verifies the server certificate against a trusted CA. This can work with both trusted CA and self-signed CA certificates. However, this mode does not verify the hostname of the server. For full hostname and certificate verification, useverify-full. For more information about the configuration options available, see PostgreSQL SSL/TLS connection arguments. DB_CONNECTION_ARGS.sslrootcert-
Specifies the
root.crtfile that contains the root certificate used to verify the SSL/TLS connection with your CloudSQL database. This file is mounted in theQuaypod from the Kubernetes secret. DB_CONNECTION_ARGS.sslcert-
Specifies the
postgresql.crtfile that contains the client certificate used to authenticate the connection to your CloudSQL database. This file is mounted in theQuaypod from the Kubernetes secret. DB_CONNECTION_ARGS.sslkey-
Specifies the
postgresql.keyfile that contains the private key associated with the client certificate. This file is mounted in theQuaypod from the Kubernetes secret. DB_CONNECTION_ARGS.threadlocals-
Specifies auto-rollback for connections.
DB_URI-
Specifies the URI that accesses your CloudSQL database. Must be appended with the
sslmodetype, yourroot.crt,postgresql.crt, andpostgresql.keyfiles. The SSL/TLS information included inDB_URImust match the information provided inDB_CONNECTION_ARGS. If you are using CloudSQL, you must include your database username and password in this variable.
-
-
Create the
configBundleSecretresource by entering the following command:$ oc create -n <namespace> -f quay-config-bundle.yamlExample outputsecret/quay-config-bundle created -
Update the
QuayRegistryYAML file to reference thequay-config-bundleobject by entering the following command:$ oc patch quayregistry <registry_name> -n <namespace> --type=merge -p '{"spec":{"configBundleSecret":"quay-config-bundle"}}'Example outputquayregistry.quay.redhat.com/example-registry patched -
Ensure that your
QuayRegistryYAML file has been updated to use the extra CA certificateconfigBundleSecretresource by entering the following command:$ oc get quayregistry <registry_name> -n <namespace> -o yamlExample output# ... configBundleSecret: quay-config-bundle # ...
Add trusted certificate authorities
Add trusted certificate authorities for LDAP, storage, and other TLS endpoints on standalone, container, and OpenShift Container Platform deployments.
Adding additional Certificate Authorities for Project Quay
Certificate Authorities (CAs) enable Project Quay to verify SSL/TLS connections to external services such as OIDC providers, LDAP servers, and storage backends. The steps for adding additional CAs differ between standalone deployments and Red Hat Quay on OpenShift Container Platform.
Adding additional Certificate Authorities to the Project Quay container
To add Certificate Authorities to a standalone Project Quay container, you can copy CA files into the extra_ca_certs directory in your configuration folder and restart the registry container. Project Quay uses these certificates to verify TLS connections to external services.
-
You have a CA for the desired service.
-
View the certificate to be added to the container by entering the following command:
$ cat storage.crtExample output-----BEGIN CERTIFICATE----- MIIDTTCCAjWgAwIBAgIJAMVr9ngjJhzbMA0GCSqGSIb3DQEBCwUAMD0xCzAJBgNV... -----END CERTIFICATE----- -
Create the
extra_ca_certsin the/configfolder of your Project Quay directory by entering the following command:$ mkdir -p /path/to/quay_config_folder/extra_ca_certs -
Copy the CA file to the
extra_ca_certsfolder. For example:$ cp storage.crt /path/to/quay_config_folder/extra_ca_certs/ -
Ensure that the
storage.crtfile exists within theextra_ca_certsfolder by entering the following command:$ tree /path/to/quay_config_folder/extra_ca_certsExample output/path/to/quay_config_folder/extra_ca_certs ├── storage.crt---- -
Obtain the
CONTAINER IDof yourQuayconsider by entering the following command:$ podman psExample outputCONTAINER ID IMAGE COMMAND CREATED STATUS PORTS 5a3e82c4a75f <registry>/<repo>/quay:{productminv} "/sbin/my_init" 24 hours ago Up 18 hours 0.0.0.0:80->80/tcp, 0.0.0.0:443->443/tcp, 443/tcp grave_keller -
Restart the container by entering the following command
$ podman restart 5a3e82c4a75f -
Confirm that the certificate was copied into the container namespace by running the following command:
$ podman exec -it 5a3e82c4a75f cat /etc/ssl/certs/storage.pemExample output-----BEGIN CERTIFICATE----- MIIDTTCCAjWgAwIBAgIJAMVr9ngjJhzbMA0GCSqGSIb3DQEBCwUAMD0xCzAJBgNV... -----END CERTIFICATE-----
Adding additional Certificate Authorities to Red Hat Quay on OpenShift Container Platform
On Red Hat Quay on OpenShift Container Platform, additional Certificate Authorities (CAs) in the configuration bundle are added to the registry trust store. Project Quay uses these CAs to verify TLS connections to external services.
This path is the same logical location as the extra_ca_certs directory used on standalone deployments. On Red Hat Quay on OpenShift Container Platform, you do not create that directory on a node yourself. Instead, add each CA PEM file to the configBundleSecret as its own Secret data entry whose key name begins with extra_ca_cert_. The Project Quay Operator extracts these keys when it reconciles the registry and writes the files under conf/stack/extra_ca_certs/. The file name in that directory is the key name with the extra_ca_cert_ prefix removed. For example, a Secret key extra_ca_cert_ldap-ca.pem is available at runtime as conf/stack/extra_ca_certs/ldap-ca.pem.
You do not add an extra_ca_certs list or block to config.yaml only to load those CAs on Red Hat Quay on OpenShift Container Platform. The supported approach is the extra_ca_cert_* keys in the bundle Secret, as shown in the procedures that follow.
When another setting requires an explicit path to one of those PEM files (for example, ssl_ca_path for a given integration), set the path in config.yaml to the runtime location under conf/stack/extra_ca_certs/, for example:
# ...
ssl_ca_path: conf/stack/extra_ca_certs/ldap-ca.pem
# ...The following procedures show you how to download your existing configuration file, include additional CA files in the configBundleSecret, and re-apply the bundle so that OpenShift Container Platform deploys the updated configuration.
Adding additional Certificate Authorities to Red Hat Quay on OpenShift Container Platform
To add additional Certificate Authorities to Red Hat Quay on OpenShift Container Platform, you can extend the configBundleSecret with extra_ca_cert_* entries for each CA PEM file and update the QuayRegistry custom resource to reference the updated secret.
Each key name determines the file name under conf/stack/extra_ca_certs/ at runtime. Additional CAs are not declared as an extra_ca_certs field inside the config.yaml file. Each CA is a separate entry in the Secret: the key must start with extra_ca_cert_, and the remainder of the key name becomes the file name under conf/stack/extra_ca_certs/ after the Operator reconciles the registry.
-
You have base64 decoded the original config bundle into a
config.yamlfile. For more information, see Downloading the existing configuration. -
You have a Certificate Authority (CA) file or files.
-
Create a new YAML file, for example,
extra-ca-certificate-config-bundle-secret.yaml:$ touch extra-ca-certificate-config-bundle-secret.yaml -
Create the
extra-ca-certificate-config-bundle-secretresource.-
Create the resource by entering the following command:
$ oc -n <namespace> create secret generic extra-ca-certificate-config-bundle-secret \ --from-file=config.yaml=</path/to/config.yaml> \ --from-file=extra_ca_cert_<name-of-certificate-one>=<path/to/certificate_one> \ --from-file=extra_ca_cert_<name-of-certificate-two>=<path/to/certificate_two> \ --from-file=extra_ca_cert_<name-of-certificate-three>=<path/to/certificate_three> \ --dry-run=client -o yaml > extra-ca-certificate-config-bundle-secret.yamlwhere:
--from-file=config.yaml=</path/to/config.yaml>-
Specifies your base64 decoded
config.yamlfile. --from-file=extra_ca_cert_<name-of-certificate-one>=<path/to/certificate_one>-
Specifies the extra CA file to be added to the system trust bundle.
--from-file=extra_ca_cert_<name-of-certificate-two>=<path/to/certificate_two>-
Specifies a second CA file to be added into the system trust bundle. This parameter is optional.
--from-file=extra_ca_cert_<name-of-certificate-three>=<path/to/certificate_three>-
Specifies a third CA file to be added into the system trust bundle. This parameter is optional.
-
-
Optional. You can check the content of the
extra-ca-certificate-config-bundle-secret.yamlfile by entering the following command:$ cat extra-ca-certificate-config-bundle-secret.yamlExample outputapiVersion: v1 data: config.yaml: <example_scren>... extra_ca_cert_certificate-one: <example_secret>... extra_ca_cert_certificate-three: <example_secret>... extra_ca_cert_certificate-two: <example_secret>... kind: Secret metadata: creationTimestamp: null name: extra-ca-certificate-config-bundle-secret namespace: <namespace> -
Create the
configBundleSecretresource by entering the following command:$ oc create -n <namespace> -f extra-ca-certificate-config-bundle-secret.yamlExample outputsecret/extra-ca-certificate-config-bundle-secret created -
Update the
QuayRegistryYAML file to reference theextra-ca-certificate-config-bundle-secretobject by entering the following command:$ oc patch quayregistry <registry_name> -n <namespace> --type=merge -p '{"spec":{"configBundleSecret":"extra-ca-certificate-config-bundle-secret"}}'Example outputquayregistry.quay.redhat.com/example-registry patched -
Ensure that your
QuayRegistryYAML file has been updated to use the extra CA certificateconfigBundleSecretresource by entering the following command:$ oc get quayregistry <registry_name> -n <namespace> -o yamlExample output# ... configBundleSecret: extra-ca-certificate-config-bundle-secret # ...
Modifying the configuration file by using the CLI
To modify the config.yaml file for your Project Quay registry and enable new features, you can download the existing configuration from the configBundleSecret by using the CLI. After making changes, you can re-upload the configBundleSecret resource to apply the changes.
|
Note
|
Modifying the |
-
You are logged in to the OpenShift Container Platform cluster as a user with admin privileges.
-
Describe the
QuayRegistryresource by entering the following command:$ oc describe quayregistry -n <quay_namespace># ... Config Bundle Secret: example-registry-config-bundle-v123x # ... -
Obtain the secret data by entering the following command:
$ oc get secret -n <quay_namespace> <example-registry-config-bundle-v123x> -o jsonpath='{.data}'{ "config.yaml": "RkVBVFVSRV9VU0 ... MDAwMAo=" } -
Decode the data into a YAML file into the current directory by passing in the
>> config.yamlflag. For example:$ echo 'RkVBVFVSRV9VU0 ... MDAwMAo=' | base64 --decode >> config.yaml -
Make the desired changes to your
config.yamlfile, and then save the file asconfig.yaml. -
Create a new
configBundleSecretYAML by entering the following command.$ touch <new_configBundleSecret_name>.yaml -
Create the new
configBundleSecretresource, passing in theconfig.yamlfile` by entering the following command:$ oc -n <namespace> create secret generic <secret_name> \ --from-file=config.yaml=</path/to/config.yaml> \ --dry-run=client -o yaml > <new_configBundleSecret_name>.yamlwhere:
- </path/to/config.yaml>
-
Specifies your base64 decoded
config.yamlfile.
-
Create the
configBundleSecretresource by entering the following command:$ oc create -n <namespace> -f <new_configBundleSecret_name>.yamlsecret/config-bundle created -
Update the
QuayRegistryYAML file to reference the newconfigBundleSecretobject by entering the following command:$ oc patch quayregistry <registry_name> -n <namespace> --type=merge -p '{"spec":{"configBundleSecret":"<new_configBundleSecret_name>"}}'quayregistry.quay.redhat.com/example-registry patched
-
Verify that the
QuayRegistryCR has been updated with the newconfigBundleSecret:$ oc describe quayregistry -n <quay_namespace># ... Config Bundle Secret: <new_configBundleSecret_name> # ...After patching the registry, the Project Quay Operator automatically reconciles the changes.
Adding custom SSL/TLS certificates when Project Quay is deployed on Kubernetes
To add custom SSL/TLS certificates to your Project Quay deployment on Kubernetes, you can base64 encode the certificate, add it to the config secret, and restart the pods.
The following procedure works around the limitation where the superuser panel certificate upload function does not work with Kubernetes deployments.
-
Project Quay has been deployed.
-
You have a custom
ca.crtfile.
-
Base64 encode the contents of an SSL/TLS certificate by entering the following command:
$ cat ca.crt | base64 -w 0Example output...c1psWGpqeGlPQmNEWkJPMjJ5d0pDemVnR2QNCnRsbW9JdEF4YnFSdVd3PT0KLS0tLS1FTkQgQ0VSVElGSUNBVEUtLS0tLQo= -
Enter the following
kubectlcommand to edit thequay-enterprise-config-secretfile:$ kubectl --namespace quay-enterprise edit secret/quay-enterprise-config-secret -
Add an entry for the certificate and paste the full
base64encoded stringer under the entry. For example:custom-cert.crt: c1psWGpqeGlPQmNEWkJPMjJ5d0pDemVnR2QNCnRsbW9JdEF4YnFSdVd3PT0KLS0tLS1FTkQgQ0VSVElGSUNBVEUtLS0tLQo= -
Use the
kubectl deletecommand to remove all Project Quay pods. For example:$ kubectl delete pod quay-operator.v3.7.1-6f9d859bd-p5ftc quayregistry-clair-postgres-7487f5bd86-xnxpr quayregistry-quay-app-upgrade-xq2v6 quayregistry-quay-database-859d5445ff-cqthr quayregistry-quay-redis-84f888776f-hhgmsAfterwards, the Project Quay deployment automatically schedules replace pods with the new certificate data.
Authenticate users with LDAP
Configure LDAP authentication, restricted user and superuser filters, and troubleshoot common directory integration issues.
LDAP authentication setup for Project Quay
You can configure Lightweight Directory Access Protocol (LDAP) authentication for Project Quay in your config.yaml file. LDAP can create users on first login and can map selected users as restricted users or superusers.
Considerations when enabling LDAP
Before you enable LDAP for Project Quay, review how existing local usernames interact with directory accounts and how FEATURE_USER_CREATION affects first login.
Existing Project Quay deployments
Conflicts between usernames can arise when you enable LDAP for an existing Project Quay deployment that already has users configured. For example, one user, alice, was manually created in Project Quay prior to enabling LDAP. If the username alice also exists in the LDAP directory, Project Quay automatically creates a new user, alice-1, when alice logs in for the first time using LDAP. Project Quay then automatically maps the LDAP credentials to the alice account. For consistency reasons, this might be erroneous for your Project Quay deployment. Remove any potentially conflicting local account names from Project Quay prior to enabling LDAP.
Manual user creation and LDAP authentication
When Project Quay is configured for LDAP, LDAP-authenticated users are automatically created in the Project Quay database on first log in, if the configuration option FEATURE_USER_CREATION is set to true. If this option is set to false, the automatic user creation for LDAP users fails, and the user is not allowed to log in. In this scenario, the superuser needs to create the desired user account first. Conversely, if FEATURE_USER_CREATION is set to true, a user can still create an account from the Project Quay login screen, even if an equivalent user exists in LDAP.
Configuring LDAP for Project Quay
To configure LDAP authentication for Project Quay, you can update your config.yaml file with the required LDAP fields and restart the registry.
-
Update your
config.yamlfile directly to include the following relevant information:# ... AUTHENTICATION_TYPE: LDAP # ... LDAP_ADMIN_DN: uid=<name>,ou=Users,o=<organization_id>,dc=<example_domain_component>,dc=com LDAP_ADMIN_PASSWD: ABC123 LDAP_ALLOW_INSECURE_FALLBACK: false LDAP_BASE_DN: - dc=example - dc=com LDAP_EMAIL_ATTR: mail LDAP_UID_ATTR: uid LDAP_URI: ldap://<example_url>.com LDAP_USER_FILTER: (memberof=cn=developers,ou=Users,dc=<domain_name>,dc=com) LDAP_USER_RDN: - ou=people LDAP_SECONDARY_USER_RDNS: - ou=<example_organization_unit_one> - ou=<example_organization_unit_two> - ou=<example_organization_unit_three> - ou=<example_organization_unit_four> FEATURE_LDAP_CACHING: true LDAP_CACHE_TTL: 10 # ...where:
AUTHENTICATION_TYPE-
Specifies the authentication type. This field is required and must be set to
LDAP. LDAP_ADMIN_DN-
Specifies the admin DN for LDAP authentication. This field is required.
LDAP_ADMIN_PASSWD-
Specifies the admin password for LDAP authentication. This field is required.
LDAP_ALLOW_INSECURE_FALLBACK-
Specifies whether to allow SSL/TLS insecure fallback for LDAP authentication. This field is required.
LDAP_BASE_DN-
Specifies the base DN for LDAP authentication. This field is required.
LDAP_EMAIL_ATTR-
Specifies the email attribute for LDAP authentication. This field is required.
LDAP_UID_ATTR-
Specifies the UID attribute for LDAP authentication. This field is required.
LDAP_URI-
Specifies the LDAP URI. This field is required.
LDAP_USER_FILTER-
Specifies the user filter for LDAP authentication. This field is required.
LDAP_USER_RDN-
Specifies the user RDN for LDAP authentication. This field is required.
LDAP_SECONDARY_USER_RDNS-
Optional. Specifies secondary user relative DNs when user objects are located in multiple organizational units.
FEATURE_LDAP_CACHING-
Optional. Specifies whether to enable in-memory caching for LDAP permission check results (superuser, restricted user). Caching reduces LDAP server load. Defaults to
false. LDAP_CACHE_TTL-
Specifies the time-to-live, in seconds, for cached LDAP permission results. Defaults to
60.
-
After you have added all required LDAP fields, save the changes and restart your Project Quay deployment.
Enabling the LDAP_RESTRICTED_USER_FILTER configuration field
To mark selected LDAP users as restricted in Project Quay, you can set FEATURE_RESTRICTED_USERS and LDAP_RESTRICTED_USER_FILTER in your config.yaml file and restart the registry.
The LDAP_RESTRICTED_USER_FILTER configuration field is a subset of the LDAP_USER_FILTER configuration field. When configured, this option allows Project Quay administrators to configure LDAP users as restricted users when Project Quay uses LDAP as its authentication provider.
-
Your Project Quay deployment uses LDAP as its authentication provider.
-
You have configured the
LDAP_USER_FILTERfield in yourconfig.yamlfile.
-
In your deployment’s
config.yamlfile, add theLDAP_RESTRICTED_USER_FILTERparameter and specify the group of restricted users, for example,members:# ... AUTHENTICATION_TYPE: LDAP # ... FEATURE_RESTRICTED_USERS: true # ... LDAP_ADMIN_DN: uid=<name>,ou=Users,o=<organization_id>,dc=<example_domain_component>,dc=com LDAP_ADMIN_PASSWD: ABC123 LDAP_ALLOW_INSECURE_FALLBACK: false LDAP_BASE_DN: - o=<organization_id> - dc=<example_domain_component> - dc=com LDAP_EMAIL_ATTR: mail LDAP_UID_ATTR: uid LDAP_URI: ldap://<example_url>.com LDAP_USER_FILTER: (memberof=cn=developers,ou=Users,o=<example_organization_unit>,dc=<example_domain_component>,dc=com) LDAP_RESTRICTED_USER_FILTER: (<filterField>=<value>) LDAP_USER_RDN: - ou=<example_organization_unit> - o=<organization_id> - dc=<example_domain_component> - dc=com FEATURE_LDAP_CACHING: true LDAP_CACHE_TTL: 10 # ...where:
FEATURE_RESTRICTED_USERS-
Specifies whether restricted users are enabled. Must be set to
truewhen configuring an LDAP restricted user. LDAP_RESTRICTED_USER_FILTER-
Specifies the filter that configures selected users as restricted users.
-
Start, or restart, your Project Quay deployment.
-
After enabling the
LDAP_RESTRICTED_USER_FILTERfeature, your LDAP Project Quay users are restricted from reading and writing content, and creating organizations.
Enabling the LDAP_SUPERUSER_FILTER configuration field
To grant selected LDAP users superuser privileges in Project Quay, you can set LDAP_SUPERUSER_FILTER in your config.yaml file and restart the registry.
-
Your Project Quay deployment uses LDAP as its authentication provider.
-
You have configured the
LDAP_USER_FILTERfield in yourconfig.yamlfile.
-
In your deployment’s
config.yamlfile, add theLDAP_SUPERUSER_FILTERparameter and add the group of users you want configured as superusers, for example,root:# ... AUTHENTICATION_TYPE: LDAP # ... LDAP_ADMIN_DN: uid=<name>,ou=Users,o=<organization_id>,dc=<example_domain_component>,dc=com LDAP_ADMIN_PASSWD: ABC123 LDAP_ALLOW_INSECURE_FALLBACK: false LDAP_BASE_DN: - o=<organization_id> - dc=<example_domain_component> - dc=com LDAP_EMAIL_ATTR: mail LDAP_UID_ATTR: uid LDAP_URI: ldap://<example_url>.com LDAP_USER_FILTER: (memberof=cn=developers,ou=Users,o=<example_organization_unit>,dc=<example_domain_component>,dc=com) LDAP_SUPERUSER_FILTER: (<filterField>=<value>) LDAP_USER_RDN: - ou=<example_organization_unit> - o=<organization_id> - dc=<example_domain_component> - dc=com FEATURE_LDAP_CACHING: true LDAP_CACHE_TTL: 10 # ...where:
LDAP_SUPERUSER_FILTER-
Specifies the filter that configures selected users as superusers.
-
Start, or restart, your Project Quay deployment.
-
After enabling the
LDAP_SUPERUSER_FILTERfeature, your LDAP Project Quay users have superuser privileges. The following options are available to superusers:-
Manage users
-
Manage organizations
-
Manage service keys
-
View the change log
-
Query the usage logs
-
Create globally visible user messages
-
Common LDAP configuration issues
Invalid LDAP settings in Project Quay can return errors such as invalid credentials, failed superuser verification, or an inability to find the logged-in user.
The following errors might be returned with an invalid configuration.
-
Invalid credentials. If you receive this error, the Administrator DN or Administrator DN password values are incorrect. Ensure that you are providing accurate Administrator DN and password values.
-
Verification of superuser %USERNAME% failed. This error is returned for the following reasons:
-
The username has not been found.
-
The user does not exist in the remote authentication system.
-
LDAP authorization is configured improperly.
-
-
Cannot find the current logged in user. When configuring LDAP for Project Quay, situations can occur where the LDAP connection is established successfully using the username and password provided in the Administrator DN fields. However, if the current logged-in user cannot be found within the specified User Relative DN path using the UID Attribute or Mail Attribute fields, two potential reasons typically apply:
-
The current logged in user does not exist in the User Relative DN path.
-
The Administrator DN does not have rights to search or read the specified LDAP path.
To fix this issue, ensure that the logged in user is included in the User Relative DN path, or provide the correct permissions to the Administrator DN account.
-
Authenticate users with OIDC and single sign-on
Configure Microsoft Entra ID OIDC, Red Hat Single Sign-On, team synchronization, and On-Behalf-Of flows for enterprise login.
Configuring Microsoft Entra ID OIDC on a standalone deployment of Project Quay
To configure Microsoft Entra ID OIDC on a standalone Project Quay deployment, you can add an AZURE_LOGIN_CONFIG block to your config.yaml file and restart the registry.
By integrating Microsoft Entra ID authentication with Project Quay, your organization can take advantage of the centralized user management and security features offered by Microsoft Entra ID. Some features include the ability to manage user access to Project Quay repositories based on their Microsoft Entra ID roles and permissions, and the ability to enable multi-factor authentication and other security features provided by Microsoft Entra ID.
Azure Active Directory (Microsoft Entra ID) authentication for Project Quay allows users to authenticate and access Project Quay by using their Microsoft Entra ID credentials.
|
Note
|
|
-
Use the following reference and update your
config.yamlfile with your desired OIDC provider’s credentials:AUTHENTICATION_TYPE: OIDC # ... AZURE_LOGIN_CONFIG: CLIENT_ID: <client_id> CLIENT_SECRET: <client_secret> OIDC_SERVER: https://login.microsoftonline.com/<tenant-id>/v2.0/ SERVICE_NAME: Microsoft Entra ID OIDC_DISABLE_USER_ENDPOINT: true VERIFIED_EMAIL_CLAIM_NAME: <verified_email> USE_PKCE: True PKCE_METHOD: "S256" PUBLIC_CLIENT: True # ...where:
AZURE_LOGIN_CONFIG-
Specifies the parent key that holds the OIDC configuration settings. In this example, the parent key used is
AZURE_LOGIN_CONFIG. However, the stringAZUREcan be replaced with any arbitrary string based on your specific needs, for exampleABC123. The following strings are not accepted:GOOGLE,GITHUB. These strings are reserved for their respective identity platforms and require a specificconfig.yamlentry contingent upon which platform you are using. CLIENT_ID-
Specifies the client ID of the application that is being registered with the identity provider.
CLIENT_SECRET-
Specifies the client secret of the application that is being registered with the identity provider.
OIDC_SERVER-
Specifies the OIDC discovery base URL. The URL must end with a trailing
/because Project Quay uses path joining for OIDC discovery. For new deployments, use the Entra ID v2.0 endpoint. To accept both v1.0 and v2.0 tokens during migration, configure multi-issuer OIDC. SERVICE_NAME-
Specifies the name of the service that is being authenticated.
OIDC_DISABLE_USER_ENDPOINT-
Specifies whether to disable the
/userinfoendpoint. Set totruefor Microsoft Entra ID because Azure obtains user information from the token instead of calling the/userinfoendpoint. VERIFIED_EMAIL_CLAIM_NAME-
Specifies the name of the claim that is used to verify the email address of the user.
USE_PKCE-
Specifies whether to enable Proof Key for Code Exchange (PKCE) for OIDC authentication. Defaults to
false. PKCE_METHOD-
Specifies the code challenge method used to generate the
code_challengesent in the initial authorization request. Defaults toS256. PUBLIC_CLIENT-
Specifies whether to omit
client_secretduring the token request when the client is public. Defaults tofalse.
-
Proper configuration of Microsoft Entra ID results in three redirects with the following format:
-
https://QUAY_HOSTNAME/oauth2/<name_of_service>/callback -
https://QUAY_HOSTNAME/oauth2/<name_of_service>/callback/attach -
https://QUAY_HOSTNAME/oauth2/<name_of_service>/callback/cli
-
-
Restart your Project Quay deployment.
Configuring Microsoft Entra ID v2 and multi-issuer OIDC
To accept Microsoft Entra ID v2.0 tokens and On-Behalf-Of API flows in Project Quay, you can configure multi-issuer and multi-audience settings in your OIDC *_LOGIN_CONFIG block.
This support enables Microsoft Entra ID v2.0 access tokens, dual v1.0 and v2.0 acceptance during migration, and On-Behalf-Of (OBO) API flows used by integrations such as Red Hat Developer Hub (RHDH).
-
You have an Entra ID app registration for Project Quay with a client secret and redirect URIs for your Project Quay hostname.
-
You can edit the Project Quay
config.yamlfile or OperatorconfigBundleSecretresource.
-
In the Azure Portal, open your Project Quay app registration and set
requestedAccessTokenVersionto2in the app manifest. The field might appear asapi.requestedAccessTokenVersion.For OBO flows, expose an API on the Project Quay app registration, for example
api://quay-api, and grant the upstream application permission to that scope. -
Update your
*_LOGIN_CONFIGblock with the v2.0 discovery endpoint and multi-issuer settings. For example:AUTHENTICATION_TYPE: OIDC # ... AZURE_LOGIN_CONFIG: CLIENT_ID: <quay_app_client_id> CLIENT_SECRET: <quay_app_client_secret> OIDC_SERVER: https://login.microsoftonline.com/<tenant-id>/v2.0/ SERVICE_NAME: Microsoft Entra ID OIDC_DISABLE_USER_ENDPOINT: true OIDC_ISSUERS: - https://sts.windows.net/<tenant-id>/ - https://login.microsoftonline.com/<tenant-id>/v2.0 OIDC_AUDIENCES: - <quay_app_client_id> - api://quay-api OIDC_ALLOWED_CLIENTS: - <quay_app_client_id> - <upstream_app_client_id> USE_PKCE: true PKCE_METHOD: "S256" PUBLIC_CLIENT: true # ... -
Restart your Project Quay deployment or reconcile the Operator so the updated configuration is applied.
Note-
Set
OIDC_SERVERto the v2.0 endpoint. The v2.0 JWKS endpoint includes v1.0 signing keys, so one discovery URL supports both token versions. -
If you set
OIDC_ALLOWED_CLIENTS, include your Project Quay application’s ownCLIENT_ID. Direct user logins setazpto the application’s client ID. OmitOIDC_ALLOWED_CLIENTSif you do not need to restrict OBO clients. -
Do not request Microsoft Graph scopes such as
openid profile emailwhen you need tokens with a custom audience. Use application-specific scopes such asapi://quay-api/registry.accessinstead.
-
Configuring On-Behalf-Of (OBO) flows
To allow an upstream service to call Project Quay APIs on behalf of authenticated users, you can configure On-Behalf-Of (OBO) audiences and allowed clients in your Entra ID OIDC settings.
-
In the Azure Portal, expose an API on the Project Quay app registration and add a scope, for example
registry.accessunderapi://quay-api. -
Create a second app registration for the upstream service and grant it permission to the Project Quay API scope.
-
Add the exposed API identifier to
OIDC_AUDIENCESin your Project Quay configuration, for exampleapi://quay-api. -
Add the upstream application’s client ID to
OIDC_ALLOWED_CLIENTS.OBO tokens have
aud: api://quay-apiandazp: <upstream_client_id>. Project Quay validates both claims.
Troubleshooting Microsoft Entra ID OIDC
Use this reference to resolve common Microsoft Entra ID OIDC errors in Project Quay, including issuer, audience, allowed client, and JWKS signature failures.
| Error or symptom | Resolution |
|---|---|
Issuer not configured |
The token |
Audience doesn’t match |
The token |
Client is not in the allowed clients list |
The token |
Signature verification failed |
JWKS keys from |
OIDC discovery fails |
|
Configuring Red Hat Single Sign-On for Project Quay
You can configure Red Hat Single Sign-On (RH-SSO) as an OpenID Connect provider for Project Quay on OpenShift Container Platform. Create an RH-SSO client, then add an RHSSO_LOGIN_CONFIG block to your Operator config bundle.
Based on the Keycloak project, Red Hat Single Sign-On (RH-SSO) is an open source identity and access management (IAM) solution provided by Red Hat. RH-SSO allows organizations to manage user identities, secure applications, and enforce access control policies across their systems and applications. It also provides a unified authentication and authorization framework, which allows users to log in one time and gain access to multiple applications and resources without needing to re-authenticate.
By configuring Red Hat Single Sign-On on Project Quay, you can create a seamless authentication integration between Project Quay and other application platforms like OpenShift Container Platform.
Configuring the Red Hat Single Sign-On Operator for use with the Project Quay Operator
To prepare Red Hat Single Sign-On for Project Quay on OpenShift Container Platform, you can create a confidential OIDC client in the RH-SSO Admin Console and copy the client secret.
-
You have configured the Red Hat Single Sign-On Operator.
-
You have configured SSL/TLS for your Red Hat Quay on OpenShift Container Platform deployment and for Red Hat Single Sign-On.
-
You have generated a single Certificate Authority (CA) and uploaded it to your Red Hat Single Sign-On Operator and to your Project Quay configuration.
-
Navigate to the Red Hat Single Sign-On Admin Console.
-
On the OpenShift Container Platform Web Console, navigate to Network → Route.
-
Select the Red Hat Single Sign-On project from the drop-down list.
-
Find the Red Hat Single Sign-On Admin Console in the Routes table.
-
-
Select the Realm that you use to configure Project Quay.
-
Click Clients under the Configure section of the navigation panel, and then click Create to add a new OIDC client for Project Quay.
-
Enter the following information:
-
Client ID:
quay-enterprise -
Client Protocol:
openid-connect -
Root URL:
https://<quay_endpoint>/
-
-
Click Save. This results in a redirect to the Clients setting panel.
-
Navigate to Access Type and select Confidential.
-
Navigate to Valid Redirect URIs. You must provide three redirect URIs. The value should be the fully qualified domain name of the Project Quay registry appended with
/oauth2/redhatsso/callback. For example:-
https://<quay_endpoint>/oauth2/redhatsso/callback -
https://<quay_endpoint>/oauth2/redhatsso/callback/attach -
https://<quay_endpoint>/oauth2/redhatsso/callback/cli
-
-
Click Save and navigate to the new Credentials setting.
-
Copy the value of the Secret.
Configuring the Project Quay Operator to use Red Hat Single Sign-On
To enable Red Hat Single Sign-On authentication for an Operator-based Project Quay deployment, you can add an RHSSO_LOGIN_CONFIG block to your config bundle and restart the registry.
-
You have configured the Red Hat Single Sign-On Operator.
-
You have configured SSL/TLS for your Red Hat Quay on OpenShift Container Platform deployment and for Red Hat Single Sign-On.
-
You have generated a single Certificate Authority (CA) and uploaded it to your Red Hat Single Sign-On Operator and to your Project Quay configuration.
-
Edit your Project Quay
config.yamlfile by navigating to Operators → Installed Operators → Red Hat Quay → Quay Registry → Config Bundle Secret. Then, click Actions → Edit Secret. Alternatively, you can update theconfig.yamlfile locally. -
Add the following information to your Red Hat Quay on OpenShift Container Platform
config.yamlfile:# ... RHSSO_LOGIN_CONFIG: CLIENT_ID: <client_id> CLIENT_SECRET: <client_secret> OIDC_SERVER: <oidc_server_url> SERVICE_NAME: <service_name> SERVICE_ICON: <service_icon> VERIFIED_EMAIL_CLAIM_NAME: <example_email_address> PREFERRED_USERNAME_CLAIM_NAME: <preferred_username> LOGIN_SCOPES: [ 'openid', 'roles' ] USE_PKCE: true PKCE_METHOD: "S256" # ...where:
RHSSO_LOGIN_CONFIG-
Specifies the parent key that holds the OIDC configuration settings. In this example, the parent key used is
RHSSO_LOGIN_CONFIG. The string can be replaced with any arbitrary string based on your specific needs, for exampleABC123. However, the stringsGOOGLEandGITHUBare not accepted. These strings are reserved for their respective identity platforms and require a specificconfig.yamlentry contingent upon which platform you are using. CLIENT_ID-
Specifies the client ID of the application that is being registered with the identity provider. For example,
quay. CLIENT_SECRET-
Specifies the client secret.
OIDC_SERVER-
Specifies the fully qualified domain name (FQDN) of the Red Hat Single Sign-On instance, appended with
/auth/realms/and the Realm name. You must include the forward slash at the end, for example,https://sso-redhat.example.com/auth/realms/<your_realm_name>/. SERVICE_NAME-
Specifies the name that is displayed on the Project Quay login page, for example,
Red Hat Single Sign-On. SERVICE_ICON-
Specifies the icon on the login screen. For example,
/static/img/RedHat.svg. VERIFIED_EMAIL_CLAIM_NAME-
Specifies the name of the claim that is used to verify the email address of the user.
PREFERRED_USERNAME_CLAIM_NAME-
Specifies the name of the claim that is used for the preferred username of the user.
LOGIN_SCOPES-
Specifies the scopes to send to the OIDC provider when performing the login flow, for example,
openid. USE_PKCE-
Specifies whether to enable Proof Key for Code Exchange (PKCE). Defaults to
false. PKCE_METHOD-
Specifies the code challenge method used to generate the
code_challengesent in the initial authorization request. Defaults toS256.
-
Restart your Red Hat Quay on OpenShift Container Platform deployment with Red Hat Single Sign-On enabled.
Team synchronization for Project Quay OIDC deployments
You can sync Project Quay team membership with groups from an OpenID Connect (OIDC) identity provider. Enable team syncing in your config.yaml file, then configure directory sync for a team in the UI.
Enabling synchronization for Project Quay OIDC deployments
To enable team synchronization when your Project Quay deployment uses an OIDC authenticator, you can set the team syncing fields in your config.yaml file and restart the registry.
|
Important
|
The following procedure does not use a specific OIDC provider. Instead, it provides a general outline of how best to approach team synchronization between an OIDC provider and Project Quay. Any OIDC provider can be used to enable team synchronization, however, setup might vary depending on your provider. |
-
Update your
config.yamlfile with the following information:AUTHENTICATION_TYPE: OIDC # ... OIDC_LOGIN_CONFIG: CLIENT_ID: CLIENT_SECRET: OIDC_SERVER: SERVICE_NAME: PREFERRED_GROUP_CLAIM_NAME: LOGIN_SCOPES: [ 'openid', '<example_scope>' ] OIDC_DISABLE_USER_ENDPOINT: false # ... FEATURE_TEAM_SYNCING: true FEATURE_NONSUPERUSER_TEAM_SYNCING_SETUP: true FEATURE_UI_V2: true # ...where:
CLIENT_ID-
Specifies the registered OIDC client ID for this Project Quay instance. This field is required.
CLIENT_SECRET-
Specifies the registered OIDC client secret for this Project Quay instance. This field is required.
OIDC_SERVER-
Specifies the address of the OIDC server that is being used for authentication. This URL should be such that a
GETrequest to<OIDC_SERVER>/.well-known/openid-configurationreturns the provider’s configuration information. This field is required. SERVICE_NAME-
Specifies the name of the service that is being authenticated. This field is required.
PREFERRED_GROUP_CLAIM_NAME-
Specifies the key name within the OIDC token payload that holds information about the user’s group memberships. This field allows the authentication system to extract group membership information from the OIDC token so that it can be used with Project Quay. This field is required.
LOGIN_SCOPES-
Specifies the scopes Project Quay requests during login. Must include
'openid'. Each scope must also be listed in the identity provider’sscopes_supportedfrom/.well-known/openid-configuration. This field is required. OIDC_DISABLE_USER_ENDPOINT-
Specifies whether to allow or disable the
/userinfoendpoint. If using Azure Entra ID, set this field totrue. Defaults tofalse. FEATURE_TEAM_SYNCING-
Specifies whether to allow team membership to be synced from a backing group in the authentication engine. This field is required.
FEATURE_NONSUPERUSER_TEAM_SYNCING_SETUP-
Optional. If enabled, non-superusers can configure team synchronization.
-
Restart your Project Quay registry.
Setting up your Project Quay deployment for team synchronization
To sync a Project Quay team with an OIDC group, you can create an organization and team in the UI, enable directory sync, and verify membership changes from the identity provider.
-
You have enabled team synchronization for your OIDC-authenticated Project Quay deployment.
-
Log in to your Project Quay registry by using your OIDC provider.
-
On the Project Quay v2 UI dashboard, click Create Organization.
-
Enter an organization name, for example,
test-org. -
Click the name of the organization.
-
In the navigation pane, click Teams and membership.
-
Click Create new team and enter a name, for example,
testteam. -
On the Create team pop-up:
-
Optional. Add this team to a repository.
-
Add a team member, for example,
user1, by typing in the user’s account name. -
Add a robot account to this team. This page provides the option to create a robot account.
-
-
Click Next.
-
On the Review and Finish page, review the information that you have provided and click Review and Finish.
-
To enable team synchronization for your Project Quay OIDC deployment, click Enable Directory Sync on the Teams and membership page.
-
You are prompted to enter the group Object ID if your OIDC authenticator is Azure Entra ID, or the group name if using a different provider.
WarningAfter you enable team syncing, membership of users who are already part of the team is revoked. The OIDC group is the single source of truth. This action is not reversible. Team user membership from within Project Quay is read-only.
-
Click Enable Sync.
-
You are returned to the Teams and membership page. Note that users of this team are removed and are re-added upon logging back in. At this stage, only the robot account is still part of the team.
A banner at the top of the page confirms that the team is synced:
This team is synchronized with a group in OIDC and its user membership is therefore read-only.By clicking the Directory Synchronization Config accordion, the OIDC group that your deployment syncs with appears.
-
Log out of your Project Quay registry.
-
Log back in to your Project Quay registry.
-
Click Organizations → test-org → test-team → Teams and memberships.
user1now appears as a team member for this team. -
Navigate to your OIDC provider’s administration console.
-
Navigate to the Users page of your OIDC provider. The name of this page varies depending on your provider.
-
Click the name of the user associated with Project Quay, for example,
user1. -
Remove the user from the group in the configured identity provider.
-
Remove, or unassign, the access permissions from the user.
-
Log in to your Project Quay registry.
-
Click Organizations → test-org → test-team → Teams and memberships.
user1has been removed from this team.
Eliminate long-lived robot credentials with keyless authentication
Configure keyless robot account federation to exchange short-lived OAuth2 tokens for registry access.
Keyless authentication with robot accounts
With keyless authentication in Project Quay, you can exchange an OIDC token for a short-lived robot account token that expires after one hour.
In previous versions of Project Quay, robot account tokens were valid for the lifetime of the token unless deleted or regenerated. Tokens that do not expire have security implications for users who do not want to store long-term passwords or manage the deletion or regeneration of authentication tokens.
Keyless authentication reduces the risk of robot token exposure by removing exchanged tokens after one hour.
Configuring keyless authentication with robot accounts is a multi-step procedure that requires setting a robot federation, generating an OAuth2 token from your OIDC provider, and exchanging the OAuth2 token for a robot account access token.
Generating an OAuth2 token with Red Hat Single Sign-On
To exchange an external OIDC token for a Project Quay robot account token, you can first generate an OAuth2 token by using Red Hat Single Sign-On.
-
On the Red Hat Single Sign-On UI:
-
Click Clients and then the name of the application or service that can request authentication of a user.
-
On the Settings page of your client, ensure that the following options are set or enabled:
-
Client ID
-
Valid redirect URI
-
Client authentication
-
Authorization
-
Standard flow
-
Direct access grants
NoteSettings can differ depending on your setup.
-
-
On the Credentials page, store the Client Secret for future use.
-
On the Users page, click Add user and enter a username, for example,
service-account-quaydev. Then, click Create. -
Click the name of the user, for example service-account-quaydev on the Users page.
-
Click the Credentials tab → Set password → and provide a password for the user. If warranted, you can make this password temporary by selecting the Temporary option.
-
Click the Realm settings tab → OpenID Endpoint Configuration. Store the
/protocol/openid-connect/tokenendpoint. For example:http://localhost:8080/realms/master/protocol/openid-connect/token
-
-
On a web browser, navigate to the following URL:
http://<keycloak_url>/realms/<realm_name>/protocol/openid-connect/auth?response_type=code&client_id=<client_id> -
When prompted, log in with the service-account-quaydev user and the temporary password you set. Complete the login by providing the required information and setting a permanent password if necessary.
-
You are redirected to the URI address provided for your client. For example:
https://localhost:3000/cb?session_state=5c9bce22-6b85-4654-b716-e9bbb3e755bc&iss=http%3A%2F%2Flocalhost%3A8080%2Frealms%2Fmaster&code=ea5b76eb-47a5-4e5d-8f71-0892178250db.5c9bce22-6b85-4654-b716-e9bbb3e755bc.cdffafbc-20fb-42b9-b254-866017057f43Take note of the
codeprovided in the address. For example:code=ea5b76eb-47a5-4e5d-8f71-0892178250db.5c9bce22-6b85-4654-b716-e9bbb3e755bc.cdffafbc-20fb-42b9-b254-866017057f43NoteThis is a temporary code that can only be used one time. If necessary, you can refresh the page or revisit the URL to obtain another code.
-
On your terminal, use the following
curl -X POSTcommand to generate a temporary OAuth2 access token:$ curl -X POST "http://localhost:8080/realms/master/protocol/openid-connect/token" \ -H "Content-Type: application/x-www-form-urlencoded" \ -d "client_id=quaydev" \ -d "client_secret=<client_secret>" \ -d "grant_type=authorization_code" \ -d "code=ea5b76eb-47a5-4e5d-8f71-0892178250db.5c9bce22-6b85-4654-b716-e9bbb3e755bc.cdffafbc-20fb-42b9-b254-866017057f43"where:
http://localhost:8080/realms/master/protocol/openid-connect/token-
Specifies the
protocol/openid-connect/tokenendpoint found on the Realm settings page of the Red Hat Single Sign-On UI. quaydev-
Specifies the Client ID used for this procedure.
<client_secret>-
Specifies the Client Secret for the Client ID.
ea5b76eb-47a5-4e5d-8f71-0892178250db.5c9bce22-6b85-4654-b716-e9bbb3e755bc.cdffafbc-20fb-42b9-b254-866017057f43-
Specifies the code returned from the redirect URI.
Example output{"access_token":"<access_token>...", "expires_in":60,"refresh_expires_in":1800,"refresh_token":"<refresh_token>","token_type":"Bearer","not-before-policy":0,"session_state":"5c9bce22-6b85-4654-b716-e9bbb3e755bc","scope":"profile email"}
-
Store the
access_tokenfrom the previous step so that you can exchange it for a Project Quay robot account token in the following procedure.
Setting up a robot account federation by using the UI
To configure robot account federation in Project Quay, you can map an OIDC issuer and subject to a robot account in the v2 UI.
This procedure uses Red Hat Single Sign-On, which is based on the Keycloak project. The steps, and the information used to configure a robot account federation, vary depending on your OIDC provider.
-
You have created an organization. The following example uses
fed_test. -
You have created a robot account. The following example uses
fest_test+robot1. -
You have configured OIDC for your Project Quay deployment. The following example uses Red Hat Single Sign-On.
-
On the Red Hat Single Sign-On main page:
-
Select the appropriate realm that is authenticated for use with Project Quay. Store the issuer URL, for example,
https://keycloak-auth-realm.quayadmin.org/realms/quayrealm. -
Click Users → the name of the user to be linked with the robot account for authentication. You must use the same user account that you used when generating the OAuth2 access token.
-
On the Details page, store the ID of the user, for example,
449e14f8-9eb5-4d59-a63e-b7a77c75f770.NoteThe information collected in this step varies depending on your OIDC provider. For example, with Red Hat Single Sign-On, the ID of a user is used as the Subject to configure the robot account federation in a subsequent step. For a different OIDC provider, like Microsoft Entra ID, this information is stored as the Subject.
-
-
On your Project Quay registry:
-
Navigate to Organizations and click the name of your organization, for example, fed_test.
-
Click Robot Accounts.
-
Click the menu kebab → Set robot federation.
-
Click the + symbol.
-
In the popup window, include the following information:
-
Issuer URL:
https://keycloak-auth-realm.quayadmin.org/realms/quayrealm. For Red Hat Single Sign-On, this is the URL of your Red Hat Single Sign-On realm. This might vary depending on your OIDC provider. -
Subject:
449e14f8-9eb5-4d59-a63e-b7a77c75f770. For Red Hat Single Sign-On, the Subject is the ID of your Red Hat Single Sign-On user. This varies depending on your OIDC provider. For example, if you are using Microsoft Entra ID, the Subject is the Subject of your Entra ID user.
-
-
Click Save.
NoteThe Project Quay v2 UI federation modal accepts Issuer URL and Subject only.
-
Configuring federation audiences
To manage robot federation entries in Project Quay, you can use the robot federation API to set the issuer and subject that map an OIDC identity to a robot account.
Each robot federation entry maps an external OIDC identity (issuer and subject) to a Project Quay robot account. Starting in Project Quay {producty}, robot federation supports an optional audiences array on each entry for token audience validation during federated robot token exchange (GET /oauth2/federation/robot/token).
|
Important
|
In Project Quay 3.18, create and update requests persist |
When audiences is present in stored federation configuration, configure it to match the aud claim values your OIDC provider issues—for example, a custom API audience such as api://quay-api for Microsoft Entra ID v2.0 tokens, or your OIDC client ID for standard flows. For Microsoft Entra ID v2.0, use an application-specific audience rather than the Microsoft Graph audience.
-
You have created an organization and robot account.
-
You have configured OIDC for your Project Quay deployment.
-
You have the issuer URL and subject identifier from your OIDC provider.
-
Create or update the robot federation configuration by using
POST /api/v1/organization/{orgname}/robots/{robot_shortname}/federation. Includeissuerandsubjectin each federation entry. For example:$ curl -X POST "https://<quay-server.example.com>/api/v1/organization/fed_test/robots/robot1/federation" \ -H "Authorization: Bearer <your_access_token>" \ -H "Content-Type: application/json" \ -d '[ { "issuer": "https://login.microsoftonline.com/<tenant-id>/v2.0", "subject": "<user-object-id>" } ]' -
After you configure federation, exchange an external OIDC access token for a Project Quay robot token.
Exchanging an OAuth2 access token for a Project Quay robot account token
To authenticate with a federated robot account in Project Quay, you can exchange an OAuth2 access token for a short-lived robot token by using a Python script.
|
Note
|
The following example uses a Python script to exchange the OAuth2 access token for a Project Quay robot account token. |
-
You have the
python3CLI tool installed.
-
Save the following Python script in a
.pyfile, for example,robot_fed_token_auth.py:import requests import os TOKEN=os.environ.get('TOKEN') robot_user = "fed-test+robot1" def get_quay_robot_token(fed_token): URL = "https://<quay-server.example.com>/oauth2/federation/robot/token" response = requests.get(URL, auth=(robot_user,fed_token)) print(response) print(response.text) if __name__ == "__main__": get_quay_robot_token(TOKEN)where:
response = requests.get(URL, auth=(robot_user,fed_token))-
Specifies the request that retrieves the robot token. If your Project Quay deployment is using custom SSL/TLS certificates, the response must be
response = requests.get(URL,auth=(robot_user,fed_token),verify=False), which includes theverify=Falseflag.
-
Export the OAuth2 access token as
TOKEN. For example:$ export TOKEN=<export_token>... -
Run the
robot_fed_token_auth.pyscript by entering the following command:$ python3 robot_fed_token_auth.pyExample output<Response [200]> {"token": "string..."}ImportantThis token expires after one hour. After one hour, you must generate a new token.
-
Export the robot account access token as
QUAY_TOKEN. For example:$ export QUAY_TOKEN=<quay_token>
Pushing and pulling images
To verify federated robot account access in Project Quay, you can log in with the robot token and pull images that the robot is allowed to access.
-
You have exported the OAuth2 access token into a new robot account access token.
-
Log in to your Project Quay registry by using the
fed_test+robot1robot account and theQUAY_TOKENaccess token. For example:$ podman login <quay-server.example.com> -u fed_test+robot1 -p $QUAY_TOKEN -
Pull an image from a Project Quay repository for which the robot account has the proper permissions. For example:
$ podman pull <quay-server.example.com>/<repository_name>/<image_name>Example outputGetting image source signatures Copying blob 900e6061671b done Copying config 8135583d97 done Writing manifest to image destination Storing signatures 8135583d97feb82398909c9c97607159e6db2c4ca2c885c0b8f590ee0f9fe90d 0.57user 0.11system 0:00.99elapsed 68%CPU (0avgtext+0avgdata 78716maxresident)k 800inputs+15424outputs (18major+6528minor)pagefaults 0swaps -
Attempt to pull an image from a Project Quay repository for which the robot account does not have the proper permissions. For example:
$ podman pull <quay-server.example.com>/<different_repository_name>/<image_name>Example outputError: initializing source docker://quay-server.example.com/example_repository/busybox:latest: reading manifest in quay-server.example.com/example_repository/busybox: unauthorized: access to the requested resource is not authorizedAfter one hour, the credentials for this robot account expire. Afterwards, you must generate a new access token for this robot account.
Ensure FIPS compliance for the registry
Enable FIPS compliance for Red Hat Quay and Clair to meet cryptographic module requirements.
Enabling FIPS compliance
To enable FIPS compliance for your Project Quay deployment, you can set the FEATURE_FIPS configuration field to True in your config.yaml file. This ensures that Project Quay uses only FIPS-validated cryptographic modules for securing sensitive data.
-
If you are running a standalone deployment of Project Quay, your Red Hat Enterprise Linux (RHEL) deployment is version 8 or later and FIPS-enabled.
-
If you are deploying Red Hat Quay on OpenShift Container Platform, OpenShift Container Platform is version 4.10 or later.
-
Your Project Quay version is 3.5.0 or later.
-
If you are using the Red Hat Quay on OpenShift Container Platform on an IBM Power or IBM Z cluster:
-
OpenShift Container Platform version 4.14 or later is required
-
Project Quay version 3.10 or later is required
-
-
You have administrative privileges for your Project Quay deployment.
-
In your Project Quay
config.yamlfile, set theFEATURE_FIPSconfiguration field toTrue. For example:# ... FEATURE_FIPS = true # ...With
FEATURE_FIPSset toTrue, Project Quay runs using FIPS-compliant hash functions.
Set repository permissions and visibility
Set default permissions, adjust repository access, and control repository visibility by using the UI or API.
Creating and managing default permissions by using the UI
To grant access automatically when users create repositories in Project Quay, you can configure default permissions in the UI. Default permissions apply to a selected user, robot, or team in addition to the repository creator.
-
Click the name of an organization.
-
Click Default permissions.
-
Click Create default permissions. A toggle drawer appears.
-
Select either Anyone or Specific user to create a default permission when a repository is created.
-
If selecting Anyone, the following information must be provided:
-
Applied to. Search, invite, or add a user/robot/team.
-
Permission. Set the permission to one of Read, Write, or Admin.
-
-
If selecting Specific user, the following information must be provided:
-
Repository creator. Provide either a user or robot account.
-
Applied to. Provide a username, robot account, or team name.
-
Permission. Set the permission to one of Read, Write, or Admin.
-
-
-
Click Create default permission. A confirmation box appears, returning the following alert: Successfully created default permission for creator.
Creating and managing default permissions by using the API
To create, update, or delete default permissions for an Project Quay organization, you can use the API. Default permissions grant access when a repository is created.
-
You have Created an OAuth access token.
-
Enter the following command to create a default permission with the
POST /api/v1/organization/{orgname}/prototypesendpoint:$ curl -X POST -H "Authorization: Bearer <bearer_token>" -H "Content-Type: application/json" --data '{ "role": "<admin_read_or_write>", "delegate": { "name": "<username>", "kind": "user" }, "activating_user": { "name": "<robot_name>" } }' https://<quay-server.example.com>/api/v1/organization/<organization_name>/prototypesExample output{"activating_user": {"name": "test-org+test", "is_robot": true, "kind": "user", "is_org_member": true, "avatar": {"name": "test-org+test", "hash": "aa85264436fe9839e7160bf349100a9b71403a5e9ec684d5b5e9571f6c821370", "color": "#8c564b", "kind": "robot"}}, "delegate": {"name": "testuser", "is_robot": false, "kind": "user", "is_org_member": false, "avatar": {"name": "testuser", "hash": "f660ab912ec121d1b1e928a0bb4bc61b15f5ad44d5efdc4e1c92a25e99b8e44a", "color": "#6b6ecf", "kind": "user"}}, "role": "admin", "id": "977dc2bc-bc75-411d-82b3-604e5b79a493"} -
Enter the following command to update a default permission using the
PUT /api/v1/organization/{orgname}/prototypes/{prototypeid}endpoint, for example, if you want to change the permission type. You must include the ID that was returned when you created the policy.$ curl -X PUT \ -H "Authorization: Bearer <bearer_token>" \ -H "Content-Type: application/json" \ --data '{ "role": "write" }' \ https://<quay-server.example.com>/api/v1/organization/<organization_name>/prototypes/<prototypeid>Example output{"activating_user": {"name": "test-org+test", "is_robot": true, "kind": "user", "is_org_member": true, "avatar": {"name": "test-org+test", "hash": "aa85264436fe9839e7160bf349100a9b71403a5e9ec684d5b5e9571f6c821370", "color": "#8c564b", "kind": "robot"}}, "delegate": {"name": "testuser", "is_robot": false, "kind": "user", "is_org_member": false, "avatar": {"name": "testuser", "hash": "f660ab912ec121d1b1e928a0bb4bc61b15f5ad44d5efdc4e1c92a25e99b8e44a", "color": "#6b6ecf", "kind": "user"}}, "role": "write", "id": "977dc2bc-bc75-411d-82b3-604e5b79a493"} -
You can delete the permission by entering the
DELETE /api/v1/organization/{orgname}/prototypes/{prototypeid}command:curl -X DELETE \ -H "Authorization: Bearer <bearer_token>" \ -H "Accept: application/json" \ https://<quay-server.example.com>/api/v1/organization/<organization_name>/prototypes/<prototype_id>This command does not return an output. Instead, you can obtain a list of all permissions by entering the
GET /api/v1/organization/{orgname}/prototypescommand:$ curl -X GET \ -H "Authorization: Bearer <bearer_token>" \ -H "Accept: application/json" \ https://<quay-server.example.com>/api/v1/organization/<organization_name>/prototypesExample output{"prototypes": []}
Adjusting access settings for a repository by using the UI
To change access for a user or robot account on a repository, you can use the Quay UI. You can set Read, Write, or Admin permissions.
-
You have created a user account or robot account.
-
Log into Quay.
-
On the v2 UI, click Repositories.
-
Click the name of a repository, for example,
quayadmin/busybox. -
Click the Settings tab.
-
Optional. Click User and robot permissions. You can adjust the settings for a user or robot account by clicking the dropdown menu option under Permissions. You can change the settings to Read, Write, or Admin.
-
Read. The User or Robot Account can view and pull from the repository.
-
Write. The User or Robot Account can read (pull) from and write (push) to the repository.
-
Admin. The User or Robot account has access to pull from, and push to, the repository, plus the ability to do administrative tasks associated with the repository.
-
Adjusting access settings for a repository by using the API
To change or remove access for a user or robot account on a repository, you can use the Project Quay API. You can grant Read, Write, or Admin permissions, or delete an existing permission.
-
You have created a user account or robot account.
-
You have Created an OAuth access token.
-
Enter the following
PUT /api/v1/repository/{repository}/permissions/user/{username}command to change the permissions of a user:$ curl -X PUT \ -H "Authorization: Bearer <bearer_token>" \ -H "Content-Type: application/json" \ -d '{"role": "admin"}' \ https://<quay-server.example.com>/api/v1/repository/<namespace>/<repository>/permissions/user/<username>Example output{"role": "admin", "name": "quayadmin+test", "is_robot": true, "avatar": {"name": "quayadmin+test", "hash": "ca9afae0a9d3ca322fc8a7a866e8476dd6c98de543decd186ae090e420a88feb", "color": "#8c564b", "kind": "robot"}} -
To delete the current permission, you can enter the
DELETE /api/v1/repository/{repository}/permissions/user/{username}command:$ curl -X DELETE \ -H "Authorization: Bearer <bearer_token>" \ -H "Accept: application/json" \ https://<quay-server.example.com>/api/v1/repository/<namespace>/<repository>/permissions/user/<username>This command does not return any output in the CLI. Instead, you can confirm deletion by entering the
GET /api/v1/repository/{repository}/permissions/user/command:$ curl -X GET \ -H "Authorization: Bearer <bearer_token>" \ -H "Accept: application/json" \ https://<quay-server.example.com>/api/v1/repository/<namespace>/<repository>/permissions/user/<username>/Example output{"message":"User does not have permission for repo."}
Adjusting repository visibility by using the UI
To control who can pull or interact with a repository, you can adjust its visibility to public or private by using the Project Quay UI.
-
On the Project Quay UI, click Repositories in the navigation pane.
-
Click the name of a repository.
-
Click Settings in the navigation pane.
-
Click Repository visibility.
-
Click Make private. The repository is made private, and only users on the permissions list can view and interact with it.
Adjusting repository visibility by using the API
To control who can pull or interact with a repository, you can set its visibility to public or private by using the Project Quay API.
The visibility of your repository can be set to private or public by using the POST /api/v1/repository/{repository}/changevisibility command.
-
You have Created an OAuth access token.
-
You have created a repository.
-
You can change the visibility of your repository to public or private by specifying the desired option in the
visibilityschema. For example:$ curl -X POST \ -H "Authorization: Bearer <bearer_token>" \ -H "Content-Type: application/json" \ -d '{ "visibility": "private" }' \ "https://quay-server.example.com/api/v1/repository/my_namespace/test_repo_three/changevisibility"Example output{"success": true}
Manage registry-wide and team access policies
Manage registry-wide access, restricted users, superuser access, and team roles for consistent security policies.
Registry-wide access management
Registry-wide access settings in Project Quay control what users and superusers can do across the entire registry. You can restrict ordinary users and grant superusers broader access when needed.
Managing restricted users
With restricted users in Project Quay, you can prevent registry members from creating organizations or pushing to their own namespaces unless they belong to an organization team. You can allowlist specific users so that they keep those capabilities.
By default, all Project Quay members part of a registry can create repositories and upload content to their own user account. For example, when user1 pushes an artifact tag such as /<user1>/<image>:<tag>, a repository of the name user1/image is created. Inside of that repository is information about the artifact tag.
With the FEATURE_RESTRICTED_USERS configuration field, Project Quay administrators can restrict all users that are part of their registry from pushing images or artifacts to the registry. This configuration field effectively renders all users from creating new organizations or pushing content altogether unless they are already part of that organization and defined as a team member of that organization; that is, restricted users still have normal permissions in organizations based on the teams that they are members of.
For example, a Project Quay administrator sets the FEATURE_RESTRICTED_USERS configuration field in their config.yaml file as follows:
FEATURE_RESTRICTED_USERS: trueWhen set as shown, user1 is unable to create a new organization by using the Project Quay UI. Upon attempt, the following error message is returned: Unauthorized. Additionally, if user1 attempts to push an image to their own namespace by using the CLI (that is, /<user1>/<image>:<tag>), the following error message is returned: Error: writing blob: initiating layer upload to /v2/user1/<image>/blobs/uploads/ in <quay-server.example.com>: unauthorized: access to the requested resource is not authorized. However, if user1 is part of an organization’s team as defined by an administrator, they maintain the permissions capable of that team. For example, if user1 is added to an organization’s team and given the Admin role, they have administrative privileges for that organization.
When you combine FEATURE_RESTRICTED_USERS with the RESTRICTED_USERS_WHITELIST configuration field, Project Quay administrators can allow specified members to continue to push to the registry or create organizations. In general, when FEATURE_RESTRICTED_USERS is set, Project Quay administrators might also set RESTRICTED_USERS_WHITELIST, otherwise all members of the registry (with the exception of those defined by a team) are rendered incapable of doing basic tasks.
For example, a Project Quay administrator sets the FEATURE_RESTRICTED_USERS and RESTRICTED_USERS_WHITELIST configuration fields in their config.yaml file as follows:
# ...
FEATURE_RESTRICTED_USERS: true
RESTRICTED_USERS_WHITELIST:
- user2
# ...With this configuration, all users except user2 are restricted from pushing images or creating organizations. Other users who are part of a team also have these privileges. Users in the registry who are neither defined by the RESTRICTED_USERS_WHITELIST field nor part of an organization team have no permissions within the registry, and therefore cannot perform basic tasks.
|
Note
|
This feature works differently for LDAP deployment types. |
About superuser full access
Superuser full access in Project Quay lets administrators grant superusers read, write, and delete rights in organizations that they do not own. You enable the feature with the FEATURE_SUPERUSERS_FULL_ACCESS configuration field.
When a user, for example, user1 creates an organization within a registry, they own the access and permissions to that organization. As such, they can create repositories, define teams and memberships, create robot accounts, set default permissions, view logs, and adjust other settings as warranted. That organization is effectively the user’s organization.
By default, superusers do not have access to a user’s organization. When the FEATURE_SUPERUSERS_FULL_ACCESS field is enabled (true), all organizations and members of the registry are revealed on the Organizations page of the UI. However, when this field is enabled, the superuser cannot view the image repository of every organization at once. This is a known limitation. As a temporary workaround, the superuser can view image repositories by navigating to them from the Organizations page.
|
Note
|
When |
To grant superusers full access to all organizations within the registry, you can use the following YAML configuration:
# ...
FEATURE_SUPERUSERS_FULL_ACCESS: true
# ...After you set FEATURE_SUPERUSERS_FULL_ACCESS: true, all organizations are visible on the superuser Organization page.
Setting a team role by using the UI
To assign a role to a team within a Quay organization, you can use the UI. Team roles determine a member’s permissions, such as administrative or contributor access.
-
You have created a team.
-
On the Project Quay landing page, click the name of your Organization.
-
In the navigation pane, click Teams and Membership.
-
Select the TEAM ROLE drop-down menu, as shown in the following figure:
-
For the selected team, choose one of the following roles:
-
Admin. Full administrative access to the organization, including the ability to create teams, add members, and set permissions.
-
Member. Inherits all permissions set for the team.
-
Creator. All member permissions, plus the ability to create new repositories.
-
Managing team members and repository permissions
To manage team members and set repository permissions for a team, you can use the Quay UI. You can add or remove members, and adjust access levels for each repository.
-
On the Teams and membership page of your organization, you can also manage team members and set repository permissions.
-
Click the kebab menu, and select one of the following options:
-
Manage Team Members. On this page, you can view all members, team members, robot accounts, or users who have been invited. You can also add a new team member by clicking Add new member.
-
Set repository permissions. On this page, you can set the repository permissions to one of the following:
-
None. Team members have no permission to the repository.
-
Read. Team members can view and pull from the repository.
-
Write. Team members can read (pull) from and write (push) to the repository.
-
Admin. Full access to pull from, and push to, the repository, plus the ability to do administrative tasks associated with the repository.
-
-
Delete. This popup window allows you to delete the team by clicking Delete.
-
Setting the role of a team within an organization by using the API
To view repository permissions for a team or set a team’s role in an Project Quay organization, you can use the organization team API endpoints with an OAuth access token.
-
You have created an OAuth access token.
-
Enter the following
GET /api/v1/organization/{orgname}/team/{teamname}/permissionscommand to return a list of repository permissions for the organization’s team. Note that your team must have been added to a repository for this command to return information.$ curl -X GET \ -H "Authorization: Bearer <your_access_token>" \ "<quay-server.example.com>/api/v1/organization/<organization_name>/team/<team_name>/permissions"Example output{"permissions": [{"repository": {"name": "api-repo", "is_public": true}, "role": "admin"}]} -
You can create or update a team within an organization to have a specified role of admin, member, or creator using the
PUT /api/v1/organization/{orgname}/team/{teamname}command. For example:$ curl -X PUT \ -H "Authorization: Bearer <your_access_token>" \ -H "Content-Type: application/json" \ -d '{ "role": "<role>" }' \ "<quay-server.example.com>/api/v1/organization/<organization_name>/team/<team_name>"Example output{"name": "testteam", "description": "", "can_view": true, "role": "creator", "avatar": {"name": "testteam", "hash": "827f8c5762148d7e85402495b126e0a18b9b168170416ed04b49aae551099dc8", "color": "#ff7f0e", "kind": "team"}, "new_team": false}
Observe
Understand audit and action logs
Review usage logs, database logs, log entry kinds, and Splunk audit display options for Red Hat Quay action logs.
Understanding usage logs
By default, Project Quay stores usage logs in its database and shows them in the web UI. You can query those logs in PostgreSQL and map action types by kind_id.
Usage logs appear at the organization and repository levels, and in the Superuser Admin Panel. Database logs capture a wide range of events in Project Quay, such as account plan changes, user actions, and general operations. Log entries include information such as the action performed (kind_id), the user who performed the action (account_id or performer_id), the timestamp (datetime), and other relevant data associated with the action (metadata_json).
Viewing database logs
To view repository usage logs stored in the Project Quay PostgreSQL database, you can query the logentry tables with the psql CLI tool.
-
You have administrative privileges.
-
You have installed the
psqlCLI tool.
-
Enter the following command to log in to your Project Quay PostgreSQL database:
$ psql -h <quay-server.example.com> -p 5432 -U <user_name> -d <database_name>Example outputpsql (16.1, server 13.7) Type "help" for help. -
Optional. Enter the following command to display the tables list of your PostgreSQL database:
quay=> \dtExample outputList of relations Schema | Name | Type | Owner --------+----------------------------+-------+---------- public | logentry | table | quayuser public | logentry2 | table | quayuser public | logentry3 | table | quayuser public | logentrykind | table | quayuser ... -
Enter the following command to return a list of
repository_idsthat are required to return log information:quay=> SELECT id, name FROM repository;Example outputid | name ----+--------------------- 3 | new_repository_name 6 | api-repo 7 | busybox ... -
Enter the following command to use the
logentry3relation to show log information about one of your repositories:SELECT * FROM logentry3 WHERE repository_id = <repository_id>;Example outputid | kind_id | account_id | performer_id | repository_id | datetime | ip | metadata_json 59 | 14 | 2 | 1 | 6 | 2024-05-13 15:51:01.897189 | 192.168.1.130 | {"repo": "api-repo", "namespace": "test-org"}In this example, the following information is returned:
{ "log_data": { "id": 59 "kind_id": "14", "account_id": "2", "performer_id": "1", "repository_id": "6", "ip": "192.168.1.100", "metadata_json": {"repo": "api-repo", "namespace": "test-org"} "datetime": "2024-05-13 15:51:01.897189" } }where:
id-
Specifies the unique identifier for the log entry.
kind_id-
Specifies the action that was performed. In this example,
14maps to creating a repository (create_repo). account_id-
Specifies the account that performed the action.
performer_id-
Specifies the performer of the action.
repository_id-
Specifies the repository that the action was performed on. In this example,
6correlates to theapi-reporepository from the previous step. ip-
Specifies the IP address where the action was performed.
metadata_json-
Specifies metadata information, including the name of the repository and its namespace.
datetime-
Specifies the time when the action was performed.
Log entry kind_ids
The kind_id value in a Project Quay usage log entry identifies the type of action that was recorded. You can use this table to map each kind_id to its action name and description.
| kind_id | Action | Description |
|---|---|---|
1 |
account_change_cc |
Change of credit card information. |
2 |
account_change_password |
Change of account password. |
3 |
account_change_plan |
Change of account plan. |
4 |
account_convert |
Account conversion. |
5 |
add_repo_accesstoken |
Adding an access token to a repository. |
6 |
add_repo_notification |
Adding a notification to a repository. |
7 |
add_repo_permission |
Adding permissions to a repository. |
8 |
add_repo_webhook |
Adding a webhook to a repository. |
9 |
build_dockerfile |
Building a Dockerfile. |
10 |
change_repo_permission |
Changing permissions of a repository. |
11 |
change_repo_visibility |
Changing the visibility of a repository. |
12 |
create_application |
Creating an application. |
13 |
create_prototype_permission |
Creating permissions for a prototype. |
14 |
create_repo |
Creating a repository. |
15 |
create_robot |
Creating a robot (service account or bot). |
16 |
create_tag |
Creating a tag. |
17 |
delete_application |
Deleting an application. |
18 |
delete_prototype_permission |
Deleting permissions for a prototype. |
19 |
delete_repo |
Deleting a repository. |
20 |
delete_repo_accesstoken |
Deleting an access token from a repository. |
21 |
delete_repo_notification |
Deleting a notification from a repository. |
22 |
delete_repo_permission |
Deleting permissions from a repository. |
23 |
delete_repo_trigger |
Deleting a repository trigger. |
24 |
delete_repo_webhook |
Deleting a webhook from a repository. |
25 |
delete_robot |
Deleting a robot. |
26 |
delete_tag |
Deleting a tag. |
27 |
manifest_label_add |
Adding a label to a manifest. |
28 |
manifest_label_delete |
Deleting a label from a manifest. |
29 |
modify_prototype_permission |
Modifying permissions for a prototype. |
30 |
move_tag |
Moving a tag. |
31 |
org_add_team_member |
Adding a member to a team. |
32 |
org_create_team |
Creating a team within an organization. |
33 |
org_delete_team |
Deleting a team within an organization. |
34 |
org_delete_team_member_invite |
Deleting a team member invitation. |
35 |
org_invite_team_member |
Inviting a member to a team in an organization. |
36 |
org_remove_team_member |
Removing a member from a team. |
37 |
org_set_team_description |
Setting the description of a team. |
38 |
org_set_team_role |
Setting the role of a team. |
39 |
org_team_member_invite_accepted |
Acceptance of a team member invitation. |
40 |
org_team_member_invite_declined |
Declining of a team member invitation. |
41 |
pull_repo |
Pull from a repository. |
42 |
push_repo |
Push to a repository. |
43 |
regenerate_robot_token |
Regenerating a robot token. |
44 |
repo_verb |
Generic repository action (specifics might be defined elsewhere). |
45 |
reset_application_client_secret |
Resetting the client secret of an application. |
46 |
revert_tag |
Reverting a tag. |
47 |
service_key_approve |
Approving a service key. |
48 |
service_key_create |
Creating a service key. |
49 |
service_key_delete |
Deleting a service key. |
50 |
service_key_extend |
Extending a service key. |
51 |
service_key_modify |
Modifying a service key. |
52 |
service_key_rotate |
Rotating a service key. |
53 |
setup_repo_trigger |
Setting up a repository trigger. |
54 |
set_repo_description |
Setting the description of a repository. |
55 |
take_ownership |
Taking ownership of a resource. |
56 |
update_application |
Updating an application. |
57 |
change_repo_trust |
Changing the trust level of a repository. |
58 |
reset_repo_notification |
Resetting repository notifications. |
59 |
change_tag_expiration |
Changing the expiration date of a tag. |
60 |
create_app_specific_token |
Creating an application-specific token. |
61 |
revoke_app_specific_token |
Revoking an application-specific token. |
62 |
toggle_repo_trigger |
Toggling a repository trigger on or off. |
63 |
repo_mirror_enabled |
Enabling repository mirroring. |
64 |
repo_mirror_disabled |
Disabling repository mirroring. |
65 |
repo_mirror_config_changed |
Changing the configuration of repository mirroring. |
66 |
repo_mirror_sync_started |
Starting a repository mirror sync. |
67 |
repo_mirror_sync_failed |
Repository mirror sync failed. |
68 |
repo_mirror_sync_success |
Repository mirror sync succeeded. |
69 |
repo_mirror_sync_now_requested |
Immediate repository mirror sync requested. |
70 |
repo_mirror_sync_tag_success |
Repository mirror tag sync succeeded. |
71 |
repo_mirror_sync_tag_failed |
Repository mirror tag sync failed. |
72 |
repo_mirror_sync_test_success |
Repository mirror sync test succeeded. |
73 |
repo_mirror_sync_test_failed |
Repository mirror sync test failed. |
74 |
repo_mirror_sync_test_started |
Repository mirror sync test started. |
75 |
change_repo_state |
Changing the state of a repository. |
76 |
create_proxy_cache_config |
Creating proxy cache configuration. |
77 |
delete_proxy_cache_config |
Deleting proxy cache configuration. |
78 |
start_build_trigger |
Starting a build trigger. |
79 |
cancel_build |
Canceling a build. |
80 |
org_create |
Creating an organization. |
81 |
org_delete |
Deleting an organization. |
82 |
org_change_email |
Changing organization email. |
83 |
org_change_invoicing |
Changing organization invoicing. |
84 |
org_change_tag_expiration |
Changing organization tag expiration. |
85 |
org_change_name |
Changing organization name. |
86 |
user_create |
Creating a user. |
87 |
user_delete |
Deleting a user. |
88 |
user_disable |
Disabling a user. |
89 |
user_enable |
Enabling a user. |
90 |
user_change_email |
Changing user email. |
91 |
user_change_password |
Changing user password. |
92 |
user_change_name |
Changing user name. |
93 |
user_change_invoicing |
Changing user invoicing. |
94 |
user_change_tag_expiration |
Changing user tag expiration. |
95 |
user_change_metadata |
Changing user metadata. |
96 |
user_generate_client_key |
Generating a client key for a user. |
97 |
login_success |
Successful login. |
98 |
logout_success |
Successful logout. |
99 |
permanently_delete_tag |
Permanently deleting a tag. |
100 |
autoprune_tag_delete |
Auto-pruning tag deletion. |
101 |
create_namespace_autoprune_policy |
Creating namespace auto-prune policy. |
102 |
update_namespace_autoprune_policy |
Updating namespace auto-prune policy. |
103 |
delete_namespace_autoprune_policy |
Deleting namespace auto-prune policy. |
104 |
login_failure |
Failed login attempt. |
Displaying Splunk audit logs in the Project Quay UI
To view Splunk audit logs in the Project Quay UI, you can configure Splunk or Splunk HEC credentials in your config.yaml file and restart the registry. Then open the Logs panel for an organization, repository, or superuser view.
-
You have created an
hec_token.NoteFor the HEC producer, two tokens are required:
hec_tokenfor writing logs andsearch_tokenfor reading logs in the UI. Thesearch_tokenis a bearer token (the same type you create when generating a Splunk bearer token). HEC tokens are ingest-only and cannot run searches. -
You have configured Project Quay to forward action logs to Splunk.
-
Update your
config.yamlfile:-
To display Splunk SDK audit logs on the Project Quay UI, use the following reference:
LOGS_MODEL: splunk LOGS_MODEL_CONFIG: producer: splunk splunk_config: host: <splunk.example.com> port: 8089 bearer_token: <your_bearer_token> url_scheme: https verify_ssl: false index_prefix: quay_logs search_timeout: 60 max_results: 10000 export_batch_size: 5000where:
LOGS_MODEL_CONFIG.splunk_config.host-
Specifies the host name of your Splunk instance.
LOGS_MODEL_CONFIG.splunk_config.bearer_token-
Specifies the bearer token you generated for Splunk.
LOGS_MODEL_CONFIG.splunk_config.index_prefix-
Specifies the Splunk index prefix.
-
To display Splunk HEC logs on the Project Quay UI, include the generated
search_tokenandhec_token. For example:LOGS_MODEL: splunk LOGS_MODEL_CONFIG: producer: splunk_hec splunk_hec_config: host: <splunk.example.com> port: 8088 hec_token: <your_hec_token> search_token: <your_bearer_token> url_scheme: https verify_ssl: true ssl_ca_path: conf/stack/ca.pem index: quay_logs splunk_host: <quay-server.example.com> splunk_sourcetype: access_combined timeout: 10 search_host: <splunk.example.com> search_port: 8089 search_timeout: 60 max_results: 10000 export_batch_size: 5000where:
LOGS_MODEL_CONFIG.splunk_hec_config.host-
Specifies the host name of your Splunk instance (used for both the HEC endpoint and the search API).
LOGS_MODEL_CONFIG.splunk_hec_config.port-
Specifies the port number for the Splunk HEC endpoint.
LOGS_MODEL_CONFIG.splunk_hec_config.hec_token-
Specifies the HEC token you generated for Splunk.
LOGS_MODEL_CONFIG.splunk_hec_config.search_token-
Specifies the bearer token you generated for Splunk search. This field is optional.
LOGS_MODEL_CONFIG.splunk_hec_config.splunk_host-
Specifies the host name of your Project Quay instance.
-
-
Restart your Project Quay instance to apply the changes.
-
Push an example image to your Project Quay instance to generate an audit log by entering the following command. Note that you can push to an organization or a repository.
$ podman push <quay-server.example.com>/<organization_name>/busybox:test -
On the Project Quay UI, open the Logs view in one of these places:
-
Organizations → <organization_name> → Logs
-
Repositories → <organization_name> / <repository_name> → Logs
-
Superuser → Usage Logs
-
-
The
busybox:testSplunk audit is available.
Exporting logs by using the API
To export detailed Project Quay logs for a user, organization, or repository, you can call the export logs API endpoints and deliver the results to a callback URL or email address.
-
You have created an OAuth access token.
-
Use the
POST /api/v1/user/exportlogsendpoint to export logs for the current user:$ curl -X POST \ -H "Authorization: Bearer <bearer_token>" \ -H "Content-Type: application/json" \ -H "Accept: application/json" \ -d '{ "starttime": "<MM/DD/YYYY>", "endtime": "<MM/DD/YYYY>", "callback_email": "your.email@example.com" }' \ "http://<quay-server.example.com>/api/v1/user/exportlogs"Example output{"export_id": "6a0b9ea9-444c-4a19-9db8-113201c38cd4"} -
Use the
POST /api/v1/organization/{orgname}/exportlogsendpoint to export logs for an organization:$ curl -X POST \ -H "Authorization: Bearer <bearer_token>" \ -H "Content-Type: application/json" \ -H "Accept: application/json" \ -d '{ "starttime": "<MM/DD/YYYY>", "endtime": "<MM/DD/YYYY>", "callback_email": "org.logs@example.com" }' \ "http://<quay-server.example.com>/api/v1/organization/{orgname}/exportlogs" -
Use the
POST /api/v1/repository/{repository}/exportlogsendpoint to export logs for a repository:$ curl -X POST \ -H "Authorization: Bearer <bearer_token>" \ -H "Content-Type: application/json" \ -H "Accept: application/json" \ -d '{ "starttime": "2024-01-01", "endtime": "2024-06-18", "callback_url": "http://your-callback-url.example.com" }' \ "http://<quay-server.example.com>/api/v1/repository/{repository}/exportlogs"
View and export registry usage logs
View and export usage logs from the Red Hat Quay UI and API, including aggregated and detailed log views.
Viewing and exporting logs
Activity logs in Project Quay record repository and namespace events for operations and security review. You can view usage patterns and export logs for longer-term retention.
Usage logs might reveal the following information:
-
Resource Planning: Usage logs can provide data on the number of image pulls, pushes, and overall traffic to your registry.
-
User Activity: Logs can help you track user activity, showing which users are accessing and interacting with images in the registry. This can be useful for auditing, understanding user behavior, and managing access controls.
-
Usage Patterns: By studying usage patterns, you can gain insights into which images are popular, which versions are frequently used, and which images are rarely accessed. This information can help prioritize image maintenance and cleanup efforts.
-
Security Auditing: Usage logs enable you to track who is accessing images and when. This is crucial for security auditing, compliance, and investigating any unauthorized or suspicious activity.
-
Image Lifecycle Management: Logs can reveal which images are being pulled, pushed, and deleted. This information is essential for managing image lifecycles, including deprecating old images and ensuring that only authorized images are used.
-
Compliance and Regulatory Requirements: Many industries have compliance requirements that mandate tracking and auditing of access to sensitive resources. Usage logs can help you demonstrate compliance with such regulations.
-
Identifying Abnormal Behavior: Unusual or abnormal patterns in usage logs can indicate potential security breaches or malicious activity. Monitoring these logs can help you detect and respond to security incidents more effectively.
-
Trend Analysis: Over time, usage logs can provide trends and insights into how your registry is being used. This can help you make informed decisions about resource allocation, access controls, and image management strategies.
There are multiple ways of accessing log files:
-
Viewing logs through the web UI.
-
Exporting logs so that they can be saved externally.
-
Accessing log entries using the API.
To access logs, you must have administrative privileges for the selected repository or namespace.
|
Note
|
A maximum of 100 log results are available at a time via the API. To gather more results that that, you must use the log exporter feature described in this chapter. |
Viewing usage logs
To review how your registry is being used, you can view usage logs for an organization, repository, or namespace in the Project Quay v2 UI. You can filter by date range and export the logs for later use.
-
Log in to your Project Quay registry.
-
Navigate to an Organization, repository, or namespace for which you are an administrator of.
-
Click Logs.
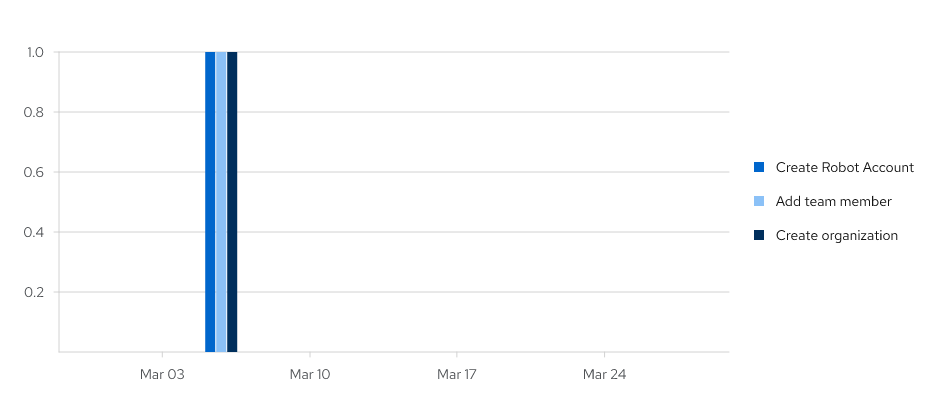
-
Optional. Set the date range for viewing log entries by adding dates to the From and To boxes.
-
Optional. Export the logs by clicking Export. You must enter an email address or a valid callback URL that uses the HTTP or HTTPS scheme. This process can take an hour depending on how many logs there are.
Viewing usage logs by using the API
To review registry activity, you can view usage logs by organization or repository through the Project Quay API. You can aggregate logs, list detailed entries, filter by user or date range, and page through results.
Viewing aggregated logs
To review grouped activity for a user, organization, or repository in Project Quay, you can retrieve aggregated logs through the API. You can filter results by performer and date range.
-
You have created an OAuth access token.
-
Use the
GET /api/v1/user/aggregatelogsAPI endpoint to return the aggregated (or grouped) logs for the current user:$ curl -X GET \ -H "Authorization: Bearer <bearer_token>" \ -H "Accept: application/json" \ "https://<quay-server.example.com>/api/v1/user/aggregatelogs"The following example shows aggregated log output:
{"aggregated": [{"kind": "create_tag", "count": 1, "datetime": "Tue, 18 Jun 2024 00:00:00 -0000"}, {"kind": "manifest_label_add", "count": 1, "datetime": "Tue, 18 Jun 2024 00:00:00 -0000"}, {"kind": "push_repo", "count": 2, "datetime": "Tue, 18 Jun 2024 00:00:00 -0000"}, {"kind": "revert_tag", "count": 1, "datetime": "Tue, 18 Jun 2024 00:00:00 -0000"}]}You can also pass in the
performerandstarttime/endtimequeries to obtain aggregated logs for a specific user between a specific time period. For example:$ curl -X GET \ -H "Authorization: Bearer <bearer_token>" \ -H "Accept: application/json" \ "<quay-server.example.com>/api/v1/user/aggregatelogs?performer=<username>&starttime=<MM/DD/YYYY>&endtime=<MM/DD/YYYY>" -
View aggregated logs by organization by using the
GET /api/v1/organization/{orgname}/aggregatelogsendpoint. For example:$ curl -X GET \ -H "Authorization: Bearer <bearer_token>" \ -H "Accept: application/json" \ "<quay-server.example.com>/api/v1/organization/{orgname}/aggregatelogs" -
View aggregated logs by repository by using the
GET /api/v1/repository/{repository}/aggregatelogsendpoint. The following example includes thestarttime/endtimefields:$ curl -X GET \ -H "Authorization: Bearer <bearer_token>" \ -H "Accept: application/json" \ "<quay-server.example.com>/api/v1/repository/<repository_name>/<namespace>/aggregatelogs?starttime=2024-01-01&endtime=2024-06-18""
Viewing detailed logs
To inspect individual registry events for a user, organization, or repository in Project Quay, you can retrieve detailed logs through the API. You can filter results by performer and date range.
-
Use the
GET /api/v1/user/logsAPI endpoint to return a list of log entries for a user. For example:$ curl -X GET -H "Authorization: Bearer <bearer_token>" -H "Accept: application/json" "<quay-server.example.com>/api/v1/user/logs"You can also pass in the
performerandstarttime/endtimequeries to obtain logs for a specific user between a specific time period. For example:$ curl -X GET -H "Authorization: Bearer <bearer_token>" -H "Accept: application/json" "http://quay-server.example.com/api/v1/user/logs?performer=quayuser&starttime=01/01/2024&endtime=06/18/2024"The following example shows detailed log output:
--- {"start_time": "Mon, 01 Jan 2024 00:00:00 -0000", "end_time": "Wed, 19 Jun 2024 00:00:00 -0000", "logs": [{"kind": "revert_tag", "metadata": {"username": "quayuser", "repo": "busybox", "tag": "test-two", "manifest_digest": "sha256:57583a1b9c0a7509d3417387b4f43acf80d08cdcf5266ac87987be3f8f919d5d"}, "ip": "192.168.1.131", "datetime": "Tue, 18 Jun 2024 18:59:13 -0000", "performer": {"kind": "user", "name": "quayuser", "is_robot": false, "avatar": {"name": "quayuser", "hash": "b28d563a6dc76b4431fc7b0524bbff6b810387dac86d9303874871839859c7cc", "color": "#17becf", "kind": "user"}}}, {"kind": "push_repo", "metadata": {"repo": "busybox", "namespace": "quayuser", "user-agent": "containers/5.30.1 (github.com/containers/image)", "tag": "test-two", "username": "quayuser", } --- -
Use the
GET /api/v1/organization/{orgname}/logsendpoint to return logs for a specified organization:$ curl -X GET \ -H "Authorization: Bearer <bearer_token>" \ -H "Accept: application/json" \ "http://<quay-server.example.com>/api/v1/organization/{orgname}/logs" -
Use the
GET /api/v1/repository/{repository}/logsendpoint to return logs for a specified repository:$ curl -X GET \ -H "Authorization: Bearer <bearer_token>" \ -H "Accept: application/json" \ "http://<quay-server.example.com>/api/v1/repository/{repository}/logs"
Exporting repository logs by using the UI
To export repository logs from Project Quay, you can use the Export Logs feature in the UI. You receive the exported data by email or callback URL, and it expires after a set time.
This feature has the following benefits and constraints:
-
You can choose a range of dates for the logs you want to gather from a repository.
-
You can request that the logs be sent to you by an email attachment or directed to a callback URL.
-
To export logs, you must be an administrator of the repository or namespace.
-
30 days worth of logs are retained for all users.
-
Export logs only gathers log data that was previously produced. It does not stream logging data.
-
When logs are gathered and made available to you, you should immediately copy that data if you want to save it. By default, the data expires after one hour.
Use the following procedure to export logs.
-
Select a repository for which you have administrator privileges.
-
Click the Logs tab.
-
Optional. If you want to specify specific dates, enter the range in the From and to boxes.
-
Click the Export Logs button. An Export Usage Logs pop-up appears, as shown
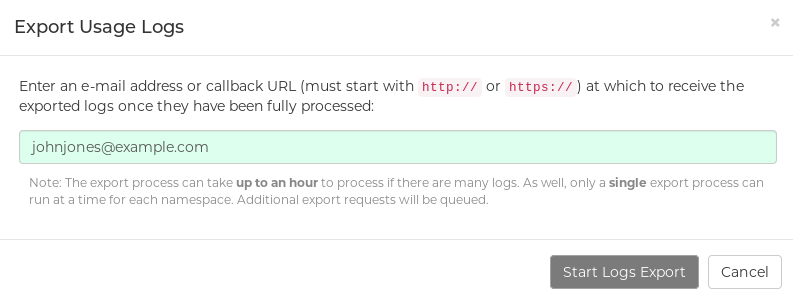
-
Enter an email address or callback URL to receive the exported log. For the callback URL, you can use a URL to a specified domain, for example, <webhook.site>.
-
Select Confirm to start the process for gather the selected log entries. Depending on the amount of logging data being gathered, this can take anywhere from a few minutes to several hours to complete.
-
When the log export is completed, the one of following two events happens:
-
An email is received, alerting you to the available of your requested exported log entries.
-
A successful status of your log export request from the webhook URL is returned. Additionally, a link to the exported data is made available for you to delete to download the logs.
-
Expose Prometheus metrics for Red Hat Quay
Expose Prometheus metrics from standalone and Operator Red Hat Quay deployments and configure Prometheus and DNS for scraping.
Prometheus and Grafana metrics under Project Quay
Project Quay exports a Prometheus- and Grafana-compatible metrics endpoint on each instance so that you can monitor and alert on registry activity.
Standalone Project Quay
To expose Prometheus metrics for a standalone Project Quay deployment, you can publish port 9091 when you start the Quay container.
-
When using
podman runto start theQuaycontainer, expose the metrics port9091:$ sudo podman run -d --rm -p 80:8080 -p 443:8443 -p 9091:9091\ --name=quay \ -v $QUAY/config:/conf/stack:Z \ -v $QUAY/storage:/datastorage:Z \ {productrepo}/{quayimage}:{productminv} -
Verify that the metrics are available:
$ curl quay.example.com:9091/metrics
Project Quay Operator
To access Prometheus metrics for an Operator-managed Project Quay deployment, you can use the cluster IP of the quay-metrics service.
-
Determine the cluster IP for the
quay-metricsservice:$ oc get services -n quay-enterprise NAME TYPE CLUSTER-IP EXTERNAL-IP PORT(S) AGE example-registry-clair-app ClusterIP 172.30.61.161 <none> 80/TCP,8089/TCP 18h example-registry-clair-postgres ClusterIP 172.30.122.136 <none> 5432/TCP 18h example-registry-quay-app ClusterIP 172.30.72.79 <none> 443/TCP,80/TCP,8081/TCP,55443/TCP 18h example-registry-quay-config-editor ClusterIP 172.30.185.61 <none> 80/TCP 18h example-registry-quay-database ClusterIP 172.30.114.192 <none> 5432/TCP 18h example-registry-quay-metrics ClusterIP 172.30.37.76 <none> 9091/TCP 18h example-registry-quay-redis ClusterIP 172.30.157.248 <none> 6379/TCP 18h -
Connect to your cluster and access the metrics using the cluster IP and port for the
quay-metricsservice:$ oc debug node/master-0 sh-4.4# curl 172.30.37.76:9091/metrics # HELP go_gc_duration_seconds A summary of the pause duration of garbage collection cycles. # TYPE go_gc_duration_seconds summary go_gc_duration_seconds{quantile="0"} 4.0447e-05 go_gc_duration_seconds{quantile="0.25"} 6.2203e-05 ...
Setting up Prometheus to consume metrics
To allow Prometheus to scrape metrics from every Project Quay instance in a cluster, you can publish the instances under a single DNS name that Prometheus can resolve.
DNS configuration under Kubernetes
To provide a DNS entry for Prometheus on Kubernetes, you can configure a simple Kubernetes service that resolves to your Project Quay instances.
DNS configuration for a manual cluster
To manage a Prometheus DNS record outside Kubernetes, you can use SkyDNS with an etcd cluster to track Project Quay instance addresses.
SkyDNS can run on an etcd cluster. Entries for each Project Quay instance in the cluster can be added and removed in the etcd store. SkyDNS regularly reads them from there and updates the list of Project Quay instances in the DNS record accordingly.
Project Quay garbage collection metrics
Use these metrics to track how often Project Quay garbage collection workers run and how many namespaces, repositories, and blobs they remove.
| Metric name | Description |
|---|---|
quay_gc_iterations_total |
Number of iterations by the GCWorker |
quay_gc_namespaces_purged_total |
Number of namespaces purged by the NamespaceGCWorker |
quay_gc_repos_purged_total |
Number of repositories purged by the RepositoryGCWorker or NamespaceGCWorker |
quay_gc_storage_blobs_deleted_total |
Number of storage blobs deleted |
# TYPE quay_gc_iterations_created gauge
quay_gc_iterations_created{host="example-registry-quay-app-6df87f7b66-9tfn6",instance="",job="quay",pid="208",process_name="secscan:application"} 1.6317823190189714e+09
...
# HELP quay_gc_iterations_total number of iterations by the GCWorker
# TYPE quay_gc_iterations_total counter
quay_gc_iterations_total{host="example-registry-quay-app-6df87f7b66-9tfn6",instance="",job="quay",pid="208",process_name="secscan:application"} 0
...
# TYPE quay_gc_namespaces_purged_created gauge
quay_gc_namespaces_purged_created{host="example-registry-quay-app-6df87f7b66-9tfn6",instance="",job="quay",pid="208",process_name="secscan:application"} 1.6317823190189433e+09
...
# HELP quay_gc_namespaces_purged_total number of namespaces purged by the NamespaceGCWorker
# TYPE quay_gc_namespaces_purged_total counter
quay_gc_namespaces_purged_total{host="example-registry-quay-app-6df87f7b66-9tfn6",instance="",job="quay",pid="208",process_name="secscan:application"} 0
....
# TYPE quay_gc_repos_purged_created gauge
quay_gc_repos_purged_created{host="example-registry-quay-app-6df87f7b66-9tfn6",instance="",job="quay",pid="208",process_name="secscan:application"} 1.631782319018925e+09
...
# HELP quay_gc_repos_purged_total number of repositories purged by the RepositoryGCWorker or NamespaceGCWorker
# TYPE quay_gc_repos_purged_total counter
quay_gc_repos_purged_total{host="example-registry-quay-app-6df87f7b66-9tfn6",instance="",job="quay",pid="208",process_name="secscan:application"} 0
...
# TYPE quay_gc_storage_blobs_deleted_created gauge
quay_gc_storage_blobs_deleted_created{host="example-registry-quay-app-6df87f7b66-9tfn6",instance="",job="quay",pid="208",process_name="secscan:application"} 1.6317823190189059e+09
...
# HELP quay_gc_storage_blobs_deleted_total number of storage blobs deleted
# TYPE quay_gc_storage_blobs_deleted_total counter
quay_gc_storage_blobs_deleted_total{host="example-registry-quay-app-6df87f7b66-9tfn6",instance="",job="quay",pid="208",process_name="secscan:application"} 0
...Understand Red Hat Quay Prometheus metrics
Review Prometheus metrics for registry queues, garbage collection, push and pull activity, and authentication.
Use these general registry statistics metrics to track how large a Project Quay deployment has grown, including users, robots, organizations, repositories, and unscanned images.
| Metric name | Description |
|---|---|
quay_user_rows |
Number of users in the database |
quay_robot_rows |
Number of robot accounts in the database |
quay_org_rows |
Number of organizations in the database |
quay_repository_rows |
Number of repositories in the database |
quay_security_scanning_unscanned_images_remaining_total |
Number of images that are not scanned by the latest security scanner |
# HELP quay_user_rows number of users in the database
# TYPE quay_user_rows gauge
quay_user_rows{host="example-registry-quay-app-6df87f7b66-9tfn6",instance="",job="quay",pid="65",process_name="globalpromstats.py"} 3
# HELP quay_robot_rows number of robot accounts in the database
# TYPE quay_robot_rows gauge
quay_robot_rows{host="example-registry-quay-app-6df87f7b66-9tfn6",instance="",job="quay",pid="65",process_name="globalpromstats.py"} 2
# HELP quay_org_rows number of organizations in the database
# TYPE quay_org_rows gauge
quay_org_rows{host="example-registry-quay-app-6df87f7b66-9tfn6",instance="",job="quay",pid="65",process_name="globalpromstats.py"} 2
# HELP quay_repository_rows number of repositories in the database
# TYPE quay_repository_rows gauge
quay_repository_rows{host="example-registry-quay-app-6df87f7b66-9tfn6",instance="",job="quay",pid="65",process_name="globalpromstats.py"} 4
# HELP quay_security_scanning_unscanned_images_remaining number of images that are not scanned by the latest security scanner
# TYPE quay_security_scanning_unscanned_images_remaining gauge
quay_security_scanning_unscanned_images_remaining{host="example-registry-quay-app-6df87f7b66-9tfn6",instance="",job="quay",pid="208",process_name="secscan:application"} 5Use these queue items metrics to monitor the work queues that Project Quay uses for exports, garbage collection, notifications, builds, and storage replication.
| Metric name | Description |
|---|---|
quay_queue_items_available |
Number of items in a specific queue |
quay_queue_items_locked |
Number of items that are running |
quay_queue_items_available_unlocked |
Number of items that are waiting to be processed |
Metric labels:
queue_name-
The name of the queue. One of:
exportactionlogs-
Queued requests to export action logs. These logs are then processed and put in storage. A link is then sent to the requester by email.
namespacegc-
Queued namespaces to be garbage collected.
notification-
Queue for repository notifications to be sent out.
repositorygc-
Queued repositories to be garbage collected.
secscanv4-
Notification queue specific for Clair V4.
dockerfilebuild-
Queue for Project Quay container image builds.
imagestoragereplication-
Queued blob to be replicated across multiple storages.
chunk_cleanup-
Queued blob segments that need to be deleted. This is only used by some storage implementations, for example, Swift.
For example, the queue labeled repositorygc contains the repositories marked for deletion by the repository garbage collection worker. For metrics with a queue_name label of repositorygc:
-
quay_queue_items_lockedis the number of repositories currently being deleted. -
quay_queue_items_available_unlockedis the number of repositories waiting to get processed by the worker.
# HELP quay_queue_items_available number of queue items that have not expired
# TYPE quay_queue_items_available gauge
quay_queue_items_available{host="example-registry-quay-app-6df87f7b66-9tfn6",instance="",job="quay",pid="63",process_name="exportactionlogsworker.py",queue_name="exportactionlogs"} 0
...
# HELP quay_queue_items_available_unlocked number of queue items that have not expired and are not locked
# TYPE quay_queue_items_available_unlocked gauge
quay_queue_items_available_unlocked{host="example-registry-quay-app-6df87f7b66-9tfn6",instance="",job="quay",pid="63",process_name="exportactionlogsworker.py",queue_name="exportactionlogs"} 0
...
# HELP quay_queue_items_locked number of queue items that have been acquired
# TYPE quay_queue_items_locked gauge
quay_queue_items_locked{host="example-registry-quay-app-6df87f7b66-9tfn6",instance="",job="quay",pid="63",process_name="exportactionlogsworker.py",queue_name="exportactionlogs"} 0Use these garbage collection metrics to track how often garbage collection workers run and how many namespaces, repositories, and blobs they remove.
| Metric name | Description |
|---|---|
quay_gc_iterations_total |
Number of iterations by the GCWorker |
quay_gc_namespaces_purged_total |
Number of namespaces purged by the NamespaceGCWorker |
quay_gc_repos_purged_total |
Number of repositories purged by the RepositoryGCWorker or NamespaceGCWorker |
quay_gc_storage_blobs_deleted_total |
Number of storage blobs deleted |
# TYPE quay_gc_iterations_created gauge
quay_gc_iterations_created{host="example-registry-quay-app-6df87f7b66-9tfn6",instance="",job="quay",pid="208",process_name="secscan:application"} 1.6317823190189714e+09
...
# HELP quay_gc_iterations_total number of iterations by the GCWorker
# TYPE quay_gc_iterations_total counter
quay_gc_iterations_total{host="example-registry-quay-app-6df87f7b66-9tfn6",instance="",job="quay",pid="208",process_name="secscan:application"} 0
...
# TYPE quay_gc_namespaces_purged_created gauge
quay_gc_namespaces_purged_created{host="example-registry-quay-app-6df87f7b66-9tfn6",instance="",job="quay",pid="208",process_name="secscan:application"} 1.6317823190189433e+09
...
# HELP quay_gc_namespaces_purged_total number of namespaces purged by the NamespaceGCWorker
# TYPE quay_gc_namespaces_purged_total counter
quay_gc_namespaces_purged_total{host="example-registry-quay-app-6df87f7b66-9tfn6",instance="",job="quay",pid="208",process_name="secscan:application"} 0
....
# TYPE quay_gc_repos_purged_created gauge
quay_gc_repos_purged_created{host="example-registry-quay-app-6df87f7b66-9tfn6",instance="",job="quay",pid="208",process_name="secscan:application"} 1.631782319018925e+09
...
# HELP quay_gc_repos_purged_total number of repositories purged by the RepositoryGCWorker or NamespaceGCWorker
# TYPE quay_gc_repos_purged_total counter
quay_gc_repos_purged_total{host="example-registry-quay-app-6df87f7b66-9tfn6",instance="",job="quay",pid="208",process_name="secscan:application"} 0
...
# TYPE quay_gc_storage_blobs_deleted_created gauge
quay_gc_storage_blobs_deleted_created{host="example-registry-quay-app-6df87f7b66-9tfn6",instance="",job="quay",pid="208",process_name="secscan:application"} 1.6317823190189059e+09
...
# HELP quay_gc_storage_blobs_deleted_total number of storage blobs deleted
# TYPE quay_gc_storage_blobs_deleted_total counter
quay_gc_storage_blobs_deleted_total{host="example-registry-quay-app-6df87f7b66-9tfn6",instance="",job="quay",pid="208",process_name="secscan:application"} 0
...Use these multipart upload metrics to monitor blob uploads to object storage and to help identify failures when Project Quay cannot complete an upload.
The multipart uploads metrics show the number of blob uploads to storage (S3, Rados, GoogleCloudStorage, RHOCS).
| Metric name | Description |
|---|---|
quay_multipart_uploads_started_total |
Number of multipart uploads to Project Quay storage that started |
quay_multipart_uploads_completed_total |
Number of multipart uploads to Project Quay storage that completed |
# TYPE quay_multipart_uploads_completed_created gauge
quay_multipart_uploads_completed_created{host="example-registry-quay-app-6df87f7b66-9tfn6",instance="",job="quay",pid="208",process_name="secscan:application"} 1.6317823308284895e+09
...
# HELP quay_multipart_uploads_completed_total number of multipart uploads to Quay storage that completed
# TYPE quay_multipart_uploads_completed_total counter
quay_multipart_uploads_completed_total{host="example-registry-quay-app-6df87f7b66-9tfn6",instance="",job="quay",pid="208",process_name="secscan:application"} 0
# TYPE quay_multipart_uploads_started_created gauge
quay_multipart_uploads_started_created{host="example-registry-quay-app-6df87f7b66-9tfn6",instance="",job="quay",pid="208",process_name="secscan:application"} 1.6317823308284352e+09
...
# HELP quay_multipart_uploads_started_total number of multipart uploads to Quay storage that started
# TYPE quay_multipart_uploads_started_total counter
quay_multipart_uploads_started_total{host="example-registry-quay-app-6df87f7b66-9tfn6",instance="",job="quay",pid="208",process_name="secscan:application"} 0
...Use these image push and pull metrics to track how many images and bytes clients upload to or download from the Project Quay registry.
| Metric name | Description |
|---|---|
quay_registry_image_pulls_total |
The number of images downloaded from the registry. |
Metric labels:
protocol-
The registry protocol used (should always be
v2). ref-
Reference used to pull - tag, manifest.
status-
HTTP return code of the request.
| Metric name | Description |
|---|---|
quay_registry_image_pulled_estimated_bytes_total |
The number of bytes downloaded from the registry. |
Metric labels:
protocol-
The registry protocol used (should always be
v2).
| Metric name | Description |
|---|---|
quay_registry_image_pushes_total |
The number of images uploaded to the registry. |
Metric labels:
protocol-
The registry protocol used (should always be
v2). pstatus-
HTTP return code of the request.
pmedia_type-
The uploaded manifest type.
| Metric name | Description |
|---|---|
quay_registry_image_pushed_bytes_total |
The number of bytes uploaded to the registry. |
# HELP quay_registry_image_pushed_bytes_total number of bytes pushed to the registry
# TYPE quay_registry_image_pushed_bytes_total counter
quay_registry_image_pushed_bytes_total{host="example-registry-quay-app-6df87f7b66-9tfn6",instance="",job="quay",pid="221",process_name="registry:application"} 0
...Use these authentication metrics to count registry and API authentication requests by type and by whether each request succeeded or failed.
| Metric name | Description |
|---|---|
quay_authentication_attempts_total |
Number of authentication attempts across the registry and API |
Metric labels:
auth_kind-
The type of authentication used, including:
-
basic -
oauth -
credentials
-
success-
trueorfalse.
# TYPE quay_authentication_attempts_created gauge
quay_authentication_attempts_created{auth_kind="basic",host="example-registry-quay-app-6df87f7b66-9tfn6",instance="",job="quay",pid="221",process_name="registry:application",success="True"} 1.6317843039374158e+09
...
# HELP quay_authentication_attempts_total number of authentication attempts across the registry and API
# TYPE quay_authentication_attempts_total counter
quay_authentication_attempts_total{auth_kind="basic",host="example-registry-quay-app-6df87f7b66-9tfn6",instance="",job="quay",pid="221",process_name="registry:application",success="True"} 2
...Monitor the registry from the OpenShift console
Monitor Red Hat Quay health and alerts from the OpenShift web console.
Project Quay provides monitoring and alerting features in the OpenShift Container Platform console for instances deployed by the Operator. You can use Grafana dashboards, individual metrics, and alerts to monitor registry performance and receive notifications when Quay pods restart frequently.
|
Note
|
To enable the monitoring features, you must select All namespaces on the cluster as the installation mode when installing the Project Quay Operator. |
On the OpenShift Container Platform console, click Monitoring → Dashboards and search for the dashboard of your desired Project Quay registry instance:
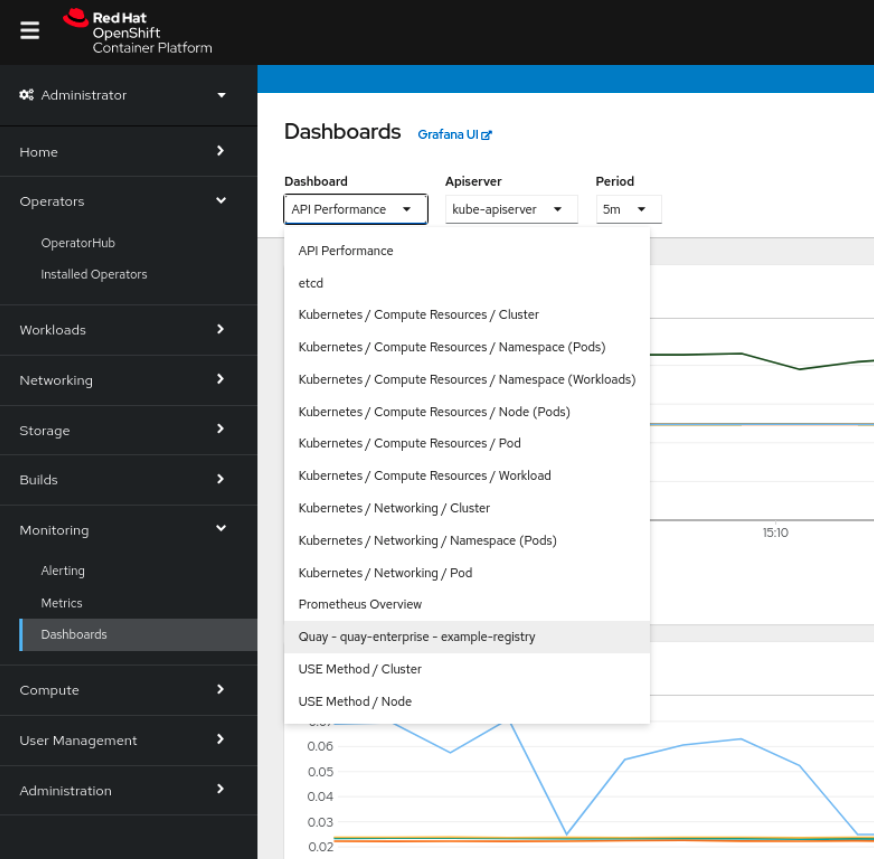
The dashboard shows various statistics including the following:
-
The number of Organizations, Repositories, Users, and Robot accounts
-
CPU Usage
-
Max memory usage
-
Rates of pulls and pushes, and authentication requests
-
API request rate
-
Latencies
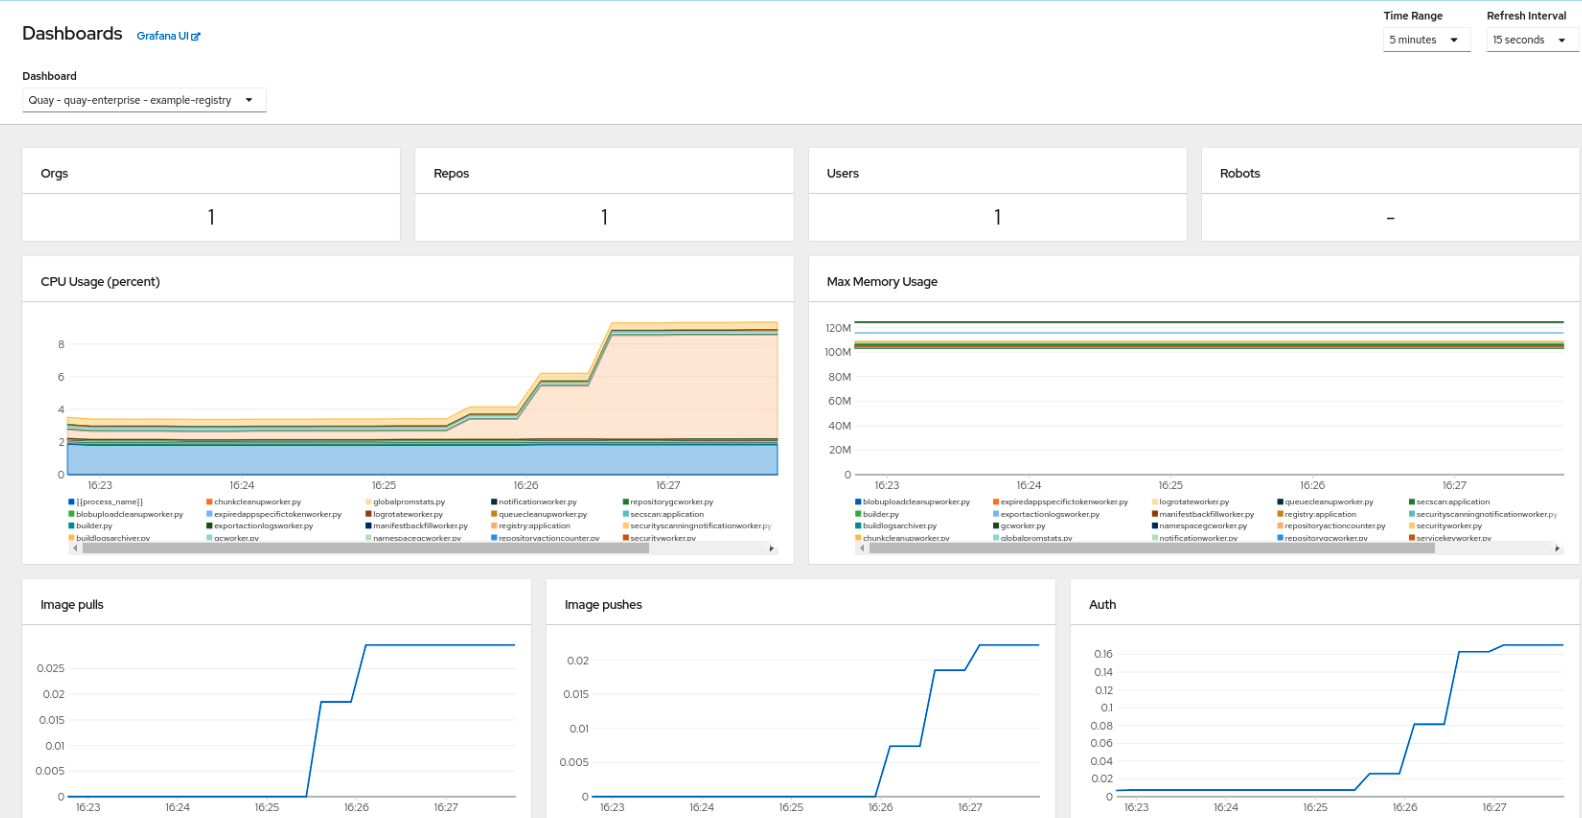
You can see the underlying metrics behind the Project Quay dashboard by accessing Monitoring → Metrics in the UI. In the Expression field, enter the text quay_ to see the list of metrics available:
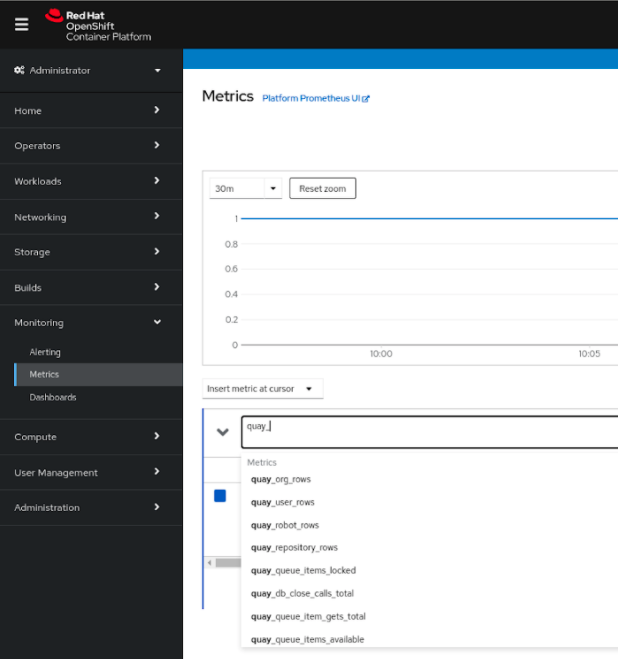
Select a sample metric, for example, quay_org_rows:
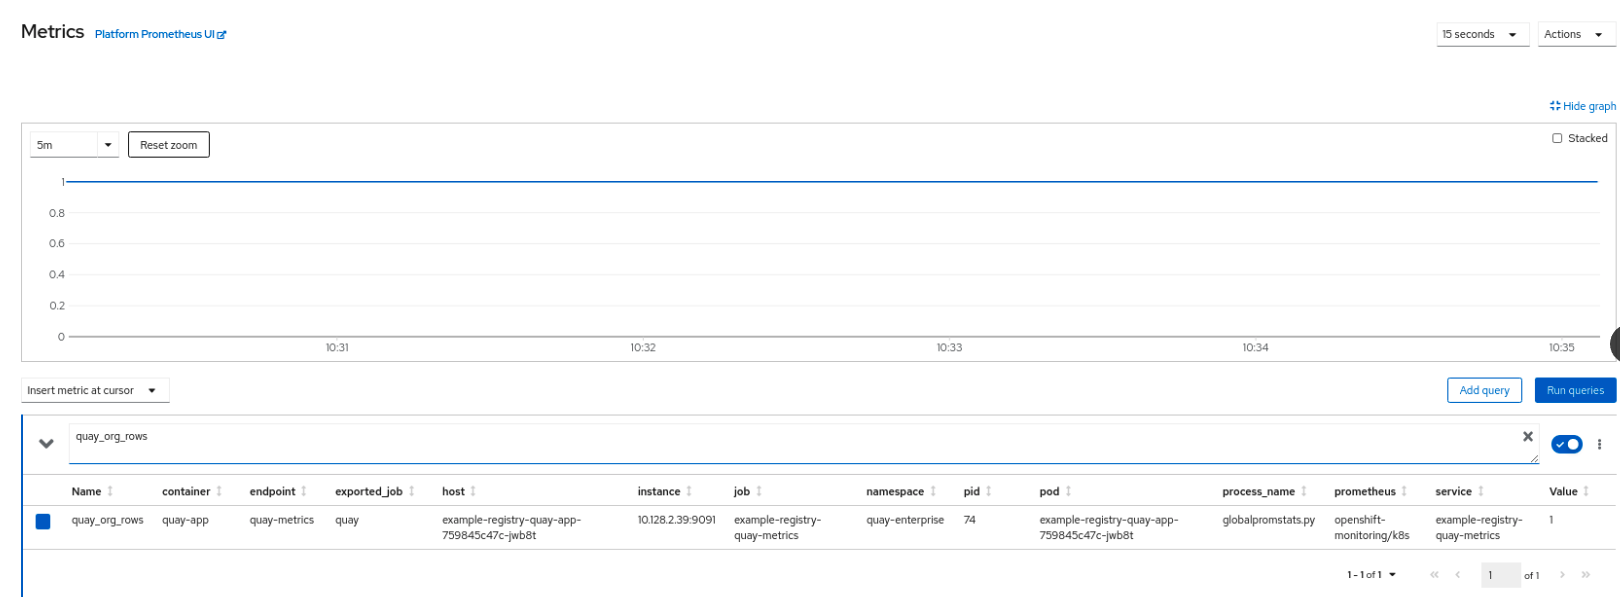
This metric shows the number of organizations in the registry. It is also directly surfaced in the dashboard.
An alert is raised if the Quay pods restart too often. The alert can be configured by accessing the Alerting rules tab from Monitoring → Alerting in the console UI and searching for the Quay-specific alert:
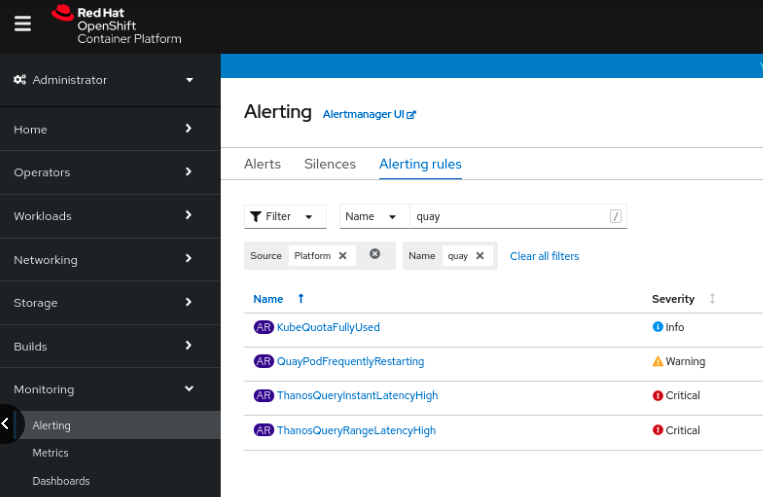
Select the QuayPodFrequentlyRestarting rule detail to configure the alert:
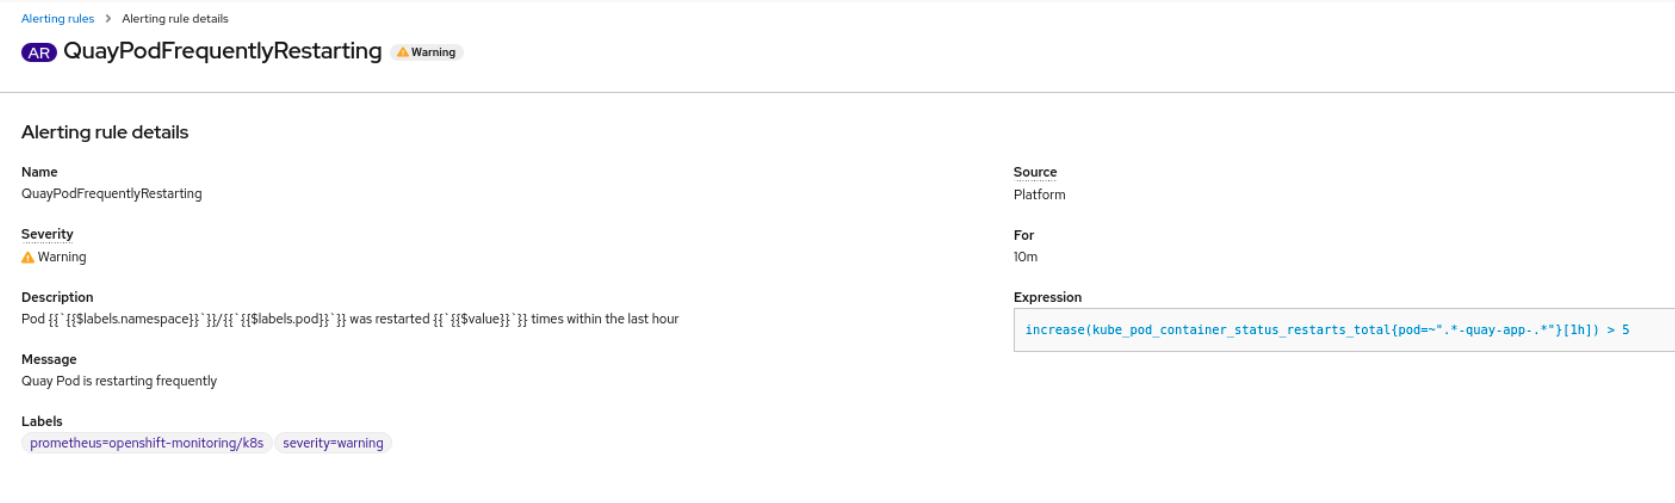
Verify deployment health status
Verify deployment health by using health-check endpoints on Red Hat Quay.
Use Project Quay health check endpoints to monitor instance, end-to-end, and warning status before issues become critical.
Health checks help ensure that everything is working correctly, and can be used to identify potential issues before they become critical problems. By monitoring the health of a system, Project Quay administrators can address abnormalities or potential failures for things like geo-replication deployments, Operator deployments, standalone Project Quay deployments, object storage issues, and so on. Performing health checks can also help reduce the likelihood of encountering troubleshooting scenarios.
|
Important
|
Links contained herein to any external website(s) are provided for convenience only. Red Hat has not reviewed the links and is not responsible for the content or its availability. The inclusion of any link to an external website does not imply endorsement by Red Hat of the website or its entities, products, or services. You agree that Red Hat is not responsible or liable for any loss or expenses that may result due to your use of (or reliance on) the external site or content. |
Project Quay has several health check endpoints. The following table shows you the health check, a description, an endpoint, and an example output.
| Health check | Description | Endpoint | Example output |
|---|---|---|---|
|
The When |
Default: With Preferred storage unavailable: |
|
|
The By default, only the preferred storage engine is validated. When |
All services healthy: Storage engine unavailable (superuser view with |
|
|
The |
|
|
Note
|
Superusers and sessions with |
To check the health of your Project Quay instance and view service status, you can navigate to the health/instance endpoint in your browser. The endpoint returns JSON with status_code 200 for healthy or 503 when your deployment has an issue.
-
On your web browser, navigate to
https://{quay-ip-endpoint}/health/instance. -
You are taken to the health instance page, which returns information like the following:
{"data":{"services":{"auth":true,"database":true,"disk_space":true,"registry_gunicorn":true,"service_key":true,"web_gunicorn":true}},"status_code":200}For Project Quay,
"status_code": 200means that the instance is healthy. Conversely, if you receive"status_code": 503, your deployment has an issue.
Review Clair vulnerability scan results
Review Clair vulnerability scan results and severity mapping in the UI or API before promoting container images.
To review the results of a Clair security scan, you can open the Security Scanner page for a tag in the Project Quay UI. You can inspect detected CVEs and check available remediation options.
-
For standalone Project Quay deployments, you have deployed Clair. For more information, see "Setting up Clair on standalone Project Quay deployments"
-
Navigate to a repository and click Tags in the navigation pane. This page shows the results of the security scan.
-
To reveal more information about multi-architecture images, click See Child Manifests to see the list of manifests in extended view.
-
Click a relevant link under See Child Manifests, for example, 1 Unknown to be redirected to the Security Scanner page.
-
The Security Scanner page provides information for the tag, such as which CVEs the image is susceptible to, and what remediation options you might have available.
NoteImage scanning only lists vulnerabilities found by Clair security scanner. What users do about the vulnerabilities are uncovered is up to said user.
To view Clair security scan results for a repository manifest in Project Quay, you can call the manifest security API endpoint with an OAuth access token.
-
You have created an OAuth access token.
-
Use the
GET /api/v1/repository/{repository}/manifest/{manifestref}/securityendpoint to retrieve security information about a specific manifest in a repository. For example:$ curl -X GET \ -H "Authorization: Bearer <bearer_token>" \ -H "Accept: application/json" \ "https://quay-server.example.com/api/v1/repository/<namespace>/<repository>/manifest/<manifest_digest>/security?vulnerabilities=<true_or_false>"Example output{"status": "queued", "data": null}
Clair maps severity strings from multiple security databases to a common set of values in Project Quay. You can use the mapped severities to assess vulnerabilities consistently.
Clair alerts users with the following severity strings:
-
Unknown
-
Negligible
-
Low
-
Medium
-
High
-
Critical
These severity strings are similar to the strings found within the relevant security database.
The Alpine SecDB database does not provide severity information. All vulnerability severities are Unknown.
| Alpine Severity | Clair Severity |
|---|---|
* |
Unknown |
The AWS UpdateInfo database provides severity information.
| AWS Severity | Clair Severity |
|---|---|
low |
Low |
medium |
Medium |
important |
High |
critical |
Critical |
The Debian Oval database provides severity information.
| Debian Severity | Clair Severity |
|---|---|
* |
Unknown |
Unimportant |
Low |
Low |
Medium |
Medium |
High |
High |
Critical |
The Oracle Oval database provides severity information.
| Oracle Severity | Clair Severity |
|---|---|
N/A |
Unknown |
LOW |
Low |
MODERATE |
Medium |
IMPORTANT |
High |
CRITICAL |
Critical |
The RHEL Oval database provides severity information.
| RHEL Severity | Clair Severity |
|---|---|
None |
Unknown |
Low |
Low |
Moderate |
Medium |
Important |
High |
Critical |
Critical |
The SUSE Oval database provides severity information.
| Severity | Clair Severity |
|---|---|
None |
Unknown |
Low |
Low |
Moderate |
Medium |
Important |
High |
Critical |
Critical |
The Ubuntu Oval database provides severity information.
| Severity | Clair Severity |
|---|---|
Untriaged |
Unknown |
Negligible |
Negligible |
Low |
Low |
Medium |
Medium |
High |
High |
Critical |
Critical |
The following table shows how CVSSv3 base scores map to Clair severities:
| Base Score | Clair Severity |
|---|---|
0.0 |
Negligible |
0.1-3.9 |
Low |
4.0-6.9 |
Medium |
7.0-8.9 |
High |
9.0-10.0 |
Critical |
The following table shows how CVSSv2 base scores map to Clair severities:
| Base Score | Clair Severity |
|---|---|
0.0-3.9 |
Low |
4.0-6.9 |
Medium |
7.0-10 |
High |
Integrate
Connect OpenShift to Quay with the Quay Bridge Operator
Install and configure the Quay Bridge Operator, create OAuth secrets, and deploy a QuayIntegration custom resource on OpenShift.
Quay Bridge Operator features
The Quay Bridge Operator duplicates integrated OpenShift Container Platform registry features in Project Quay and synchronizes namespaces, image streams, and robot accounts between your clusters.
The features enabled with the Quay Bridge Operator include:
-
Synchronizing OpenShift Container Platform namespaces as Project Quay organizations.
-
Creating robot accounts for each default namespace service account.
-
Creating secrets for each created robot account, and associating each robot secret to a service account as
MountableandImage Pull Secret. -
Synchronizing OpenShift Container Platform image streams as Project Quay repositories.
-
Automatically rewriting new builds making use of image streams to output to Project Quay.
-
Automatically importing an image stream tag after a build completes.
Setting up Project Quay for the Quay Bridge Operator
To enable the Quay Bridge Operator to communicate with your Project Quay registry, you can create a dedicated organization and generate an OAuth token with the required permissions.
-
You are logged in to Project Quay as a user with administrative privileges.
-
Log in to Project Quay through the web UI.
-
Select the organization for which you configure the external application.
-
On the navigation pane, select Applications.
-
Select Create New Application and enter a name for the new application, for example,
openshift. -
On the OAuth Applications page, select your application, for example,
openshift. -
On the navigation pane, select Generate Token.
-
Select the following fields:
-
Administer Organization
-
Administer Repositories
-
Create Repositories
-
View all visible repositories
-
Read/Write to any accessible repositories
-
Super User Access
-
Administer User
-
Read User Information
-
-
Review the assigned permissions.
-
Select Authorize Application and then confirm the authorization by selecting Authorize Application.
-
Save the generated access token.
ImportantProject Quay does not offer token management. You cannot list tokens, delete tokens, or modify tokens. The generated access token is only shown once and cannot be re-obtained after closing the page.
Installing the Quay Bridge Operator on OpenShift Container Platform
To enable the Quay Bridge Operator to synchronize your OpenShift Container Platform registry with Project Quay, you can install the operator from OperatorHub in the OpenShift Container Platform web console.
|
Warning
|
The Quay Bridge Operator integrates OpenShift Container Platform resources, such as |
-
You have configured Project Quay and obtained an OAuth access token.
-
You are logged in to OpenShift Container Platform as a user with administrative privileges.
-
Open the Administrator perspective of the web console and navigate to Operators → OperatorHub on the navigation pane.
-
Search for
Quay Bridge Operator, click the Quay Bridge Operator title, and then click Install. -
Select the version to install, for example, stable-{producty}, and then click Install.
-
Click View Operator when the installation finishes to go to the Quay Bridge Operator’s Details page. Alternatively, you can click Installed Operators → Red Hat Quay Bridge Operator to go to the Details page.
Creating an OpenShift Container Platform secret for the OAuth token
To enable the Quay Bridge Operator to communicate with your Project Quay deployment, you can create a secret in OpenShift Container Platform that stores the OAuth access token.
-
You have configured Project Quay and obtained an access token.
-
You have deployed the Quay Bridge Operator on OpenShift Container Platform.
-
You have installed the OpenShift CLI (
oc).
-
Create a secret that contains the access token in the
openshift-operatorsnamespace:$ oc create secret -n openshift-operators generic <secret_name> --from-literal=token=<access_token><secret_name>specifies the name of the secret to create, for example,quay-bridge-operator-token.<access_token>specifies the access token generated during "Setting up Project Quay for the Quay Bridge Operator".
Creating the QuayIntegration custom resource
The QuayIntegration custom resource connects your OpenShift Container Platform cluster to a Project Quay registry and defines the configuration that the Quay Bridge Operator uses to synchronize projects, organizations, and robot accounts.
The QuayIntegration custom resource can be created by using the OpenShift Container Platform web console, or from the command-line interface.
Creating the QuayIntegration custom resource using the CLI
To create the QuayIntegration custom resource from the command line, you can define the configuration in a YAML file and apply it using the oc create command.
-
You have installed the Quay Bridge Operator on OpenShift Container Platform.
-
You have created a secret containing the OAuth access token in OpenShift Container Platform.
-
You have installed the OpenShift CLI (
oc).
-
Create a
quay-integration.yaml:$ touch quay-integration.yaml
-
Use the following configuration for a minimal deployment of the
QuayIntegrationcustom resource:apiVersion: quay.redhat.com/v1 kind: QuayIntegration metadata: name: example-quayintegration spec: clusterID: openshift credentialsSecret: namespace: openshift-operators name: quay-integration quayHostname: https://<QUAY_URL> insecureRegistry: falsewhere:
spec.clusterID-
Specifies the unique identifier for the OpenShift Container Platform cluster. This value is required and defaults to
openshift. spec.credentialsSecret-
Specifies the namespace and name of the secret containing the token that was previously created.
spec.quayHostname-
Specifies the hostname of your Project Quay instance.
spec.insecureRegistry-
Specifies whether Project Quay uses self signed certificates. When Project Quay uses self signed certificates, set the property to
insecureRegistry: true.
For a list of all configuration fields, see "`QuayIntegration` configuration fields".
-
Create the
QuayIntegrationcustom resource by entering the following command:$ oc create -f quay-integration.yaml
Creating the QuayIntegration custom resource using the web console
To create the QuayIntegration custom resource using the web console, you can use the Create Instance option from the Quay Bridge Operator operator details page and enter the required configuration fields.
After the QuayIntegration custom resource is created, your OpenShift Container Platform cluster is linked to your Project Quay instance. Organizations within your Project Quay registry should be created for the related namespace for the OpenShift Container Platform environment.
-
You have installed the Quay Bridge Operator on OpenShift Container Platform.
-
You have created a secret containing the OAuth access token in OpenShift Container Platform.
-
You are logged in to OpenShift Container Platform as a cluster administrator.
-
Open the Administrator perspective of the web console and navigate to Operators → Installed Operators.
-
Click Red Hat Quay Bridge Operator.
-
On the Details page of the Quay Bridge Operator, click Create Instance on the Quay Integration API card.
-
On the Create QuayIntegration page, enter the following required information in either Form view or YAML view:
-
Name: The name that refers to the
QuayIntegrationcustom resource object. -
Cluster ID: The ID associated with this cluster. This value should be unique across the entire ecosystem. Defaults to
openshiftif left unspecified. -
Credentials secret: Refers to the namespace and name of the secret containing the token that was previously created.
-
Quay hostname: The hostname of the Quay registry.
-
Using the Quay Bridge Operator
To verify that the Quay Bridge Operator synchronizes your OpenShift Container Platform projects with Project Quay, you can create a test project and confirm that organizations, robot accounts, and image repositories are created automatically.
-
You have installed the Project Quay Operator.
-
You have logged into OpenShift Container Platform as a cluster administrator.
-
You have logged into your Project Quay registry.
-
You have installed the Quay Bridge Operator.
-
You have configured the
QuayIntegrationcustom resource.
-
Enter the following command to create a new OpenShift Container Platform project called
e2e-demo:$ oc new-project e2e-demo -
After you have created a new project, a new Organization is created in Project Quay. Navigate to the Project Quay registry and confirm that you have created a new Organization named
openshift_e2e-demo.NoteThe
openshiftvalue of the Organization might be different if the clusterID in yourQuayIntegrationresource used a different value. -
On the Project Quay UI, click the name of the new Organization, for example, openshift_e2e-demo.
-
Click Robot Accounts in the navigation pane. As part of new project, the following Robot Accounts should have been created:
-
openshift_e2e-demo+deployer
-
openshift_e2e-demo+default
-
openshift_e2e-demo+builder
-
-
Enter the following command to confirm three secrets containing Docker configuration associated with the applicable Robot Accounts were created:
$ oc get secrets builder-quay-openshift deployer-quay-openshift default-quay-openshiftExample outputstevsmit@stevsmit ocp-quay $ oc get secrets builder-quay-openshift deployer-quay-openshift default-quay-openshift NAME TYPE DATA AGE builder-quay-openshift kubernetes.io/dockerconfigjson 1 77m deployer-quay-openshift kubernetes.io/dockerconfigjson 1 77m default-quay-openshift kubernetes.io/dockerconfigjson 1 77m -
Enter the following command to display detailed information about
builderServiceAccount (SA), including its secrets, token expiration, and associated roles and role bindings. This ensures that the project is integrated via the Quay Bridge Operator.$ oc describe sa builder default deployerExample output... Name: builder Namespace: e2e-demo Labels: <none> Annotations: <none> Image pull secrets: builder-dockercfg-12345 builder-quay-openshift Mountable secrets: builder-dockercfg-12345 builder-quay-openshift Tokens: builder-token-12345 Events: <none> ... -
Enter the following command to create and deploy a new application called
httpd-template:$ oc new-app --template=httpd-exampleExample output--> Deploying template "e2e-demo/httpd-example" to project e2e-demo ... --> Creating resources ... service "httpd-example" created route.route.openshift.io "httpd-example" created imagestream.image.openshift.io "httpd-example" created buildconfig.build.openshift.io "httpd-example" created deploymentconfig.apps.openshift.io "httpd-example" created --> Success Access your application via route 'httpd-example-e2e-demo.apps.quay-ocp.gcp.quaydev.org' Build scheduled, use 'oc logs -f buildconfig/httpd-example' to track its progress. Run 'oc status' to view your app.After running this command,
BuildConfig,ImageStream,Service,Route, andDeploymentConfigresources are created. When theImageStreamresource is created, an associated repository is created in Project Quay. -
The
ImageChangeTriggerfor theBuildConfigtriggers a new Build when the Apache HTTPD image, located in theopenshiftnamespace, is resolved. As the new Build is created, theMutatingWebhookConfigurationautomatically rewrites the output to point at Project Quay. You can confirm that the build is complete by querying the output field of the build by running the following command:$ oc get build httpd-example-1 --template='{{ .spec.output.to.name }}'Example outputexample-registry-quay-quay-enterprise.apps.quay-ocp.gcp.quaydev.org/openshift_e2e-demo/httpd-example:latest -
On the Project Quay UI, navigate to the
openshift_e2e-demoOrganization and select the httpd-example repository. -
Click Tags in the navigation pane and confirm that the
latesttag has been successfully pushed. -
Enter the following command to ensure that the latest tag has been resolved:
$ oc describe is httpd-exampleExample outputName: httpd-example Namespace: e2e-demo Created: 55 minutes ago Labels: app=httpd-example template=httpd-example Description: Keeps track of changes in the application image Annotations: openshift.io/generated-by=OpenShiftNewApp openshift.io/image.dockerRepositoryCheck=2023-10-02T17:56:45Z Image Repository: image-registry.openshift-image-registry.svc:5000/e2e-demo/httpd-example Image Lookup: local=false Unique Images: 0 Tags: 1 latest tagged from example-registry-quay-quay-enterprise.apps.quay-ocp.gcp.quaydev.org/openshift_e2e-demo/httpd-example:latest -
After the
ImageStreamis resolved, a new deployment should have been triggered. Enter the following command to generate a URL output:$ oc get route httpd-example --template='{{ .spec.host }}'Example outputhttpd-example-e2e-demo.apps.quay-ocp.gcp.quaydev.org -
Navigate to the URL. If a sample web page appears, the deployment was successful.
-
Enter the following command to delete the resources and clean up your Project Quay repository:
$ oc delete project e2e-demoNoteThe command waits until the project resources have been removed. This can be bypassed by adding the
--wait=falseto the above command -
After the command completes, navigate to your Project Quay repository and confirm that the
openshift_e2e-demoOrganization is no longer available.
Plan and enable image mirroring
To bring upstream images into Project Quay, you can review mirroring concepts and enable repository and organization mirroring. You can then create mirrors after mirroring is turned on.
Repository mirroring
With repository mirroring in Project Quay, you can copy images from an external registry into your cluster. You sync by repository or organization name and tag, set intervals, and filter architectures.
From a Project Quay registry with mirroring enabled, you can:
-
Choose a repository or organization from an external registry to mirror
-
Add credentials to access the external registry
-
Identify specific container image repository or organization names and tags to sync
-
Set intervals at which a repository or organization is synced
-
Check the current state of synchronization
-
Filter the architectures that are mirrored
Repository mirroring suits distinct registries that must share selected upstream content. You can configure mirroring in the Project Quay configuration file or by using the Project Quay API when you are ready to implement it.
Mirroring compared to geo-replication
Mirroring and geo-replication solve different distribution needs in Project Quay. Mirroring syncs selected repositories between separate registries; geo-replication shares one database and replicates blob storage across regions.
For example, a geo-replicated Project Quay registry can use two different blob storage endpoints.
The primary use cases for geo-replication include the following:
-
Speeding up access to the binary blobs for geographically dispersed setups
-
Guaranteeing that the image content is the same across regions
Mirroring synchronizes selected repositories, or subsets of repositories, from one registry to another. The registries are distinct, with each registry having a separate database and separate image storage.
The primary use cases for mirroring include the following:
-
Independent registry deployments in different data centers or regions, where a certain subset of the overall content is supposed to be shared across the data centers and regions
-
Automatic synchronization or mirroring of selected (allowlisted) upstream repositories from external registries into a local Project Quay deployment
|
Note
|
Mirroring and geo-replication can be used simultaneously. |
| Feature / Capability | Geo-replication | Mirroring |
|---|---|---|
What is the feature designed to do? |
A shared, global registry |
Distinct, different registries |
What happens if replication or mirroring has not been completed yet? |
The remote copy is used (slower) |
No image is served |
Is access to all storage backends in both regions required? |
Yes (all Project Quay nodes) |
No (distinct storage) |
Can users push images from both sites to the same repository or organization? |
Yes |
No |
Is all registry content and configuration identical across all regions (shared database)? |
Yes |
No |
Can users select individual namespaces or repositories to be mirrored? |
No |
Yes |
Can users apply filters to synchronization rules? |
No |
Yes |
Are individual / different role-based access control configurations allowed in each region |
No |
Yes |
Using mirroring
Repository mirroring in Project Quay syncs images for a repository or organization from an external registry. Filters, robot accounts, and sync intervals control what is copied and when.
The following list shows features and limitations of Project Quay mirroring for a repository or organization.
|
Note
|
The word entity is used in the mirroring documentation to refer to either a repository or organization. |
-
With mirroring, you can mirror an entire entity or selectively limit which images are synced. Filters can be based on a comma-separated list of tags, a range of tags, or other means of identifying tags through Unix shell-style wildcards.
-
After you set mirroring for an entity, you cannot manually add other images to that entity.
-
Because the mirrored entity is based on the entity and the tags that you set, the entity holds only the content represented by the entity and tag pair. For example, if you change the tag so that some images in the entity no longer match, those images are deleted.
-
Only the designated robot can push images to a mirrored entity, superseding any role-based access control permissions set on the entity.
-
Mirroring can be configured to roll back on failure, or to run on a best-effort basis.
-
With a mirrored entity, a user with read permissions can pull images from the entity but cannot push images to the entity.
-
Changing settings on your mirrored entity can be performed in the Project Quay user interface.
-
Images are synced at set intervals, but can also be synced on demand.
-
In the current implementation of organization-level repository mirroring, Project Quay does not replicate deletions from the source registry. If any of the following entities are removed or absent in the upstream source, they persist in the local Project Quay mirror:
-
Source namespaces or organizations and their repositories. If the entire upstream source namespace (for example, a Harbor project or Project Quay organization) is removed, all previously mirrored repositories and their content remain in the local mirror.
-
Individual repositories. Repositories previously discovered and synced continue to be tracked and served even if removed from the upstream source.
-
Image tags. Tags that existed at the time of the last sync persist in the mirror even if deleted upstream.
-
Referrers. OCI Referrers API artifacts, such as Cosign signatures and SBOMs, are not currently mirrored. When present locally, they are not cleaned up automatically.
-
-
The downstream mirror acts as a cumulative archive. If an upstream namespace is emptied or its repositories and tags are removed, the mirror continues to serve the last successfully synchronized versions of those objects. This might lead to higher storage consumption in the mirror than in the source.
NoteThis behavior differs from repository-level mirroring, which automatically removes local tags that are no longer present in the source registry.
Manual deletion by using the Project Quay UI or API is required to remove these entities from the mirror. A future release can introduce a configurable option to automatically delete absent items, including organizations, repositories, tags, referrers, and manifest list children from the local mirror.
Enabling repository mirroring for Project Quay
To enable repository mirroring in Project Quay, you can set FEATURE_REPO_MIRROR to true in your config.yaml file and restart the registry.
-
To enable mirroring for repositories, set
FEATURE_REPO_MIRROR: truein yourconfig.yamlfile:# ... FEATURE_REPO_MIRROR: true REPO_MIRROR_INTERVAL: 30 REPO_MIRROR_SERVER_HOSTNAME: "openshift-quay-service" REPO_MIRROR_TLS_VERIFY: true REPO_MIRROR_ROLLBACK: false FEATURE_SPARSE_INDEX: true REPO_MIRROR_MAX_MANIFEST_LIST_SIZE: 10485760 REPO_MIRROR_MAX_MANIFEST_ENTRIES: 1000 # ...where:
FEATURE_REPO_MIRROR-
Specifies whether to enable or disable repository-level mirroring.
REPO_MIRROR_INTERVAL-
Specifies the worker processing interval in seconds.
REPO_MIRROR_SERVER_HOSTNAME-
Specifies the hostname of the server hosting the mirrored repository.
REPO_MIRROR_TLS_VERIFY-
Specifies whether to verify the TLS certificate of the mirrored repository.
REPO_MIRROR_ROLLBACK-
Specifies whether to roll back the repository if a mirroring operation fails.
FEATURE_SPARSE_INDEX-
Specifies whether to allow sparse manifest indexes.
REPO_MIRROR_MAX_MANIFEST_LIST_SIZE-
Specifies the maximum size of the manifest list in bytes.
REPO_MIRROR_MAX_MANIFEST_ENTRIES-
Specifies the maximum number of manifest entries to process.
-
Restart your Project Quay registry.
Enabling organization mirroring for Project Quay
To enable organization mirroring in Project Quay, you can set FEATURE_ORG_MIRROR to true in your config.yaml file and restart the registry.
-
To enable organization mirroring, set the following configuration fields in your
config.yamlfile:# ... FEATURE_PROXY_CACHE: true FEATURE_REPO_MIRROR: true FEATURE_ORG_MIRROR: true ORG_MIRROR_INTERVAL: 60 ORG_MIRROR_BATCH_SIZE: 100 ORG_MIRROR_MAX_SYNC_DURATION: 3600 ORG_MIRROR_DEFAULT_SKOPEO_TIMEOUT: 600 ORG_MIRROR_DISCOVERY_TIMEOUT: 600 ORG_MIRROR_MAX_REPOS_PER_ORG: 5000 ORG_MIRROR_MAX_RETRIES: 3 SSRF_ALLOWED_HOSTS: - harbor.example.lab # ...where:
FEATURE_PROXY_CACHE-
Specifies whether to enable or disable proxy caching. This field must be set to
trueto use the organization mirroring feature. FEATURE_REPO_MIRROR-
Specifies whether to enable or disable repository-level mirroring. This field must be set to
trueto use the organization mirroring feature. FEATURE_ORG_MIRROR-
Specifies whether to enable or disable organization-level mirroring.
ORG_MIRROR_INTERVAL-
Specifies the worker processing interval in seconds.
ORG_MIRROR_BATCH_SIZE-
Specifies the number of organization mirrors to process for each iteration.
ORG_MIRROR_MAX_SYNC_DURATION-
Specifies the maximum sync duration in seconds.
ORG_MIRROR_DEFAULT_SKOPEO_TIMEOUT-
Specifies the default skopeo timeout in seconds.
ORG_MIRROR_DISCOVERY_TIMEOUT-
Specifies the discovery timeout in seconds.
ORG_MIRROR_MAX_REPOS_PER_ORG-
Specifies the maximum repositories to discover for each organization.
ORG_MIRROR_MAX_RETRIES-
Specifies the maximum sync retries for a failure operation.
SSRF_ALLOWED_HOSTS-
Specifies the allowed hosts for Server-Side Request Forgery (SSRF) protection. Use this optional field to allow specific hosts to be accessed by the registry.
-
Restart your Project Quay registry.
Creating a mirroring worker
To run repository mirroring in a standalone Project Quay deployment, you can start a Podman container with the repomirror option.
-
If you have not configured TLS communications by using a
/root/ca.crtcertificate, enter the following command to start a mirroring worker:$ sudo podman run -d --name mirroring-worker \ -v $QUAY/config:/conf/stack:Z \ {productrepo}/{quayimage}:{productminv} repomirror -
If you have configured TLS communications by using a
/root/ca.crtcertificate, enter the following command to start the repository mirroring worker:$ sudo podman run -d --name mirroring-worker \ -v $QUAY/config:/conf/stack:Z \ -v /root/ca.crt:/etc/pki/ca-trust/source/anchors/ca.crt:Z \ {productrepo}/{quayimage}:{productminv} repomirror
Create mirrors and monitor synchronization
Create mirrored organizations and repositories, start synchronizations, and monitor mirroring health, events, and capacity.
Creating a mirroring organization by using the UI
To automatically synchronize container images between registries, you can use the Project Quay UI to create a mirroring organization.
|
Note
|
Organization-level mirroring cannot be configured on an existing organization that already contains repositories. A dedicated organization must be created specifically to serve as a mirror target, with all repositories within the organization managed exclusively by the mirroring configuration. |
-
You have a Project Quay organization with sufficient permissions.
-
You have created a robot account.
-
You have access to a source Harbor instance.
-
You have Harbor credentials, such as a username and a password or an API token.
-
-
You have set
FEATURE_ORG_MIRROR: truein yourconfig.yamlfile. -
You have set
FEATURE_PROXY_CACHE: truein yourconfig.yamlfile. -
You have set
FEATURE_REPO_MIRROR: truein yourconfig.yamlfile. -
For standalone Project Quay deployments, you have created a mirroring worker.
-
If you are using an OAuth token to mirror from Quay to Quay, your token must have the following permissions:
-
Administer Repositories
-
View all visible repositories
-
Read/Write to any accessible repositories
-
Administer User
-
-
On the Project Quay v2 UI, click Organizations in the navigation pane.
-
Find your organization listed under the Name column and then click the name of the organization.
-
Click Settings → Organization state.
-
Click the Mirror radio button to set the organization state to mirroring.
-
Click Submit. Completion of this step takes you to the Mirroring tab.
-
Under the Source Registry section, complete the following settings:
-
For Source Registry Type, select Quay or Harbor.
-
In the Source Registry URL field, enter a valid URL, for example,
https://registry.example.com. -
For Source Namespace, enter the namespace or project name on the source registry. For example,
my-project. -
Select Private or Public for Repository Visibility.
-
For Start Date, set the date in
yyyy-mm-ddformat and set the time. -
Set the Sync interval. Set the integer in the box and select seconds, minutes, hours, days, or weeks from the drop-down menu.
-
Set the Skopeo Timeout value for Skopeo operations.
-
Select a Robot User from the drop-down menu.
-
Set any desired Filter Patterns.
-
-
In the Credentials section, do one of the following actions:
-
If you specified Harbor for Source Registry Type, enter your username and password for the source registry.
-
If you specified Quay for Source Registry Type, enter
$oauthtokenfor the Username field and your OAuth token for the Password field.
-
-
Optional: In Advanced Settings, complete any of the following options:
-
For Verify TLS, select the checkbox to verify certificates.
-
Set an HTTP Proxy URL.
-
Set an HTTPS Proxy URL.
-
Set a No Proxy URL.
-
-
When you have configured the desired settings, click Enable Organization Mirror.
-
On the Project Quay web console, click Organizations → the organization name → Mirroring.
-
Scroll to the Status section to view the status and verify the connection.
Creating a mirrored organization by using the API
To create a mirrored organization in Project Quay by using the API, you can send HTTP requests to the organization mirror endpoints with curl and an OAuth bearer token.
|
Note
|
Organization-level mirroring cannot be configured on an existing organization that already contains repositories. A dedicated organization must be created specifically to serve as a mirror target, with all repositories within the organization managed exclusively by the mirroring configuration. |
-
You have generated an OAuth access token.
-
Use the
POST /api/v1/organization/{orgname}/mirrorendpoint to create a new organization-level mirroring configuration:$ curl -X POST "https://<quay-server.example.com>/api/v1/organization/<orgname>/mirror" \ -H "Authorization: Bearer <access_token>" \ -H "Accept: application/json" \ -H "Content-Type: application/json" \ -d '{ "external_registry_type": "quay", "external_registry_url": "https://quay.io", "external_namespace": "<external_namespace>", "robot_username": "<orgname>+<robot_account>", "visibility": "private", "sync_interval": 3600, "sync_start_date": "2025-01-01T00:00:00Z", "is_enabled": true }' -
Use the
GET /api/v1/organization/{orgname}/mirrorendpoint to retrieve the organization-level mirroring configuration:$ curl -X GET \ -H "Authorization: Bearer <bearer_token>" \ -H "Accept: application/json" \ https://<quay-server.example.com>/api/v1/organization/<orgname>/mirrorExample output{"is_enabled": true, "external_registry_type": "quay", "external_registry_url": "http://quay.io", "external_namespace": "test", "external_registry_username": null, "external_registry_config": {}, "repository_filters": [], "robot_username": "example+test", "visibility": "private", "sync_interval": 3600, "sync_start_date": "2025-01-01T00:00:00Z", "sync_expiration_date": null, "sync_status": "NEVER_RUN", "sync_retries_remaining": 3, "skopeo_timeout": 300, "creation_date": "2026-03-09T18:39:21.993431Z"} -
Use the
GET /api/v1/organization/{orgname}/mirror/repositoriesendpoint to obtain a list of repositories that are being mirrored in the organization:$ curl -X GET \ -H "Authorization: Bearer <bearer_token>" \ -H "Accept: application/json" \ "https://<quay-server.example.com>/api/v1/organization/<orgname>/mirror/repositories?page=1&limit=100"Example output{"repositories": [], "page": 1, "limit": 100, "total": 0, "has_next": false} -
Use the
POST /api/v1/organization/{orgname}/mirror/sync-nowendpoint to trigger an immediate sync of all repositories in the organization:$ curl -X POST \ -H "Authorization: Bearer <bearer_token>" \ -H "Accept: application/json" \ https://<quay-server.example.com>/api/v1/organization/<orgname>/mirror/sync-nowThis command does not return output in the CLI.
-
Use the
POST /api/v1/organization/{orgname}/mirror/sync-cancelendpoint to cancel a pending sync of all repositories in the organization:$ curl -X POST \ -H "Authorization: Bearer <bearer_token>" \ -H "Accept: application/json" \ https://<quay-server.example.com>/api/v1/organization/<orgname>/mirror/sync-cancelThis command does not return output in the CLI.
-
Use the
PUT /api/v1/organization/{orgname}/mirrorendpoint to update the organization-level mirroring configuration:$ curl -X PUT \ -H "Authorization: Bearer <bearer_token>" \ -H "Accept: application/json" \ -H "Content-Type: application/json" \ -d '{"is_enabled": true, "sync_interval": 7200}' \ https://<quay-server.example.com>/api/v1/organization/<orgname>/mirrorExample output" " -
Use the
POST /api/v1/organization/{orgname}/mirror/verifyendpoint to verify the connection to the external registry for the organization-level mirroring configuration:$ curl -X POST \ -H "Authorization: Bearer <bearer_token>" \ -H "Accept: application/json" \ https://<quay-server.example.com>/api/v1/organization/<orgname>/mirror/verifyExample output{"success": false, "message": "Unexpected response: 301"} -
Use the
DELETE /api/v1/organization/{orgname}/mirrorendpoint to delete the organization-level mirroring configuration:$ curl -X DELETE \ -H "Authorization: Bearer <bearer_token>" \ -H "Accept: application/json" \ https://<quay-server.example.com>/api/v1/organization/<orgname>/mirrorThis command does not return output in the CLI.
Creating a mirrored repository by using the UI
To mirror a repository from an external registry into Project Quay, you can create a private repository and configure mirroring settings in the UI.
When mirroring a repository from an external container registry, you must create a new private repository. Typically, the same name is used as the target repository, for example, quay-rhel9.
-
You have set
FEATURE_REPO_MIRROR: truein yourconfig.yamlfile. -
For standalone Project Quay deployments, you have created a mirroring worker.
-
You have created a robot account.
-
Navigate to the Repositories page of your registry and click the name of a repository, for example, test-mirror.
-
Click Settings → Repository state.
-
Click Mirror.
-
Click the Mirroring tab and enter the details for connecting to the external registry, along with the tags, scheduling, and access information.
-
Enter the details as required in the following fields:
-
Registry Location: The external repository you want to mirror, for example,
registry.redhat.io/quay/quay-rhel8. -
Tags: Enter a comma-separated list of individual tags or tag patterns. You can use Unix shell-style wildcards.
-
Architecture Filter: Select the architectures that you want to mirror. For example, select
AMD64 (x86_64)to mirror only thex86_64architecture. By default, all architectures are mirrored. -
Start Date: The date on which mirroring begins. By default, the current date and time are used.
-
Sync Interval: Defaults to syncing every 24 hours. You can change that based on hours or days.
-
Skopeo timeout interval: Defaults to
300seconds (5 minutes). The maximum timeout length is43200seconds (12 hours). -
Robot User: Create a new robot account or choose an existing robot account to do the mirroring.
-
Username: The username for accessing the external registry holding the repository you are mirroring.
-
Password: The password associated with the username. Note that the password cannot include characters that require an escape character (
\).
-
-
In the Advanced Settings section, you can optionally configure SSL/TLS and proxy with the following options:
-
Verify TLS: Select this option if you want to require HTTPS and to verify certificates when communicating with the target remote registry.
-
Accept Unsigned Images: Selecting this option allows unsigned images to be mirrored.
-
HTTP Proxy: Identify the HTTP proxy server needed to access the remote site, if a proxy server is needed.
-
HTTPS Proxy: Identify the HTTPS proxy server needed to access the remote site, if a proxy server is needed.
-
No Proxy: List of locations that do not require a proxy.
-
-
After filling out all information, click Enable Mirror.
Starting a mirroring synchronization
To start a mirroring sync immediately in Project Quay, you can open the Mirroring tab for your repository or organization and click Sync Now.
-
Navigate to the Mirroring tab of your repository or organization.
-
Click Sync Now.
-
Click the Logs tab to view available logs.
-
When mirroring is complete, the images appear in the Tags tab.
Event notifications for mirroring
Project Quay repository mirroring supports three event notifications: Mirror Started, Mirror Success, and Mirror Unsuccessful. You can configure them per repository in the Settings tab and deliver them by email, Slack, the UI, or webhooks.
The events can be configured inside of the Settings tab for each repository, and all existing notification methods such as email, Slack, Quay UI, and webhooks are supported.
Monitoring repository mirroring
Project Quay exposes Prometheus metrics and a health API endpoint for repository mirroring. Use these tools to monitor synchronization progress, detect failures, and configure alerts in Prometheus or Grafana.
Metrics are published from the mirror worker process through the existing Prometheus push gateway (typically port 9091). The health API endpoint reads repository state from the database and, when available, worker metrics from the in-process Prometheus registry.
Repository mirror Prometheus metrics
The following table describes the primary repository mirroring metrics added in Project Quay 3.18.
| Metric | Type | Description |
|---|---|---|
|
Gauge |
Number of tags pending synchronization. Labels: |
|
Gauge |
Status of the last synchronization attempt. Labels: |
|
Gauge |
Whether all tags synchronized in the last run. Labels: |
|
Counter |
Cumulative synchronization failures. Labels: |
|
Gauge |
Set to |
|
Gauge |
Unix timestamp when the last sync attempt started. Labels: |
|
Histogram |
Sync operation duration aggregated by namespace. |
|
Gauge |
Number of repositories not yet mirrored. Maintained for backward compatibility. |
Example Prometheus queries
Use the following example queries to monitor repository mirroring:
quay_repository_mirror_last_sync_status{last_error_reason=""} == 0(time() - quay_repository_mirror_last_sync_timestamp) > 3600rate(quay_repository_mirror_sync_failures_total[5m])Repository mirror health endpoint
Project Quay exposes two health endpoints for repository mirroring:
-
GET /api/v1/repository/mirror/health— namespace-scoped or global health. Withoutnamespace, the caller must be a superuser with full access. Withnamespace, organization members can query their organization, and user-namespace owners or user administrators can query that namespace. -
GET /api/v1/superuser/mirror/health— global summary for superusers, without repository-identifying issue samples.
Both endpoints require a fresh login. A validated OAuth or SSO token satisfies the check. A password-based browser session must be within FRESH_LOGIN_TIMEOUT (default: 10m).
The responses include overall health, worker status, repository counts, pending tags, and any detected issues. HTTP 200 means healthy; HTTP 503 means unhealthy.
Optional query parameters for GET /api/v1/repository/mirror/health:
-
namespace— limit results to one namespace -
detailed— include per-repository details -
limitandoffset— paginate detailed results
$ curl -X GET "https://<quay-server.example.com>/api/v1/repository/mirror/health?namespace=<orgname>&detailed=true" \
-H "Authorization: Bearer <access_token>"$ curl -X GET "https://<quay-server.example.com>/api/v1/superuser/mirror/health" \
-H "Authorization: Bearer <access_token>"For endpoint parameters, response schema, and authorization requirements, see getRepositoryMirrorHealth and getSuperUserRepositoryMirrorHealth.
Working with mirrored repositories
After you create a mirrored repository in Project Quay, you can enable or disable mirroring, sync on demand, update credentials, and manage robot account permissions.
Select your mirrored repository from the Repositories page to do any of the following actions:
-
Enable or disable the repository: Select Mirroring in the left column, then toggle the Enabled check box to enable or disable the repository temporarily.
-
Check mirror logs: To make sure the mirrored repository is working properly, you can check the mirror logs. Select Usage Logs in the left column.
-
Sync mirror now: To immediately sync the images in your repository, select Sync Now.
-
Change credentials: To change the username and password, select DELETE from the Credentials line. Then select None and add the username and password needed to log into the external registry when prompted.
-
Cancel mirroring: To stop mirroring, which keeps the current images available but stops new ones from being synced, select CANCEL.
-
Set robot permissions: Project Quay robot accounts are named tokens that hold credentials for accessing external repositories. By assigning credentials to a robot, that robot can be used across multiple mirrored repositories that need to access the same external registry.
You can assign an existing robot to a repository by navigating to Organizations → Robot accounts. On this page, you can view the following information:
-
Check which repositories are assigned to that robot.
-
Assign
Read,Write, orAdminprivileges to that robot from the PERMISSION field.
-
-
Change robot credentials: Robots can hold credentials such as Kubernetes secrets, Docker login information, and Podman login information. To change robot credentials, select the Options gear on the robot account line on the Robot Accounts window and choose View Credentials. Add the appropriate credentials for the external repository the robot needs to access.
-
Check and change general settings: Select Settings (gear icon) from the left column on the mirrored repository page. On the resulting page, you can change settings associated with the mirrored repository. In particular, you can change user and robot permissions to specify exactly which users and robots can read from or write to the repository.
Repository mirroring capacity considerations
For Project Quay repository mirroring, you can run mirroring workers on any node and size the number of workers to how many repositories you want to sync in parallel.
When you plan mirroring capacity, consider the following:
-
Mirroring workers can run on nodes that already run Project Quay.
-
Mirroring runs in scheduled batches. More workers allow more repositories to sync at the same time. For example, 10 workers can run 10 mirroring operations in parallel.
-
Size workers based on how many repositories you need to mirror in parallel, how many images and tags those repositories contain, and how often content changes.
-
Multiple tags in the same repository cannot be mirrored in parallel.
Use Quay as a proxy cache for upstream registries
Configure Red Hat Quay as a proxy cache for upstream registries, including architecture, limitations, and storage quota settings.
Project Quay as a proxy cache for upstream registries
You can use Project Quay as a proxy cache for upstream registries to avoid pull-rate limits and speed up image pulls. Cached images update only when the upstream digest changes.
With Project Quay cache proxy, the following features are available:
-
Specific organizations can be defined as a cache for upstream registries.
-
Configuration of a Quay organization that acts as a cache for a specific upstream registry. This repository can be defined by using the Quay UI, and offers the following configurations:
-
Upstream registry credentials for private repositories or increased rate limiting.
-
Expiration timer to avoid surpassing cache organization size.
-
-
Global on/off configurable via the configuration application.
-
Caching of entire upstream registries or just a single namespace, for example, all of
docker.ioor justdocker.io/library. -
Logging of all cache pulls.
-
Cached images scannability by Clair.
-
Caching of all layers when an image is pulled from a proxied repository, which helps ensure that Clair can scan all images and that images remain pullable even if the upstream registry becomes unavailable.
Proxy cache architecture
The Project Quay proxy cache architecture shows how image pulls are served from cache or fetched from an upstream registry. Cache behavior depends on whether the image exists, is stale, or differs from upstream.
The following image shows the expected design flow and architecture of the proxy cache feature.
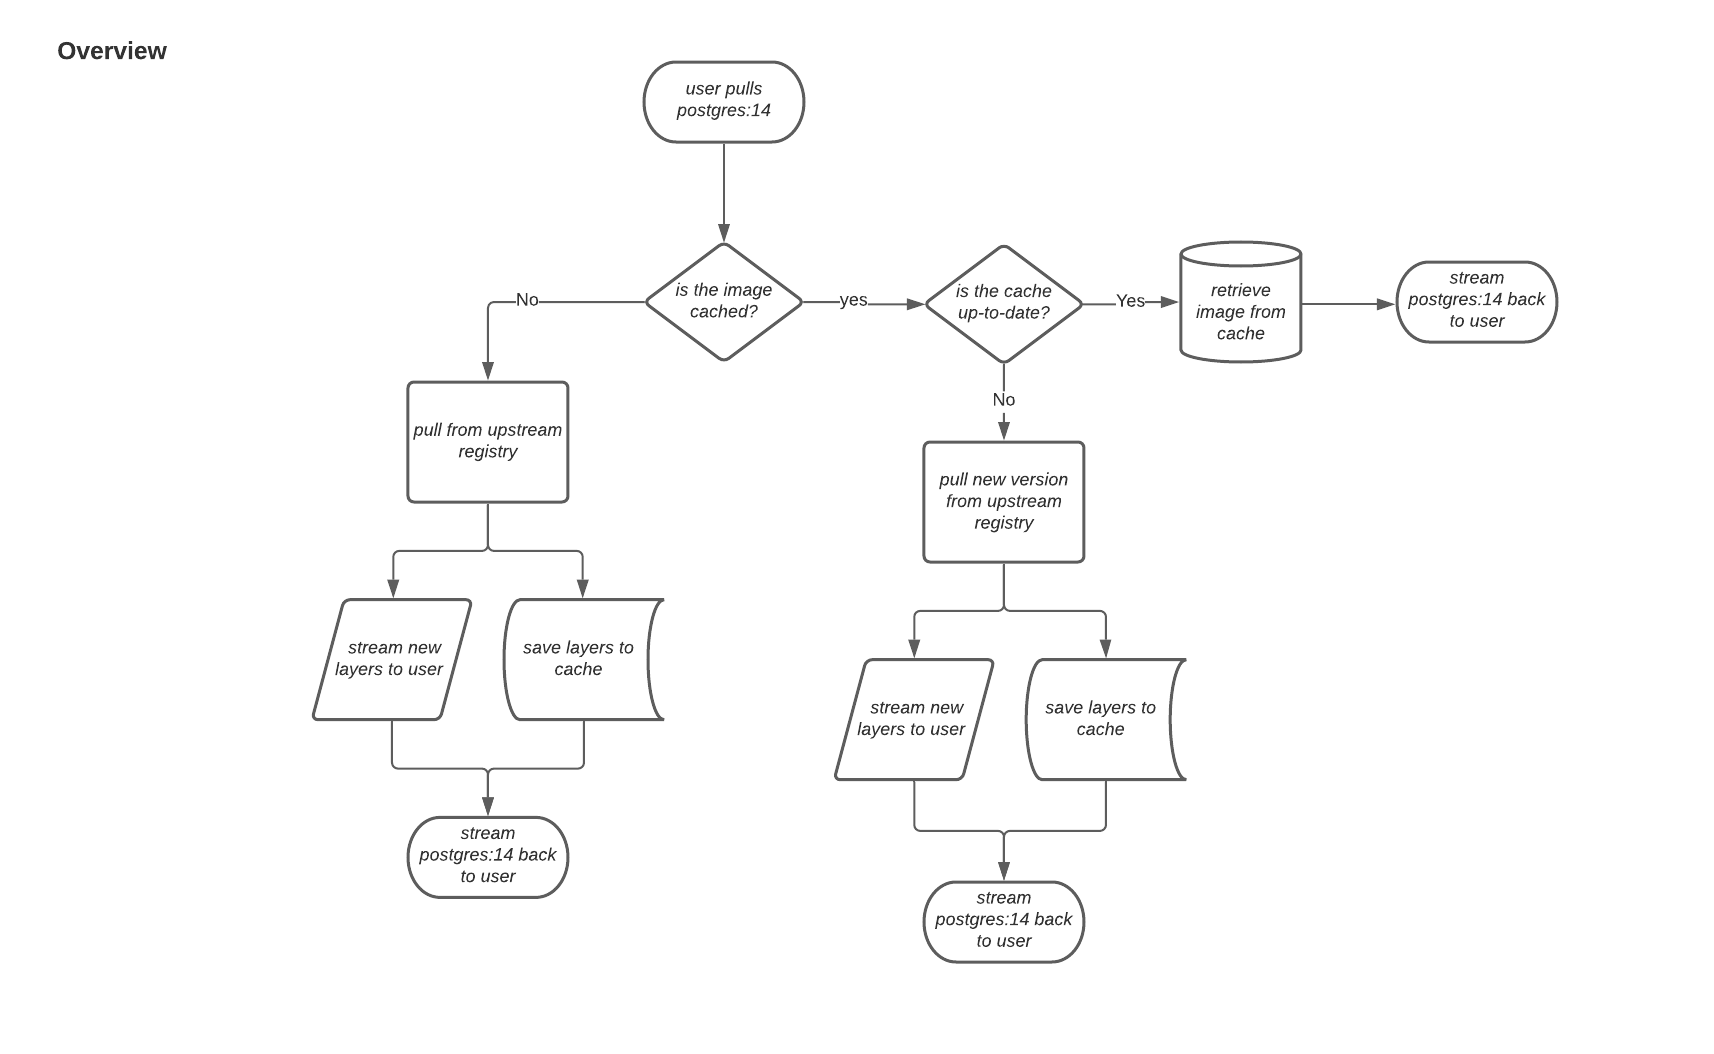
When a user pulls an image, for example, postgres:14, from an upstream repository on Project Quay, the repository checks to see if an image is present. If the image does not exist, a fresh pull is initiated. After being pulled, the image layers are saved to cache and server to the user in parallel. The following image depicts an architectural overview of this scenario:
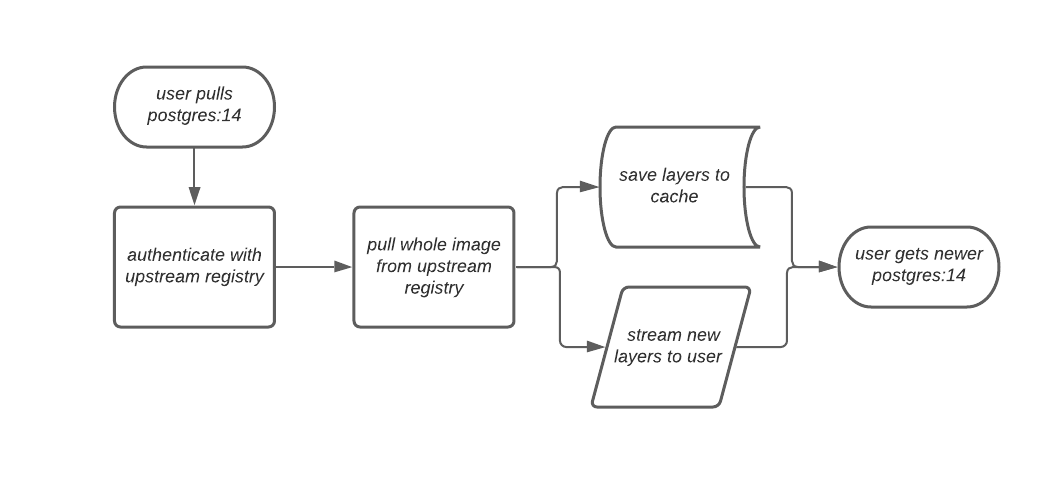
If the image in the cache exists, users can rely on Quay’s cache to stay up-to-date with the upstream source so that newer images from the cache are automatically pulled. This happens when tags of the original image have been overwritten in the upstream registry. The following image depicts an architectural overview of what happens when the upstream image and cached version of the image are different:
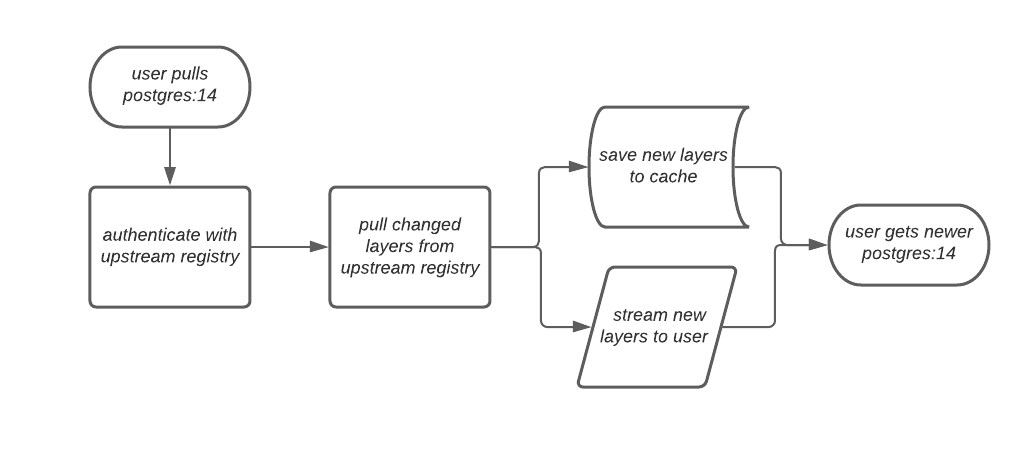
If the upstream image and cached version are the same, no layers are pulled and the cached image is delivered to the user.
In some cases, users initiate pulls when the upstream registry is down. If this happens with the configured staleness period, the image stored in cache is delivered. If the pull happens after the configured staleness period, the error is propagated to the user. The following image depicts an architectural overview when a pull happens after the configured staleness period:
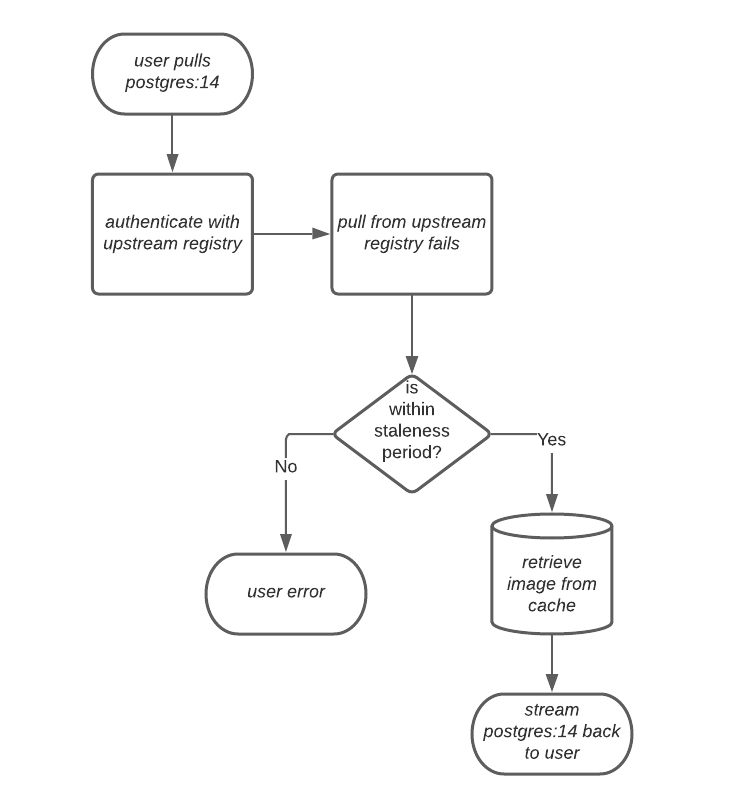
Quay administrators can leverage the configurable size limit of an organization to limit cache size so that backend storage consumption remains predictable. This is achieved by discarding images from the cache according to the frequency in which an image is used. The following image depicts an architectural overview of this scenario:
Proxy cache limitations
Proxy caching in Project Quay has size, property, and anonymous-user limitations. You can use these constraints to plan cache organization capacity and access.
The following limitations apply:
-
Your proxy cache must have a size limit of greater than, or equal to, the image you want to cache. For example, if your proxy cache organization has a maximum size of 500 MB, and the image a user wants to pull is 700 MB, the image will be cached and will overflow beyond the configured limit.
-
Cached images must have the same properties that images on a Quay repository must have.
-
Anonymous users cannot pull images through a proxy cache if the image has not been previously cached. This operation requires the creation of a new repository within the proxy organization to store the cached image, and anonymous users do not have the necessary permissions to create repositories.
Using Project Quay to proxy a remote registry
To proxy a remote registry with Project Quay, you can configure an organization as a cache and pull images through it. You set the remote registry, optional credentials, and expiration on the UI.
-
FEATURE_PROXY_CACHEin your config.yaml is set toTrue. -
Assigned the Member team role. For more information about team roles, see Setting a team role by using the UI.
-
On the Project Quay v2 UI, click the name of an organization, for example, cache-org.
-
In the navigation pane, click Settings.
-
In the Remote Registry box, enter the name of the remote registry to be cached, for example,
quay.io, and click Save.NoteBy adding a namespace to the Remote Registry, for example,
quay.io/<namespace>, users in your organization will only be able to proxy from that namespace. -
Optional. In the Remote Registry username box, enter the username for authenticating into the remote registry specified in the previous step. If you leave this empty, Quay will attempt to pull content anonymously from the upstream registry.
-
Optional. In the Remote registry password box, enter the password for authenticating into the remote registry. If you leave this empty, Quay will attempt to pull content anonymously from the upstream registry.
-
Optional. Set a time in the Expiration field.
Note-
The default tag Expiration field for cached images in a proxy organization is set to 86400 seconds. In the proxy organization, the tag expiration is refreshed to the value set in the UI’s Expiration field every time the tag is pulled. This feature is different than Quay’s default individual tag expiration feature. In a proxy organization, it is possible to override the individual tag feature. When this happens, the individual tag’s expiration is reset according to the Expiration field of the proxy organization.
-
Expired images will disappear after the allotted time, but are still stored in Project Quay. The time in which an image is completely deleted, or collected, depends on the Time Machine setting of your organization. The default time for garbage collection is 14 days unless otherwise specified.
-
-
Optional. Check the http box if you want an unsecure protocol used. If not checked, https is used to request the remote registry.
-
Click Save.
-
On the CLI, pull a public image from the remote registry that was specified, for example,
quay.io, acting as a proxy cache:$ podman pull <registry_url>/<organization_name>/<quayio_namespace>/<image_name>
ImportantIf your organization is set up to pull from a single namespace in the remote registry, the remote registry namespace must be omitted from the URL. For example,
podman pull <registry_url>/<organization_name>/<image_name>.
Leveraging storage quota limits in proxy organizations
When a proxied namespace has quota limits configured, Project Quay can auto-prune the least recently used image tags so that a new push that exceeds available storage is stored instead of being skipped.
|
Important
|
|
Testing the storage quota limits feature in proxy organizations
Confirm that auto-pruning works in a proxy organization with storage quota limits by pulling images until the quota is exceeded and verifying that the least recently used tag is removed.
-
Your organization is configured to serve as a proxy organization. The following example proxies from quay.io.
-
FEATURE_PROXY_CACHEis set toTruein yourconfig.yamlfile. -
FEATURE_QUOTA_MANAGEMENTis set toTruein yourconfig.yamlfile. -
Your organization is configured with a quota limit, for example,
150 MB.
-
Pull an image to your repository from your proxy organization, for example:
$ podman pull quay-server.example.com/proxytest/projectquay/quay:3.7.9
-
Depending on the space left in your repository, you might need to pull additional images from your proxy organization, for example:
$ podman pull quay-server.example.com/proxytest/projectquay/quay:3.6.2
-
In the Project Quay registry UI, click the name of your repository.
-
Click Tags in the navigation pane and ensure that
quay:3.7.9andquay:3.6.2are tagged.
-
-
Pull the last image that will result in your repository exceeding the allotted quota, for example:
$ podman pull quay-server.example.com/proxytest/projectquay/quay:3.5.1
-
Refresh the Tags page of your Project Quay registry. The first image that you pushed, for example,
quay:3.7.9should have been auto-pruned. The Tags page should now showquay:3.6.2andquay:3.5.1.
Integrate Quay object storage with AWS
Integrate Red Hat Quay object storage with AWS STS, IAM roles, and CloudFront for cloud-native access patterns.
Configuring AWS STS for Project Quay
You can configure AWS Security Token Service (STS) with Project Quay to authenticate to Amazon S3 by using temporary credentials. STS is available for standalone deployments, Red Hat Quay on OpenShift Container Platform, and Project Quay on Red Hat OpenShift Service on AWS (ROSA).
AWS STS provides temporary, limited-privilege credentials for AWS Identity and Access Management (IAM) users. When Project Quay uses Amazon S3 as object storage, STS protocols can authenticate access so that sensitive data remains properly authenticated and authorized.
Configuring AWS STS for OpenShift Container Platform or ROSA requires creating an AWS IAM user, creating an S3 role, and configuring your Project Quay config.yaml file to include the proper resources.
Creating an IAM user
To configure AWS STS authentication for your Project Quay deployment, you can create an IAM user in the AWS console, copy the user ARN, and create access keys. This procedure sets up the IAM user that Project Quay uses to authenticate with Amazon S3 using temporary credentials.
-
Log in to the Amazon Web Services (AWS) console and navigate to the Identity and Access Management (IAM) console.
-
In the navigation pane, under Access management click Users.
-
Click Create User and enter the following information:
-
Enter a valid username, for example,
quay-user. -
For Permissions options, click Add user to group.
-
-
On the review and create page, click Create user. You are redirected to the Users page.
-
Click the username, for example, quay-user.
-
Copy the ARN of the user, for example,
arn:aws:iam::123456:user/quay-user. -
On the same page, click the Security credentials tab.
-
Navigate to Access keys.
-
Click Create access key.
-
On the Access key best practices & alternatives page, click Command Line Interface (CLI), then, check the confirmation box. Then click Next.
-
Optional. On the Set description tag - optional page, enter a description.
-
Click Create access key.
-
Copy and store the access key and the secret access key.
ImportantThis is the only time that the secret access key can be viewed or downloaded. You cannot recover it later. However, you can create a new access key any time.
-
Click Done.
Creating an S3 role
To enable AWS STS authentication for your Project Quay deployment, you can create an S3 role in the AWS IAM console with a custom trust policy that allows your IAM user to assume the role. This procedure sets up the role that grants S3 access permissions for temporary credential authentication.
-
You have created an IAM user and stored the access key and the secret access key.
-
Navigate to the IAM dashboard.
-
In the navigation pane, click Roles under Access management.
-
Click Create role → Custom Trust Policy.
-
Under the
Principalconfiguration field, add your AWS ARN information. For example:{ "Version": "2012-10-17", "Statement": [ { "Sid": "Statement1", "Effect": "Allow", "Principal": { "AWS": "arn:aws:iam::123456:user/quay-user" }, "Action": "sts:AssumeRole" } ] } -
Click Next.
-
On the Add permissions page, type
AmazonS3FullAccessin the search box. Check the box to add that policy to the S3 role, then click Next. -
On the Name, review, and create page, enter the following information:
-
Enter a role name, for example,
example-role. -
Optional. Add a description.
-
-
Click the Create role button. You are navigated to the Roles page. Under Role name, the newly created S3 should be available.
Configuring Red Hat Quay on OpenShift Container Platform to use AWS STS
To configure your Red Hat Quay on OpenShift Container Platform deployment to use AWS STS for S3 authentication, you can edit the config.yaml file through the OpenShift Container Platform UI and update the DISTRIBUTED_STORAGE_CONFIG fields with your role ARN, bucket name, and access keys.
This procedure enables temporary credential authentication for object storage access.
|
Note
|
You can also edit and re-deploy your Red Hat Quay on OpenShift Container Platform |
-
You have configured a Role ARN.
-
You have generated a User Access Key.
-
You have generated a User Secret Key.
-
On the Home page of your OpenShift Container Platform deployment, click Operators → Installed Operators.
-
Click Red Hat Quay.
-
Click Quay Registry and then the name of your Project Quay registry.
-
Under Config Bundle Secret, click the name of your registry configuration bundle, for example, quay-registry-config-bundle-qet56.
-
On the configuration bundle page, click Actions to reveal a drop-down menu. Then click Edit Secret.
-
Update your the
DISTRIBUTED_STORAGE_CONFIGfields of yourconfig.yamlfile with the following information:# ... DISTRIBUTED_STORAGE_CONFIG: default: - STSS3Storage - sts_role_arn: <role_arn> s3_bucket: <s3_bucket_name> storage_path: <storage_path> s3_region: <region> sts_user_access_key: <s3_user_access_key> sts_user_secret_key: <s3_user_secret_key> # ...where:
DISTRIBUTED_STORAGE_CONFIG.default.sts_role_arn-
Specifies the unique Amazon Resource Name (ARN) required when configuring AWS STS.
DISTRIBUTED_STORAGE_CONFIG.default.s3_bucket-
Specifies the name of your s3 bucket.
DISTRIBUTED_STORAGE_CONFIG.default.storage_path-
Specifies the storage path for data. Usually
/datastorage. DISTRIBUTED_STORAGE_CONFIG.default.s3_region-
Specifies the Amazon Web Services region. Defaults to
us-east-1. DISTRIBUTED_STORAGE_CONFIG.default.sts_user_access_key-
Specifies the generated AWS S3 user access key required when configuring AWS STS.
DISTRIBUTED_STORAGE_CONFIG.default.sts_user_secret_key-
Specifies the generated AWS S3 user secret key required when configuring AWS STS.
-
Click Save.
-
Tag a sample image, for example,
busybox, that will be pushed to the repository. For example:$ podman tag docker.io/library/busybox <quay-server.example.com>/<organization_name>/busybox:test -
Push the sample image by running the following command:
$ podman push <quay-server.example.com>/<organization_name>/busybox:test -
Verify that the push was successful by navigating to the Organization that you pushed the image to in your Project Quay registry → Tags.
-
Navigate to the Amazon Web Services (AWS) console and locate your s3 bucket.
-
Click the name of your s3 bucket.
-
On the Objects page, click datastorage/.
-
On the datastorage/ page, the following resources should seen:
-
sha256/
-
uploads/
These resources indicate that the push was successful, and that AWS STS is properly configured.
-
Configuring Project Quay on Red Hat OpenShift Service on AWS to use AWS STS
To configure your Project Quay deployment on Red Hat OpenShift Service on AWS to use AWS STS for S3 authentication, you can update the IAM role trust policy to use federated identity, configure the config.yaml file, and annotate the service account with the role ARN.
This procedure enables web identity federation for temporary credential authentication.
-
You have created an IAM user.
-
You have created an s3 Role ARN.
-
You have created a Custom Trust Policy that uses the Role ARN.
-
Get the
serviceAccountIssuerresource by entering the following command:$ oc get authentication.config.openshift.io cluster -o json | jq -r .spec.serviceAccountIssuer | sed -e "s/^https:\/\///"Example outputoidc.op1.openshiftapps.com/123456 -
On the Identity and Access Management (IAM) console of the Amazon Web Services (AWS) console:
-
Click Roles.
-
Click the name of the Role to be used with AWS STS, for example,
example-role. -
Click the Trust relationships tab, which shows the JSON policy created during "Creating an S3 role". Update the JSON policy as follows:
{ "Version": "2012-10-17", "Statement": [ { "Sid": "Statement1", "Effect": "Allow", "Principal": { "Federated": "arn:aws:iam::123456:oidc-provider/oidc.op1.openshiftapps.com/123456" }, "Action": "sts:AssumeRoleWithWebIdentity", "Condition": { "StringEquals": { "oidc.op1.openshiftapps.com/123456:sub": "system:serviceaccount:quay:registry-quay-app" } } } ] }where:
Statement.Principal.Federated-
Specifies that the
Principalparameter of the JSON policy is updated toFederated:<your_user_ARN>:<serviceAccountIssuer_domain_path>. Statement.Action-
Specifies that the
Actionparameter of the JSON policy is updated tosts:AssumeRoleWithWebIdentity. Statement.Condition-
Specifies that the
Conditionparameter of the JSON policy is updated toStringEquals”: “<serviceAccountIssuer>:sub”: “system:serviceAccount:<quay_namespace>:<quay_registry_using_serviceAccount>.
-
Verify that your User ARN is configured correct, then click Next.
-
On the Add permissions page, select AmazonS3FullAccess, then click Next.
-
On the Name, review, and create page, provide your role a name, a description, verify your configuration, add any optional tags. Then, click Create Role.
-
-
On the Roles page, click the new role and store the
Role ARNresource. For example:arn:aws:iam::123456:role/test_s3_access -
On the Project Quay web console:
-
Click Operators → Installed Operators.
-
Click Red Hat Quay.
-
Click Quay Registry and then the name of your Project Quay registry.
-
Under Config Bundle Secret, click the name of your registry configuration bundle, for example, quay-registry-config-bundle-12345.
-
On the configuration bundle page, click Actions to reveal a drop-down menu. Then click Edit Secret.
-
Update your the
DISTRIBUTED_STORAGE_CONFIGfields of yourconfig.yamlfile with the following information:# ... DISTRIBUTED_STORAGE_CONFIG: default: - STSS3Storage s3_bucket: <s3_bucket_name> storage_path: <storage_path> s3_region: <region> # ...where:
DISTRIBUTED_STORAGE_CONFIG.default.s3_bucket-
Specifies the name of your s3 bucket.
DISTRIBUTED_STORAGE_CONFIG.default.storage_path-
Specifies the storage path for data. Usually
/datastorage. DISTRIBUTED_STORAGE_CONFIG.default.s3_region-
Specifies the Amazon Web Services region. Defaults to
us-east-1.
-
-
Click Save. Your
QuayRegistrycustom resource (CR) automatically restarts. -
Annotate the Service Account (SA) that executes pods with the EKS configuration values. For example:
$ oc annotate sa registry-quay-app "eks.amazonaws.com/role-arn"="arn:aws:iam::123456:role/test_s3_access" "eks.amazonaws.com/audience"="sts.amazonaws.com" "eks.amazonaws.com/sts-regional-endpoints"="true"
-
Tag a sample image, for example,
busybox, that will be pushed to the repository. For example:$ podman tag docker.io/library/busybox <quay-server.example.com>/<organization_name>/busybox:test -
Push the sample image by running the following command:
$ podman push <quay-server.example.com>/<organization_name>/busybox:test -
Verify that the push was successful by navigating to the Organization that you pushed the image to in your Project Quay registry → Tags.
-
Navigate to the Amazon Web Services (AWS) console and locate your s3 bucket.
-
Click the name of your s3 bucket.
-
On the Objects page, click datastorage/.
-
On the datastorage/ page, the following resources should seen:
-
sha256/
-
uploads/
These resources indicate that the push was successful, and that AWS STS is properly configured.
-
AWS S3 CloudFront
To configure AWS S3 CloudFront for your Project Quay backend registry storage, you can create a secret that includes your config.yaml file and the CloudFront signing key. This enables CloudFront content delivery for your registry storage.
-
Create a secret that includes your
config.yamlfile and the CloudFront signing key by entering the following command:$ oc create secret generic --from-file config.yaml=./config_awss3cloudfront.yaml --from-file default-cloudfront-signing-key.pem=./default-cloudfront-signing-key.pem test-config-bundle
Optimize
Tune Operator component resources and autoscaling
Tune QuayRegistry component resources and Horizontal Pod Autoscaling by using the OpenShift web console or CLI.
About Horizontal Pod Autoscaling (HPA)
Horizontal Pod Autoscalers (HPAs) automatically adjust the number of running pods based on CPU and memory utilization. Project Quay deployments include managed HPAs for key components to ensure availability and performance during load spikes or maintenance events.
A typical Project Quay deployment includes the following pods:
-
Two pods for the Project Quay application (
example-registry-quay-app-*) -
One Redis pod for Project Quay logging (
example-registry-quay-redis-*) -
One PostgreSQL pod for metadata storage (
example-registry-quay-database-*) -
Two
Quaymirroring pods (example-registry-quay-mirror-*) -
Two pods for Clair (
example-registry-clair-app-*) -
One PostgreSQL pod for Clair (
example-registry-clair-postgres-*)
HPAs are managed by default for the Quay, Clair, and Mirror components, each starting with two replicas to prevent downtime during upgrades, reconfigurations, or pod rescheduling ev
Managing Horizontal Pod Autoscaling
To customize scaling thresholds or replica limits for your Project Quay registry, you can set the horizontalpodautoscaler component to unmanaged in the QuayRegistry custom resource. You can then explicitly set replica counts for the quay, clair, and mirror components.
|
Note
|
The following procedure uses the OpenShift Container Platform web console to configure the Project Quay registry to use an external PostgreSQL database. For most users, use the web console is simpler. This procedure can also be done by using the |
-
Edit your
QuayRegistryCR:$ oc edit quayregistry <quay_registry_name> -n <quay_namespace>apiVersion: quay.redhat.com/v1 kind: QuayRegistry metadata: name: quay-registry namespace: quay-enterprise spec: components: - kind: horizontalpodautoscaler managed: false - kind: quay managed: true overrides: replicas: null - kind: clair managed: true overrides: replicas: null - kind: mirror managed: true overrides: replicas: null # ... -
Create a custom
HorizontalPodAutoscalerresource with your desired configuration, for example:kind: HorizontalPodAutoscaler apiVersion: autoscaling/v2 metadata: name: quay-registry-quay-app namespace: quay-enterprise spec: scaleTargetRef: kind: Deployment name: quay-registry-quay-app apiVersion: apps/v1 minReplicas: 3 maxReplicas: 20 metrics: - type: Resource resource: name: memory target: type: Utilization averageUtilization: 90 - type: Resource resource: name: cpu target: type: Utilization averageUtilization: 90 -
Apply the new HPA configuration to your cluster:
$ oc apply -f <custom_hpa>.yamlhorizontalpodautoscaler.autoscaling/quay-registry-quay-app created
-
Verify that your Project Quay application pods are running:
$ oc get pod | grep quay-appquay-registry-quay-app-5b8fd49d6b-7wvbk 1/1 Running 0 34m quay-registry-quay-app-5b8fd49d6b-jslq9 1/1 Running 0 3m42s quay-registry-quay-app-5b8fd49d6b-pskpz 1/1 Running 0 43m -
Verify that your custom HPA is active:
$ oc get hpaNAME REFERENCE TARGETS MINPODS MAXPODS REPLICAS AGE quay-registry-quay-app Deployment/quay-registry-quay-app 67%/90%, 54%/90% 3 20 3 51m
Configuring QuayRegistry CR resources
Configuring resources for managed components lets you adjust CPU and memory requests and limits for quay, clair, mirror, redis, and database pods. You can configure resources to run smaller test clusters or request more resources upfront to avoid performance issues.
The following components should not be set lower than their minimum requirements. Setting resources too low can cause issues with your deployment and, in some cases, result in failure of the pod’s deployment.
-
quay: Minimum of 6 GB, 2vCPUs -
clair: Recommended of 2 GB memory, 2 vCPUs -
clairpostgres: Minimum of 200 MB
You can configure resource requests on the OpenShift Container Platform UI or directly by updating the QuayRegistry CR via the CLI.
|
Important
|
The default values set for these components are the suggested values. Setting resource requests too high or too low might lead to inefficient resource utilization, or performance degradation, respectively. |
Configuring resource requests by using the OpenShift Container Platform web console
To configure resource requests for your Project Quay registry components, you can use the OpenShift Container Platform web console to edit the QuayRegistry custom resource. You can set CPU and memory limits and requests for quay, clair, mirror, redis, and database pods.
-
On the OpenShift Container Platform developer console, click Operators → Installed Operators → Red Hat Quay.
-
Click QuayRegistry.
-
Click the name of your registry, for example, example-registry.
-
Click YAML.
-
In the
spec.componentsfield, you can override the resources of all components by setting values for the.overrides.resources.limitsand theoverrides.resources.requestsfields. You can also specify astorageClassNameforpostgres,clairpostgres, andclairresources. Forpostgresandclairpostgres, these fields must be defined during initial installation of the component. Forclair,storageClassNameapplies to the ephemeral scratch volume used for image layer extraction. For example:spec: components: - kind: clair managed: true overrides: resources: limits: cpu: "5" # Limiting to 5 CPU (equivalent to 5000m or 5000 millicpu) memory: "18Gi" # Limiting to 18 Gibibytes of memory requests: cpu: "4" # Requesting 4 CPU memory: "4Gi" # Requesting 4 Gibibytes of memory - kind: postgres managed: true overrides: storageClassName: "local-path" resources: limits: {} requests: cpu: "700m" # Requesting 700 millicpu or 0.7 CPU memory: "4Gi" # Requesting 4 Gibibytes of memory - kind: mirror managed: true overrides: resources: limits: requests: cpu: "800m" # Requesting 800 millicpu or 0.8 CPU memory: "1Gi" # Requesting 1 Gibibyte of memory - kind: quay managed: true overrides: resources: limits: cpu: "4" # Limiting to 4 CPU memory: "10Gi" # Limiting to 10 Gibibytes of memory requests: cpu: "4" # Requesting 4 CPU memory: "10Gi" # Requesting 10 Gibi of memory - kind: redis managed: true overrides: resources: limits: cpu: "400m" # Limiting to 400 millicpu or 0.4 CPU memory: "400Mi" # Limiting to 400 Mebibytes of memory requests: cpu: "400m" # Requesting 400 millicpu or 0.4 CPU memory: "400Mi" # Requesting 400 Mebibytes of memory - kind: clairpostgres managed: true overrides: storageClassName: "local-path" resources: limits: cpu: "800m" # Limiting to 800 millicpu or 0.8 CPU memory: "3Gi" # Limiting to 3 Gibibytes of memory requests: {}-
limits: Setting thelimitsorrequestsfields to{}uses the default values for these resources. -
limits: Leaving thelimitsorrequestsfield empty puts no limitations on these resources.
-
Configuring resource requests by using the CLI
To configure resource requests for your Project Quay registry components after deployment, you can edit the QuayRegistry custom resource using the CLI. You can set CPU and memory limits and requests for quay, clair, mirror, redis, and database pods.
-
Edit the
QuayRegistryCR by entering the following command:$ oc edit quayregistry <registry_name> -n <namespace> -
Make any desired changes. For example:
- kind: quay managed: true overrides: resources: limits: {} requests: cpu: "0.7" # Requesting 0.7 CPU (equivalent to 500m or 500 millicpu) memory: "512Mi" # Requesting 512 Mebibytes of memory -
Save the changes.
Resize managed storage for Operator deployments
Resize managed storage for Red Hat Quay and Clair, apply volume size overrides, and configure ephemeral storage for managed Clair.
Resizing Managed Storage
To expand storage capacity for your Red Hat Quay on OpenShift Container Platform deployment, you can use the OpenShift Container Platform console to resize the PostgreSQL and Clair PostgreSQL persistent volume claims (PVCs).
Resizing PostgreSQL and Clair PostgreSQL PVCs lets you increase storage beyond the default 50 GiB allocation when your registry needs more space.
When deploying Red Hat Quay on OpenShift Container Platform, three distinct PVCs are deployed:
-
One for the PostgreSQL 15 registry.
-
One for the Clair PostgreSQL 15 registry.
-
One that uses NooBaa as a backend storage.
|
Note
|
The connection between Project Quay and NooBaa is done through the S3 API and ObjectBucketClaim API in OpenShift Container Platform. Project Quay leverages that API group to create a bucket in NooBaa, obtain access keys, and automatically set everything up. On the backend, or NooBaa, side, that bucket is creating inside of the backing store. As a result, NooBaa PVCs are not mounted or connected to Project Quay pods. |
-
You have cluster admin privileges on OpenShift Container Platform.
-
Log into the OpenShift Container Platform console and select Storage → Persistent Volume Claims.
-
Select the desired
PersistentVolumeClaimfor either PostgreSQL 13 or Clair PostgreSQL 13, for example,example-registry-quay-postgres-13. -
From the Action menu, select Expand PVC.
-
Enter the new size of the Persistent Volume Claim and select Expand.
After a few minutes, the expanded size should reflect in the PVC’s Capacity field.
Volume size overrides
Volume size overrides let you specify the desired capacity and storage class for managed components that use persistent or ephemeral volumes in your Project Quay deployment. You can set larger volumes upfront for performance reasons or when your storage backend does not support resizing.
The default size for the managed postgres and clairpostgres persistent volumes is 50Gi. The default size for the managed clair ephemeral scratch volume is 20Gi.
Use overrides.volumeSize and overrides.storageClassName on the postgres, clairpostgres, and clair components in the QuayRegistry custom resource. For postgres and clairpostgres, set these overrides during initial installation of the component. Changing storageClassName after a database PVC is created is not supported.
|
Note
|
To expand database storage on an existing deployment, see Resizing managed storage. |
In the following example, storage overrides are applied to three managed components:
-
On
clair,volumeSizeandstorageClassNameconfigure ephemeral scratch storage for image layer extraction at/var/tmp. -
On
postgresandclairpostgres,volumeSizeandstorageClassNameconfigure the managed PostgreSQL database persistent volumes.
apiVersion: quay.redhat.com/v1
kind: QuayRegistry
metadata:
name: quay-example
namespace: quay-enterprise
spec:
configBundleSecret: config-bundle-secret
components:
    - kind: objectstorage
      managed: false
- kind: route
managed: true
- kind: tls
managed: false
- kind: clair
managed: true
overrides:
volumeSize: 50Gi
storageClassName: fast-ssd
- kind: postgres
managed: true
overrides:
volumeSize: 70Gi
storageClassName: local-path
- kind: clairpostgres
managed: true
overrides:
volumeSize: 70Gi
storageClassName: local-pathwhere:
spec.components.clair.overrides.volumeSize-
Specifies the desired capacity for the ephemeral scratch volume.
spec.components.clair.overrides.storageClassName-
Specifies the storage class to use for the ephemeral scratch volume.
spec.components.postgres.overrides.volumeSize-
Specifies the desired capacity for the database persistent volume.
spec.components.postgres.overrides.storageClassName-
Specifies the storage class to use for the database persistent volume.
spec.components.clairpostgres.overrides.volumeSize-
Specifies the desired capacity for the database persistent volume.
spec.components.clairpostgres.overrides.storageClassName-
Specifies the storage class to use for the database persistent volume.
Configuring ephemeral storage for managed Clair
To increase Clair scratch space for image layer extraction on Project Quay, you can set volumeSize and storageClassName overrides on the managed clair component in the QuayRegistry custom resource.
When you deploy managed Clair, the Operator provisions an ephemeral volume named indexer-layer-storage for temporary image layer extraction during vulnerability scanning. If your registry scans large images, this scratch space can fill and cause Clair pods to fail.
By default, the ephemeral volume requests 20Gi of storage and uses the cluster default storage class. You can override the capacity and storage class without adding new fields to the QuayRegistry CR. The Operator applies these values to the ephemeral volume mounted at /var/tmp.
|
Note
|
These overrides apply to Clair scratch storage at |
-
Edit your
QuayRegistrycustom resource. For example:$ oc edit quayregistry <registry_name> -n <namespace> -
Under
spec.components, addoverrides.volumeSizeand, optionally,overrides.storageClassNameto the managedclaircomponent. For example:spec: components: - kind: clair managed: true overrides: volumeSize: 50Gi storageClassName: fast-ssdWhen no overrides are specified, the Operator preserves the default
20Girequest and does not set a storage class. -
Save the changes and wait for the Operator to reconcile the Clair deployment.
-
Verify that the Clair deployment includes the updated ephemeral volume claim template. Confirm that the
storageandstorageClassNamevalues match your overrides:$ oc get deploy -n <namespace> <registry_name>-clair-app \ -o jsonpath='{.spec.template.spec.volumes[?(@.name=="indexer-layer-storage")].ephemeral.volumeClaimTemplate.spec}{"\n"}'Example output{"accessModes":["ReadWriteOnce"],"resources":{"requests":{"storage":"50Gi"}},"storageClassName":"fast-ssd","volumeMode":"Filesystem"}
Tune registry runtime performance
Tune rate limits, HTTP connections, worker processes, and large-artifact settings to match your traffic profile.
Rate limiting and performance configuration fields
The following configuration fields control rate limiting and performance-related behavior for your Project Quay deployment.
| Field | Type | Description |
|---|---|---|
FEATURE_RATE_LIMITS |
Boolean |
Whether to enable rate limits on API and registry endpoints. Setting FEATURE_RATE_LIMITS to Default: |
PROMETHEUS_NAMESPACE |
String |
The prefix applied to all exposed Prometheus metrics Default: |
# ...
FEATURE_RATE_LIMITS: false
PROMETHEUS_NAMESPACE: quay
# ...Environment variable configuration
The following environment variables tune Project Quay runtime behavior for geo-replication, database pooling, HTTP concurrency, and worker scaling.
Use environment variables cautiously. These options typically override or augment existing configuration mechanisms.
This section documents environment variables related to the following components:
-
Geo-replication preferences
-
Database connection pooling
-
HTTP connection concurrency
-
Worker process scaling
HTTP connection counts
Use worker connection count environment variables to limit simultaneous HTTP connections per Project Quay worker process globally or per component. These limits apply either globally or can be scoped to individual components (registry, web UI, or security scanning).
By default, each worker process allows up to 50 parallel connections. This setting is distinct from the number of worker processes. Connection-related environment variables can be configured differently depending on your deployment type:
-
In standalone deployments, configure connection counts in the
config.yamlfile. -
In Red Hat Quay on OpenShift Container Platform deployments, define the values in the
envblock of theQuayRegistryCR.
| Variable | Type | Description |
|---|---|---|
WORKER_CONNECTION_COUNT |
Number |
Global default for the maximum number of HTTP connections per worker process. Default: 50 |
WORKER_CONNECTION_COUNT_REGISTRY |
Number |
HTTP connections per registry worker. Default: |
WORKER_CONNECTION_COUNT_WEB |
Number |
HTTP connections per web UI worker. Default: |
WORKER_CONNECTION_COUNT_SECSCAN |
Number |
HTTP connections per Clair security scanner worker. Default: |
WORKER_CONNECTION_COUNT: 10
WORKER_CONNECTION_COUNT_REGISTRY: 10
WORKER_CONNECTION_COUNT_WEB: 10
WORKER_CONNECTION_COUNT_SECSCAN: 10env:
- name: WORKER_CONNECTION_COUNT
value: "10"
- name: WORKER_CONNECTION_COUNT_REGISTRY
value: "10"
- name: WORKER_CONNECTION_COUNT_WEB
value: "10"
- name: WORKER_CONNECTION_COUNT_SECSCAN
value: "10"Worker process counts
Use worker count environment variables to set how many parallel processes handle registry, web UI, and security scanning requests in Project Quay.
If not explicitly set, Project Quay calculates the number of worker processes automatically based on the number of available CPU cores. While this dynamic scaling can optimize performance on larger machines, it might also lead to unnecessary resource usage in smaller environments.
In Red Hat Quay on OpenShift Container Platform deployments, the Operator sets the following default values:
-
WORKER_COUNT_REGISTRY: 8 -
WORKER_COUNT_WEB: 4 -
WORKER_COUNT_SECSCAN: 2
| Variable | Type | Description |
|---|---|---|
WORKER_COUNT |
Number |
Generic override for number of processes |
WORKER_COUNT_REGISTRY |
Number |
Specifies the number of processes to handle Registry requests within the |
WORKER_COUNT_WEB |
Number |
Specifies the number of processes to handle UI/Web requests within the container. Values: Integer between |
WORKER_COUNT_SECSCAN |
Number |
Specifies the number of processes to handle Security Scanning (e.g. Clair) integration within the container. Values: Integer. Because the Operator specifies 2 vCPUs for resource requests and limits, setting this value between |
WORKER_COUNT: 10
WORKER_COUNT_REGISTRY: 16
WORKER_COUNT_WEB: 8
WORKER_COUNT_SECSCAN: 4env:
- name: WORKER_COUNT
value: "10"
- name: WORKER_COUNT_REGISTRY
value: "16"
- name: WORKER_COUNT_WEB
value: "8"
- name: WORKER_COUNT_SECSCAN
value: "4"Preparing your registry to accept large artifacts
To accept large AI or ML artifacts in Project Quay, you can increase the minimum_chunk_size_mb value in your config.yaml file after you consult Red Hat Support.
|
Important
|
Before altering the Altering this field can also slow down uploads. You should only alter this field if necessary. |
Artificial intelligence (AI) or machine learning (ML) artifacts such as large-language models (LLMs), vector graphics, trained model files, or large datasets often require that Project Quay administrators modify their registry to suit the needs of pushing such larger artifacts. By default, Project Quay uses a minimum chunk size (or the pieces that a large file is split into during upload) of 5 MB. This means that larger layers, for example, 50 GB, result in 10,000 chunks. This can be confirmed based on the following formula:
-
50 GB = 50,000 MB
-
50,000 MB divided by Project Quay’s default minimum chunk size of 5 MB = 10,000 chunks
Some backend storage providers, for example, Amazon Web Services (AWS) S3, are unable to store artifacts larger than 50 GB because of a strict limitation of 10,000 parts per upload; attempting to push an artifact larger than 50 GB with Project Quay’s default of 5 MB results in S3 protocol violations.
As a workaround to this limitation, you can set the minimum_chunk_size_mb field in your config.yaml file to a value larger than 5 MB. For example:
# ...
minimum_chunk_size_mb: 20
# ...Configuring minimum_chunk_size_mb to more than 5 MB allows your registry backend to accept artifacts larger than 50 GB and up to 200 GB. In the event that your artifact is larger than 200 GB, you could increase the minimum_chunk_size_mb value.
Consult Red Hat Support before you alter the minimum_chunk_size_mb configuration field.
Extend
Customize container images used by the Quay Operator
Override default Quay Operator container images with environment variables and apply overrides to a running Operator.
Customizing Default Operator Images
|
Note
|
Currently, customizing default Operator images is not supported on IBM Power and IBM Z. |
Customizing default Operator images lets you override the default container images used by the Project Quay Operator by setting environment variables in the ClusterServiceVersion object.
|
Important
|
Customizing default Operator images is not supported for production Project Quay environments and is only recommended for development or testing purposes. There is no guarantee your deployment will work correctly when using non-default images with the Project Quay Operator. |
Environment Variables
The Project Quay Operator uses environment variables to override default container images for components such as base, clair, postgres, and redis. You can set these variables in the ClusterServiceVersion object to customize which images the Operator uses for each component.
Environment Variable |
Component |
|
|
|
|
|
|
|
|
|
Note
|
Overridden images must be referenced by manifest (@sha256:) and not by tag (:latest). |
Applying overrides to a running Operator
To override container images for a running Project Quay Operator, you can modify the ClusterServiceVersion object to add environment variables that point to your custom images. This applies the overrides at the Operator level, so all QuayRegistry instances use the same custom images.
-
The
ClusterServiceVersionobject is Operator Lifecycle Manager’s representation of a running Operator in the cluster. Find the Project Quay Operator’sClusterServiceVersionby using a Kubernetes UI or thekubectl/ocCLI tool. For example:$ oc get clusterserviceversions -n <namespace> -
Using the UI,
oc edit, or another method, modify theClusterServiceVersionobject to include the environment variables outlined above to point to the override images:JSONPath:
spec.install.spec.deployments[0].spec.template.spec.containers[0].env- name: RELATED_IMAGE_COMPONENT_QUAY value: quay.io/projectquay/quay@sha256:c35f5af964431673f4ff5c9e90bdf45f19e38b8742b5903d41c10cc7f6339a6d - name: RELATED_IMAGE_COMPONENT_CLAIR value: quay.io/projectquay/clair@sha256:70c99feceb4c0973540d22e740659cd8d616775d3ad1c1698ddf71d0221f3ce6 - name: RELATED_IMAGE_COMPONENT_POSTGRES value: centos/postgresql-10-centos7@sha256:de1560cb35e5ec643e7b3a772ebaac8e3a7a2a8e8271d9e91ff023539b4dfb33 - name: RELATED_IMAGE_COMPONENT_REDIS value: centos/redis-32-centos7@sha256:06dbb609484330ec6be6090109f1fa16e936afcf975d1cbc5fff3e6c7cae7542
Surface image vulnerabilities in the OpenShift cluster console
Install the Container Security Operator on OpenShift to view image vulnerabilities in the console and CLI.
Container Security Operator
The Container Security Operator (CSO) scans images for active pods and reports vulnerabilities through the Kubernetes API. You can use CSO with Project Quay and Clair to monitor security issues in running workloads.
|
Important
|
The Container Security Operator has been deprecated and planned for removal in a future release of Project Quay and OpenShift Container Platform. The official replacement product of the Container Security Operator is Red Hat Advanced Cluster Security for Kubernetes. |
|
Note
|
The CSO does not work without Project Quay and Clair. |
The Container Security Operator (CSO) includes the following features:
-
Watches containers associated with pods on either specified or all namespaces.
-
Queries the container registry where the containers came from for vulnerability information, provided that an image’s registry supports image scanning, such as a Project Quay registry with Clair scanning.
-
Exposes vulnerabilities through the
ImageManifestVulnobject in the Kubernetes API.
|
Note
|
To see instructions on installing the CSO on Kubernetes, select the Install button on the Container Security Operator OperatorHub page. |
Downloading and running the Container Security Operator in OpenShift Container Platform
To scan container images for vulnerabilities in your OpenShift Container Platform cluster, you can install the Container Security Operator from the OpenShift Container Platform OperatorHub and view vulnerability information in the dashboard.
The following procedure sets up the Container Security Operator to monitor pods and expose vulnerability data through the Kubernetes API.
|
Note
|
In the following procedure, the Container Security Operator is installed in the |
After completing this procedure, you are made aware of what images are vulnerable, what you must do to fix those vulnerabilities, and every namespace that the image was run in. Knowing this, you can perform the following actions:
-
Alert users who are running the image that they need to correct the vulnerability.
-
Stop the images from running by deleting the deployment or the object that started the pod that the image is in.
-
On the OpenShift Container Platform console page, select Operators → OperatorHub and search for Container Security Operator.
-
Select the Container Security Operator, then select Install to go to the Create Operator Subscription page.
-
Check the settings (all namespaces and automatic approval strategy, by default), and select Subscribe. The Container Security appears after a few moments on the Installed Operators screen.
-
Optional: you can add custom certificates to the CSO. In this example, create a certificate named
quay.crtin the current directory. Then, run the following command to add the certificate to the CSO:$ oc create secret generic container-security-operator-extra-certs --from-file=quay.crt -n openshift-operatorsNoteYou must restart the Operator pod for the new certificates to take effect.
-
Navigate to Home → Overview. A link to Image Vulnerabilities appears under the status section, with a listing of the number of vulnerabilities found so far. Select the link to see a security breakdown, as shown in the following image:
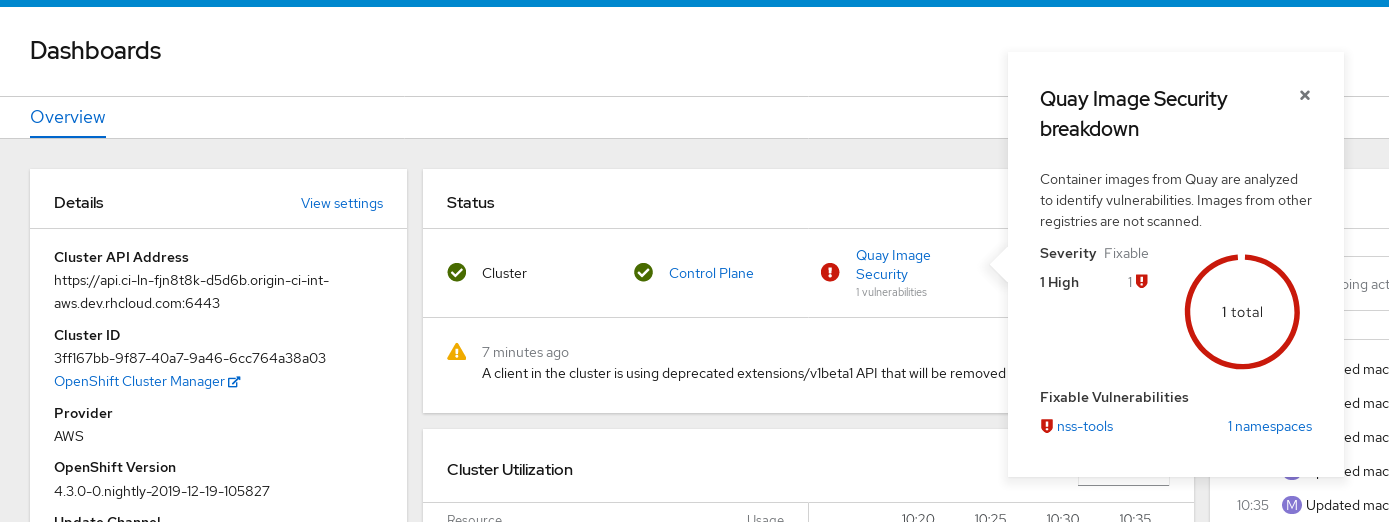 Important
The Container Security Operator currently provides broken links for Red Hat Security advisories. For example, the following link might be provided:
https://access.redhat.com/errata/RHSA-2023:1842%20https://access.redhat.com/security/cve/CVE-2023-23916. The%20in the URL represents a space character, however it currently results in the combination of the two URLs into one incomplete URL, for example,https://access.redhat.com/errata/RHSA-2023:1842andhttps://access.redhat.com/security/cve/CVE-2023-23916. As a temporary workaround, you can copy each URL into your browser to navigate to the proper page. This is a known issue and will be fixed in a future version of Project Quay. -
You can do one of two things at this point to follow up on any detected vulnerabilities:
-
Select the link to the vulnerability. You are taken to the container registry, Project Quay or other registry where the container came from, where you can see information about the vulnerability. The following figure shows an example of detected vulnerabilities from a Quay.io registry:
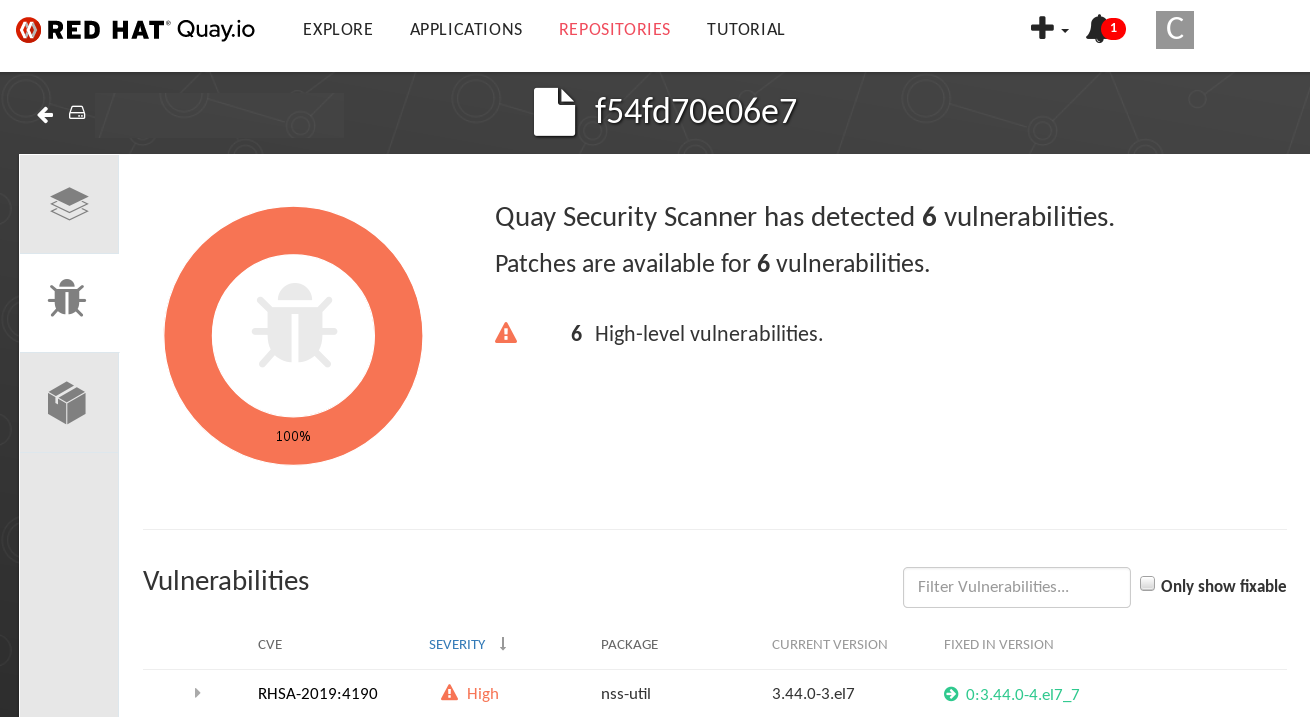
-
Select the namespaces link to go to the Image Manifest Vulnerabilities page, where you can see the name of the selected image and all namespaces where that image is running. The following figure indicates that a particular vulnerable image is running in two namespaces:
-
Querying image vulnerabilities from the CLI
To check for security vulnerabilities in your Project Quay container images, you can query vulnerability information from the command line using the oc get vuln command. You can also view detailed information about specific vulnerabilities by using the oc describe vuln command.
-
Enter the following command to query for detected vulnerabilities:
$ oc get vuln --all-namespacesExample outputNAMESPACE NAME AGE default sha256.ca90... 6m56s skynet sha256.ca90... 9m37s -
Optional. To display details for a particular vulnerability, identify a specific vulnerability and its namespace, and use the
oc describecommand. The following example shows an active container whose image includes an RPM package with a vulnerability:$ oc describe vuln --namespace <namespace> sha256.ac50e3752...
Name: sha256.ac50e3752...
Namespace: quay-enterprise
...
Spec:
Features:
Name: nss-util
Namespace Name: centos:7
Version: 3.44.0-3.el7
Versionformat: rpm
Vulnerabilities:
Description: Network Security Services (NSS) is a set of libraries...
Uninstalling the Container Security Operator
To uninstall the Container Security Operator from your OpenShift Container Platform deployment, you must uninstall the Operator and delete the imagemanifestvulns.secscan.quay.redhat.com custom resource definition (CRD).
Without removing the CRD, image vulnerabilities are still reported on the OpenShift Container Platform Overview page.
-
On the OpenShift Container Platform web console, click Operators → Installed Operators.
-
Click the menu kebab of the Container Security Operator.
-
Click Uninstall Operator. Confirm your decision by clicking Uninstall in the popup window.
-
Remove the
imagemanifestvulns.secscan.quay.redhat.comcustom resource definition by entering the following command:$ oc delete customresourcedefinition imagemanifestvulns.secscan.quay.redhat.comExample outputcustomresourcedefinition.apiextensions.k8s.io "imagemanifestvulns.secscan.quay.redhat.com" deleted
Troubleshoot
Get help from Red Hat Support
Search the Red Hat Knowledgebase and submit a support case when you need help with Red Hat Quay.
Getting support
To get help with Project Quay or file a support ticket, you can use the Red Hat Customer Portal and Knowledgebase. You can search articles, submit a support case, or use the debugging tool and health endpoint to gather information before contacting support.
To identify issues with your deployment, you can use the Project Quay debugging tool, or check the health endpoint of your deployment to obtain information about your problem. After you have debugged or obtained health information about your deployment, you can search the Red Hat Knowledgebase for a solution or file a support ticket.
If you have a suggestion for improving this documentation or have found an error, submit a Jira issue to the ProjectQuay project. Provide specific details, such as the section name and Project Quay version.
About the Red Hat Knowledgebase
The Red Hat Knowledgebase provides rich content aimed at helping you make the most of Red Hat’s products and technologies. The Red Hat Knowledgebase consists of articles, product documentation, and videos outlining best practices on installing, configuring, and using Red Hat products. In addition, you can search for solutions to known issues, each providing concise root cause descriptions and remedial steps.
The Project Quay Support Team also maintains a consolidate troubleshooting article for Project Quay that details solutions to common problems. This evolving document can guide you through various issues effectively and efficiently.
Searching the Red Hat Knowledgebase
To find solutions for Project Quay issues, you can search the Red Hat Knowledgebase. Log in to the Customer Portal, enter keywords related to your problem, and apply the Project Quay and Knowledgebase filters.
-
You have a Red Hat Customer Portal account.
-
Log in to the Red Hat Customer Portal.
-
In the main Red Hat Customer Portal search field, input keywords and strings relating to the problem, including:
-
Project Quay components (such as database)
-
Related procedure (such as installation)
-
Warnings, error messages, and other outputs related to explicit failures
-
-
Click Search.
-
Select the Project Quay product filter.
-
Select the Knowledgebase content type filter.
Submitting a support case
To file a support ticket for Project Quay, you can submit a support case from the Red Hat Customer Portal. Log in, open a support case, enter problem details, select Project Quay and your version, and optionally attach debug logs.
-
You have a Red Hat Customer Portal account.
-
You have a Red Hat standard or premium Subscription.
-
Log in to the Red Hat Customer Portal and select Open a support case.
-
Select the Troubleshoot tab.
-
For Summary, enter a concise but descriptive problem summary and further details about the symptoms being experienced, as well as your expectations.
-
Review the list of suggested Red Hat Knowledgebase solutions for a potential match against the problem that is being reported. If the suggested articles do not address the issue, continue to the following step.
-
For Product, select Project Quay.
-
Select the version of Project Quay that you are using.
-
Click Continue.
-
Optional. Drag and drop, paste, or browse to upload a file. This could be debug logs gathered from your Project Quay deployment.
-
Click Get support to file your ticket.
Enable debug mode to diagnose issues
Run standalone Red Hat Quay or the Operator in debug mode, including LDAP deployments, to capture detailed diagnostic logs.
Running Project Quay in debug mode
To gather debugging information for support cases and troubleshoot issues, you can run Project Quay in debug mode. Debug mode provides verbose logging that speeds up reproducing errors and supports root cause analysis for geo-replication, Operator, standalone deployments, and object storage.
Project Quay debug variables
Project Quay offers two configuration fields that can be added to your config.yaml file to help diagnose issues or help obtain log information.
| Variable | Type | Description | ||
|---|---|---|---|---|
DEBUGLOG |
Boolean |
Whether to enable or disable debug logs. Must be |
||
USERS_DEBUG |
Integer. Either |
Used to debug LDAP operations in clear text, including passwords. Must be used with
|
Running a standalone Project Quay deployment in debug mode
To run a standalone Project Quay deployment in debug mode and get verbose logging for troubleshooting, you can use podman run with DEBUGLOG=true. View debug output with the podman logs command.
-
Enter the following command to run your standalone Project Quay deployment in debug mode:
$ podman run -p 443:8443 -p 80:8080 -e DEBUGLOG=true -v /config:/conf/stack -v /storage:/datastorage -d {productrepo}/{quayimage}:{productminv} -
To view the debug logs, enter the following command:
$ podman logs <quay_container_name>
Running an LDAP Project Quay deployment in debug mode
To run an LDAP Project Quay deployment in debug mode and debug LDAP operations, you can use podman run with DEBUGLOG=true and USERS_DEBUG=1. View debug output with the podman logs command.
-
Enter the following command to run your LDAP Project Quay deployment in debug mode:
$ podman run -p 443:8443 -p 80:8080 -e DEBUGLOG=true -e USERS_DEBUG=1 -v /config:/conf/stack -v /storage:/datastorage -d {productrepo}/{quayimage}:{productminv} -
To view the debug logs, enter the following command:
$ podman logs <quay_container_name>ImportantSetting
USERS_DEBUG=1exposes credentials in clear text. This variable should be removed from the Project Quay deployment after debugging. The log file that is generated with this environment variable should be scrutinized, and passwords should be removed before sending to other users. Use with caution.
Running the Project Quay Operator in debug mode
To run the Project Quay Operator in debug mode and get verbose logging for troubleshooting, you can edit the QuayRegistry custom resource and add DEBUGLOG=true to the env overrides. After the Operator restarts, try pulling an image or dump logs from Quay pods for more information.
-
Enter the following command to edit the
QuayRegistrycustom resource definition:$ oc edit quayregistry <quay_registry_name> -n <quay_namespace> -
Update the
QuayRegistryto add the following parameters:spec: - kind: quay managed: true overrides: env: - name: DEBUGLOG value: "true" -
After the Project Quay Operator has restarted with debugging enabled, try pulling an image from the registry. If the pull is still slow, dump all logs from all
Quaypods to a file, and check the files for more information.
Collect logs and configuration for troubleshooting
Collect Red Hat Quay logs, verbose output, and configuration details to diagnose failures or share evidence with support.
Logging information for Project Quay
To troubleshoot, monitor, and secure your Project Quay deployment, you can use log information from containers and pods. Logs support debugging, performance monitoring, security analysis, capacity planning, and deployment verification.
Some of the reasons why obtaining log information is valuable include the following:
-
Debugging and Troubleshooting: Logs provide insights into what’s happening inside the application, allowing developers and system administrators to identify and resolve issues. By analyzing log messages, one can identify errors, exceptions, warnings, or unexpected behavior that might occur during the application’s execution.
-
Performance Monitoring: Monitoring logs helps to track the performance of the application and its components. Monitoring metrics like response times, request rates, and resource utilization can help in optimizing and scaling the application to meet the demand.
-
Security Analysis: Logs can be essential in auditing and detecting potential security breaches. By analyzing logs, suspicious activities, unauthorized access attempts, or any abnormal behavior can be identified, helping in detecting and responding to security threats.
-
Tracking User Behavior: In some cases, logs can be used to track user activities and behavior. This is particularly important for applications that handle sensitive data, where tracking user actions can be useful for auditing and compliance purposes.
-
Capacity Planning: Log data can be used to understand resource utilization patterns, which can aid in capacity planning. By analyzing logs, one can identify peak usage periods, anticipate resource needs, and optimize infrastructure accordingly.
-
Error Analysis: When errors occur, logs can provide valuable context about what happened leading up to the error. This can help in understanding the root cause of the issue and facilitating the debugging process.
-
Verification of Deployment: Logging during the deployment process can help verify if the application is starting correctly and if all components are functioning as expected.
-
Continuous Integration/Continuous Deployment (CI/CD): In CI/CD pipelines, logging is essential to capture build and deployment statuses, allowing teams to monitor the success or failure of each stage.
Obtaining log information for Project Quay
To obtain log information for your Project Quay deployment and troubleshoot authentication, authorization, or object storage issues, you can use oc logs for Operator deployments or podman logs for standalone deployments. You can then search the Red Hat Knowledgebase or file a support ticket.
-
If you are using the Project Quay Operator on OpenShift Container Platform, enter the following command to view the logs:
$ oc logs <quay_pod_name> -
If you are on a standalone Project Quay deployment, enter the following command:
$ podman logs <quay_container_name>Example output... gunicorn-web stdout | 2023-01-20 15:41:52,071 [205] [DEBUG] [app] Starting request: urn:request:0d88de25-03b0-4cf9-b8bc-87f1ac099429 (/oauth2/azure/callback) {'X-Forwarded-For': '174.91.79.124'} ...
Examining verbose logs
To get a detailed status check of your Project Quay database pod or container, you can use oc logs or podman logs with --previous and copy PostgreSQL logs with oc cp or podman cp. Enable DEBUGLOG=true for additional debugging information.
|
Note
|
Additional debugging information can be returned if you have deployed Project Quay in one of the following ways:
For more information, see "Running Project Quay in debug mode". |
-
Enter the following commands to examine verbose database logs.
-
If you are using the Project Quay Operator on OpenShift Container Platform, enter the following commands:
$ oc logs <quay_pod_name> --previous$ oc logs <quay_pod_name> --previous -c <container_name>$ oc cp <quay_pod_name>:/var/lib/pgsql/data/userdata/log/* /path/to/desired_directory_on_host -
If you are using a standalone deployment of Project Quay, enter the following commands:
$ podman logs <quay_container_id> --previous$ podman logs <quay_container_id> --previous -c <container_name>$ podman cp <quay_container_id>:/var/lib/pgsql/data/userdata/log/* /path/to/desired_directory_on_host
-
Configuration information for Project Quay
To identify and resolve Project Quay configuration issues, you can check the configuration YAML. You can verify parameters, resource limits, connectivity, authentication, replication, and backup settings.
Checking the configuration YAML can help you address the following issues:
-
Incorrect Configuration Parameters: If the database is not functioning as expected or is experiencing performance issues, your configuration parameters could be at fault. By checking the configuration YAML, administrators can ensure that all the required parameters are set correctly and match the intended settings for the database.
-
Resource Limitations: The configuration YAML might specify resource limits for the database, such as memory and CPU limits. If the database is running into resource constraints or experiencing contention with other services, adjusting these limits can help optimize resource allocation and improve overall performance.
-
Connectivity Issues: Incorrect network settings in the configuration YAML can lead to connectivity problems between the application and the database. Ensuring that the correct network configurations are in place can resolve issues related to connectivity and communication.
-
Data Storage and Paths: The configuration YAML may include paths for storing data and logs. If the paths are misconfigured or inaccessible, the database may encounter errors while reading or writing data, leading to operational issues.
-
Authentication and Security: The configuration YAML may contain authentication settings, including usernames, passwords, and access controls. Verifying these settings is crucial for maintaining the security of the database and ensuring only authorized users have access.
-
Plugin and Extension Settings: Some databases support extensions or plugins that enhance functionality. Issues may arise if these plugins are misconfigured or not loaded correctly. Checking the configuration YAML can help identify any problems with plugin settings.
-
Replication and High Availability Settings: In clustered or replicated database setups, the configuration YAML may define replication settings and high availability configurations. Incorrect settings can lead to data inconsistency and system instability.
-
Backup and Recovery Options: The configuration YAML might include backup and recovery options, specifying how data backups are performed and how data can be recovered in case of failures. Validating these settings can ensure data safety and successful recovery processes.
By checking your configuration YAML, Project Quay administrators can detect and resolve these issues before they cause significant disruptions to the application or service relying on the database.
Obtaining database configuration information
To obtain database configuration information for your Project Quay deployment, you can use oc exec for Operator deployments or podman exec for standalone deployments to read postgresql.conf from the database pod or container.
|
Warning
|
Interacting with the PostgreSQL database is potentially destructive. Red Hat recommends that you perform the following procedure with a Project Quay Support Specialist. |
-
If you are using the Project Quay Operator on OpenShift Container Platform, enter the following command:
$ oc exec -it <database_pod> -- cat /var/lib/pgsql/data/userdata/postgresql.conf -
If you are using a standalone deployment of Project Quay, enter the following command:
$ podman exec -it <database_container> cat /var/lib/pgsql/data/userdata/postgresql.conf
Troubleshoot Quay database and authentication issues
Troubleshoot Red Hat Quay database, authentication, and superuser password reset issues on standalone or Operator deployments.
Troubleshooting Project Quay components
To troubleshoot specific Project Quay components and resolve component-related issues, you can use the procedures in this document. You can also run in debug mode, obtain logs and config, perform health checks, then search the Red Hat Knowledgebase or file a support ticket.
By using the following procedures, you are able to troubleshoot common component issues. Afterwards, you can search for solutions on the Red Hat Knowledgebase or file a support ticket with the Red Hat Support team.
Troubleshooting the Project Quay database
To troubleshoot the Project Quay database and resolve connectivity, configuration, or resource issues, you can check deployment type, pod or container status, logs, connectivity, and configuration. You can also examine resource allocation and interact with the PostgreSQL database.
-
Image Metadata. The database stores metadata associated with container images, such as image names, versions, creation timestamps, and the user or organization that owns the image. This information allows for easy identification and organization of container images within the registry.
-
Image Tags. You can assign tags to container images for labeling and versioning. The PostgreSQL database maintains the mapping between image tags and their corresponding image manifests, so you can retrieve specific versions of container images based on the provided tags.
-
Image Layers. Container images are composed of multiple layers, which are stored as individual objects. The database records information about these layers, including their order, checksums, and sizes. This data is crucial for efficient storage and retrieval of container images.
-
User and Organization Data. Project Quay supports user and organization management, allowing users to authenticate and manage access to container images. The PostgreSQL database stores user and organization information, including usernames, email addresses, authentication tokens, and access permissions.
-
Repository Information. Project Quay organizes container images into repositories, which act as logical units for grouping related images. The database maintains repository data, including names, descriptions, visibility settings, and access control information, enabling users to manage and share their repositories effectively.
-
Event Logs. Project Quay tracks various events and activities related to image management and repository operations. These event logs, including image pushes, pulls, deletions, and repository modifications, are stored in the PostgreSQL database, providing an audit trail and allowing administrators to monitor and analyze system activities.
You can use the following procedures to troubleshoot the database:
-
Checking the type of deployment: Determine if the database is deployed as a container on a virtual machine or as a pod on OpenShift Container Platform.
-
Checking the container or pod status: Verify the status of the
databasepod or container using specific commands based on the deployment type. -
Examining the database container or pod logs: Access and examine the logs of the database pod or container, including commands for different deployment types.
-
Checking the connectivity between Project Quay and the database pod: Check the connectivity between Project Quay and the
databasepod using relevant commands. -
Checking the database configuration: Check the database configuration at various levels (OpenShift Container Platform or PostgreSQL level) based on the deployment type.
-
Checking resource allocation: Monitor resource allocation for the Project Quay deployment, including disk usage and other resource usage.
-
Interacting with the Project Quay database: Learn how to interact with the PostgreSQL database, including commands to access and query databases.
Troubleshooting Project Quay database issues
To troubleshoot Project Quay database issues and resolve common errors like database connection refused or authentication failed, you can check the database logs, verify credentials, and ensure the database is running.
Resetting superuser passwords on Project Quay standalone deployments
To reset the superuser password on your Project Quay standalone deployment, you can generate a bcrypt-hashed password with Python, exec into the PostgreSQL container with podman exec, and update the user table with the new hashed password.
-
You have created a Project Quay superuser.
-
You have installed Python 3.9.
-
You have installed the
pippackage manager for Python. -
You have installed the
bcryptpackage forpip.
-
Generate a secure, hashed password using the
bcryptpackage in Python 3.9 by entering the following command:$ python3.9 -c 'import bcrypt; print(bcrypt.hashpw(b"newpass1234", bcrypt.gensalt(12)).decode("utf-8"))'Example output$2b$12$T8pkgtOoys3G5ut7FV1She6vXlYgU.6TeoGmbbAVQtN8X8ch4knKm -
Enter the following command to show the container ID of your Project Quay container registry:
$ sudo podman ps -aExample outputCONTAINER ID IMAGE COMMAND CREATED STATUS PORTS NAMES 70560beda7aa registry.redhat.io/rhel8/redis-5:1 run-redis 2 hours ago Up 2 hours ago 0.0.0.0:6379->6379/tcp redis 8012f4491d10 registry.redhat.io/quay/quay-rhel8:v3.8.2 registry 3 minutes ago Up 8 seconds ago 0.0.0.0:80->8080/tcp, 0.0.0.0:443->8443/tcp quay 8b35b493ac05 registry.redhat.io/rhel8/postgresql-10:1 run-postgresql 39 seconds ago Up 39 seconds ago 0.0.0.0:5432->5432/tcp postgresql-quay -
Execute an interactive shell for the
postgresqlcontainer image by entering the following command:$ sudo podman exec -it 8b35b493ac05 /bin/bash -
Re-enter the
quayPostgreSQL database server, specifying the database, username, and host address:bash-4.4$ psql -d quay -U quayuser -h 192.168.1.28 -W -
Update the
password_hashof the superuser admin who lost their password:quay=> UPDATE public.user SET password_hash = '$2b$12$T8pkgtOoys3G5ut7FV1She6vXlYgU.6TeoGmbbAVQtN8X8ch4knKm' where username = 'quayadmin';Example outputUPDATE 1 -
Enter the following to command to ensure that the
password_hashhas been updated:quay=> select * from public.user;Example outputid | uuid | username | password_hash | email | verified | stripe_id | organization | robot | invoice_email | invalid_login_attempts | last_invalid_login |removed_tag_expiration_s | enabled | invoice_email_address | company | family_name | given_name | location | maximum_queued_builds_count | creation_date | last_accessed ----+--------------------------------------+-----------+--------------------------------------------------------------+-----------------------+--- -------+-----------+--------------+-------+---------------+------------------------+----------------------------+--------------------------+------ ---+-----------------------+---------+-------------+------------+----------+-----------------------------+----------------------------+----------- 1 | 73f04ef6-19ba-41d3-b14d-f2f1eed94a4a | quayadmin | $2b$12$T8pkgtOoys3G5ut7FV1She6vXlYgU.6TeoGmbbAVQtN8X8ch4knKm | quayadmin@example.com | t | | f | f | f | 0 | 2023-02-23 07:54:39.116485 | 1209600 | t | | | | | | | 2023-02-23 07:54:39.116492 -
Log in to your Project Quay deployment using the new password:
$ sudo podman login -u quayadmin -p newpass1234 http://quay-server.example.com --tls-verify=falseExample outputLogin Succeeded!
Resetting superuser passwords on the Project Quay Operator
To reset the superuser password on your Project Quay Operator deployment, you can generate a bcrypt-hashed password with Python, log in to the PostgreSQL database with oc rsh and psql, and update the user table with the new hashed password.
-
You have created a Project Quay superuser.
-
You have installed Python 3.9.
-
You have installed the
pippackage manager for Python. -
You have installed the
bcryptpackage forpip.
-
Log in to your Project Quay deployment.
-
On the OpenShift Container Platform UI, navigate to Workloads → Secrets.
-
Select the namespace for your Project Quay deployment, for example,
Project quay. -
Locate and store the PostgreSQL database credentials.
-
Generate a secure, hashed password using the
bcryptpackage in Python 3.9 by entering the following command:$ python3.9 -c 'import bcrypt; print(bcrypt.hashpw(b"newpass1234", bcrypt.gensalt(12)).decode("utf-8"))'Example output$2b$12$zoilcTG6XQeAoVuDuIZH0..UpvQEZcKh3V6puksQJaUQupHgJ4.4y -
On the CLI, log in to the database, for example:
$ oc rsh quayuser-quay-quay-database-669c8998f-v9qsl -
Enter the following command to open a connection to the
quayPostgreSQL database server, specifying the database, username, and host address:sh-4.4$ psql -U quayuser-quay-quay-database -d quayuser-quay-quay-database -W -
Enter the following command to connect to the default database for the current user:
quay=> \c -
Update the
password_hashof the superuser admin who lost their password:quay=> UPDATE public.user SET password_hash = '$2b$12$zoilcTG6XQeAoVuDuIZH0..UpvQEZcKh3V6puksQJaUQupHgJ4.4y' where username = 'quayadmin'; -
Enter the following to command to ensure that the
password_hashhas been updated:quay=> select * from public.user;Example outputid | uuid | username | password_hash | email | verified | stripe_id | organization | robot | invoice_email | invalid_login_attempts | last_invalid_login |removed_tag_expiration_s | enabled | invoice_email_address | company | family_name | given_name | location | maximum_queued_builds_count | creation_date | last_accessed ----+--------------------------------------+-----------+--------------------------------------------------------------+-----------------------+--- -------+-----------+--------------+-------+---------------+------------------------+----------------------------+--------------------------+------ ---+-----------------------+---------+-------------+------------+----------+-----------------------------+----------------------------+----------- 1 | 73f04ef6-19ba-41d3-b14d-f2f1eed94a4a | quayadmin | $2b$12$zoilcTG6XQeAoVuDuIZH0..UpvQEZcKh3V6puksQJaUQupHgJ4.4y | quayadmin@example.com | t | | f | f | f | 0 | 2023-02-23 07:54:39.116485 | 1209600 | t | | | | | | | 2023-02-23 07:54:39.116492 -
Navigate to your Project Quay UI on OpenShift Container Platform and log in using the new credentials.
Troubleshooting Project Quay authentication
Authentication and authorization secure access to Project Quay and safeguard container images, verify identities, and enforce access controls.
The following authentication methods are supported by Project Quay:
-
Username and password. Users can authentication by providing their username and password, which are validated against the user database configured in Project Quay. This traditional method requires users to enter their credentials to gain access.
-
OAuth. Project Quay supports OAuth authentication, which allows users to authenticate using their credentials from third party services like Google, GitHub, or Keycloak. OAuth enables a seamless and federated login experience, eliminating the need for separate account creation and simplifying user management.
-
OIDC. OpenID Connect enables single sign-on (SSO) capabilities and integration with enterprise identity providers. With OpenID Connect, users can authenticate using their existing organizational credentials, providing a unified authentication experience across various systems and applications.
-
Token-based authentication. Users can obtain unique tokens that grant access to specific resources within Project Quay. Tokens can be obtained through various means, such as OAuth or by generating API tokens within the Project Quay user interface. Token-based authentication is often used for automated or programmatic access to the registry.
-
External identity provider. Project Quay can integrate with external identity providers, such as LDAP or AzureAD, for authentication purposes. This integration allows organizations to use their existing identity management infrastructure, enabling centralized user authentication and reducing the need for separate user databases.
Troubleshooting Project Quay authentication and authorization issues for specific users
To troubleshoot Project Quay authentication and authorization issues for specific users, you can exec into the Project Quay pod or container and query the federatedlogin and user tables to verify user records.
-
Exec into the Project Quay pod or container. For more information, see "Interacting with the Project Quay database".
-
Enter the following command to show all users for external authentication:
quay=# select * from federatedlogin;Example outputid | user_id | service_id | service_ident | metadata_json ----+---------+------------+---------------------------------------------+------------------------------------------- 1 | 1 | 3 | testuser0 | {} 2 | 1 | 8 | PK7Zpg2Yu2AnfUKG15hKNXqOXirqUog6G-oE7OgzSWc | {"service_username": "live.com#testuser0"} 3 | 2 | 3 | testuser1 | {} 4 | 2 | 4 | 110875797246250333431 | {"service_username": "testuser1"} 5 | 3 | 3 | testuser2 | {} 6 | 3 | 1 | 26310880 | {"service_username": "testuser2"} (6 rows) -
Verify that the users are inserted into the
usertable:quay=# select username, email from "user";Example outputusername | email -----------+---------------------- testuser0 | testuser0@outlook.com testuser1 | testuser1@gmail.com testuser2 | testuser2@redhat.com (3 rows)
Troubleshoot Quay connectivity and storage issues
Troubleshoot Red Hat Quay connectivity, crashloop states, database pod access, resource allocation, and object storage issues.
Interacting with the Project Quay database
To interact with the Project Quay PostgreSQL database and troubleshoot authorization or authentication issues, you can exec into the database using oc exec for Red Hat Quay on OpenShift Container Platform or podman exec for standalone, then enter the PostgreSQL shell with psql.
|
Warning
|
Interacting with the PostgreSQL database is potentially destructive. Red Hat recommends that you perform the following procedure with a Project Quay Support Specialist. |
|
Note
|
Interacting with the PostgreSQL database can also be used to troubleshoot authorization and authentication issues. |
-
Exec into the Project Quay database.
-
Enter the following commands to exec into the Project Quay database pod on OpenShift Container Platform:
$ oc exec -it <quay_database_pod> -- psql -
Enter the following command to exec into the Project Quay database on a standalone deployment:
$ sudo podman exec -it <quay_container_name> /bin/bash
-
-
Enter the PostgreSQL shell.
WarningInteracting with the PostgreSQL database is potentially destructive. Red Hat recommends that you perform the following procedure with a Project Quay Support Specialist.
-
If you are using the Project Quay Operator, enter the following command to enter the PostgreSQL shell:
$ oc rsh <quay_pod_name> psql -U your_username -d your_database_name -
If you are on a standalone Project Quay deployment, enter the following command to enter the PostgreSQL shell:
bash-4.4$ psql -U your_username -d your_database_name
-
Troubleshooting crashloopbackoff states
To troubleshoot crashloopbackoff states for your Project Quay deployment and restore pods or containers, you can scale down the Quay Operator and database, then edit the database deployment as needed.
-
If your container or pod is in a
crashloopbackoffstate, you can enter the following commands.-
Enter the following command to scale down the Project Quay Operator:
$ oc scale deployment/quay-operator.v3.8.z --replicas=0Example outputdeployment.apps/quay-operator.v3.8.z scaled -
Enter the following command to scale down the Project Quay database:
$ oc scale deployment/<quay_database> --replicas=0Example outputdeployment.apps/<quay_database> scaled -
Enter the following command to edit the Project Quay database:
WarningInteracting with the PostgreSQL database is potentially destructive. Red Hat recommends that you perform the following procedure with a Project Quay Support Specialist.
$ oc edit deployment <quay_database>... template: metadata: creationTimestamp: null labels: quay-component: <quay_database> quay-operator/quayregistry: quay-operator.v3.8.z spec: containers: - env: - name: POSTGRESQL_USER value: postgres - name: POSTGRESQL_DATABASE value: postgres - name: POSTGRESQL_PASSWORD value: postgres - name: POSTGRESQL_ADMIN_PASSWORD value: postgres - name: POSTGRESQL_MAX_CONNECTIONS value: "1000" image: registry.redhat.io/rhel8/postgresql-10@sha256:a52ad402458ec8ef3f275972c6ebed05ad64398f884404b9bb8e3010c5c95291 imagePullPolicy: IfNotPresent name: postgres command: ["/bin/bash", "-c", "sleep 86400"] ...-
Add the
command: ["/bin/bash", "-c", "sleep 86400"]line in the same indentation.Example outputdeployment.apps/<quay_database> edited
-
-
Execute the following command inside of your
<quay_database>:$ oc exec -it <quay_database> -- cat /var/lib/pgsql/data/userdata/postgresql/logs/* /path/to/desired_directory_on_host
-
Checking the connectivity between Project Quay and the database pod
To check the connectivity between your Project Quay instance and the database pod and troubleshoot connection issues, you can use oc exec for Operator deployments or podman exec for standalone deployments.
-
Check the connectivity between Project Quay and the database pod.
-
If you are using the Project Quay Operator on OpenShift Container Platform, enter the following command:
$ oc exec -it _quay_pod_name_ -- curl -v telnet://<database_pod_name>:5432 -
If you are using a standalone deployment of Project Quay, enter the following command:
$ podman exec -it <quay_container_name >curl -v telnet://<database_container_name>:5432
-
Checking resource allocation
To check resource allocation for your Project Quay deployment and monitor disk, CPU, and memory usage, you can use oc exec or podman exec for disk usage and oc adm top pods or podman stats for other resources.
-
Obtain a list of running containers.
-
Monitor disk usage of your Project Quay deployment.
-
If you are using the Project Quay Operator on OpenShift Container Platform, enter the following command:
$ oc exec -it <quay_database_pod_name> -- df -ah -
If you are using a standalone deployment of Project Quay, enter the following command:
$ podman exec -it <quay_database_conatiner_name> df -ah
-
-
Monitor other resource usage.
-
Enter the following command to check resource allocation on a Project Quay Operator deployment:
$ oc adm top pods -
Enter the following command to check the status of a specific pod on a standalone deployment of Project Quay:
$ podman pod stats <pod_name> -
Enter the following command to check the status of a specific container on a standalone deployment of Project Quay:
$ podman stats <container_name>The following information is returned:
-
CPU %. The percentage of CPU usage by the container since the last measurement. This value represents the container’s share of the available CPU resources.
-
MEM USAGE / LIMIT. The current memory usage of the container followed by its memory limit. The values are displayed in the format
current_usage / memory_limit. For example,300.4MiB / 7.795GiBindicates that the container is currently using 300.4 megabytes of memory out of a limit of 7.795 gigabytes. -
MEM %. The percentage of memory usage by the container in relation to its memory limit.
-
NET I/O. The network I/O (input/output) statistics of the container. It displays the amount of data transmitted and received by the container over the network. The values are displayed in the format:
transmitted_bytes / received_bytes. -
BLOCK I/O. The block I/O (input/output) statistics of the container. It represents the amount of data read from and written to the block devices (for example, disks) used by the container. The values are displayed in the format
read_bytes / written_bytes.
-
-
Troubleshooting Project Quay object storage
To troubleshoot Project Quay object storage and resolve issues with container image storage, you can use the procedures in this section. Object storage manages data as discrete units called objects, each with a unique identifier and metadata.
Unlike traditional file systems that organize data into hierarchical directories and files, object storage treats data as independent entities. Each object contains the data itself, along with metadata that describes the object and enables efficient retrieval.
Project Quay uses object storage as the underlying storage mechanism for storing and managing container images. It stores container images as individual objects. Each container image is treated as an object, with its own unique identifier and associated metadata.
Troubleshooting Project Quay object storage issues
To troubleshoot Project Quay object storage issues, you can check the QuayRegistry CR and config.yaml file, verify supported storage and network connectivity, enable debug mode, and test storage access outside Quay.
-
Enter the following command to see what object storage is used:
$ oc get quayregistry quay-registry-name -o yaml -
Ensure that the object storage you are using is officially supported by Project Quay by checking the tested integrations page.
-
Enable debug mode.
-
Check your object storage configuration in your
config.yamlfile. Ensure that the configuration is accurate and matches the settings provided by your object storage provider. You can check information like access credentials, endpoint URLs, bucket and container names, and other relevant configuration parameters. -
Ensure that Project Quay has network connectivity to the object storage endpoint. Check the network configurations to ensure that no restrictions block communication between Project Quay and the object storage endpoint.
-
If
FEATURE_STORAGE_PROXYis enabled in yourconfig.yamlfile, check to see if its download URL is accessible. This can be found in the Project Quay debug logs. For example:$ curl -vvv "https://QUAY_HOSTNAME/_storage_proxy/dhaWZKRjlyO......Kuhc=/https/quay.hostname.com/quay-test/datastorage/registry/sha256/0e/0e1d17a1687fa270ba4f52a85c0f0e7958e13d3ded5123c3851a8031a9e55681?AWSAccessKeyId=xxxx&Signature=xxxxxx4%3D&Expires=1676066703" -
Try access the object storage service outside of Project Quay to determine if the issue is specific to your deployment, or the underlying object storage. You can use command line tools like
aws,gsutil, ors3cmdprovided by the object storage provider to perform basic operations like listing buckets, containers, or uploading and downloading objects. This might help you isolate the problem.
Troubleshoot geo-replication and mirroring
Troubleshoot geo-replication and repository mirroring, including backend bucket checks and authentication.
Troubleshooting geo-replication for Project Quay
To troubleshoot geo-replication for Project Quay and resolve replication issues, you can use the procedures in the following sections. These procedures enable you to identify and fix problems with geo-replication deployments.
Checking data replication in backend buckets
To ensure that your Project Quay data is properly replicated in all backend buckets, you can use the aws CLI to list objects in the bucket. Run aws s3 ls with --recursive, --human-readable, and --summarize to verify replication.
-
You have installed the
awsCLI.
-
Enter the following command to ensure that your data is replicated in all backend buckets:
$ aws --profile quay_prod_s3 --endpoint=http://10.0.x.x:port s3 ls ocp-quay --recursive --human-readable --summarizeExample outputTotal Objects: 17996 Total Size: 514.4 GiB
Checking the status of your backend storage
To check the status of your Project Quay backend storage and verify access, you can use provider dashboards and CLIs for AWS, GCS, NooBaa, ODF, Ceph, Azure, or OpenStack Swift. Ensure all Project Quay instances have access to all S3 storage backends.
-
Amazon Web Service Storage (AWS). Check the AWS S3 service health status on the AWS Service Health Dashboard. Validate your access to S3 by listing objects in a known bucket using the
awsCLI or SDKs. -
Google Cloud Storage (GCS). Check the Google Cloud Status Dashboard for the status of the GCS service. Verify your access to GCS by listing objects in a known bucket using the Google Cloud SDK or GCS client libraries.
-
NooBaa. Check the NooBaa management console or administrative interface for any health or status indicators. Ensure that the NooBaa services and related components are running and accessible. Verify access to NooBaa by listing objects in a known bucket using the NooBaa CLI or SDK.
-
Red Hat OpenShift Data Foundation. Check the OpenShift Container Platform Console or management interface for the status of the Red Hat OpenShift Data Foundation components. Verify the availability of Red Hat OpenShift Data Foundation S3 interface and services. Ensure that the Red Hat OpenShift Data Foundation services are running and accessible. Validate access to Red Hat OpenShift Data Foundation S3 by listing objects in a known bucket using the appropriate S3-compatible SDK or CLI.
-
Ceph. Check the status of Ceph services, including Ceph monitors, OSDs, and RGWs. Validate that the Ceph cluster is healthy and operational. Verify access to Ceph object storage by listing objects in a known bucket using the appropriate Ceph object storage API or CLI.
-
Azure Blob Storage. Check the Azure Status Dashboard to see the health status of the Azure Blob Storage service. Validate your access to Azure Blob Storage by listing containers or objects using the Azure CLI or Azure SDKs.
-
OpenStack Swift. Check the OpenStack Status page to verify the status of the OpenStack Swift service. Ensure that the Swift services, like the proxy server, container servers, object servers, are running and accessible. Validate your access to Swift by listing containers or objects using the appropriate Swift CLI or SDK.
After checking the status of your backend storage, ensure that all Project Quay instances have access to all s3 storage backends.
Verifying authentication and permissions
To verify authentication and permissions for Project Quay repository mirroring and resolve mirroring issues, you can ensure credentials have the necessary access on source and destination instances.
On the Project Quay UI, check the following settings:
-
The access control settings. Ensure that the user or service account performing the mirroring operation has the required privileges.
-
The permissions of your robot account on the Project Quay registry.
Troubleshoot Clair scanning issues
Troubleshoot Clair scanning issues to restore vulnerability reporting in your registry.
Troubleshooting Clair issue
To troubleshoot Clair vulnerability scanning in Project Quay and resolve scan issues, you can verify image compatibility, allowlist Clair updaters when using a proxy, check the Clair config.yaml, and inspect image metadata.
Verifying image compatibility
If you are using Clair, ensure that Clair supports the images you are trying to scan. Clair has certain requirements and does not support all image formats or configurations.
Allowlisting Clair updaters
If you are using Clair behind a proxy configuration, you must allowlist the updaters in your proxy or firewall configuration.
Checking Clair configuration
Check your Clair config.yaml file to ensure that no misconfigurations or inconsistencies could lead to issues.
Inspect image metadata
In some cases, you might receive an Unsupported message. This might indicate that the scanner is unable to extract the necessary metadata from the image. Check if the image metadata is properly formatted and accessible.
Troubleshoot build failures
Troubleshoot Red Hat Quay build failures on Amazon EC2, OpenShift, and Kubernetes, including debug configuration flags.
Troubleshooting Builds
Builder instances in Project Quay are ephemeral and shut down automatically after builds complete or fail. To troubleshoot build issues, you must capture logs while the builds are running.
Debug configuration flag
The DEBUG configuration flag in Project Quay prevents builder instances from shutting down automatically after builds complete or fail. Set this flag to True to debug builder node issues.
EXECUTORS:
- EXECUTOR: ec2
DEBUG: true
...
- EXECUTOR: kubernetes
DEBUG: true
...When set to True, the debug feature prevents the build nodes from shutting down after the quay-builder service is done or fails. It also prevents the build manager from cleaning up the instances by terminating EC2 instances or deleting Kubernetes jobs. This allows debugging builder node issues.
Debugging should not be set in a production cycle. The lifetime service still exists; for example, the instance still shuts down after approximately two hours. When this happens, EC2 instances are terminated and Kubernetes jobs are completed.
Enabling debug also affects the ALLOWED_WORKER_COUNT because the unterminated instances and jobs still count toward the total number of running workers. As a result, the existing builder workers must be manually deleted if ALLOWED_WORKER_COUNT is reached to be able to schedule new builds.
Troubleshooting Amazon EC2
To troubleshoot Amazon EC2 builds in Project Quay, you can identify the builder instance in the EC2 console and access it via SSH. Check the quay-builder service logs to diagnose build issues.
-
Start a Build in Project Quay.
-
In the EC2 console, identify the Build instance. Build instances are named
Quay Ephemeral Builderand have the tag {<Build_UUID>: <uuid>} -
Using the SSH key set by the
EC2_KEY_NAMEconfiguration field, log in to the Builder instance by running the following command:$ ssh -i /path/to/ssh/key/in/ec2/or/config/id_rsa core@<instance_ip> -
Obtain the
quay-builderservice logs by entering the following commands:$ systemctl status quay-builder$ journalctl -f -u quay-builder
Troubleshooting OpenShift Container Platform and Kubernetes Builds
To troubleshoot OpenShift Container Platform and Kubernetes builds in Project Quay, you can create a port forwarding tunnel to the builder pod and access it via SSH. Check the quay-builder service logs to diagnose build issues.
-
Create a port forwarding tunnel between your local machine and a pod running with either an OpenShift Container Platform cluster or a Kubernetes cluster by entering the following command:
$ oc port-forward <builder_pod> 9999:2222 -
Establish an SSH connection to the remote host using a specified SSH key and port, for example:
$ ssh -i /path/to/ssh/key/set/in/ssh_authorized_keys -p 9999 core@localhost -
Obtain the
quay-builderservice logs by entering the following commands:$ systemctl status quay-builder$ journalctl -f -u quay-builder
Troubleshoot Operator-managed PostgreSQL TLS
Troubleshoot Operator-managed PostgreSQL TLS configurations to restore secure database connectivity.
Troubleshooting Operator-managed PostgreSQL TLS configurations
If TLS configuration is invalid, the Operator sets a RolloutBlocked condition on the QuayRegistry and emits Kubernetes Events with details.
Common causes include:
-
A referenced TLS Secret does not exist
-
The Secret is missing
ca.crt,tls.crt, ortls.key -
The certificate and private key do not match
-
The certificate has expired
On OpenShift Container Platform, if the Service CA serving certificate Secret has not yet been created, the Operator emits Events such as a PostgreSQL service CA error and retries until the Secret is available. A brief RolloutBlocked condition during that wait is expected.
If SHOW ssl; returns on but pg_stat_ssl shows no TLS client sessions, PostgreSQL is accepting encrypted connections, but Project Quay or Clair might still be connecting without SSL. Check the registry configuration for an sslmode value on the database URI or connection arguments, and review Operator Events for certificate or CA problems.
For external PostgreSQL databases, continue to configure TLS through DB_URI and related configuration fields in the config bundle. For more information, see Database configuration fields.
Reference
Required configuration fields
Look up required configuration fields for general settings, storage, database, and Redis.
Required configuration field categories
Project Quay requires a minimal set of configuration fields to operate correctly. These fields define essential aspects of your deployment, such as how the registry is accessed, where image content is stored, how metadata is persisted, and how background services such as logs are managed.
The required configuration fields fall into four main categories:
-
General required configuration fields. Core fields such as the authentication type, URL scheme, server hostname, database secret key, and secret key are covered in this section.
-
Database configuration fields. Project Quay requires a PostgreSQL relational database to store metadata about repositories, users, teams, and tags.
-
Object storage configuration fields. Object storage defines the backend where container image blobs and manifests are stored. Your storage backend must be supported by Project Quay, such as Ceph/RadosGW, AWS S3 storage, Google Cloud Storage, and Nutanix.
-
Redis configuration fields. Redis is used as a backend for data such as push logs, user notifications, and other operations.
General required configuration fields
General required fields must be present in every Project Quay configuration to start the registry. Use this reference to confirm values for authentication, URL settings, and secret keys.
| Field | Type | Description |
|---|---|---|
AUTHENTICATION_TYPE (Required) |
String |
The authentication engine to use for credential authentication. Values: One of |
PREFERRED_URL_SCHEME (Required) |
String |
The URL scheme to use when accessing Project Quay. Values: One of |
SERVER_HOSTNAME (Required) |
String |
The URL at which Project Quay is accessible, without the scheme. Example: |
DATABASE_SECRET_KEY (Required) |
String |
Key used to encrypt sensitive fields within the database. This value should never be changed once set, otherwise all reliant fields, for example, repository mirror username and password configurations, are invalidated. This value is set automatically by the Project Quay Operator for Operator-based deployments. For standalone deployments, administrators can provide their own key using Open SSL or a similar tool. Key length should not exceed 63 characters. |
SECRET_KEY (Required) |
String |
Key used to encrypt the session cookie and the CSRF token needed for correct interpretation of the user session. The value should not be changed when set. The value should be persistent across all Project Quay instances. If the value is not persistent across all instances, login failures and other errors related to session persistence might occur. |
SETUP_COMPLETE (Required) |
Boolean |
This is an artifact left over from earlier versions of the software and currently it must be specified with a value of |
AUTHENTICATION_TYPE: Database
PREFERRED_URL_SCHEME: https
SERVER_HOSTNAME: <quay-server.example.com>
SECRET_KEY: <secret_key_value>
DATABASE_SECRET_KEY: <database_secret_key_value>
SETUP_COMPLETE: true
# ...Database and Redis configuration reference
Reference database and Redis configuration fields for Project Quay. Use these fields to set the database URI, connection arguments, SSL/TLS connection behavior, Redis build log settings, and Redis user event settings.
Database configuration fields
You must configure database connectivity for Project Quay by setting the DB_URI field. You can optionally define connection settings such as SSL/TLS behavior by using DB_CONNECTION_ARGS.
Database URI
You configure the database connection for Project Quay by setting the required DB_URI field.
The following table describes the DB_URI configuration field:
| Field | Type | Description |
|---|---|---|
DB_URI (Required) |
String |
The URI for accessing the database, including any credentials. |
# ...
DB_URI: postgresql://quayuser:quaypass@quay-server.example.com:5432/quay
# ...Database connection arguments
You can define optional connection arguments by using the DB_CONNECTION_ARGS parameter. Some of the key-value pairs under DB_CONNECTION_ARGS are generic, while others are database specific.
| Field | Type | Description |
|---|---|---|
DB_CONNECTION_ARGS |
Object |
Optional connection arguments for the database, such as timeouts and SSL/TLS. |
.autorollback |
Boolean |
Whether to use thread-local connections. Should always be |
.threadlocals |
Boolean |
Whether to use auto-rollback connections. Should always be |
# ...
DB_URI: postgresql://quayuser:quaypass@quay-server.example.com:5432/quay
DB_CONNECTION_ARGS:
autorollback: true
threadlocals: true
# ...SSL/TLS connection arguments
With SSL/TLS, configuration depends on the database you are deploying.
The sslmode option determines whether Project Quay negotiates a secure SSL/TLS TCP/IP connection with the server, and with what priority. The following modes are available:
| Mode | Description |
|---|---|
sslmode |
Determines whether, or with, what priority a secure SSL/TLS or TCP/IP connection is negotiated with the server. |
*: disable |
Your configuration only tries non-SSL/TLS connections. |
*: allow |
Your configuration first tries a non-SSL/TLS connection. Upon failure, tries an SSL/TLS connection. |
*: prefer (Default) |
Your configuration first tries an SSL/TLS connection. Upon failure, tries a non-SSL/TLS connection. |
*: require |
Your configuration only tries an SSL/TLS connection. If a root CA file is present, it verifies the certificate in the same way as if verify-ca was specified. |
*: verify-ca |
Your configuration only tries an SSL/TLS connection, and verifies that the server certificate is issued by a trusted certificate authority (CA). |
*: verify-full |
Only tries an SSL/TLS connection, and verifies that the server certificate is issued by a trusted CA and that the requested server hostname matches that in the certificate. |
For more information on the valid arguments for PostgreSQL, see Database Connection Control Functions in Additional resources.
# ...
DB_CONNECTION_ARGS:
sslmode: <value>
sslrootcert: path/to/.postgresql/root.crt
# ...Redis configuration fields
Redis is used by Project Quay to support backend tasks and services, such as build triggers and notifications. There are configuration types related to Redis: build logs and user events. The following sections detail the configuration fields available for each type.
Build logs
Project Quay uses Redis to temporarily store build logs before they are accessed through the user interface or API. Use this reference to configure Redis connection settings for build log caching.
| Field | Type | Description |
|---|---|---|
BUILDLOGS_REDIS (Required) |
Object |
Redis connection details for build logs caching. |
.host (Required) |
String |
The hostname at which Redis is accessible. Example: |
.port (Required) |
Number |
The port at which Redis is accessible. Example: |
.password |
String |
The password to connect to the Redis instance. Example: |
.ssl (Optional) |
Boolean |
Whether to enable TLS communication between Redis and Quay. Defaults to false. |
# ...
BUILDLOGS_REDIS:
host: <quay-server.example.com>
password: <example_password>
port: 6379
ssl: true
# ...If your deployment uses Azure Cache for Redis and ssl is set to True, the port defaults to 6380.
User events
User events record activity in Project Quay and store it in Redis for access through the API or web interface. Use these fields to configure the Redis connection for user event handling.
| Field | Type | Description |
|---|---|---|
USER_EVENTS_REDIS (Required) |
Object |
Redis connection details for user event handling. |
.host (Required) |
String |
The hostname at which Redis is accessible. Example: |
.port (Required) |
Number |
The port at which Redis is accessible. Example: |
.password |
String |
The password to connect to the Redis instance. Example: |
.ssl |
Boolean |
Whether to enable TLS communication between Redis and Quay. Defaults to false. |
.ssl_keyfile (Optional) |
String |
The key database file that contains the client certificate key. Example: |
.ssl_certfile (Optional) |
String |
The file path of the SSL certificate. Example: |
.ssl_cert_reqs (Optional) |
String |
The certificate validation level to use during the SSL/TLS handshake. Example: |
.ssl_ca_certs (Optional) |
String |
The path to a file containing trusted CA certificates. Example: |
.ssl_ca_data (Optional) |
String |
A string that contains trusted CA certificates in PEM format. Example: |
.ssl_check_hostname (Optional) |
Boolean |
Whether the client checks that the hostname in the server SSL/TLS certificate matches the hostname of the server it connects to. Example: |
# ...
USER_EVENTS_REDIS:
host: <quay-redis.example.com>
port: 6379
password: <example_password>
ssl: true
ssl_keyfile: /etc/ssl/private/redis-client.key
ssl_certfile: /etc/ssl/certs/redis-client.crt
ssl_cert_reqs: <required_certificate>
ssl_ca_certs: /etc/ssl/certs/ca-bundle.crt
ssl_check_hostname: true
# ...Automation and user access configuration reference
Reference the automation and user access configuration fields for Project Quay. Use these fields to enable first-user bootstrapping, control API browser access, define superusers, and restrict user creation to administrators.
Automation configuration options
Project Quay supports various mechanisms for automating deployment and configuration, which allows the integration of Project Quay into GitOps and CI/CD pipelines. By defining these options and leveraging the API, Project Quay can be initialized and managed without using the UI.
|
Note
|
Because the Project Quay Operator manages the For on-premise Project Quay deployments, pre-configuration is done by manually creating a valid |
Automation options are ideal for environments that require declarative Project Quay deployments, such as disconnected or air-gapped clusters.
Pre-configuration options for automation
Project Quay provides configuration options that enable registry administrators to automate early setup tasks and API accessibility. These options are useful for new deployments and controlling how API calls can be made.
The following options support automation and administrative control.
| Field | Type | Description |
|---|---|---|
FEATURE_USER_INITIALIZE |
Boolean |
Enables initial user bootstrapping in a newly deployed Project Quay registry. When this field is set to |
BROWSER_API_CALLS_XHR_ONLY |
Boolean |
Controls whether the registry API only accepts calls from browsers. To allow general browser-based access to the API, administrators must set this field to |
SUPER_USERS |
String |
Defines a list of administrative users, or superusers, who have full privileges and unrestricted access to the registry. Project Quay administrators should configure |
FEATURE_USER_CREATION |
Boolean |
Relegates the creation of new users to only superusers when this field is set to |
|
Note
|
Unlike all other registry API calls that require an OAuth 2 access token generated by an OAuth application in an existing organization, the |
The following YAML shows you the suggested configuration for automation:
# ...
FEATURE_USER_INITIALIZE: true
BROWSER_API_CALLS_XHR_ONLY: false
SUPER_USERS:
- quayadmin
FEATURE_USER_CREATION: false
# ...Performance tuning environment variable reference
Reference the environment variables available for tuning Project Quay runtime behavior. Use these variables to configure geo-replication storage preferences and database connection pooling. For rate limits, HTTP connection counts, worker process scaling, and large artifact settings, see the Optimize documentation.
Environment variable configuration
The following environment variables tune Project Quay runtime behavior for geo-replication, database pooling, HTTP concurrency, and worker scaling.
Use environment variables cautiously. These options typically override or augment existing configuration mechanisms.
This section documents environment variables related to the following components:
-
Geo-replication preferences
-
Database connection pooling
-
HTTP connection concurrency
-
Worker process scaling
Geo-replication storage preference environment variable
Use the QUAY_DISTRIBUTED_STORAGE_PREFERENCE environment variable to set the preferred storage engine for a geo-replicated Project Quay deployment in each region.
Project Quay supports multi-region deployments where multiple instances operate across geographically distributed sites. In these scenarios, each site shares the same configuration and metadata, but storage backends might vary between regions.
To accommodate this, Project Quay allows specifying a preferred storage engine for each deployment using an environment variable. This ensures that while metadata remains synchronized across all regions, each region can use its own optimized storage backend without requiring separate configuration files.
| Variable | Type | Description |
|---|---|---|
QUAY_DISTRIBUTED_STORAGE_PREFERENCE |
String |
The preferred storage engine (by ID in DISTRIBUTED_STORAGE_CONFIG) to use. |
Database connection pooling
Use the DB_CONNECTION_POOLING environment variable and DB_CONNECTION_ARGS settings to control whether Project Quay pools database connections and the maximum pool size per process.
Database connection pooling is enabled by default, and each process that interacts with the database contains a connection pool. These per-process connection pools are configured to maintain a maximum of 20 connections. Under heavy load, it is possible to fill the connection pool for every process within a Project Quay container. Under certain deployments and loads, this might require analysis to ensure that Project Quay does not exceed the configured database’s maximum connection count.
Overtime, the connection pools release idle connections. To release all connections immediately, Project Quay requires a restart.
| Variable | Type | Description |
|---|---|---|
DB_CONNECTION_POOLING |
String |
Whether to enable or disable database connection pooling. Defaults to true. Accepted values are |
If database connection pooling is enabled, it is possible to change the maximum size of the connection pool. This can be done through the following config.yaml option:
# ...
DB_CONNECTION_ARGS:
max_connections: 10
# ...Disabling database pooling in standalone deployments
For standalone Project Quay deployments, database connection pooling can be toggled off when starting your deployment. For example:
$ sudo podman run -d --rm -p 80:8080 -p 443:8443 \
--name=quay \
-v $QUAY/config:/conf/stack:Z \
-v $QUAY/storage:/datastorage:Z \
-e DB_CONNECTION_POOLING=false
registry.redhat.io/quay/quay-rhel8:v3.12.1Disabling database pooling for Red Hat Quay on OpenShift Container Platform
For Red Hat Quay on OpenShift Container Platform, database connection pooling can be configured by modifying the QuayRegistry custom resource definition (CRD). For example:
spec:
components:
- kind: quay
managed: true
overrides:
env:
- name: DB_CONNECTION_POOLING
value: "false"Object storage backend configuration reference
Look up object storage configuration fields for local, cloud, Ceph, Nutanix, IBM Cloud, NetApp, and HCP backends.
Storage configuration fields
You configure backend storage for Project Quay by setting distributed storage fields such as engine configuration, default locations, and preferences. Use this reference to review field types, defaults, and an example configuration.
| Field | Type | Description |
|---|---|---|
DISTRIBUTED_STORAGE_CONFIG (Required) |
Object |
Configuration for storage engine(s) to use in Project Quay. Each key represents an unique identifier for a storage engine. The value consists of a tuple of (key, value) forming an object describing the storage engine parameters. Default: |
DISTRIBUTED_STORAGE_DEFAULT_LOCATIONS (Required) |
Array of string |
The list of storage engine(s) (by ID in |
DISTRIBUTED_STORAGE_PREFERENCE (Required) |
Array of string |
The preferred storage engine(s) (by ID in |
MAXIMUM_LAYER_SIZE (Optional) |
String |
Maximum allowed size of an image layer. Pattern: |
DISTRIBUTED_STORAGE_CONFIG:
DISTRIBUTED_STORAGE_DEFAULT_LOCATIONS: []
DISTRIBUTED_STORAGE_PREFERENCE:
- default
MAXIMUM_LAYER_SIZE: 100GLocal storage
You can configure Project Quay to use local filesystem storage for proof of concept deployments. Use this example to map registry data to the datastorage path in the container.
|
Important
|
Only use local storage when deploying a registry for proof of concept purposes. It is not intended for production purposes. When using local storage, you must map the registry to a local directory to the |
DISTRIBUTED_STORAGE_CONFIG:
default:
- LocalStorage
- storage_path: /datastorage/registry
DISTRIBUTED_STORAGE_DEFAULT_LOCATIONS: []
DISTRIBUTED_STORAGE_PREFERENCE:
- defaultRed Hat OpenShift Data Foundation
You can configure Project Quay to use Red Hat OpenShift Data Foundation object storage by defining a DISTRIBUTED_STORAGE_CONFIG entry for the storage backend. Use this example as a starting point for required fields and optional tuning parameters.
The following YAML shows a sample configuration using an Red Hat OpenShift Data Foundation:
DISTRIBUTED_STORAGE_CONFIG:
rhocsStorage:
- RHOCSStorage
- access_key: <access_key_here>
secret_key: <secret_key_here>
bucket_name: <bucket_name>
hostname: <hostname>
is_secure: 'true'
port: '443'
storage_path: /datastorage/registry
maximum_chunk_size_mb: 100
maximum_chunk_size_gb: 5
server_side_assembly: truewhere:
DISTRIBUTED_STORAGE_CONFIG.rhocsStorage.maximum_chunk_size_mb-
Specifies the maximum chunk size, in MB, for the final copy. Has no effect if
server_side_assemblyis set toFalse. DISTRIBUTED_STORAGE_CONFIG.rhocsStorage.maximum_chunk_size_gb-
Specifies the maximum chunk size, in GB, for the final copy. Defaults to
5. Has no effect ifserver_side_assemblyis set toFalse. This field is optional. DISTRIBUTED_STORAGE_CONFIG.rhocsStorage.server_side_assembly-
Specifies whether Project Quay tries to use server-side assembly and the final chunked copy instead of client assembly. Defaults to
True. This field is optional.
Ceph Object Gateway (RadosGW) storage example
You can configure Project Quay to use Ceph Object Gateway (RadosGW) as an S3-compatible storage backend. Use this example to set required authentication fields and optional assembly settings.
|
Note
|
RadosGW is an on-premises S3-compatible storage solution. It implements the S3 API and requires the same authentication fields, such as |
The following YAML shows an example configuration using RadosGW.
DISTRIBUTED_STORAGE_CONFIG:
radosGWStorage:
- RadosGWStorage
- access_key: <access_key_here>
bucket_name: <bucket_name_here>
hostname: <hostname_here>
is_secure: true
port: '443'
secret_key: <secret_key_here>
storage_path: /datastorage/registry
maximum_chunk_size_mb: 100
maximum_chunk_size_gb: 5
server_side_assembly: truewhere:
DISTRIBUTED_STORAGE_CONFIG.radosGWStorage-
Specifies general S3 access. Note that general S3 access is not strictly limited to Amazon Web Services (AWS) S3, and can be used with RadosGW or other storage services. For an example of general S3 access using the AWS S3 driver, see "AWS S3 storage".
DISTRIBUTED_STORAGE_CONFIG.radosGWStorage.maximum_chunk_size_mb-
Specifies the maximum chunk size in MB for the final copy. Has no effect if
server_side_assemblyis set toFalse. This field is optional. DISTRIBUTED_STORAGE_CONFIG.radosGWStorage.maximum_chunk_size_gb-
Specifies the maximum chunk size in GB for the final copy. Defaults to
5. Has no effect ifserver_side_assemblyis set toFalse. This field is optional. DISTRIBUTED_STORAGE_CONFIG.radosGWStorage.server_side_assembly-
Specifies whether Project Quay tries to use server-side assembly and the final chunked copy instead of client assembly. Defaults to
True. This field is optional.
Amazon Web Services storage backends
You can configure Project Quay to use AWS S3, STS, or CloudFront storage backends in DISTRIBUTED_STORAGE_CONFIG. Use these examples to set credentials, regions, and distribution settings for each backend.
Project Quay supports multiple Amazon Web Services (AWS) storage backends:
-
S3 storage: Standard support for AWS S3 buckets that uses AWS’s native object storage service.
-
STS S3 storage: Support for AWS Security Token Service (STS) to assume IAM roles, allowing for more secure S3 operations.
-
CloudFront S3 storage: Integrates with AWS CloudFront to enable high-availability distribution of content while still using AWS S3 as the origin.
The following sections provide example YAML configurations and additional information about each AWS storage backend.
Amazon Web Services S3 storage
Project Quay supports using AWS S3 as an object storage backend. AWS S3 is an object storage service designed for data availability, scalability, security, and performance. The following YAML shows an example configuration using AWS S3.
# ...
DISTRIBUTED_STORAGE_CONFIG:
default:
- S3Storage
- host: s3.us-east-2.amazonaws.com
s3_access_key: ABCDEFGHIJKLMN
s3_secret_key: OL3ABCDEFGHIJKLMN
s3_bucket: quay_bucket
s3_region: <region>
storage_path: /datastorage/registry
DISTRIBUTED_STORAGE_DEFAULT_LOCATIONS: []
DISTRIBUTED_STORAGE_PREFERENCE:
- default
# ...where:
DISTRIBUTED_STORAGE_CONFIG.default-
Specifies the
S3Storagestorage driver for AWS S3 buckets. Note that this differs from general S3 access, where the RadosGW driver or other storage services can be used. For an example, see "Example B: Using RadosGW with general S3 access". DISTRIBUTED_STORAGE_CONFIG.default.s3_region-
Specifies the Amazon Web Services region. Defaults to
us-east-1.
Amazon Web Services STS S3 storage
AWS Security Token Service (STS) provides temporary, limited-privilege credentials for accessing AWS resources, improving security by avoiding the need to store long-term access keys. This is useful in environments such as OpenShift Container Platform where credentials can be rotated or managed through IAM roles.
The following YAML shows an example configuration for using AWS STS with Red Hat Quay on OpenShift Container Platform configurations.
# ...
DISTRIBUTED_STORAGE_CONFIG:
default:
- STSS3Storage
- sts_role_arn: <role_arn>
s3_bucket: <s3_bucket_name>
storage_path: <storage_path>
sts_user_access_key: <s3_user_access_key>
sts_user_secret_key: <s3_user_secret_key>
s3_region: <region>
DISTRIBUTED_STORAGE_DEFAULT_LOCATIONS: []
DISTRIBUTED_STORAGE_PREFERENCE:
- default
# ...where:
DISTRIBUTED_STORAGE_CONFIG.default.sts_role_arn-
Specifies the unique Amazon Resource Name (ARN).
DISTRIBUTED_STORAGE_CONFIG.default.sts_user_access_key-
Specifies the generated AWS S3 user access key.
DISTRIBUTED_STORAGE_CONFIG.default.sts_user_secret_key-
Specifies the generated AWS S3 user secret key.
DISTRIBUTED_STORAGE_CONFIG.default.s3_region-
Specifies the Amazon Web Services region. Defaults to
us-east-1.
AWS CloudFront storage
AWS CloudFront is a content delivery network (CDN) service that caches and distributes content closer to users for improved performance and lower latency. Project Quay supports CloudFront through the CloudFrontedS3Storage driver, which enables secure, signed access to S3 buckets via CloudFront distributions.
Use the following example when configuring AWS CloudFront for your Project Quay deployment.
|
Note
|
|
DISTRIBUTED_STORAGE_CONFIG:
default:
- CloudFrontedS3Storage
- cloudfront_distribution_domain: <CLOUDFRONT_DISTRIBUTION_DOMAIN>
cloudfront_key_id: <CLOUDFRONT_KEY_ID>
cloudfront_privatekey_filename: <CLOUDFRONT_PRIVATE_KEY_FILENAME>
host: <S3_HOST>
s3_access_key: <S3_ACCESS_KEY>
s3_bucket: <S3_BUCKET_NAME>
s3_secret_key: <S3_SECRET_KEY>
storage_path: <STORAGE_PATH>
s3_region: <S3_REGION>
DISTRIBUTED_STORAGE_DEFAULT_LOCATIONS:
- default
DISTRIBUTED_STORAGE_PREFERENCE:
- default{
"Version": "2012-10-17",
"Statement": [
{
"Effect": "Allow",
"Principal": {
"AWS": "arn:aws:iam::<AWS_ACCOUNT_ID>:user/CloudFront Origin Access Identity <CLOUDFRONT_OAI_ID>"
},
"Action": "s3:GetObject",
"Resource": "arn:aws:s3:::<S3_BUCKET_NAME>/*"
},
{
"Effect": "Allow",
"Principal": {
"AWS": "arn:aws:iam::<AWS_ACCOUNT_ID>:user/CloudFront Origin Access Identity <CLOUDFRONT_OAI_ID>"
},
"Action": "s3:ListBucket",
"Resource": "arn:aws:s3:::<S3_BUCKET_NAME>"
}
]
}-
<AWS_ACCOUNT_ID>is the identifier, or account ID, of the AWS account that owns the CloudFront OAI and S3 bucket. -
<CLOUDFRONT_OAI_ID>is the CloudFront Origin Access Identity (OAI) that accesses the S3 bucket. -
arn:aws:s3:::<S3_BUCKET_NAME>specifies that CloudFront can access the specified bucket in the S3 bucket.
Google Cloud Storage
You can configure Project Quay to use Google Cloud Storage (GCS) as an object storage backend. Use this example to set bucket credentials and optional connection timeout settings.
DISTRIBUTED_STORAGE_CONFIG:
googleCloudStorage:
- GoogleCloudStorage
- access_key: <access_key>
bucket_name: <bucket_name>
secret_key: <secret_key>
storage_path: /datastorage/registry
boto_timeout: 120
DISTRIBUTED_STORAGE_DEFAULT_LOCATIONS: []
DISTRIBUTED_STORAGE_PREFERENCE:
- googleCloudStorageDISTRIBUTED_STORAGE_CONFIG.googleCloudStorage.boto_timeout-
Specifies the time, in seconds, until a timeout exception is thrown when attempting to read from a connection. The default is
60seconds. Also encompasses the time, in seconds, until a timeout exception is thrown when attempting to make a connection. The default is60seconds. This field is optional.
Microsoft Azure Blob Storage
You can configure Project Quay to use Microsoft Azure Blob Storage as an object storage backend. Use this example to set account credentials, container details, and optional government cloud endpoints.
DISTRIBUTED_STORAGE_CONFIG:
azureStorage:
- AzureStorage
- azure_account_name: <azure_account_name>
azure_container: <azure_container_name>
storage_path: /datastorage/registry
azure_account_key: <azure_account_key>
sas_token: some/path/
endpoint_url: https://[account-name].blob.core.usgovcloudapi.net
DISTRIBUTED_STORAGE_DEFAULT_LOCATIONS: []
DISTRIBUTED_STORAGE_PREFERENCE:
- azureStorageDISTRIBUTED_STORAGE_CONFIG.azureStorage.endpoint_url-
Specifies the endpoint URL for Azure storage. This parameter is optional and can be used with Microsoft Azure Government (MAG) endpoints. If left blank, the
endpoint_urlconnects to the normal Azure region.
You must use the Primary endpoint of your MAG Blob service. Using the Secondary endpoint of your MAG Blob service results in the following error: AuthenticationErrorDetail:Cannot find the claimed account when trying to GetProperties for the account whusc8-secondary.
Swift object storage
You can configure Project Quay to use Red Hat OpenStack Platform (RHOSP) Swift object storage as a backend. Use this example to set authentication credentials, container details, and tenant options.
DISTRIBUTED_STORAGE_CONFIG:
swiftStorage:
- SwiftStorage
- swift_user: <swift_username>
swift_password: <swift_password>
swift_container: <swift_container>
auth_url: https://example.org/swift/v1/quay
auth_version: 3
os_options:
tenant_id: <osp_tenant_id>
user_domain_name: <osp_domain_name>
ca_cert_path: /conf/stack/swift.cert
storage_path: /datastorage/registry
DISTRIBUTED_STORAGE_DEFAULT_LOCATIONS: []
DISTRIBUTED_STORAGE_PREFERENCE:
- swiftStorageNutanix Objects Storage
You can configure Project Quay to use Nutanix Objects Storage as an object storage backend. Use this example to set credentials, bucket details, and connection options for private cloud infrastructure.
DISTRIBUTED_STORAGE_CONFIG:
nutanixStorage: # storage config name
- RadosGWStorage # actual driver
- access_key: <access_key>
secret_key: <secret_key>
bucket_name: <bucket_name>
hostname: <hostname>
is_secure: 'true'
port: '443'
storage_path: /datastorage/registry
DISTRIBUTED_STORAGE_DEFAULT_LOCATIONS: []
DISTRIBUTED_STORAGE_PREFERENCE: # must contain name of the storage config
- nutanixStorageIBM Cloud Object Storage
You can configure Project Quay to use IBM Cloud Object Storage as an object storage backend. Use this example to set credentials, bucket details, and optional chunk size parameters.
DISTRIBUTED_STORAGE_CONFIG:
default:
- IBMCloudStorage # actual driver
- access_key: <access_key> # parameters
secret_key: <secret_key>
bucket_name: <bucket_name>
hostname: <hostname>
is_secure: 'true'
port: '443'
storage_path: /datastorage/registry
maximum_chunk_size_mb: 100mb
maximum_chunk_size_gb: 5gb
minimum_chunk_size_mb: 5mb
DISTRIBUTED_STORAGE_DEFAULT_LOCATIONS:
- default
DISTRIBUTED_STORAGE_PREFERENCE:
- defaultwhere:
DISTRIBUTED_STORAGE_CONFIG.default.maximum_chunk_size_mb-
Specifies the maximum chunk size. Recommended to be set to
100mb. This field is optional. DISTRIBUTED_STORAGE_CONFIG.default.maximum_chunk_size_gb-
Specifies the maximum chunk size, in GB. Defaults to
5gb. This field is optional. DISTRIBUTED_STORAGE_CONFIG.default.minimum_chunk_size_mb-
Specifies defaults to
5mb. Do not adjust this field without consulting Red Hat Support in Additional resources, because it can have unintended consequences. This field is optional.
NetApp ONTAP S3 object storage
You can configure Project Quay to use NetApp ONTAP S3 as an object storage backend. Use this example to set credentials, bucket details, and connection options.
DISTRIBUTED_STORAGE_CONFIG:
local_us:
- RadosGWStorage
- access_key: <access_key>
bucket_name: <bucket_name>
hostname: <host_url_address>
is_secure: true
port: <port>
secret_key: <secret_key>
storage_path: /datastorage/registry
signature_version: v4
DISTRIBUTED_STORAGE_DEFAULT_LOCATIONS:
- local_us
DISTRIBUTED_STORAGE_PREFERENCE:
- local_usHitachi Content Platform object storage
You can configure Project Quay to use Hitachi Content Platform (HCP) as an object storage backend. Use this example to set credentials, bucket details, and connection options.
DISTRIBUTED_STORAGE_CONFIG:
hcp_us:
- RadosGWStorage
- access_key: <access_key>
bucket_name: <bucket_name>
hostname: <hitachi_hostname_example>
is_secure: true
secret_key: <secret_key>
storage_path: /datastorage/registry
signature_version: v4
DISTRIBUTED_STORAGE_DEFAULT_LOCATIONS:
- hcp_us
DISTRIBUTED_STORAGE_PREFERENCE:
- hcp_usCore, web UI, and user configuration reference
Optional configuration fields for core registry behavior, IPv6, debugging, registry state, the web UI, session logout, and user and robot account settings.
Core configuration overview
The following core configuration fields set the registry hostname, protocol, authentication, and other fundamental Project Quay behavior.
Registry branding and identity fields
Customize registry branding, contact information, and footer links that appear in the Project Quay user interface.
The following configuration fields allow you to modify the branding, identity, and contact information displayed in your Project Quay deployment. With these fields, you can customize how the registry appears to users by specifying titles, headers, footers, and organizational contact links shown throughout the UI.
|
Note
|
Some of the following fields are not available on the Project Quay v2 UI. |
| Field | Type | Description |
|---|---|---|
REGISTRY_TITLE |
String |
If specified, the long-form title for the registry. Displayed in frontend of your Project Quay deployment, for example, at the sign in page of your organization. Should not exceed 35 characters. Default: |
REGISTRY_TITLE_SHORT |
String |
If specified, the short-form title for the registry. Title is displayed on various pages of your organization, for example, as the title of the tutorial on your organization’s Tutorial page. Default: |
CONTACT_INFO |
Array of String |
If specified, contact information to display on the contact page. If only a single piece of contact information is specified, the contact footer will link directly. |
[0] |
String |
Adds a link to send an e-mail. Pattern: |
[1] |
String |
Adds a link to visit an IRC chat room. Pattern: |
[2] |
String |
Adds a link to call a phone number. Pattern: |
[3] |
String |
Adds a link to a defined URL. Pattern: |
| Field | Type | Description |
|---|---|---|
BRANDING |
Object |
Custom branding for logos and URLs in the Project Quay UI. |
.logo (Required) |
String |
Main logo image URL. The header logo defaults to 205x30 PX. The form logo on the Project Quay sign in screen of the web UI defaults to 356.5x39.7 PX. Example: |
.footer_img |
String |
Logo for UI footer. Defaults to 144x34 PX. Example: |
.footer_url |
String |
Link for footer image. Example: |
| Field | Type | Description |
|---|---|---|
FOOTER_LINKS |
Object |
Enable customization of footer links in Project Quay’s UI for on-prem installations. |
.TERMS_OF_SERVICE_URL |
String |
Custom terms of service for on-prem installations. Example: |
.PRIVACY_POLICY_URL |
String |
Custom privacy policy for on-prem installations. Example: |
.SECURITY_URL |
String |
Custom security page for on-prem installations. Example: |
.ABOUT_URL |
String |
Custom about page for on-prem installations. Example: |
# ...
REGISTRY_TITLE: "Example Container Registry"
REGISTRY_TITLE_SHORT: "Example Quay"
CONTACT_INFO:
- mailto:support@example.io
- irc://chat.freenode.net:6665/examplequay
- tel:+1-800-555-1234
- https://support.example.io
BRANDING:
logo: https://www.mend.io/wp-content/media/2020/03/5-tips_small.jpg
footer_img: https://www.mend.io/wp-content/media/2020/03/5-tips_small.jpg
footer_url: https://opensourceworld.org/
FOOTER_LINKS:
"TERMS_OF_SERVICE_URL": "https://www.index.hr"
"PRIVACY_POLICY_URL": "https://www.example.hr"
"SECURITY_URL": "https://www.example.hr"
"ABOUT_URL": "https://www.example.hr"
# ...IPv6 configuration field
Use the FEATURE_LISTEN_IP_VERSION field to configure whether Project Quay listens on IPv4, IPv6, or dual-stack networks.
You can use the FEATURE_LISTEN_IP_VERSION configuration field to specify which IP protocol family Project Quay should listen on: IPv4, IPv6, or both (dual-stack). This field is critical in environments where the registry must operate on IPv6-only or dual-stack networks.
| Field | Type | Description |
|---|---|---|
FEATURE_LISTEN_IP_VERSION |
String |
Enables IPv4, IPv6, or dual-stack protocol family. This configuration field must be properly set, otherwise Project Quay fails to start.
Default: |
# ...
FEATURE_LISTEN_IP_VERSION: dual-stack
# ...Logging and debugging variables
Configure logging, debugging, and health check variables for troubleshooting Project Quay.
The following variables control how Project Quay logs events, exposes debugging information, and interacts with system health checks. These settings are useful for troubleshooting and monitoring your registry
| Variable | Type | Description | ||
|---|---|---|---|---|
DEBUGLOG |
Boolean |
Whether to enable or disable debug logs. |
||
USERS_DEBUG |
Integer. Either |
Used to debug LDAP operations in clear text, including passwords. Must be used with
|
||
ALLOW_PULLS_WITHOUT_STRICT_LOGGING |
Boolean |
If true, pulls will still succeed even if the pull audit log entry cannot be written . This is useful if the database is in a read-only state and it is desired for pulls to continue during that time. Default: False |
||
ENABLE_HEALTH_DEBUG_SECRET |
String |
If specified, a secret that can be given to health endpoints to see full debug info when not authenticated as a superuser |
||
HEALTH_CHECKER |
String |
The configured health check Example: |
||
FEATURE_AGGREGATED_LOG_COUNT_RETRIEVAL |
Boolean |
Whether to allow retrieval of aggregated log counts Default: True |
#...
DEBUGLOG: true
USERS_DEBUG: 1
ALLOW_PULLS_WITHOUT_STRICT_LOGGING: "true"
ENABLE_HEALTH_DEBUG_SECRET: "<secret_value>"
HEALTH_CHECKER: "('RDSAwareHealthCheck', {'access_key': 'foo', 'secret_key': 'bar'})"
FEATURE_AGGREGATED_LOG_COUNT_RETRIEVAL: true
# ...Registry state and system behavior configuration fields
The following configuration fields control Project Quay registry operational state, including read-only mode and webhook hostname restrictions.
| Field | Type | Description |
|---|---|---|
REGISTRY_STATE |
String |
The state of the registry. Values: |
WEBHOOK_HOSTNAME_BLACKLIST |
Array of String |
The set of hostnames to disallow from webhooks when validating, beyond localhost |
# ...
REGISTRY_STATE: normal
WEBHOOK_HOSTNAME_BLACKLIST:
- "169.254.169.254"
- "internal.example.com"
- "127.0.0.2"
# ...User Experience and Interface
The following fields configure how users interact with the UI, including branding, pagination, browser behavior, and accessibility options like recaptcha. This also covers user-facing performance and display settings.
Web UI and user experience configuration fields
The following configuration fields control the behavior and appearance of the Project Quay web interface and overall user experience. Options in this section allow administrators to customize login behavior, avatar display, user autocomplete, session handling, and catalog visibility.
| Field | Type | Description |
|---|---|---|
AVATAR_KIND |
String |
The types of avatars to display, either generated inline (local) or Gravatar (gravatar) Values: |
FRESH_LOGIN_TIMEOUT |
String |
The time after which a fresh login requires users to re-enter their password Example: |
FEATURE_UI_V2 |
Boolean |
When set, allows users to try the v2 beta UI environment. Default: |
FEATURE_UI_V2_REPO_SETTINGS |
Boolean |
When set to Default: |
FEATURE_DIRECT_LOGIN |
Boolean |
Whether users can directly login to the UI Default: True |
FEATURE_PARTIAL_USER_AUTOCOMPLETE |
Boolean |
If set to true, autocompletion will apply to partial usernames+ Default: True |
FEATURE_LIBRARY_SUPPORT |
Boolean |
Whether to allow for "namespace-less" repositories when pulling and pushing from Docker Default: True |
FEATURE_PERMANENT_SESSIONS |
Boolean |
Whether sessions are permanent Default: True |
FEATURE_PUBLIC_CATALOG |
Boolean |
If set to true, the Default: False |
DISABLE_ANGULAR_UI |
Boolean |
Disable legacy Angular UI pages and redirects. Default: False |
DEFAULT_UI |
String |
Allows Project Quay administrators the option to set the default UI to the angular theme (legacy) or react theme (v2 UI). Options: |
# ...
AVATAR_KIND: local
FRESH_LOGIN_TIMEOUT: 5m
FEATURE_UI_V2: true
FEATURE_UI_V2_REPO_SETTINGS: false
FEATURE_DIRECT_LOGIN: true
FEATURE_PARTIAL_USER_AUTOCOMPLETE: true
FEATURE_LIBRARY_SUPPORT: true
FEATURE_PERMANENT_SESSIONS: true
FEATURE_PUBLIC_CATALOG: false
# ...Session timeout configuration field
The following configuration field sets how long permanent user sessions remain active in Project Quay before they expire.
This field relies on on the Flask API configuration field of the same name.
|
Important
|
Altering session lifetime is not recommended. Administrators should be aware of the allotted time when setting a session timeout. If you set the time too early, it might interrupt your workflow. |
| Field | Type | Description |
|---|---|---|
PERMANENT_SESSION_LIFETIME |
Integer |
A Default: |
# ...
PERMANENT_SESSION_LIFETIME: 3000
# ...User and Access Management
Use the following fields to configure how users are created, authenticated, and managed. This includes settings for superusers, account recovery, app-specific tokens, login behavior, and external identity providers like LDAP, OAuth, and OIDC.
User configuration fields
The following configuration fields define how user accounts behave in your Project Quay deployment.
These fields enable control over user creation, access levels, metadata tracking, recovery options, and namespace management. You can also enforce restrictions, such as invite-only creation or superuser privileges, to match your organization’s governance and security policies.
| Field | Type | Description |
|---|---|---|
FEATURE_SUPER_USERS |
Boolean |
Whether superusers are supported Default: |
FEATURE_USER_CREATION |
Boolean |
Whether users can be created (by non-superusers) Default: |
FEATURE_USER_LAST_ACCESSED |
Boolean |
Whether to record the last time a user was accessed Default: |
FEATURE_USER_LOG_ACCESS |
Boolean |
If set to true, users will have access to audit logs for their namespace Default: |
FEATURE_USER_METADATA |
Boolean |
Whether to collect and support user metadata Default: |
FEATURE_USERNAME_CONFIRMATION |
Boolean |
If set to true, users can confirm and modify their initial usernames when logging in via OpenID Connect (OIDC) or a non-database internal authentication provider like LDAP. Default: |
FEATURE_USER_RENAME |
Boolean |
If set to true, users can rename their own namespace. Default: |
FEATURE_INVITE_ONLY_USER_CREATION |
Boolean |
Whether users being created must be invited by another user Default: |
FRESH_LOGIN_TIMEOUT |
String |
The time after which a fresh login requires users to re-enter their password Example: |
USERFILES_LOCATION |
String |
ID of the storage engine in which to place user-uploaded files Example: |
USERFILES_PATH |
String |
Path under storage in which to place user-uploaded files Example: |
USER_RECOVERY_TOKEN_LIFETIME |
String |
The length of time a token for recovering a user accounts is valid Pattern: Default: |
FEATURE_SUPERUSERS_FULL_ACCESS |
Boolean |
Grants superusers the ability to read, write, and delete content from other repositories in namespaces that they do not own or have explicit permissions for. Default: |
FEATURE_SUPERUSERS_ORG_CREATION_ONLY |
Boolean |
Whether to only allow superusers to create organizations. Default: |
FEATURE_SUPERUSER_CONFIGDUMP |
Boolean |
Enables a full config dump of the running Framework, environment and schema for validation. Default: |
FEATURE_RESTRICTED_USERS |
Boolean |
When set to
Default: |
RESTRICTED_USERS_WHITELIST |
String |
When set with |
GLOBAL_READONLY_SUPER_USERS |
String |
When set, grants users of this list read access to all repositories, regardless of whether they are public repositories. |
# ...
FEATURE_SUPER_USERS: true
FEATURE_USER_CREATION: true
FEATURE_INVITE_ONLY_USER_CREATION: false
FEATURE_USER_RENAME: true
FEATURE_SUPERUSERS_FULL_ACCESS: true
FEATURE_SUPERUSERS_ORG_CREATION_ONLY: false
FEATURE_SUPERUSER_CONFIGDUMP: true
FEATURE_RESTRICTED_USERS: true
RESTRICTED_USERS_WHITELIST:
- user1
GLOBAL_READONLY_SUPER_USERS:
- quayadmin
FRESH_LOGIN_TIMEOUT: "5m"
USER_RECOVERY_TOKEN_LIFETIME: "30m"
USERFILES_LOCATION: "s3_us_east"
USERFILES_PATH: "userfiles"
# ...When the RESTRICTED_USERS_WHITELIST field is set, allowlisted users can create organizations, or read or write content from the repository even if FEATURE_RESTRICTED_USERS is set to True. Other users, for example, user2, user3, and user4 are restricted from creating organizations, reading, or writing content.
Robot account configuration fields
The following configuration fields control whether robot account creation and interaction is allowed globally in Project Quay.
| Field | Type | Description |
|---|---|---|
ROBOTS_DISALLOW |
Boolean |
When set to |
# ...
ROBOTS_DISALLOW: true
# ...Authentication, repository, and security configuration reference
Optional configuration fields for reCAPTCHA, JWT, application tokens, programmatic bootstrap, namespace and repository management, nested repositories, additional security policies, and registry search.
Recaptcha configuration fields
The following configuration fields enable Recaptcha protection for user login and account recovery forms in Project Quay.
| Field | Type | Description |
|---|---|---|
FEATURE_RECAPTCHA |
Boolean |
Whether Recaptcha is necessary for user login and recovery Default: False |
RECAPTCHA_SECRET_KEY |
String |
If recaptcha is enabled, the secret key for the Recaptcha service |
RECAPTCHA_SITE_KEY |
String |
If recaptcha is enabled, the site key for the Recaptcha service |
# ...
FEATURE_RECAPTCHA: true
RECAPTCHA_SITE_KEY: "<site_key>"
RECAPTCHA_SECRET_KEY: "<secret_key>"
# ...JWT configuration fields
The following configuration fields enable external authentication using JSON Web Tokens (JWT).
JWT integration allows third-party identity providers or token issuers to authenticate and authorize users by calling specific endpoints that handle token verification, user lookup, and permission queries.
| Field | Type | Description |
|---|---|---|
JWT_AUTH_ISSUER |
String |
The endpoint for JWT users Pattern: |
JWT_GETUSER_ENDPOINT |
String |
The endpoint for JWT users Pattern: |
JWT_QUERY_ENDPOINT |
String |
The endpoint for JWT queries Pattern: |
JWT_VERIFY_ENDPOINT |
String |
The endpoint for JWT verification Pattern: |
# ...
JWT_AUTH_ISSUER: "http://192.168.99.101:6060"
JWT_GETUSER_ENDPOINT: "http://192.168.99.101:6060/getuser"
JWT_QUERY_ENDPOINT: "http://192.168.99.101:6060/query"
JWT_VERIFY_ENDPOINT: "http://192.168.99.101:6060/verify"
# ...App tokens configuration fields
App-specific tokens allow users to authenticate with Project Quay using token-based credentials. These fields might be useful for CLI tools like Docker.
| Field | Type | Description |
|---|---|---|
FEATURE_APP_SPECIFIC_TOKENS |
Boolean |
If enabled, users can create tokens for use by the Docker CLI Default: True |
APP_SPECIFIC_TOKEN_EXPIRATION |
String |
The expiration for external app tokens. Default None Pattern: |
EXPIRED_APP_SPECIFIC_TOKEN_GC |
String |
Duration of time expired external app tokens will remain before being garbage collected Default: |
# ...
FEATURE_APP_SPECIFIC_TOKENS: true
APP_SPECIFIC_TOKEN_EXPIRATION: "30d"
EXPIRED_APP_SPECIFIC_TOKEN_GC: "1d"
# ...Programmatic bootstrap configuration fields
The following configuration fields enable the control of bootstrap OAuth token provisioning for automated Project Quay deployments.
Programmatic bootstrapping remains disabled until you enable it. Standalone deployments store the token in a local file. Red Hat Quay on OpenShift Container Platform Operator deployments store the token in a Kubernetes Secret that the Operator creates and mounts.
| Field | Type | Description |
|---|---|---|
FEATURE_PROGRAMMATIC_BOOTSTRAP |
Boolean |
Enables programmatic bootstrap token provisioning. When Default: |
BOOTSTRAP_TOKEN_OWNER |
String |
Username that owns the bootstrap OAuth application and token. Required when |
BOOTSTRAP_TOKEN_PATH |
String |
Filesystem path where the bootstrap token JSON is written on standalone and virtual machine deployments. In containerized deployments, use a mounted path that the Project Quay process can write, for example Default: |
BOOTSTRAP_TOKEN_EXPIRATION |
Integer |
Bootstrap token lifetime in seconds. Default: |
BOOTSTRAP_TOKEN_SCOPE |
String |
Space-separated OAuth scopes assigned to the bootstrap token. Default: |
PROGRAMMATIC_TOKEN_K8S_SECRET |
String |
Kubernetes Secret name used to store the bootstrap token when Project Quay runs in Kubernetes. When set, Project Quay writes the token to this Secret instead of |
PROGRAMMATIC_TOKEN_K8S_KEY |
String |
Secret data key that stores the bootstrap token JSON. On Red Hat Quay on OpenShift Container Platform, the Operator sets this field to Default: |
PROGRAMMATIC_TOKEN_K8S_NAMESPACE |
String |
Kubernetes namespace that contains the bootstrap token Secret. When unset, Project Quay uses the pod service account namespace. On Red Hat Quay on OpenShift Container Platform, the Operator uses the |
PROGRAMMATIC_TOKEN_PATH |
String |
Operator-rendered mount path for configuration compatibility. On Red Hat Quay on OpenShift Container Platform, the Operator sets this field to |
FEATURE_PROGRAMMATIC_BOOTSTRAP: true
SUPER_USERS:
- quayadmin
BOOTSTRAP_TOKEN_OWNER: quayadmin
BOOTSTRAP_TOKEN_PATH: /var/lib/quay/quay-machine-token.json
BOOTSTRAP_TOKEN_EXPIRATION: 7776000
BOOTSTRAP_TOKEN_SCOPE: "org:admin repo:admin repo:create repo:read repo:write super:user user:admin user:read"configBundleSecret)FEATURE_PROGRAMMATIC_BOOTSTRAP: true
SUPER_USERS:
- quayadmin
BOOTSTRAP_TOKEN_OWNER: quayadmin
BOOTSTRAP_TOKEN_EXPIRATION: 7776000
BOOTSTRAP_TOKEN_SCOPE: "org:admin repo:admin repo:create repo:read repo:write super:user user:admin user:read"|
Note
|
For Operator deployments, omit Always quote |
|
Important
|
The bootstrap token is a high-privilege credential. Use it only to provision organizations, applications, and narrower-scoped OAuth tokens for automation. Do not use the bootstrap token for routine API operations. For regulated environments, set |
Namespace and repository management configuration fields
The following configuration fields govern how Project Quay manages namespaces and repositories, including behavior during automated image pushes, visibility defaults, and rate limiting exceptions.
| Field | Type | Description |
|---|---|---|
DEFAULT_NAMESPACE_MAXIMUM_BUILD_COUNT |
Number |
The default maximum number of builds that can be queued in a namespace. Default: None |
CREATE_PRIVATE_REPO_ON_PUSH |
Boolean |
Whether new repositories created by push are set to private visibility Default: True |
CREATE_NAMESPACE_ON_PUSH |
Boolean |
Whether new push to a non-existent organization creates it Default: False |
PUBLIC_NAMESPACES |
Array of String |
If a namespace is defined in the public namespace list, then it will appear on all users' repository list pages, regardless of whether the user is a member of the namespace. Typically, this is used by an enterprise customer in configuring a set of "well-known" namespaces. |
NON_RATE_LIMITED_NAMESPACES |
Array of String |
If rate limiting has been enabled using |
DISABLE_PUSHES |
Boolean |
Disables pushes of new content to the registry while retaining all other functionality. Differs from Default: False |
# ...
DEFAULT_NAMESPACE_MAXIMUM_BUILD_COUNT: 10
CREATE_PRIVATE_REPO_ON_PUSH: true
CREATE_NAMESPACE_ON_PUSH: false
PUBLIC_NAMESPACES:
- redhat
- opensource
- infra-tools
NON_RATE_LIMITED_NAMESPACES:
- ci-pipeline
- trusted-partners
DISABLE_PUSHES: false
# ...Nested repositories configuration fields
Support for nested repository path names has been added by the FEATURE_EXTENDED_REPOSITORY_NAMES property. This optional configuration is added to the config.yaml by default. Enablement allows the use of / in repository names.
| Field | Type | Description |
|---|---|---|
FEATURE_EXTENDED_REPOSITORY_NAMES |
Boolean |
Enable support for nested repositories Default: True |
# ...
FEATURE_EXTENDED_REPOSITORY_NAMES: true
# ...Additional security configuration fields
The following configuration fields allow administrators to enforce authentication practices, control anonymous access to content, require team invitations, and enable FIPS-compliant cryptographic functions for environments with enhanced security requirements.
| Feature | Type | Description |
|---|---|---|
FEATURE_REQUIRE_TEAM_INVITE |
Boolean |
Whether to require invitations when adding a user to a team Default: True |
FEATURE_REQUIRE_ENCRYPTED_BASIC_AUTH |
Boolean |
Whether non-encrypted passwords (as opposed to encrypted tokens) can be used for basic auth Default: False |
FEATURE_ANONYMOUS_ACCESS |
Boolean |
Whether to allow anonymous users to browse and pull public repositories Default: True |
FEATURE_FIPS |
Boolean |
If set to true, Project Quay will run using FIPS-compliant hash functions Default: False |
# ...
FEATURE_REQUIRE_TEAM_INVITE: true
FEATURE_REQUIRE_ENCRYPTED_BASIC_AUTH: false
FEATURE_ANONYMOUS_ACCESS: true
FEATURE_FIPS: false
# ...Search configuration fields
The following configuration fields define how search results are paginated in the Project Quay user interface.
| Field | Type | Description |
|---|---|---|
SEARCH_MAX_RESULT_PAGE_COUNT |
Number |
Maximum number of pages the user can paginate in search before they are limited Default: 10 |
SEARCH_RESULTS_PER_PAGE |
Number |
Number of results returned per page by search page Default: 10 |
# ...
SEARCH_MAX_RESULT_PAGE_COUNT: 10
SEARCH_RESULTS_PER_PAGE: 10
# ...Storage, image, and metadata configuration reference
Optional configuration fields for storage and data management, image storage features, tag and image management, image activity tracking, tag expiration, immutable tags, repository and organization mirroring, model cache, and model card rendering.
Storage and Data Management
This section describes the configuration fields that govern how Project Quay stores, manages, and audits data.
Image storage features
The following configuration fields enable repository mirroring, storage proxying, and automatic storage replication features. These features allow you to enhance scalability, resilience, and flexibility when managing container image data.
| Field | Type | Description |
|---|---|---|
FEATURE_REPO_MIRROR |
Boolean |
If set to true, enables repository mirroring. Default: |
FEATURE_PROXY_STORAGE |
Boolean |
Whether to proxy all direct download URLs in storage through NGINX. Default: |
FEATURE_STORAGE_REPLICATION |
Boolean |
Whether to automatically replicate between storage engines. Default: |
# ...
FEATURE_REPO_MIRROR: true
FEATURE_PROXY_STORAGE: false
FEATURE_STORAGE_REPLICATION: true
# ...Tag and image management
The following configuration fields control how tags and images are managed within Project Quay. These settings help track image activity, automate image cleanup, and enforce tag policies.
You can use these fields to:
-
Track image pull activity and display statistics in the web UI.
-
Define expiration policies for untagged or outdated images.
-
Enable immutable tag policies to prevent tag overwrites.
These options help maintain an up-to-date image registry environment.
Image activity tracking configuration fields
The following configuration fields are available to track image activities. When enabled, clear visibility into how often and when image tags are pulled are provided in the UI.
| Field | Type | Description |
|---|---|---|
FEATURE_IMAGE_PULL_STATS |
Boolean |
Whether to track and display image pull statistics. Default: False |
REDIS_FLUSH_INTERVAL_SECONDS |
Integer |
Interval, in seconds, at which the Redis flush worker clears old data. Shorter intervals keep data fresher and help prevent Redis from bloating, while longer intervals reduce flush frequency. Default: 300 (5 minutes) |
PULL_METRICS_REDIS |
Object |
Connection settings for the Redis database used to store image pull metrics. The Default: {"host": "<redis_host>", "password": "<redis_password>", "port": "<port>", "db": 1} |
# ...
FEATURE_IMAGE_PULL_STATS: true
REDIS_FLUSH_INTERVAL_SECONDS: 30
PULL_METRICS_REDIS:
host: <redis_host>
password: <redis_password>
port: 6379
db: 1
# ...Tag expiration configuration fields
The following configuration fields are available to automate tag expiration and garbage collection. These features help manage storage usage by enabling cleanup of unused or expired tags based on defined policies.
| Field | Type | Description |
|---|---|---|
FEATURE_GARBAGE_COLLECTION |
Boolean |
Whether garbage collection of repositories is enabled. Default: True |
TAG_EXPIRATION_OPTIONS (Required) |
Array of string |
If enabled, the options that users can select for expiration of tags in their namespace. Pattern: |
DEFAULT_TAG_EXPIRATION (Required) |
String |
The default, configurable tag expiration time for time machine. Pattern: Default: |
FEATURE_CHANGE_TAG_EXPIRATION |
Boolean |
Whether users and organizations are allowed to change the tag expiration for tags in their namespace. Default: True |
FEATURE_AUTO_PRUNE |
Boolean |
When set to Default: |
NOTIFICATION_TASK_RUN_MINIMUM_INTERVAL_MINUTES |
Integer |
The interval, in minutes, that defines the frequency to re-run notifications for expiring images. Default: |
DEFAULT_NAMESPACE_AUTOPRUNE_POLICY |
Object |
The default organization-wide auto-prune policy. |
.method: number_of_tags |
Object |
The option specifying the number of tags to keep. |
.value: <integer> |
Integer |
When used with method: number_of_tags, denotes the number of tags to keep. For example, to keep two tags, specify |
.creation_date |
Object |
The option specifying the duration of which to keep tags. |
.value: <integer> |
Integer |
When used with creation_date, denotes how long to keep tags. Can be set to seconds ( |
AUTO_PRUNING_DEFAULT_POLICY_POLL_PERIOD |
Integer |
The period in which the auto-pruner worker runs at the registry level. By default, it is set to run one time per day (one time per 24 hours). Value must be in seconds. |
FEATURE_IMAGE_EXPIRY_TRIGGER |
Boolean |
Allows users to set up notifications on image expiration. Notifications are only returned on the v2 UI. Default: False |
# ...
FEATURE_GARBAGE_COLLECTION: true
TAG_EXPIRATION_OPTIONS:
- 1w
- 2w
- 1m
- 90d
DEFAULT_TAG_EXPIRATION: 2w
FEATURE_CHANGE_TAG_EXPIRATION: true
FEATURE_AUTO_PRUNE: true
NOTIFICATION_TASK_RUN_MINIMUM_INTERVAL_MINUTES: 300
DEFAULT_NAMESPACE_AUTOPRUNE_POLICY:
method: number_of_tags
value: 10
AUTO_PRUNING_DEFAULT_POLICY_POLL_PERIOD: 86400
FEATURE_IMAGE_EXPIRY_TRIGGER: false
# ...DEFAULT_NAMESPACE_AUTOPRUNE_POLICY.value-
Specifies ten tags to remain.
# ...
DEFAULT_NAMESPACE_AUTOPRUNE_POLICY:
method: creation_date
value: 1y
# ...DEFAULT_NAMESPACE_AUTOPRUNE_POLICY.value-
Specifies tags to be pruned one year after their creation date.
Immutable tags configuration fields
The following configuration field is available to enable immutable tags. Immutable tag policies prevent tags from being overwritten in Project Quay.
| Field | Type | Description |
|---|---|---|
FEATURE_IMMUTABLE_TAGS |
Boolean |
Whether to enable immutability policies. Immutability can be set at the individual setting level and via a policy in the repository configuration by an administrator. Default: False |
# ...
FEATURE_IMMUTABLE_TAGS: true
# ...Mirroring configuration fields for repositories
Mirroring in Project Quay enables automatic synchronization of repositories with upstream sources. This feature is useful for maintaining local mirrors of remote container images, ensuring availability in disconnected environments or improving performance through caching.
| Field | Type | Description |
|---|---|---|
FEATURE_REPO_MIRROR |
Boolean |
Enable or disable repository mirroring. Default: |
REPO_MIRROR_INTERVAL |
Number |
The number of seconds between checking for repository mirror candidates. Default: 30 |
REPO_MIRROR_SERVER_HOSTNAME |
String |
Replaces the Default: None Example: |
REPO_MIRROR_TLS_VERIFY |
Boolean |
Require HTTPS and verify certificates of Quay registry during mirror. Default: |
REPO_MIRROR_ROLLBACK |
Boolean |
When set to Default: |
FEATURE_SPARSE_INDEX |
Boolean |
Whether to allow sparse manifest indexes where not all architectures are required to be present. Default: False |
REPO_MIRROR_MAX_MANIFEST_LIST_SIZE |
Integer |
Maximum size in bytes of manifest list JSON to parse during mirroring. Prevents DoS via oversized manifests. Default: |
REPO_MIRROR_MAX_MANIFEST_ENTRIES |
Integer |
Maximum number of manifest entries to process during architecture-filtered mirroring. Prevents DoS via manifest lists with excessive entries.
Default: |
# ...
FEATURE_REPO_MIRROR: true
REPO_MIRROR_INTERVAL: 30
REPO_MIRROR_SERVER_HOSTNAME: "openshift-quay-service"
REPO_MIRROR_TLS_VERIFY: true
REPO_MIRROR_ROLLBACK: false
FEATURE_SPARSE_INDEX: true
REPO_MIRROR_MAX_MANIFEST_LIST_SIZE: 10485760
REPO_MIRROR_MAX_MANIFEST_ENTRIES: 1000
# ...Organization mirroring configuration fields
The following configuration fields are used for organization-level mirroring intervals, batch sizes, and related proxy cache settings.
| Field | Type | Description |
|---|---|---|
FEATURE_ORG_MIRROR |
Boolean |
Enable or disable organization-level mirroring. Default: |
ORG_MIRROR_INTERVAL |
Integer |
Worker processing interval in seconds. Default: 30 |
ORG_MIRROR_BATCH_SIZE |
Integer |
Number of organization mirrors to process for each iteration. Default: 100 |
ORG_MIRROR_MAX_SYNC_DURATION |
Integer |
Maximum sync duration in seconds. Default: 3600 |
ORG_MIRROR_DEFAULT_SKOPEO_TIMEOUT |
Integer |
Default skopeo timeout in seconds. Default: 300 |
ORG_MIRROR_DISCOVERY_TIMEOUT |
Integer |
Discovery timeout in seconds. Default: 600 |
ORG_MIRROR_MAX_REPOS_PER_ORG |
Integer |
Maximum repositories to discover for each organization. Default: 10000 |
ORG_MIRROR_MAX_RETRIES |
Integer |
Maximum sync retries for a failure operation. Default: 3 |
SSRF_ALLOWED_HOSTS |
List |
Allowed hosts for the Server Side Request Forgery (SSRF) protection. Use optional field to allow specific hosts to be accessed by the registry. |
FEATURE_PROXY_CACHE |
Boolean |
Enables Project Quay to act as a pull through cache for upstream registries. |
FEATURE_REPO_MIRROR |
Boolean |
Enable or disable repository mirroring. |
# ...
FEATURE_ORG_MIRROR: true
ORG_MIRROR_INTERVAL: 60
ORG_MIRROR_BATCH_SIZE: 100
ORG_MIRROR_MAX_SYNC_DURATION: 3600
ORG_MIRROR_DEFAULT_SKOPEO_TIMEOUT: 600
ORG_MIRROR_DISCOVERY_TIMEOUT: 600
ORG_MIRROR_MAX_REPOS_PER_ORG: 5000
ORG_MIRROR_MAX_RETRIES: 3
SSRF_ALLOWED_HOSTS:
- harbor.example.lab
FEATURE_PROXY_CACHE: true
FEATURE_REPO_MIRROR: true
# ...ModelCache configuration fields
ModelCache is a caching mechanism used by Project Quay to store accessed data and reduce database load. Quay supports multiple backends for caching, including the default Memcache, as well as Redis and Redis Cluster.
-
Memcache (default): requires no additional configuration.
-
Redis: can be configured as a single instance or with a read-only replica.
-
Redis Cluster: provides high availability and sharding for larger deployments.
| Field | Type | Description |
|---|---|---|
DATA_MODEL_CACHE_CONFIG.engine |
String |
The cache backend engine. Values: |
.redis_config.primary.host |
String |
The hostname of the primary Redis instance when using the |
.redis_config.primary.port |
Number |
The port used by the primary Redis instance. |
.redis_config.primary.password |
String |
The password for authenticating with the primary Redis instance. Only required if |
.redis_config.primary.ssl |
Boolean |
Whether to use SSL/TLS for the primary Redis connection. |
.redis_config.startup_nodes |
Array of Map |
For |
redis_config.password |
String |
Password used for authentication with the Redis cluster. Required if |
.redis_config.read_from_replicas |
Boolean |
Whether to allow read operations from Redis cluster replicas. |
.redis_config.skip_full_coverage_check |
Boolean |
If set to true, skips the Redis cluster full coverage check. |
.redis_config.ssl |
Boolean |
Whether to use SSL/TLS for Redis cluster communication. |
.replica.host |
String |
The hostname of the Redis replica instance. Optional. |
.replica.port |
Number |
The port used by the Redis replica instance. |
.replica.password |
String |
The password for the Redis replica. Required if |
.replica.ssl |
Boolean |
Whether to use SSL/TLS for the Redis replica connection. |
# ...
DATA_MODEL_CACHE_CONFIG:
engine: redis
redis_config:
primary:
host: <redis-primary.example.com>
port: 6379
password: <redis_password>>
ssl: true
replica:
host: <redis-replica.example.com>
port: 6379
password: <redis_password>
ssl: true
# ...# ...
DATA_MODEL_CACHE_CONFIG:
engine: <rediscluster>
redis_config:
startup_nodes:
- host: <redis-node-1.example.com>
port: 6379
- host: <redis-node-2.example.com>
port: 6379
password: <cluster_password>
read_from_replicas: true
skip_full_coverage_check: true
ssl: true
# ...Scanner and Metadata
The following configuration fields connect vulnerability scanning, model card metadata, and OCI artifact referrers in Project Quay.
These settings enable enhanced visibility and security by providing Project Quay with the following options:
-
Integrating with a vulnerability scanner to assess container images for known CVEs.
-
Rendering AI/ML model metadata through model cards stored in the registry.
-
Exposing relationships between container artifacts using the Referrers API, aligning with the OCI artifact specification.
Collectively, these features help improve software supply chain transparency, enforce security policies, and support emerging metadata-driven workflows.
Model card rendering configuration fields
The following configuration fields enable Project Quay to display Model Card metadata in the UI for OCI-compliant machine learning images.
Model Cards are a form of metadata documentation commonly used in machine learning workflows to improve the visibility and management of model-related content within OCI-compliant images.
| Field | Type | Description |
|---|---|---|
FEATURE_UI_MODELCARD |
Boolean |
Enables Model Card image tab in UI. Defaults to |
UI_MODELCARD_ARTIFACT_TYPE |
String |
Defines the model card artifact type. |
UI_MODELCARD_ANNOTATION |
Object |
This optional field defines the layer annotation of the model card stored in an OCI image. |
UI_MODELCARD_LAYER_ANNOTATION |
Object |
This optional field defines the layer annotation of the model card stored in an OCI image. |
FEATURE_UI_MODELCARD: true
UI_MODELCARD_ARTIFACT_TYPE: application/x-mlmodel
UI_MODELCARD_ANNOTATION:
org.opencontainers.image.description: "Model card metadata"
UI_MODELCARD_LAYER_ANNOTATION:
org.opencontainers.image.title: README.mdwhere:
FEATURE_UI_MODELCARD-
Specifies enabling the Model Card image tab in the UI.
UI_MODELCARD_ARTIFACT_TYPE-
Specifies the model card artifact type. In this example, the artifact type is
application/x-mlmodel. UI_MODELCARD_ANNOTATION-
Specifies manifest-level annotation lookup when an image does not have an
artifactTypedefined. If a matching annotation is found, the system then searches for a layer with an annotation matchingUI_MODELCARD_LAYER_ANNOTATION. This field is optional. UI_MODELCARD_LAYER_ANNOTATION-
Specifies the layer annotation used to locate the specific layer containing the model card when an image has an
artifactTypedefined and multiple layers. This field is optional.
Integration and service configuration reference
Optional configuration fields for the Referrers API, quota management, proxy cache, third-party integration, and mail notifications.
Open Container Initiative referrers API configuration field
The following configuration field enables the OCI referrers API to retrieve and manage artifact referrers attached to container images. This configuration field can help improve container image management.
| Field | Type | Description |
|---|---|---|
FEATURE_REFERRERS_API |
Boolean |
Enables OCI 1.1’s referrers API. |
# ...
FEATURE_REFERRERS_API: True
# ...Quota management and proxy cache features
The following configuration fields enforce storage quotas and enable proxy caching of upstream registry images in Project Quay.
These features help registry administrators with the following:
-
Controlling how much storage organizations and users consume with configurable quotas.
-
Improving access to upstream images by caching remote content locally via proxy cache.
-
Monitoring and managing resource consumption and availability across distributed environments.
Collectively, these capabilities ensure better performance, governance, and resiliency in managing container image workflows.
Quota management configuration fields
The following configuration fields enable and customize quota management functionality in Project Quay. Quota management helps administrators enforce storage usage policies at the organization level by allowing them to set usage limits, calculate blob sizes, and control tag deletion behavior.
| Field | Type | Description |
|---|---|---|
FEATURE_QUOTA_MANAGEMENT |
Boolean |
Enables configuration, caching, and validation for quota management feature. Default: |
FEATURE_QUOTA_NOTIFICATIONS |
Boolean |
Enables external notification channels, such as email, for quota threshold alerts. When enabled, namespace owners receive proactive notifications when storage consumption crosses configured warning or critical thresholds. Default: |
FEATURE_MAILING |
Boolean |
Enables email delivery features across Project Quay. Must be Default: |
QUOTA_NOTIFICATION_COOLDOWN_SECONDS |
Integer |
Cooldown period in seconds before re-sending a quota notification for the same threshold (default: 86400 / 24 hours). The system prevents repeated notifications for the same namespace and threshold combination within this window. If storage usage drops below a threshold and later crosses the threshold again, the notification state is cleared and the notification will re-fire upon the new crossing. Notification claims ( Default: |
QUOTA_NOTIFICATION_WORKER_POLL_PERIOD |
Integer |
How often, in seconds, the quota notification background worker polls for threshold crossings that occur between image pushes—for example, when an administrator lowers a quota limit. Default: Default: |
DEFAULT_SYSTEM_REJECT_QUOTA_BYTES |
Integer |
Enables system default quota reject byte allowance for all organizations. By default, no limit is set. |
QUOTA_BACKFILL |
Boolean |
Enables the quota backfill worker to calculate the size of pre-existing blobs. Default: |
QUOTA_TOTAL_DELAY_SECONDS |
String |
The time delay for starting the quota backfill. Rolling deployments can cause incorrect totals. This field must be set to a time longer than it takes for the rolling deployment to complete. Default: |
PERMANENTLY_DELETE_TAGS |
Boolean |
Enables functionality related to the removal of tags from the time machine window. Default: |
RESET_CHILD_MANIFEST_EXPIRATION |
Boolean |
Resets the expirations of temporary tags targeting the child manifests. With this feature set to Default: |
# ...
FEATURE_QUOTA_MANAGEMENT: true
FEATURE_QUOTA_NOTIFICATIONS: true
DEFAULT_SYSTEM_REJECT_QUOTA_BYTES: 107374182400
QUOTA_BACKFILL: true
QUOTA_TOTAL_DELAY_SECONDS: 3600
QUOTA_NOTIFICATION_COOLDOWN_SECONDS: 86400
QUOTA_NOTIFICATION_WORKER_POLL_PERIOD: 300
PERMANENTLY_DELETE_TAGS: true
RESET_CHILD_MANIFEST_EXPIRATION: true
# ...Proxy cache configuration fields
The following configuration field enables Project Quay to act as a pull-through cache for upstream container registries.
When FEATURE_PROXY_CACHE is enabled, Project Quay can cache images that are pulled from external registries, reducing bandwidth consumption and improving image retrieval speed on subsequent requests.
| Field | Type | Description |
|---|---|---|
FEATURE_PROXY_CACHE |
Boolean |
Enables Project Quay to act as a pull through cache for upstream registries. Default: |
# ...
FEATURE_PROXY_CACHE: true
# ...QuayIntegration configuration fields
The QuayIntegration custom resource enables integration between your OpenShift Container Platform cluster and a Project Quay registry instance.
| Name | Description | Schema |
|---|---|---|
allowlistNamespaces (Optional) |
A list of namespaces to include. |
Array |
clusterID (Required) |
The ID associated with this cluster. |
String |
credentialsSecret.key (Required) |
The secret containing credentials to communicate with the Quay registry. |
Object |
denylistNamespaces (Optional) |
A list of namespaces to exclude. |
Array |
insecureRegistry (Optional) |
Whether to skip TLS verification to the Quay registry |
Boolean |
quayHostname (Required) |
The hostname of the Quay registry. |
String |
scheduledImageStreamImport (Optional) |
Whether to enable image stream importing. |
Boolean |
apiVersion: quay.redhat.com/v1
kind: QuayIntegration
metadata:
name: example-quayintegration
spec:
clusterID: 1df512fc-bf70-11ee-bb31-001a4a160100
quayHostname: quay.example.com
credentialsSecret:
name: quay-creds-secret
key: token
allowlistNamespaces:
- dev-team
- prod-team
denylistNamespaces:
- test
insecureRegistry: false
scheduledImageStreamImport: trueMail configuration fields
The following configuration fields allow Project Quay to connect to your SMTP server. With these fields, you can send account confirmation, password reset, and security alerts.
| Field | Type | Description |
|---|---|---|
FEATURE_MAILING |
Boolean |
Whether emails are enabled Default: |
MAIL_DEFAULT_SENDER |
String |
If specified, the e-mail address used as the Example: |
MAIL_PASSWORD |
String |
The SMTP password to use when sending e-mails |
MAIL_PORT |
Number |
The SMTP port to use. If not specified, defaults to 587. |
MAIL_SERVER |
String |
The SMTP server to use for sending e-mails. Only required if FEATURE_MAILING is set to true. Example: |
MAIL_USERNAME |
String |
The SMTP username to use when sending e-mails |
MAIL_USE_TLS |
Boolean |
If specified, whether to use TLS for sending e-mails Default: |
# ...
FEATURE_MAILING: true
MAIL_DEFAULT_SENDER: "support@example.com"
MAIL_SERVER: "smtp.example.com"
MAIL_PORT: 587
MAIL_USERNAME: "smtp-user@example.com"
MAIL_PASSWORD: "your-smtp-password"
MAIL_USE_TLS: true
# ...SSL/TLS configuration reference
Reference SSL and TLS configuration fields for securing Red Hat Quay registry traffic.
SSL/TLS configuration fields
Configure SSL/TLS settings, hostname, cipher suites, and session cookie security for Project Quay.
| Field | Type | Description |
|---|---|---|
PREFERRED_URL_SCHEME |
String |
One of |
SERVER_HOSTNAME (Required) |
String |
The URL at which Project Quay is accessible, without the scheme Example: |
SSL_CIPHERS |
Array of String |
If specified, the nginx-defined list of SSL ciphers to enabled and disabled Example: [ |
SSL_PROTOCOLS |
Array of String |
If specified, nginx is configured to enabled a list of SSL protocols defined in the list. Removing an SSL protocol from the list disables the protocol during Project Quay startup. Example: |
SESSION_COOKIE_SECURE |
Boolean |
Whether the |
EXTERNAL_TLS_TERMINATION |
Boolean |
Set to |
# ...
PREFERRED_URL_SCHEME: https
SERVER_HOSTNAME: quay-server.example.com
SSL_CIPHERS:
- ECDHE-RSA-AES128-GCM-SHA256
SSL_PROTOCOLS:
- TLSv1.3
SESSION_COOKIE_SECURE: true
EXTERNAL_TLS_TERMINATION: true
# ...LDAP configuration reference
Reference LDAP configuration fields for directory authentication, team synchronization, and superuser access in Red Hat Quay.
LDAP configuration fields
The following configuration fields allow administrators to integrate Project Quay with an LDAP-based authentication system.
When AUTHENTICATION_TYPE is set to LDAP, Project Quay can authenticate users against an LDAP directory and support additional, optional features such as team synchronization, superuser access control, restricted user roles, and secure connection parameters.
This section provides YAML examples for the following LDAP scenarios:
-
Basic LDAP configuration
-
LDAP restricted user configuration
-
LDAP superuser configuration
| Field | Type | Description |
|---|---|---|
AUTHENTICATION_TYPE (Required) |
String |
Must be set to |
FEATURE_TEAM_SYNCING |
Boolean |
Whether to allow for team membership to be synced from a backing group in the authentication engine (OIDC, LDAP, or Keystone). Default: |
FEATURE_NONSUPERUSER_TEAM_SYNCING_SETUP |
Boolean |
If enabled, non-superusers can setup team syncrhonization. Default: |
LDAP_ADMIN_DN |
String |
The admin DN for LDAP authentication. |
LDAP_ADMIN_PASSWD |
String |
The admin password for LDAP authentication. |
LDAP_ALLOW_INSECURE_FALLBACK |
Boolean |
Whether or not to allow SSL insecure fallback for LDAP authentication. |
LDAP_BASE_DN |
Array of String |
The base DN for LDAP authentication. |
LDAP_EMAIL_ATTR |
String |
The email attribute for LDAP authentication. |
LDAP_UID_ATTR |
String |
The uid attribute for LDAP authentication. |
LDAP_URI |
String |
The LDAP URI. |
LDAP_USER_FILTER |
String |
The user filter for LDAP authentication. |
LDAP_USER_RDN |
Array of String |
The user RDN for LDAP authentication. |
LDAP_SECONDARY_USER_RDNS |
Array of String |
Provide Secondary User Relative DNs if there are multiple Organizational Units where user objects are located. |
TEAM_RESYNC_STALE_TIME |
String |
If team syncing is enabled for a team, how often to check its membership and resync if necessary. Pattern: Default: |
LDAP_SUPERUSER_FILTER |
String |
Subset of the With this field, administrators can add or remove superusers without having to update the Project Quay configuration file and restart their deployment. This field requires that your |
LDAP_GLOBAL_READONLY_SUPERUSER_FILTER |
String |
Subset of the |
LDAP_RESTRICTED_USER_FILTER |
String |
Subset of the This field requires that your |
FEATURE_RESTRICTED_USERS |
Boolean |
When set to Default: |
LDAP_TIMEOUT |
Integer |
Specifies the time limit, in seconds, for LDAP operations. This limits the amount of time an LDAP search, bind, or other operation can take. Similar to the Default: |
LDAP_NETWORK_TIMEOUT |
Integer |
Specifies the time limit, in seconds, for establishing a connection to the LDAP server. This is the maximum time Project Quay waits for a response during network operations, similar to the Default: |
FEATURE_LDAP_CACHING |
Boolean |
enable in-memory caching for LDAP permission check results (superuser, restricted user). Reduces LDAP server load. Default: |
LDAP_CACHE_TTL |
Integer |
Time-to-live, in seconds, for cached LDAP permission results. Default: |
# ...
AUTHENTICATION_TYPE: LDAP
# ...
LDAP_ADMIN_DN: uid=<name>,ou=Users,o=<organization_id>,dc=<example_domain_component>,dc=com
LDAP_ADMIN_PASSWD: ABC123
LDAP_ALLOW_INSECURE_FALLBACK: false
LDAP_BASE_DN:
- dc=example
- dc=com
LDAP_EMAIL_ATTR: mail
LDAP_UID_ATTR: uid
LDAP_URI: ldap://<example_url>.com
LDAP_USER_FILTER: (memberof=cn=developers,ou=Users,dc=<domain_name>,dc=com)
LDAP_USER_RDN:
- ou=people
LDAP_SECONDARY_USER_RDNS:
- ou=<example_organization_unit_one>
- ou=<example_organization_unit_two>
- ou=<example_organization_unit_three>
- ou=<example_organization_unit_four>
FEATURE_LDAP_CACHING: true
LDAP_CACHE_TTL: 10where:
AUTHENTICATION_TYPE-
Specifies
LDAPfor LDAP authentication type. LDAP_ADMIN_DN-
Specifies the admin DN for LDAP authentication. This field is required.
LDAP_ADMIN_PASSWD-
Specifies the admin password for LDAP authentication. This field is required.
LDAP_ALLOW_INSECURE_FALLBACK-
Specifies whether to allow SSL/TLS insecure fallback for LDAP authentication. This field is required.
LDAP_BASE_DN-
Specifies the base DN for LDAP authentication. This field is required.
LDAP_EMAIL_ATTR-
Specifies the email attribute for LDAP authentication. This field is required.
LDAP_UID_ATTR-
Specifies the UID attribute for LDAP authentication. This field is required.
LDAP_URI-
Specifies the LDAP URI. This field is required.
LDAP_USER_FILTER-
Specifies the user filter for LDAP authentication. This field is required.
LDAP_USER_RDN-
Specifies the user RDN for LDAP authentication. This field is required.
LDAP_SECONDARY_USER_RDNS-
Specifies secondary User Relative DNs if there are multiple Organizational Units where user objects are located. This field is optional.
FEATURE_LDAP_CACHING-
Specifies whether to enable in-memory caching for LDAP permission check results (superuser, restricted user). Reduces LDAP server load. Defaults to
False. This field is optional. LDAP_CACHE_TTL-
Specifies the time-to-live, in seconds, for cached LDAP permission results. Defaults to
60.
# ...
AUTHENTICATION_TYPE: LDAP
# ...
FEATURE_RESTRICTED_USERS: true
# ...
LDAP_ADMIN_DN: uid=<name>,ou=Users,o=<organization_id>,dc=<example_domain_component>,dc=com
LDAP_ADMIN_PASSWD: ABC123
LDAP_ALLOW_INSECURE_FALLBACK: false
LDAP_BASE_DN:
- o=<organization_id>
- dc=<example_domain_component>
- dc=com
LDAP_EMAIL_ATTR: mail
LDAP_UID_ATTR: uid
LDAP_URI: ldap://<example_url>.com
LDAP_USER_FILTER: (memberof=cn=developers,ou=Users,o=<example_organization_unit>,dc=<example_domain_component>,dc=com)
LDAP_RESTRICTED_USER_FILTER: (<filterField>=<value>)
LDAP_USER_RDN:
- ou=<example_organization_unit>
- o=<organization_id>
- dc=<example_domain_component>
- dc=com
FEATURE_LDAP_CACHING: true
LDAP_CACHE_TTL: 10
# ...where:
FEATURE_RESTRICTED_USERS-
Specify
Truewhen configuring an LDAP restricted user. LDAP_RESTRICTED_USER_FILTER-
Specifies configured users as restricted users.
# ...
AUTHENTICATION_TYPE: LDAP
# ...
LDAP_ADMIN_DN: uid=<name>,ou=Users,o=<organization_id>,dc=<example_domain_component>,dc=com
LDAP_ADMIN_PASSWD: ABC123
LDAP_ALLOW_INSECURE_FALLBACK: false
LDAP_BASE_DN:
- o=<organization_id>
- dc=<example_domain_component>
- dc=com
LDAP_EMAIL_ATTR: mail
LDAP_UID_ATTR: uid
LDAP_URI: ldap://<example_url>.com
LDAP_USER_FILTER: (memberof=cn=developers,ou=Users,o=<example_organization_unit>,dc=<example_domain_component>,dc=com)
LDAP_SUPERUSER_FILTER: (<filterField>=<value>)
LDAP_USER_RDN:
- ou=<example_organization_unit>
- o=<organization_id>
- dc=<example_domain_component>
- dc=com
FEATURE_LDAP_CACHING: true
LDAP_CACHE_TTL: 10
# ...LDAP_SUPERUSER_FILTER-
Specify configured users as superusers.
LDAP configuration fields
You can find the full list of LDAP configuration fields for Project Quay in the Configure Project Quay documentation.
OAuth and OIDC configuration reference
Reference OAuth and OIDC configuration fields for external authentication in Red Hat Quay.
OAuth configuration fields
The following configuration fields define the behavior of Project Quay when handling authentication through external identity providers using OAuth.
You can configure global OAuth options such as token assignment and whitelisted client IDs, as well as provider-specific settings for GitHub and Google.
| Field | Type | Description |
|---|---|---|
DIRECT_OAUTH_CLIENTID_WHITELIST |
Array of String |
A list of client IDs for Quay-managed applications that are allowed to perform direct OAuth approval without user approval. |
FEATURE_ASSIGN_OAUTH_TOKEN |
Boolean |
Allows organization administrators to assign OAuth tokens to other users. |
# ...
DIRECT_OAUTH_CLIENTID_WHITELIST:
- <quay_robot_client>
- <quay_app_token_issuer>
FEATURE_ASSIGN_OAUTH_TOKEN: true
# ...| Field | Type | Description |
|---|---|---|
FEATURE_GITHUB_LOGIN |
Boolean |
Whether GitHub login is supported Default: |
GITHUB_LOGIN_CONFIG |
Object |
Configuration for using GitHub (Enterprise) as an external login provider. |
.ALLOWED_ORGANIZATIONS |
Array of String |
The names of the GitHub (Enterprise) organizations whitelisted to work with the ORG_RESTRICT option. |
.API_ENDPOINT |
String |
The endpoint of the GitHub (Enterprise) API to use. Must be overridden for github.com Example: |
.CLIENT_ID (Required) |
String |
The registered client ID for this Project Quay instance; cannot be shared with |
.CLIENT_SECRET (Required) |
String |
The registered client secret for this Project Quay instance. Example: |
.GITHUB_ENDPOINT (Required) |
String |
The endpoint for GitHub (Enterprise). Example: |
.ORG_RESTRICT |
Boolean |
If true, only users within the organization whitelist can login using this provider. |
# ...
FEATURE_GITHUB_LOGIN: true
GITHUB_LOGIN_CONFIG:
ALLOWED_ORGANIZATIONS:
- <myorg>
- <dev-team>
API_ENDPOINT: <https://api.github.com/>
CLIENT_ID: <client_id>
CLIENT_SECRET: <client_secret>
GITHUB_ENDPOINT: <https://github.com/>
ORG_RESTRICT: true
# ...| Field | Type | Description |
|---|---|---|
FEATURE_GOOGLE_LOGIN |
Boolean |
Whether Google login is supported. Default: |
GOOGLE_LOGIN_CONFIG |
Object |
Configuration for using Google for external authentication. |
.CLIENT_ID (Required) |
String |
The registered client ID for this Project Quay instance. Example: |
.CLIENT_SECRET (Required) |
String |
The registered client secret for this Project Quay instance. Example: |
# ...
FEATURE_GOOGLE_LOGIN: true
GOOGLE_LOGIN_CONFIG:
CLIENT_ID: <client_id>
CLIENT_SECRET: <client_secret>
# ...OIDC configuration fields
Configure OpenID Connect client credentials, endpoints, and token behavior for Project Quay login.
You can configure Project Quay to authenticate users through any OpenID Connect (OIDC)-compatible identity provider, including Azure Entra ID (formerly Azure AD), Okta, Keycloak, and others. These fields define the necessary client credentials, endpoints, and token behavior used during the OIDC login flow.
| Field | Type | Description |
|---|---|---|
<string>_LOGIN_CONFIG (Required) |
String |
The parent key that holds the OIDC configuration settings. Typically the name of the OIDC provider, for example, |
.CLIENT_ID (Required) |
String |
The registered client ID for this Project Quay instance. Example: |
.CLIENT_SECRET (Required) |
String |
The registered client secret for this Project Quay instance. Example: |
.LOGIN_BINDING_FIELD |
String |
Used when the internal authorization is set to LDAP. Project Quay reads this parameter and tries to search through the LDAP tree for the user with this username. If it exists, it automatically creates a link to that LDAP account. |
.LOGIN_SCOPES |
Object |
Scopes Project Quay requests during the OIDC login flow. Must include |
.OIDC_ENDPOINT_CUSTOM_PARAMS |
String |
Support for custom query parameters on OIDC endpoints. The following endpoints are supported: |
.OIDC_ISSUER |
String |
Allows the user to define the issuer to verify. For example, JWT tokens container a parameter known as |
.OIDC_ISSUERS |
Array of String |
Accepted issuer URLs for this provider. When set, Project Quay accepts tokens whose |
.OIDC_AUDIENCES |
Array of String |
Accepted audience values for bearer token and On-Behalf-Of (OBO) flows. When set, Project Quay validates the token |
.OIDC_ALLOWED_CLIENTS |
Array of String |
Optional whitelist of authorized party ( |
.OIDC_SERVER (Required) |
String |
The OIDC discovery base URL for authentication. Project Quay uses path joining for OIDC discovery, so the URL must end with a trailing |
.PREFERRED_USERNAME_CLAIM_NAME |
String |
Sets the preferred username to a parameter from the token. |
.SERVICE_ICON |
String |
Changes the icon on the login screen. |
.SERVICE_NAME (Required) |
String |
The name of the service that is being authenticated. Example: |
.VERIFIED_EMAIL_CLAIM_NAME |
String |
The name of the claim that is used to verify the email address of the user. |
.PREFERRED_GROUP_CLAIM_NAME |
String |
The key name within the OIDC token payload that holds information about the user’s group memberships. |
.OIDC_DISABLE_USER_ENDPOINT |
Boolean |
Whether to allow or disable the Default: |
USE_PKCE |
Boolean |
Whether to enable support for Proof Key for Code Exchange. Default: |
PKCE_METHOD |
Integer |
The code challenge method used to generate the Default: |
PUBLIC_CLIENT |
Boolean |
Whether to omit Default: |
AUTHENTICATION_TYPE: OIDC
# ...
<oidc_provider>_LOGIN_CONFIG:
CLIENT_ID: <client_id>
CLIENT_SECRET: <client_secret>
LOGIN_BINDING_FIELD: <login_binding_field>
LOGIN_SCOPES:
- openid
- email
- profile
OIDC_ENDPOINT_CUSTOM_PARAMS:
authorization_endpoint:
some: "param"
token_endpoint:
some: "param"
user_endpoint:
some: "param"
OIDC_ISSUER: <oidc_issuer_url>
OIDC_ISSUERS:
- <issuer_url_1>
- <issuer_url_2>
OIDC_AUDIENCES:
- <client_id>
- <custom_api_audience>
OIDC_ALLOWED_CLIENTS:
- <client_id>
- <upstream_client_id>
OIDC_SERVER: <oidc_server_address>
PREFERRED_USERNAME_CLAIM_NAME: <preferred_username_claim>
SERVICE_ICON: <service_icon_url>
SERVICE_NAME: <service_name>
VERIFIED_EMAIL_CLAIM_NAME: <verified_email_claim>
PREFERRED_GROUP_CLAIM_NAME: <preferred_group_claim>
OIDC_DISABLE_USER_ENDPOINT: true
USE_PKCE: True
PKCE_METHOD: "S256"
PUBLIC_CLIENT: True
# ...AUTHENTICATION_TYPE: OIDC
# ...
AZURE_LOGIN_CONFIG:
CLIENT_ID: <quay_app_client_id>
CLIENT_SECRET: <quay_app_client_secret>
OIDC_SERVER: https://login.microsoftonline.com/<tenant-id>/v2.0/
SERVICE_NAME: Microsoft Entra ID
OIDC_DISABLE_USER_ENDPOINT: true
  OIDC_ISSUERS:
    - https://sts.windows.net/<tenant-id>/
    - https://login.microsoftonline.com/<tenant-id>/v2.0
OIDC_AUDIENCES:
- <quay_app_client_id>
- api://quay-api
OIDC_ALLOWED_CLIENTS:
- <quay_app_client_id>
- <upstream_app_client_id>
USE_PKCE: true
PKCE_METHOD: "S256"
PUBLIC_CLIENT: true
# ...Action log, Elasticsearch, and Splunk configuration reference
Optional configuration fields for action log storage, rotation, and auditing, and for forwarding action logs to Elasticsearch or Splunk.
Action log storage configuration fields
The following configuration fields control how Project Quay stores, exports, rotates, and audits action logs for registry activity. You can use these fields to export or forward logs to external systems like Elasticsearch or Splunk for advanced analysis, auditing, or compliance.
| Field | Type | Description |
|---|---|---|
FEATURE_LOG_EXPORT |
Boolean |
Whether to allow exporting of action logs. Default: |
LOGS_MODEL |
String |
Specifies the preferred method for handling log data. Values: One of Default: |
LOGS_MODEL_CONFIG |
Object |
Logs model config for action logs. |
ALLOW_WITHOUT_STRICT_LOGGING |
Boolean |
When set to Default: False |
# ...
FEATURE_LOG_EXPORT: true
LOGS_MODEL: elasticsearch
LOGS_MODEL_CONFIG:
elasticsearch:
endpoint: http://elasticsearch.example.com:9200
index_prefix: quay-logs
username: elastic
password: changeme
ALLOW_WITHOUT_STRICT_LOGGING: true
# ...Action log rotation and archiving configuration
This section describes configuration fields related to action log rotation and archiving in Project Quay. When enabled, older logs can be automatically rotated and archived to designated storage locations, helping to manage log retention and storage utilization efficiently.
| Field | Type | Description |
|---|---|---|
FEATURE_ACTION_LOG_ROTATION |
Boolean |
Enabling log rotation and archival will move all logs older than 30 days to storage. Default: |
ACTION_LOG_ARCHIVE_LOCATION |
String |
If action log archiving is enabled, the storage engine in which to place the archived data. Example:: |
ACTION_LOG_ARCHIVE_PATH |
String |
If action log archiving is enabled, the path in storage in which to place the archived data. Example: |
ACTION_LOG_ROTATION_THRESHOLD |
String |
The time interval after which to rotate logs. Example: |
# ...
FEATURE_ACTION_LOG_ROTATION: true
ACTION_LOG_ARCHIVE_LOCATION: s3_us_east
ACTION_LOG_ARCHIVE_PATH: archives/actionlogs
ACTION_LOG_ROTATION_THRESHOLD: 30d
# ...Action log audit configuration
This section covers the configuration fields for audit logging within Project Quay. When enabled, audit logging tracks detailed user activity such as UI logins, logouts, and Docker logins for regular users, robot accounts, and token-based accounts.
| Field | Type | Description |
|---|---|---|
ACTION_LOG_AUDIT_LOGINS |
Boolean |
When set to Default: |
ACTION_LOG_AUDIT_LOGIN_FAILURES |
Boolean |
Whether logging of failed logins attempts is enabled. Default: |
ACTION_LOG_AUDIT_PULL_FAILURES |
Boolean |
Whether logging of failed image pull attempts is enabled. Default: |
ACTION_LOG_AUDIT_PUSH_FAILURES |
Boolean |
Whether logging of failed image push attempts is enabled. Default: |
ACTION_LOG_AUDIT_DELETE_FAILURES |
Boolean |
Whether logging of failed image delete attempts is enabled. Default: |
# ...
ACTION_LOG_AUDIT_LOGINS: true
ACTION_LOG_AUDIT_LOGIN_FAILURES: false
ACTION_LOG_AUDIT_PULL_FAILURES: false
ACTION_LOG_AUDIT_PUSH_FAILURES: false
ACTION_LOG_AUDIT_DELETE_FAILURES: false
# ...Elasticsearch configuration fields
The following configuration fields integrate Project Quay with an external Elasticsearch service. This enables storing and querying structured data such as action logs, repository events, and other operational records outside of the internal database.
| Field | Type | Description |
|---|---|---|
LOGS_MODEL_CONFIG.elasticsearch_config.access_key |
String |
Elasticsearch user (or IAM key for AWS ES). Example: |
.elasticsearch_config.host |
String |
Elasticsearch cluster endpoint. Example: |
.elasticsearch_config.index_prefix |
String |
Prefix for Elasticsearch indexes. Example: |
.elasticsearch_config.index_settings |
Object |
Index settings for Elasticsearch. |
LOGS_MODEL_CONFIG.elasticsearch_config.use_ssl |
Boolean |
Whether to use SSL for Elasticsearch. Default: Example: |
.elasticsearch_config.secret_key |
String |
Elasticsearch password (or IAM secret for AWS ES). Example: |
.elasticsearch_config.aws_region |
String |
AWS region. Example: |
.elasticsearch_config.port |
Number |
Port of the Elasticsearch cluster. Example: |
.kinesis_stream_config.aws_secret_key |
String |
AWS secret key. Example: |
.kinesis_stream_config.stream_name |
String |
AWS Kinesis stream to send action logs to. Example: |
.kinesis_stream_config.aws_access_key |
String |
AWS access key. Example: |
.kinesis_stream_config.retries |
Number |
Max number of retry attempts for a single request. Example: |
.kinesis_stream_config.read_timeout |
Number |
Read timeout in seconds. Example: |
.kinesis_stream_config.max_pool_connections |
Number |
Max number of connections in the pool. Example: |
.kinesis_stream_config.aws_region |
String |
AWS region. Example: |
.kinesis_stream_config.connect_timeout |
Number |
Connection timeout in seconds. Example: |
.producer |
String |
Logs producer type. Accepted values: |
.kafka_config.topic |
String |
Kafka topic used to publish log entries. Example: |
.kafka_config.bootstrap_servers |
Array |
List of Kafka brokers used to bootstrap the client. |
.kafka_config.max_block_seconds |
Number |
Max seconds to block during a |
# ...
FEATURE_LOG_EXPORT: true
LOGS_MODEL: elasticsearch
LOGS_MODEL_CONFIG:
producer: elasticsearch
elasticsearch_config:
access_key: elastic_user
secret_key: elastic_password
host: es.example.com
port: 9200
use_ssl: true
aws_region: us-east-1
index_prefix: logentry_
index_settings:
number_of_shards: 3
number_of_replicas: 1
ALLOW_WITHOUT_STRICT_LOGGING: true
# ...Splunk configuration fields
The following configuration fields export Project Quay action logs to a Splunk endpoint. This configuration allows audit and event logs to be sent to an external Splunk server for centralized analysis, search, and long-term storage.
| Field | Type | Description |
|---|---|---|
producer |
String |
Must be set to |
splunk_config |
Object |
Logs model configuration for Splunk action logs or Splunk cluster configuration. |
.host |
String |
The Splunk cluster endpoint. |
.port |
Integer |
The port number for the Splunk management cluster endpoint. |
.bearer_token |
String |
The bearer token used for authentication with Splunk. |
.verify_ssl |
Boolean |
Enable ( |
.index_prefix |
String |
The index prefix used by Splunk. |
.ssl_ca_path |
String |
The relative container path to a |
.search_timeout |
Integer |
The timeout for Splunk search queries in seconds. Increase for slow Splunk clusters or complex queries. |
.max_results |
Integer |
The maximum number of results to return per search query. Larger values require more memory. |
.export_batch_size |
Integer |
The batch size for log export operations. |
# ...
LOGS_MODEL: splunk
LOGS_MODEL_CONFIG:
producer: splunk
splunk_config:
host: http://<user_name>.remote.csb
port: 8089
bearer_token: <bearer_token>
url_scheme: <http/https>
verify_ssl: False
index_prefix: <splunk_log_index_name>
ssl_ca_path: <location_to_ssl-ca-cert.pem>
search_timeout: 60
max_results: 10000
export_batch_size: 5000
# ...Splunk HEC configuration fields
The following fields are available when configuring Splunk HTTP Event Collector (HEC) for Project Quay.
| Field | Type | Description |
|---|---|---|
producer |
String |
Must be set to |
splunk_hec_config |
Object |
Logs model configuration for Splunk HTTP Event Collector action logs. |
.host |
String |
Splunk cluster endpoint. |
.port |
Integer |
Splunk management cluster endpoint port. |
.hec_token |
String |
HEC token used for authenticating with Splunk. |
.url_scheme |
String |
URL scheme to access the Splunk service. Use |
.verify_ssl |
Boolean |
Enable ( |
.index |
String |
The Splunk index to use for log storage. |
.splunk_host |
String |
The hostname to assign to the logged event. |
.splunk_sourcetype |
String |
The Splunk |
.timeout |
Integer |
Timeout in seconds for HTTP requests to Splunk HEC endpoint. Prevents requests from hanging indefinitely when Splunk is unresponsive. |
.search_timeout |
Integer |
The timeout for Splunk search queries in seconds. Increase for slow Splunk clusters or complex queries. |
.max_results |
Integer |
The maximum number of results to return per search query. Larger values require more memory. |
.export_batch_size |
Integer |
The batch size for log export operations. |
.search_host |
String |
The Splunk management host for search API. Defaults to HEC host if not specified. |
.search_port |
Integer |
The Splunk management port for search API. Defaults to 8089 if not specified. |
.search_token (Optional) |
String |
The bearer token for Splunk search API. Required because HEC tokens are ingest-only and cannot search. |
# ...
LOGS_MODEL: splunk
LOGS_MODEL_CONFIG:
producer: splunk_hec
splunk_hec_config:
host: prd-p-aaaaaq.splunkcloud.com
port: 8088
hec_token: 12345678-1234-1234-1234-1234567890ab
url_scheme: https
verify_ssl: False
index: quay
splunk_host: quay-dev
splunk_sourcetype: quay_logs
timeout: 10
search_token: <bearer_token>
search_host: <splunk.example.com>
search_port: 8089
search_timeout: 60
max_results: 10000
export_batch_size: 5000
# ...Build automation configuration reference
Optional configuration fields for Dockerfile build triggers, the build manager, and build logs.
Builds and Automation
The following configuration fields manage automated builds within Project Quay. These settings control how Dockerfile builds are triggered, processed, and stored, and how build logs are managed and accessed.
You can use these fields to:
-
Enable or disable automated builds from source repositories.
-
Configure the behavior and resource management of the build manager.
-
Control access to and retention of build logs for auditing or debugging purposes.
These options help you streamline your CI/CD pipeline, enforce build policies, and retain visibility into your build history across the registry.
Dockerfile build triggers fields
The following configuration fields are used to enable and manage automated builds in Project Quay from Dockerfiles and source code repositories.
Use these fields to define build behavior, enable or disable support for GitHub, GitLab, and Bitbucket triggers, and provide OAuth credentials and endpoints.
| Field | Type | Description |
|---|---|---|
FEATURE_BUILD_SUPPORT |
Boolean |
Whether to support Dockerfile build. Default: |
SUCCESSIVE_TRIGGER_FAILURE_DISABLE_THRESHOLD |
Number |
If not set to Default: |
SUCCESSIVE_TRIGGER_INTERNAL_ERROR_DISABLE_THRESHOLD |
Number |
If not set to Default: |
# ...
FEATURE_BUILD_SUPPORT: true
SUCCESSIVE_TRIGGER_FAILURE_DISABLE_THRESHOLD: 100
SUCCESSIVE_TRIGGER_INTERNAL_ERROR_DISABLE_THRESHOLD: 5
# ...| Field | Type | Description |
|---|---|---|
FEATURE_GITHUB_BUILD |
Boolean |
Whether to support GitHub build triggers. Default: |
GITHUB_TRIGGER_CONFIG |
Object |
Configuration for using GitHub Enterprise for build triggers. |
.GITHUB_ENDPOINT (Required) |
String |
The endpoint for GitHub Enterprise. Example: |
.API_ENDPOINT |
String |
The endpoint of the GitHub Enterprise API to use. Must be overridden for |
.CLIENT_ID (Required) |
String |
The registered client ID for this Project Quay instance; this cannot be shared with |
.CLIENT_SECRET (Required) |
String |
The registered client secret for this Project Quay instance. |
# ...
FEATURE_GITHUB_BUILD: true
GITHUB_TRIGGER_CONFIG:
GITHUB_ENDPOINT: https://github.com/
API_ENDPOINT: https://api.github.com/
CLIENT_ID: your-client-id
CLIENT_SECRET: your-client-secret
# ...| Field | Type | Description |
|---|---|---|
FEATURE_BITBUCKET_BUILD |
Boolean |
Whether to support Bitbucket build triggers. Default: False |
BITBUCKET_TRIGGER_CONFIG |
Object |
Configuration for using BitBucket for build triggers. |
.CONSUMER_KEY (Required) |
String |
The registered consumer key (client ID) for this Project Quay instance. |
.CONSUMER_SECRET (Required) |
String |
The registered consumer secret (client secret) for this Project Quay instance. |
# ...
FEATURE_BITBUCKET_BUILD: true
BITBUCKET_TRIGGER_CONFIG:
CONSUMER_KEY: <your_consumer_key>
CONSUMER_SECRET: <your-consumer-secret>
# ...| Field | Type | Description |
|---|---|---|
FEATURE_GITLAB_BUILD |
Boolean |
Whether to support GitLab build triggers. Default: False |
GITLAB_TRIGGER_CONFIG |
Object |
Configuration for using Gitlab for build triggers. |
.GITLAB_ENDPOINT (Required) |
String |
The endpoint at which Gitlab Enterprise is running. |
.CLIENT_ID (Required) |
String |
The registered client ID for this Project Quay instance. |
.CLIENT_SECRET (Required) |
String |
The registered client secret for this Project Quay instance. |
# ...
FEATURE_GITLAB_BUILD: true
GITLAB_TRIGGER_CONFIG:
GITLAB_ENDPOINT: https://gitlab.example.com/
CLIENT_ID: <your_gitlab_client_id>
CLIENT_SECRET: <your_gitlab_client_secret>
# ...Build manager configuration fields
The following configuration fields control how the build manager component of Project Quay orchestrates and manages container image builds.
Use these fields for Redis coordination, executor backends such as Kubernetes or EC2, builder image configuration, and advanced scheduling and retry policies. You must configure to align with your infrastructure environment and workload requirements.
| Field | Type | Description |
|---|---|---|
ALLOWED_WORKER_COUNT |
String |
Defines how many Build Workers are instantiated per Project Quay pod. Typically set to |
ORCHESTRATOR_PREFIX |
String |
Defines a unique prefix to be added to all Redis keys. This is useful to isolate Orchestrator values from other Redis keys. |
REDIS_HOST |
Object |
The hostname for your Redis service. |
REDIS_PASSWORD |
String |
The password to authenticate into your Redis service. |
REDIS_SSL |
Boolean |
Defines whether or not your Redis connection uses SSL/TLS. |
REDIS_SKIP_KEYSPACE_EVENT_SETUP |
Boolean |
By default, Project Quay does not set up the keyspace events required for key events at runtime. To do so, set |
EXECUTOR |
String |
Starts a definition of an Executor of this type. Valid values are |
BUILDER_NAMESPACE |
String |
Kubernetes namespace where Project Quay Builds will take place. |
K8S_API_SERVER |
Object |
Hostname for API Server of the OpenShift Container Platform cluster where Builds will take place. |
K8S_API_TLS_CA |
Object |
The filepath in the |
KUBERNETES_DISTRIBUTION |
String |
Indicates which type of Kubernetes is being used. Valid values are |
CONTAINER_* |
Object |
Define the resource requests and limits for each |
NODE_SELECTOR_* |
Object |
Defines the node selector label name-value pair where |
CONTAINER_RUNTIME |
Object |
Specifies whether the Builder should run |
SERVICE_ACCOUNT_NAME/SERVICE_ACCOUNT_TOKEN |
Object |
Defines the Service Account name or token that will be used by |
QUAY_USERNAME/QUAY_PASSWORD |
Object |
Defines the registry credentials needed to pull the Project Quay build worker image that is specified in the |
WORKER_IMAGE |
Object |
Image reference for the Project Quay Builder image. |
WORKER_TAG |
Object |
Tag for the Builder image desired. The latest version is {producty}. |
BUILDER_VM_CONTAINER_IMAGE |
Object |
The full reference to the container image holding the internal VM needed to run each Project Quay Build. |
SETUP_TIME |
String |
Specifies the number of seconds at which a Build times out if it has not yet registered itself with the Build Manager. Defaults at |
MINIMUM_RETRY_THRESHOLD |
String |
This setting is used with multiple Executors. It indicates how many retries are attempted to start a Build before a different Executor is chosen. Setting to |
SSH_AUTHORIZED_KEYS |
Object |
List of SSH keys to bootstrap in the |
# ...
ALLOWED_WORKER_COUNT: "1"
ORCHESTRATOR_PREFIX: "quaybuild:"
REDIS_HOST: redis.example.com
REDIS_PASSWORD: examplepassword
REDIS_SSL: true
REDIS_SKIP_KEYSPACE_EVENT_SETUP: false
EXECUTOR: kubernetes
BUILDER_NAMESPACE: quay-builder
K8S_API_SERVER: https://api.openshift.example.com:6443
K8S_API_TLS_CA: /etc/ssl/certs/ca.crt
KUBERNETES_DISTRIBUTION: openshift
CONTAINER_RUNTIME: podman
CONTAINER_MEMORY_LIMITS: 2Gi
NODE_SELECTOR_ROLE: quay-build-node
SERVICE_ACCOUNT_NAME: quay-builder-sa
QUAY_USERNAME: quayuser
QUAY_PASSWORD: quaypassword
WORKER_IMAGE: quay.io/quay/quay-builder
WORKER_TAG: latest
BUILDER_VM_CONTAINER_IMAGE: quay.io/quay/vm-builder:latest
SETUP_TIME: "500"
MINIMUM_RETRY_THRESHOLD: "1"
SSH_AUTHORIZED_KEYS:
- ssh-rsa AAAAB3NzaC1yc2EAAAABIwAAAQEAsomekey user@example.com
- ssh-rsa AAAAB3NzaC1yc2EAAAABIwAAAQEAnotherkey user2@example.com
# ...Build logs configuration fields
The following configuration fields are used for managing build logs in Project Quay. These settings determine where build logs are archived, who can access them, and how they are stored.
| Field | Type | Description |
|---|---|---|
FEATURE_READER_BUILD_LOGS |
Boolean |
If set to true, build logs can be read by those with Default: |
LOG_ARCHIVE_LOCATION |
String |
The storage location, defined in |
LOG_ARCHIVE_PATH |
String |
The path under the configured storage engine in which to place the archived build logs in |
# ...
FEATURE_READER_BUILD_LOGS: true
LOG_ARCHIVE_LOCATION: s3_us_east
LOG_ARCHIVE_PATH: archives/buildlogs
# ...Clair core, indexer, matcher, and updater configuration reference
Reference configuration fields for Clair general settings, indexing, matching, matchers, and updaters.
Clair configuration overview
You can configure Clair with a structured YAML file and run each node in indexer, matcher, or combo mode. Use this overview to understand Clair configuration, proxy requirements, and the configuration reference for Project Quay.
Each Clair node needs to specify what mode it runs in and a path to a configuration file through CLI flags or environment variables. For example:
$ clair -conf ./path/to/config.yaml -mode indexeror
$ clair -conf ./path/to/config.yaml -mode matcherThe aforementioned commands each start two Clair nodes using the same configuration file. One runs the indexing facilities, while other runs the matching facilities.
If you are running Clair in combo mode, you must supply the indexer, matcher, and notifier configuration blocks in the configuration.
Information about using Clair in a proxy environment
Environment variables respected by the Go standard library can be specified if needed, for example:
-
HTTP_PROXY$ export HTTP_PROXY=http://<user_name>:<password>@<proxy_host>:<proxy_port> -
HTTPS_PROXY.$ export HTTPS_PROXY=https://<user_name>:<password>@<proxy_host>:<proxy_port> -
SSL_CERT_DIR$ export SSL_CERT_DIR=/<path>/<to>/<ssl>/<certificates> -
NO_PROXY$ export NO_PROXY=<comma_separated_list_of_hosts_and_domains>
If you are using a proxy server in your environment with Clair’s updater URLs, you must identify which URL needs to be added to the proxy allowlist to ensure that Clair can access them unimpeded. For example, the osv updater requires access to https://osv-vulnerabilities.storage.googleapis.com to fetch ecosystem data dumps. In this scenario, the URL must be added to the proxy allowlist.
You must also ensure that the standard Clair URLs are added to the proxy allowlist:
-
https://search.maven.org/solrsearch/select -
https://catalog.redhat.com/api/containers/ -
https://access.redhat.com/security/data/metrics/repository-to-cpe.json -
https://access.redhat.com/security/data/metrics/container-name-repos-map.json
When configuring the proxy server, take into account any authentication requirements or specific proxy settings needed to enable seamless communication between Clair and these URLs. By thoroughly documenting and addressing these considerations, you can ensure that Clair functions effectively while routing its updater traffic through the proxy.
Clair configuration reference
The following YAML shows an example Clair configuration:
http_listen_addr: ""
introspection_addr: ""
log_level: ""
tls: {}
indexer:
connstring: ""
scanlock_retry: 0
layer_scan_concurrency: 5
migrations: false
scanner: {}
airgap: false
matcher:
connstring: ""
indexer_addr: ""
migrations: false
period: ""
disable_updaters: false
update_retention: 2
matchers:
names: nil
config: nil
updaters:
sets: nil
config: nil
notifier:
connstring: ""
migrations: false
indexer_addr: ""
matcher_addr: ""
poll_interval: ""
delivery_interval: ""
disable_summary: false
webhook: null
amqp: null
stomp: null
auth:
psk: nil
trace:
name: ""
probability: null
jaeger:
agent:
endpoint: ""
collector:
endpoint: ""
username: null
password: null
service_name: ""
tags: nil
buffer_max: 0
metrics:
name: ""
prometheus:
endpoint: null
dogstatsd:
url: ""|
Note
|
The above YAML file lists every key for completeness. Using this configuration file as-is results in some options not having their defaults set normally. |
Clair general fields
You can use the general Clair configuration fields to set the HTTP API listen address, introspection endpoints, log level, and TLS options for Clair in Project Quay.
| Field | Type | Description |
|---|---|---|
http_listen_addr |
String |
Configures where the HTTP API is exposed. Default: |
introspection_addr |
String |
Configures where Clair’s metrics and health endpoints are exposed. |
log_level |
String |
Sets the logging level. Requires one of the following strings: debug-color, debug, info, warn, error, fatal, panic |
tls |
String |
A map containing the configuration for serving the HTTP API of TLS/SSL and HTTP/2. |
.cert |
String |
The TLS certificate to be used. Must be a full-chain certificate. |
Example configuration for general Clair fields
The following example shows a Clair configuration.
# ...
http_listen_addr: 0.0.0.0:6060
introspection_addr: 0.0.0.0:8089
log_level: info
# ...Clair indexer configuration fields
You can use the Clair indexer configuration fields to control database connections, scan concurrency, air-gap mode, and scanner options in Project Quay.
| Field | Type | Description |
|---|---|---|
indexer |
Object |
Provides Clair indexer node configuration. |
.airgap |
Boolean |
Disables HTTP access to the internet for indexers and fetchers. Private IPv4 and IPv6 addresses are allowed. Database connections are unaffected. |
.connstring |
String |
A Postgres connection string. Accepts format as a URL or libpq connection string. |
.index_report_request_concurrency |
Integer |
Rate limits the number of index report creation requests. Setting this to The API returns a |
.scanlock_retry |
Integer |
A positive integer representing seconds. Concurrent indexers lock on manifest scans to avoid clobbering. This value tunes how often a waiting indexer polls for the lock. |
.layer_scan_concurrency |
Integer |
Positive integer limiting the number of concurrent layer scans. Indexers will match a manifest’s layer concurrently. This value tunes the number of layers an indexer scans in parallel. |
.migrations |
Boolean |
Whether indexer nodes handle migrations to their database. |
.scanner |
String |
Indexer configuration. Scanner allows for passing configuration options to layer scanners. The scanner will have this configuration pass to it on construction if designed to do so. |
.scanner.dist |
String |
A map with the name of a particular scanner and arbitrary YAML as a value. |
.scanner.package |
String |
A map with the name of a particular scanner and arbitrary YAML as a value. |
.scanner.repo |
String |
A map with the name of a particular scanner and arbitrary YAML as a value. |
Example indexer configuration
The following example shows a hypothetical indexer configuration for Clair.
# ...
indexer:
connstring: host=quay-server.example.com port=5433 dbname=clair user=clairuser password=clairpass sslmode=disable
scanlock_retry: 10
layer_scan_concurrency: 5
migrations: true
# ...Clair matcher configuration fields
You can use the Clair matcher configuration fields to control database connections, update periods, and indexer addresses for Clair in Project Quay.
|
Note
|
Differs from |
| Field | Type | Description |
|---|---|---|
matcher |
Object |
Provides Clair matcher node configuration. |
.cache_age |
String |
Controls how long users should be hinted to cache responses for. |
.connstring |
String |
A Postgres connection string. Accepts format as a URL or libpq connection string. |
.max_conn_pool |
Integer |
Limits the database connection pool size. Clair allows for a custom connection pool size. This number directly sets how many active database connections are allowed concurrently. This parameter will be ignored in a future version. Users should configure this through the connection string. |
.indexer_addr |
String |
A matcher contacts an indexer to create a vulnerability report. The location of this indexer is required. Defaults to |
.migrations |
Boolean |
Whether matcher nodes handle migrations to their databases. |
.period |
String |
Determines how often updates for new security advisories take place. Defaults to |
.disable_updaters |
Boolean |
Whether to run background updates or not. Default: |
.update_retention |
Integer |
Sets the number of update operations to retain between garbage collection cycles. This should be set to a safe MAX value based on database size constraints. Defaults to If a value of less than |
Example matcher configuration
# ...
matcher:
connstring: >-
host=<DB_HOST> port=5432 dbname=<matcher> user=<DB_USER> password=D<B_PASS>
sslmode=verify-ca sslcert=/etc/clair/ssl/cert.pem sslkey=/etc/clair/ssl/key.pem
sslrootcert=/etc/clair/ssl/ca.pem
indexer_addr: http://clair-v4/
disable_updaters: false
migrations: true
period: 6h
update_retention: 2
# ...Clair matchers configuration fields
You can use the Clair matchers configuration fields to enable specific in-tree matchers and pass matcher-specific options in Project Quay.
|
Note
|
Differs from |
| Field | Type | Description |
|---|---|---|
matchers |
Array of strings |
Provides configuration for the in-tree |
.names |
String |
A list of string values informing the matcher factory about enabled matchers. If value is set to |
.config |
String |
Provides configuration to a specific matcher. A map keyed by the name of the matcher containing a sub-object which will be provided to the matchers factory constructor. For example: |
Example matchers configuration
The following example shows a hypothetical Clair deployment that only requires only the alpine, aws, debian, oracle matchers.
# ...
matchers:
names:
- "alpine-matcher"
- "aws"
- "debian"
- "oracle"
# ...Clair updaters configuration fields
You can use the Clair updaters configuration fields to select which updater sets run and to pass updater-specific options in Project Quay.
| Field | Type | Description |
|---|---|---|
updaters |
Object |
Provides configuration for the matcher’s update manager. |
.sets |
String |
A list of values informing the update manager which updaters to run. If value is set to If left blank, zero updaters run. |
.config |
String |
Provides configuration to specific updater sets. A map keyed by the name of the updater set containing a sub-object which will be provided to the updater set’s constructor. For a list of the sub-objects for each updater, see "Advanced updater configuration". |
Example updaters configuration
In the following configuration, only the rhel set is configured. The ignore_unpatched variable, which is specific to the rhel updater, is also defined.
# ...
updaters:
sets:
- rhel
config:
rhel:
ignore_unpatched: false
# ...Clair notifier, authorization, trace, metrics, and scanner configuration reference
Reference configuration fields for Clair notifiers, authorization, tracing, metrics, and the security scanner.
Clair notifier configuration fields
You can use the Clair notifier configuration fields to set database connections, polling intervals, and webhook, AMQP, or STOMP delivery options in Project Quay.
| Field | Type | Description |
|---|---|---|
notifier |
Object |
Provides Clair notifier node configuration. |
.connstring |
String |
Postgres connection string. Accepts format as URL, or libpq connection string. |
.migrations |
Boolean |
Whether notifier nodes handle migrations to their database. |
.indexer_addr |
String |
A notifier contacts an indexer to create or obtain manifests affected by vulnerabilities. The location of this indexer is required. |
.matcher_addr |
String |
A notifier contacts a matcher to list update operations and acquire diffs. The location of this matcher is required. |
.poll_interval |
String |
The frequency at which the notifier will query a matcher for update operations. |
.delivery_interval |
String |
The frequency at which the notifier attempts delivery of created, or previously failed, notifications. |
.disable_summary |
Boolean |
Controls whether notifications should be summarized to one per manifest. |
Example notifier configuration
The following notifier snippet is for a minimal configuration.
# ...
notifier:
connstring: >-
host=DB_HOST port=5432 dbname=notifier user=DB_USER password=DB_PASS
sslmode=verify-ca sslcert=/etc/clair/ssl/cert.pem sslkey=/etc/clair/ssl/key.pem
sslrootcert=/etc/clair/ssl/ca.pem
indexer_addr: http://clair-v4/
matcher_addr: http://clair-v4/
delivery_interval: 5s
migrations: true
poll_interval: 15s
webhook:
target: "http://webhook/"
callback: "http://clair-notifier/notifier/api/v1/notifications"
headers: ""
amqp: null
stomp: null
# ...Clair webhook configuration fields
The following webhook fields are available for the Clair notifier environment.
.webhook |
Object |
Configures the notifier for webhook delivery. |
.webhook.target |
String |
URL where the webhook will be delivered. |
.webhook.callback |
String |
The callback URL where notifications can be retrieved. The notification ID will be appended to this URL. This will typically be where the Clair notifier is hosted. |
.webhook.headers |
String |
A map associating a header name to a list of values. |
Example webhook configuration
# ...
notifier:
# ...
webhook:
target: "http://webhook/"
callback: "http://clair-notifier/notifier/api/v1/notifications"
# ...Clair amqp configuration fields
The following Advanced Message Queuing Protocol (AMQP) fields are available for the Clair notifier environment.
.amqp |
Object |
Configures the notifier for AMQP delivery. [NOTE] ==== Clair does not declare any AMQP components on its own. All attempts to use an exchange or queue are passive only and will fail. Broker administrators should setup exchanges and queues ahead of time. ==== |
.amqp.direct |
Boolean |
If |
.amqp.rollup |
Integer |
When |
.amqp.exchange |
Object |
The AMQP exchange to connect to. |
.amqp.exchange.name |
String |
The name of the exchange to connect to. |
.amqp.exchange.type |
String |
The type of the exchange. Typically one of the following: direct, fanout, topic, headers. |
.amqp.exchange.durability |
Boolean |
Whether the configured queue is durable. |
.amqp.exchange.auto_delete |
Boolean |
Whether the configured queue uses an |
.amqp.routing_key |
String |
The name of the routing key each notification is sent with. |
.amqp.callback |
String |
If |
.amqp.uris |
String |
A list of one or more AMQP brokers to connect to, in priority order. |
.amqp.tls |
Object |
Configures TLS/SSL connection to an AMQP broker. |
.amqp.tls.root_ca |
String |
The filesystem path where a root CA can be read. |
.amqp.tls.cert |
String |
The filesystem path where a TLS/SSL certificate can be read. [NOTE]
====
Clair also allows |
.amqp.tls.key |
String |
The filesystem path where a TLS/SSL private key can be read. |
Example AMQP configuration
The following example shows a hypothetical AMQP configuration for Clair.
# ...
notifier:
# ...
amqp:
exchange:
name: ""
type: "direct"
durable: true
auto_delete: false
uris: ["amqp://user:pass@host:10000/vhost"]
direct: false
routing_key: "notifications"
callback: "http://clair-notifier/notifier/api/v1/notifications"
tls:
root_ca: "optional/path/to/rootca"
cert: "madatory/path/to/cert"
key: "madatory/path/to/key"
# ...Clair STOMP configuration fields
The following Simple Text Oriented Message Protocol (STOMP) fields are available for the Clair notifier environment.
| .stomp | Object | Configures the notifier for STOMP delivery. |
|---|---|---|
.stomp.direct |
Boolean |
If |
.stomp.rollup |
Integer |
If |
.stomp.callback |
String |
If |
.stomp.destination |
String |
The STOMP destination to deliver notifications to. |
.stomp.uris |
String |
A list of one or more STOMP brokers to connect to in priority order. |
.stomp.tls |
Object |
Configured TLS/SSL connection to STOMP broker. |
.stomp.tls.root_ca |
String |
The filesystem path where a root CA can be read. [NOTE]
====
Clair also respects |
.stomp.tls.cert |
String |
The filesystem path where a TLS/SSL certificate can be read. |
.stomp.tls.key |
String |
The filesystem path where a TLS/SSL private key can be read. |
.stomp.user |
String |
Configures login details for the STOMP broker. |
.stomp.user.login |
String |
The STOMP login to connect with. |
.stomp.user.passcode |
String |
The STOMP passcode to connect with. |
Example STOMP configuration
The following example shows a hypothetical STOMP configuration for Clair.
# ...
notifier:
# ...
stomp:
desitnation: "notifications"
direct: false
callback: "http://clair-notifier/notifier/api/v1/notifications"
login:
login: "username"
passcode: "passcode"
tls:
root_ca: "optional/path/to/rootca"
cert: "madatory/path/to/cert"
key: "madatory/path/to/key"
# ...Clair authorization configuration fields
You can use the Clair authorization configuration fields to configure JWT authentication with a pre-shared key for Clair in Project Quay.
| Field | Type | Description |
|---|---|---|
auth |
Object |
Defines Clair’s external and intra-service JWT based authentication. If multiple |
.psk |
String |
Defines pre-shared key authentication. |
.psk.key |
String |
A shared base64 encoded key distributed between all parties signing and verifying JWTs. |
.psk.iss |
String |
A list of JWT issuers to verify. An empty list accepts any issuer in a JWT claim. |
Example authorization configuration
The following authorization snippet is for a minimal configuration.
# ...
auth:
psk:
key: MTU5YzA4Y2ZkNzJoMQ==
iss: ["quay"]
# ...Clair trace configuration fields
You can use the Clair trace configuration fields to configure OpenTelemetry and Jaeger distributed tracing for Clair in Project Quay.
| Field | Type | Description |
|---|---|---|
trace |
Object |
Defines distributed tracing configuration based on OpenTelemetry. |
.name |
String |
The name of the application traces will belong to. |
.probability |
Integer |
The probability a trace will occur. |
.jaeger |
Object |
Defines values for Jaeger tracing. |
.jaeger.agent |
Object |
Defines values for configuring delivery to a Jaeger agent. |
.jaeger.agent.endpoint |
String |
An address in the |
.jaeger.collector |
Object |
Defines values for configuring delivery to a Jaeger collector. |
.jaeger.collector.endpoint |
String |
An address in the |
.jaeger.collector.username |
String |
A Jaeger username. |
.jaeger.collector.password |
String |
A Jaeger password. |
.jaeger.service_name |
String |
The service name registered in Jaeger. |
.jaeger.tags |
String |
Key-value pairs to provide additional metadata. |
.jaeger.buffer_max |
Integer |
The maximum number of spans that can be buffered in memory before they are sent to the Jaeger backend for storage and analysis. |
Example trace configuration
The following example shows a hypothetical trace configuration for Clair.
# ...
trace:
name: "jaeger"
probability: 1
jaeger:
agent:
endpoint: "localhost:6831"
service_name: "clair"
# ...Clair metrics configuration fields
You can use the Clair metrics configuration fields to configure Prometheus metrics export for Clair in Project Quay.
| Field | Type | Description |
|---|---|---|
metrics |
Object |
Defines distributed tracing configuration based on OpenTelemetry. |
.name |
String |
The name of the metrics in use. |
.prometheus |
String |
Configuration for a Prometheus metrics exporter. |
.prometheus.endpoint |
String |
Defines the path where metrics are served. |
Example metrics configuration
The following example shows a hypothetical metrics configuration for Clair.
# ...
metrics:
name: "prometheus"
prometheus:
endpoint: "/metricsz"
# ...Clair security scanner configuration fields
The following configuration fields control how the Clair security scanner is enabled, how frequently it indexes new content, which endpoints are used, and how notifications are handled.
| Field | Type | Description |
|---|---|---|
FEATURE_SECURITY_SCANNER |
Boolean |
Enable or disable the security scanner Default: |
FEATURE_SECURITY_NOTIFICATIONS |
Boolean |
If the security scanner is enabled, turn on or turn off security notifications Default: |
SECURITY_SCANNER_V4_REINDEX_THRESHOLD |
String |
This parameter is used to determine the minimum time, in seconds, to wait before re-indexing a manifest that has either previously failed or has changed states since the last indexing. The data is calculated from the |
SECURITY_SCANNER_V4_ENDPOINT |
String |
The endpoint for the V4 security scanner Pattern: |
SECURITY_SCANNER_V4_PSK |
String |
The generated pre-shared key (PSK) for Clair // TODO 36 Check that SECURITY_SCANNER_NOTIFICATIONS can be dropped // |
SECURITY_SCANNER_NOTIFICATIONS |
String |
|
SECURITY_SCANNER_ENDPOINT |
String |
The endpoint for the V2 security scanner Pattern: |
SECURITY_SCANNER_INDEXING_INTERVAL |
Integer |
This parameter is used to determine the number of seconds between indexing intervals in the security scanner. When indexing is triggered, Project Quay will query its database for manifests that must be indexed by Clair. These include manifests that have not yet been indexed and manifests that previously failed indexing. Default: 30 |
FEATURE_SECURITY_SCANNER_NOTIFY_ON_NEW_INDEX |
Boolean |
Whether to allow sending notifications about vulnerabilities for new pushes. Default: |
SECURITY_SCANNER_V4_MANIFEST_CLEANUP |
Boolean |
Whether the Project Quay garbage collector removes manifests that are not referenced by other tags or manifests. Default: |
NOTIFICATION_MIN_SEVERITY_ON_NEW_INDEX |
String |
Set minimal security level for new notifications on detected vulnerabilities. Avoids creation of large number of notifications after first index. If not defined, defaults to |
SECURITY_SCANNER_V4_INDEX_MAX_LAYER_SIZE |
String |
The maximum layer size allowed for indexing. If the layer size exceeds the configured size, the Project Quay UI returns the following message: Default: |
# ...
FEATURE_SECURITY_NOTIFICATIONS: true
FEATURE_SECURITY_SCANNER: true
FEATURE_SECURITY_SCANNER_NOTIFY_ON_NEW_INDEX: true
...
SECURITY_SCANNER_INDEXING_INTERVAL: 30
SECURITY_SCANNER_V4_MANIFEST_CLEANUP: true
SECURITY_SCANNER_V4_ENDPOINT: http://quay-server.example.com:8081
SECURITY_SCANNER_V4_PSK: MTU5YzA4Y2ZkNzJoMQ==
SERVER_HOSTNAME: quay-server.example.com
SECURITY_SCANNER_V4_INDEX_MAX_LAYER_SIZE: 8G
# ...Recommended maximum is 10G.
Re-indexing with Clair v4
When Clair v4 indexes a manifest, the result should be deterministic. For example, the same manifest should produce the same index report. This is true until the scanners are changed, as using different scanners will produce different information relating to a specific manifest to be returned in the report. Because of this, Clair v4 exposes a state representation of the indexing engine (/indexer/api/v1/index_state) to determine whether the scanner configuration has been changed.
Project Quay leverages this index state by saving it to the index report when parsing to Quay’s database. If this state has changed since the manifest was previously scanned, Project Quay will attempt to re-index that manifest during the periodic indexing process.
By default this parameter is set to 30 seconds. Users might decrease the time if they want the indexing process to run more frequently, for example, if they did not want to wait 30 seconds to see security scan results in the UI after pushing a new tag. Users can also change the parameter if they want more control over the request pattern to Clair and the pattern of database operations being performed on the Project Quay database.