Get started with Quay.io
Create a Quay.io account, sign in, review plan and billing options, and prepare to create an organization and push your first image.
Creating a Quay.io account
New Quay.io users need both a Red Hat account and a Quay.io username. You use the Quay.io account for image storage and the Red Hat account for UI and catalog access.
New users of Quay.io are required to both register for a Red Hat account and create a Quay.io username. These accounts are correlated, with two distinct differences:
-
The Quay.io account can be used to push and pull container images or Open Container Initiative images to Quay.io to store images.
-
The Red Hat account provides users access to the Quay.io user interface. For paying customers, this account can also be used to access images from the Red Hat Ecosystem Catalog, which can be pushed to their Quay.io repository.
Users must first register for a Red Hat account, and then create a Quay.io account. Users need both accounts to properly use all features of Quay.io.
Registering for a Red Hat Account
To use Quay.io, you can register for a Red Hat account on the Red Hat Customer Portal. You create login credentials and provide the required contact information.
Use the following procedure to register for a Red Hat account for Quay.io.
-
Navigate to the Red Hat Customer Portal.
-
In navigation pane, click Log In.
-
When navigated to the log in page, click Register for a Red Hat Account.
-
Enter a Red Hat login ID.
-
Enter a password.
-
Enter the following personal information:
-
First name
-
Last name
-
Email address
-
Phone number
-
-
Enter the following contact information that is relative to your country or region. For example:
-
Country/region
-
Address
-
Postal code
-
City
-
County
-
-
Select and agree to Red Hat’s terms and conditions.
-
Click Create my account.
-
Navigate to Quay.io and log in.
Quay.io Single Sign On support
To link legacy Quay.io credentials with Red Hat Single Sign-On, you can attach your account from the Recovery page. Most accounts are already linked.
Red Hat Single Sign On (SSO) can be used with Quay.io. Use the following procedure to set up Red Hat SSO with Quay.io. For most users, these accounts are already linked. However, for some legacy Quay.io users, this procedure might be required.
-
You have created a Quay.io account.
-
Navigate to the Quay.io Recovery page.
-
Enter your username and password, then click Sign in to Quay Container Registry.
-
In the navigation pane, click your username → Account Settings.
-
In the navigation pane, click External Logins and Applications.
-
Click Attach to Red Hat.
-
If you are already signed into Red Hat SSO, your account is automatically linked. Otherwise, you are prompted to sign into Red Hat SSO by entering your Red Hat login or email, and the password. Alternatively, you might need to create a new account first.
After signing into Red Hat SSO, you can choose to authenticate against Quay.io using your Red Hat account from the login page.
Logging into Quay.io
To sign in to Quay.io, you can use the Quay.io UI with your Red Hat credentials. On first login, you confirm the generated username.
-
You have created a Red Hat account and a Quay.io account. For more information, see "Creating a Quay.io account".
-
Navigate to Quay.io.
-
In the navigation pane, select Sign In and log in using your Red Hat credentials.
-
If it is your first time logging in, you must confirm the automatically-generated username. Click Confirm Username to log in.
You are redirected to the Quay.io repository landing page.
Logging into Quay through the Hybrid Cloud Console
To sign in to Quay on the Red Hat Hybrid Cloud Console, you can use your Red Hat account. You are redirected to the Quay repository landing page after authentication.
-
You have created a Red Hat account and a Quay.io account. For more information, see "Creating a Quay.io account".
-
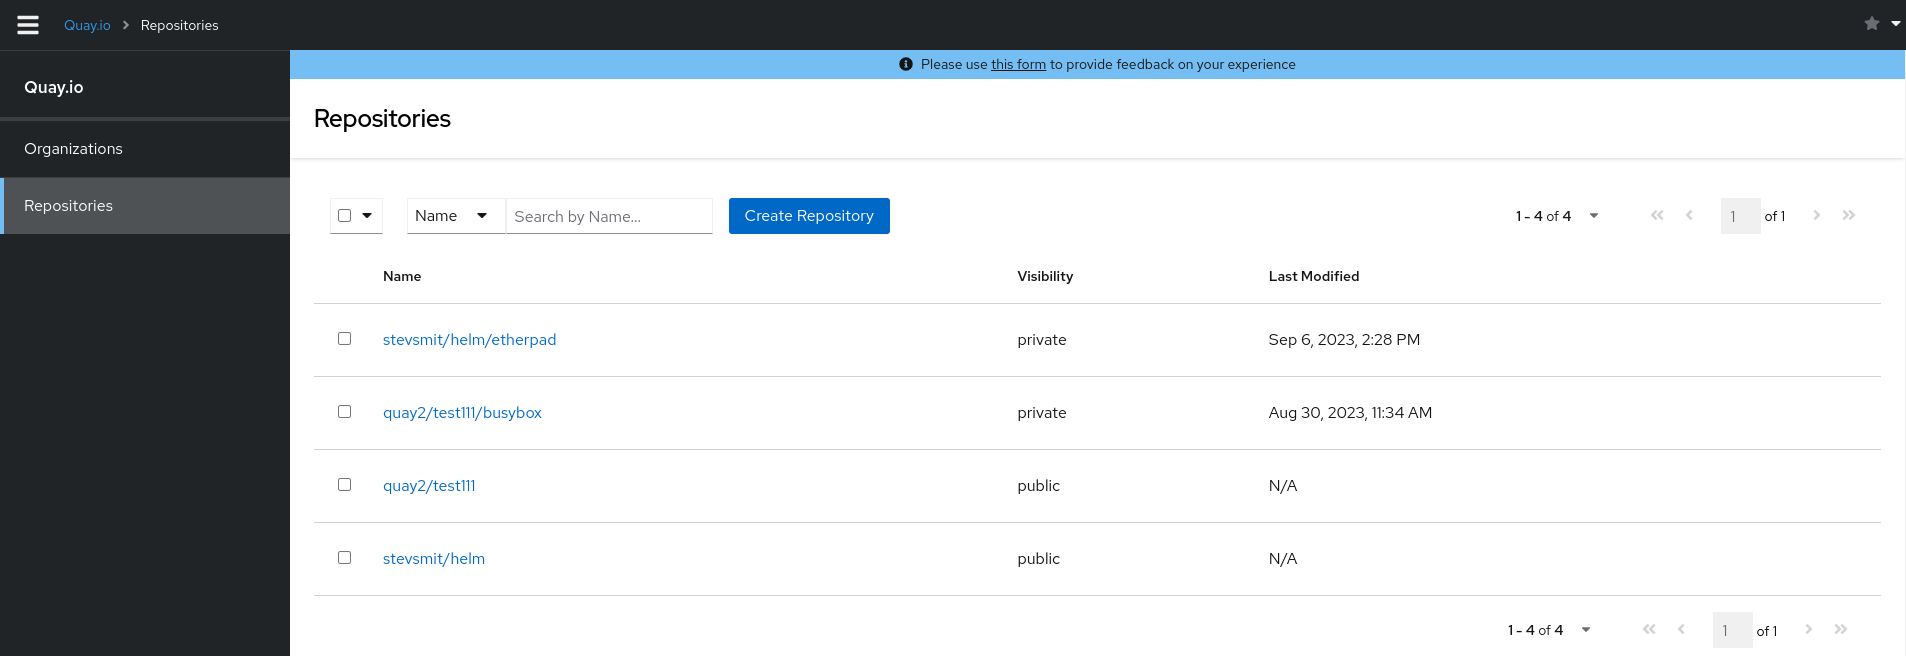
Navigate to Quay on the Red Hat Hybrid Cloud Console and log in using your Red Hat account. You are redirected to the Quay repository landing page:
Signing up for a Quay.io plan
To subscribe to a paid Quay.io plan, you can select a tier on the Pricing page and complete checkout with Stripe. A valid credit card is required.
-
Navigate to the Quay.io Pricing page.
-
Decide on a plan, for example, Small, and click Buy Now. You are redirected to the Create New Organization page. Enter the following information:
-
Organization Name
-
Organization Email
-
Optional. You can select a different plan if you want a plan larger than, for example, Small.
-
-
Resolve the captcha, and select Create Organization.
-
You are redirected to Stripe. Enter the following information:
-
Card information, including MM/YY and the CVC
-
Name on card
-
Country or region
-
ZIP (if applicable)
-
Check the box if you want your information to be saved.
-
Phone Number
-
-
Click Subscribe after all boxes have been filled.
Reviewing Quay.io billing information
The Billing information section on the Quay.io User Settings page shows your current plan, invoices, and receipt options. You can review plan details and manage how receipts are sent.
The following information is available:
-
Current Plan. This section denotes the current plan Quay.io plan that you are signed up for. It also shows the amount of private repositories you have.
-
Invoices. If you are on a paid plan, you can click View Invoices to view a list of invoices.
-
Receipts. If you are on a paid plan, you can select whether to have receipts for payment emailed to you, another user, or to opt out of receipts altogether.
Get started after deploying Quay on OpenShift Container Platform
After deploying Red Hat Quay on OpenShift Container Platform, create the first user in the UI and prepare to create a repository and push your first image.
Creating the first user by using the UI
To create the first user for your Project Quay registry, you can use the UI for a visual workflow. The UI method is simpler because it does not require additional configuration in the config.yaml file.
-
You have deployed the Project Quay registry.
-
On the OpenShift Container Platform web console, click Operators → Installed Operators → Project Quay.
-
On the Project Quay Operators page, click Quay Registry, and then the name of your registry.
-
On the QuayRegistry details page, click the Registry Endpoint link, for example, example-registry-quay.username-cluster-new.gcp.quaydev.org. You are navigated to the registry’s main page.
-
Click Create Account.
-
Enter the details for Username, Password, Email, and then click Create Account. After creating the first user, you are automatically logged in to the Project Quay registry.
Get started after deploying Project Quay on standalone hosts
After you install Project Quay as a proof of concept or in high availability on standalone hosts, create the first user in the UI and confirm you can reach the service.
Creating the first user on a standalone registry
To create the first user account on a standalone Project Quay registry, you can open the UI and complete Create Account. You can then log in from the CLI to confirm access.
-
You have deployed a proof of concept, standalone, or high availability Project Quay registry.
-
You can reach the registry UI, for example,
http://quay-server.example.com.
-
Open the Project Quay UI in a browser.
-
Click Create Account.
-
Enter the details for Username, Password, Email, and then click Create Account. After creating the first user, you are automatically logged in to the Project Quay registry.
Create your first organization
Create your first organization by using the Red Hat Quay UI to group repositories and teams.
Creating an organization by using the UI
To create an organization in Quay, you can use the UI. You set an organization name and then manage repositories and teams under that namespace.
In context of organizations, the contact email is used for the following purposes:
-
Quota warnings notifications
-
Quota errors notifications
-
Organization account recovery
-
Billing notifications
Use the following procedure to create a new organization by using the UI.
-
Log in to your Project Quay registry.
-
Click Organization in the navigation pane.
-
Click Create Organization.
-
Enter an Organization Name, for example,
testorg. -
Optional: Enter an Email for the organization. If not specified, notifications default to the organization owners.
NoteMultiple organizations can share the same organization email address, such as a team distribution list. By default, the address cannot match a user account email unless
FEATURE_ORG_SHARED_EMAILis enabled. -
Click Create.
Now, your example organization should populate under the Organizations page.
Create your first repository
Create your first repository by using the Red Hat Quay UI to store and share container images.
Creating a repository by using the UI
To create an image repository in Quay, you can use the UI. You select a namespace and set a repository name and visibility.
Use the following procedure to create a repository using the Quay UI.
-
Click Repositories on the navigation pane.
-
Click Create Repository.
-
Select a namespace, for example, quayadmin, and then enter a Repository name, for example,
testrepo.ImportantDo not use the following words in your repository name: *
build*trigger*tag*notificationWhen these words are used for repository names, users are unable access the repository, and are unable to permanently delete the repository. Attempting to delete these repositories returns the following error:
Failed to delete repository <repository_name>, HTTP404 - Not Found. -
Click Create.
Now, your example repository should populate under the Repositories page.
-
Optional. Click Settings → Repository visibility → Make private to set the repository to private.
Push and pull your first image
Push and pull your first container image with Podman to confirm your registry accepts content from the CLI.
Pushing and pulling your first image
To push and pull your first container image in Project Quay, you can log in with Podman, tag a sample image, and push it to a repository that you own.
-
You can log in to your Project Quay or Quay.io registry as a user.
-
You have a repository where you can push images, or you can create one by pushing to a new repository path.
-
Log in to your registry:
$ podman login <quay-server.example.com>Replace
<quay-server.example.com>with your registry hostname, for example,quay.ioor your Operator registry endpoint.For standalone proof of concept registries that use self-signed certificates, you might need
--tls-verify=false. -
Pull a sample image from an external registry:
$ podman pull busybox -
Tag the image for your registry namespace and repository:
$ podman tag docker.io/library/busybox <quay-server.example.com>/<namespace>/<repository>:testReplace
<namespace>with your user or organization name and<repository>with the repository name. -
Push the image to your registry:
$ podman push <quay-server.example.com>/<namespace>/<repository>:testFor standalone proof of concept registries that use self-signed certificates, you might need
--tls-verify=false. -
Pull the image from your registry to confirm that the push succeeded:
$ podman pull <quay-server.example.com>/<namespace>/<repository>:test
View your first Clair scan
View your first Clair vulnerability report in the Red Hat Quay UI to confirm security scanning is working.
Viewing Clair security scans by using the UI
To review the results of a Clair security scan, you can open the Security Scanner page for a tag in the Project Quay UI. You can inspect detected CVEs and check available remediation options.
-
For standalone Project Quay deployments, you have deployed Clair. For more information, see "Setting up Clair on standalone Project Quay deployments"
-
Navigate to a repository and click Tags in the navigation pane. This page shows the results of the security scan.
-
To reveal more information about multi-architecture images, click See Child Manifests to see the list of manifests in extended view.
-
Click a relevant link under See Child Manifests, for example, 1 Unknown to be redirected to the Security Scanner page.
-
The Security Scanner page provides information for the tag, such as which CVEs the image is susceptible to, and what remediation options you might have available.
NoteImage scanning only lists vulnerabilities found by Clair security scanner. What users do about the vulnerabilities are uncovered is up to said user.
Enable and make your first Quay API call
Review the Red Hat Quay API overview, create an OAuth 2 access token, and make your first API call.
About the Project Quay API
The Project Quay API exposes REST endpoints that you can use to automate registry tasks such as repository and user management. You authenticate requests with an OAuth 2 access token.
Before you call an endpoint, create an OAuth application in the Project Quay UI and generate an OAuth 2 access token with the scopes that you need. Pass that token in the Authorization: Bearer header of each request.
Creating an OAuth 2 access token
To create an OAuth 2 access token for Project Quay API calls, you can generate a named token from an organization OAuth application in the UI.
-
You have logged in to Project Quay as an administrator.
-
You have created an organization.
-
On the Project Quay UI, select your organization.
-
In the navigation pane, click OAuth Applications.
-
Create an application if you do not already have one:
-
Click Create OAuth Application.
-
Enter an application name and any required application details, such as homepage URL, description, avatar e-mail, and redirect/callback URL.
-
Click Create application.
-
-
Click the name of your OAuth application.
-
Click API Access Tokens.
-
Click Generate New Token.
-
Configure the token:
-
Enter a Token name.
-
Set an expiration period, such as 10 years.
-
Optional: Click Assign another user to assign this OAuth token to another user. When prompted, select the desired user.
-
Select the permissions, or scopes, for the token. For example:
-
Administer Organization. This application can administer your organizations, including creating robots, creating teams, adjusting team membership, and changing billing settings. Grant this permission only when you have absolute trust in the requesting application.
-
Administer Repositories. This application has administrator access to all repositories to which the granting user has access.
-
Create Repositories. This application can create repositories in all namespaces where the granting user can create repositories.
-
View all visible repositories. This application can view and pull all repositories visible to the granting user.
-
Read/Write to any accessible repositories. This application can view, push, and pull to all repositories to which the granting user has write access.
-
Super User Access. This application can administer your installation, including managing users, managing organizations, and other features found in the superuser panel. Grant this permission only when you have absolute trust in the requesting application.
-
Administer User. This application can administer your account, including creating robots and granting them permissions to your repositories. Grant this permission only when you have absolute trust in the requesting application.
-
Read User Information. This application can read user information such as username and email address.
-
-
-
Click Generate token.
-
Review the requested permissions, then click Authorize Application. Confirm the authorization when prompted.
ImportantAssign only the scopes that the token holder needs. Treat Administer Organization, Super User Access, and Administer User as high-trust permissions.
-
Copy and store the access token secret.
ImportantThis is the only opportunity to copy the token secret. Project Quay does not show the full secret again after you leave the page.
-
Confirm that the new token appears on the API Access Tokens page for the application. The list can include the token name, creator, scopes, expiration, and last-used information when those columns are available.
-
Optional. Call an API endpoint with the token to confirm that it works. For example:
$ curl -X GET "https://<quay-server.example.com>/api/v1/user/" \
     -H "Authorization: Bearer <access_token>"
Using a Project Quay API endpoint
To use an API endpoint, you pass in your access token and then include the appropriate fields depending on your needs.
-
You have access to the Project Quay API, which entails having already created an OAuth 2 access token.
-
Create a user application by entering the
POST /api/v1/user/apptokenAPI call:$ curl -X POST \ -H "Authorization: Bearer <access_token>" \ -H "Content-Type: application/json" \ -d '{ "title": "MyAppToken" }' \ "http://quay-server.example.com/api/v1/user/apptoken"where:
<access_token>-
Specifies the OAuth access token.
"MyAppToken"-
Specifies the name of your application token.
http://quay-server.example.com/api/v1/user/apptoken-
Specifies your Project Quay deployment appended with the
/api/v1/user/apptokenendpoint.Example output{"token": {"uuid": "6b5aa827-cee5-4fbe-a434-4b7b8a245ca7", "title": "MyAppToken", "last_accessed": null, "created": "Wed, 08 Jan 2025 19:32:48 -0000", "expiration": null, "token_code": "string"}}
-
On the Project Quay UI, click your username in the navigation pane → Account Settings. The name of your application appears under the Docker CLI and other Application Tokens heading. For example:
