Project Quay offers administrators the ability to secure communication and trusted access to their repositories through the use of Transport Layer Security (TLS), certificate management, and encryption techniques. Properly configuring SSL/TLS and implementing custom certificates can help safeguard data, secure external connections, and maintain trust between Project Quay and the integrated services of your choosing.
The following topics are covered:
-
Configuring custom SSL/TLS certificates for standalone Project Quay deployments
-
Configuring custom SSL/TLS certificates for Red Hat Quay on OpenShift Container Platform
-
Inheriting the OpenShift Container Platform cluster TLS security profile for Red Hat Quay on OpenShift Container Platform
-
Referencing an external TLS Secret for automated certificate rotation on Red Hat Quay on OpenShift Container Platform
-
Enabling TLS encryption for Operator-managed PostgreSQL on Red Hat Quay on OpenShift Container Platform
-
Adding additional Certificate Authorities to the Project Quay container
-
Adding additional Certificate Authorities to Red Hat Quay on OpenShift Container Platform
Configuring SSL and TLS for Project Quay
Transport Layer Security (TLS) is a cryptographic protocol that secures network communication between clients and the Project Quay server. You can configure Project Quay with certificates from a trusted Certificate Authority or with self-signed certificates for internal use.
Creating a Certificate Authority
To secure your Project Quay deployment with self-signed certificates, you can create a root certificate authority and generate a server certificate for your registry hostname. You can use OpenSSL to create the CA key, signing request, and certificate files.
-
Generate the root CA key by entering the following command:
$ openssl genrsa -out rootCA.key 2048 -
Generate the root CA certificate by entering the following command:
$ openssl req -x509 -new -nodes -key rootCA.key -sha256 -days 1024 -out rootCA.pem -
Enter the information to incorporate into your certificate request, including the server hostname, for example:
Country Name (2 letter code) [XX]:IE State or Province Name (full name) []:GALWAY Locality Name (eg, city) [Default City]:GALWAY Organization Name (eg, company) [Default Company Ltd]:QUAY Organizational Unit Name (eg, section) []:DOCS Common Name (eg, your name or your server's hostname) []:quay-server.example.com -
Generate the server key by entering the following command:
$ openssl genrsa -out ssl.key 2048 -
Generate a signing request by entering the following command:
$ openssl req -new -key ssl.key -out ssl.csr -
Enter the information to incorporate into your certificate request, including the server hostname, for example:
Country Name (2 letter code) [XX]:IE State or Province Name (full name) []:GALWAY Locality Name (eg, city) [Default City]:GALWAY Organization Name (eg, company) [Default Company Ltd]:QUAY Organizational Unit Name (eg, section) []:DOCS Common Name (eg, your name or your server's hostname) []:quay-server.example.com Email Address []: -
Create a configuration file
openssl.cnf, specifying the server hostname, for example:Exampleopenssl.cnffile[req] req_extensions = v3_req distinguished_name = req_distinguished_name [req_distinguished_name] [ v3_req ] basicConstraints = CA:FALSE keyUsage = nonRepudiation, digitalSignature, keyEncipherment subjectAltName = @alt_names [alt_names] DNS.1 = <quay-server.example.com> IP.1 = 192.168.1.112 -
Use the configuration file to generate the certificate
ssl.cert:$ openssl x509 -req -in ssl.csr -CA rootCA.pem -CAkey rootCA.key -CAcreateserial -out ssl.cert -days 356 -extensions v3_req -extfile openssl.cnf -
Confirm your created certificates and files by entering the following command:
$ ls /path/to/certificatesExample outputrootCA.key ssl-bundle.cert ssl.key custom-ssl-config-bundle-secret.yaml rootCA.pem ssl.cert openssl.cnf rootCA.srl ssl.csr
Configuring SSL/TLS for standalone Project Quay deployments
For standalone Project Quay deployments, you configure SSL/TLS certificates by using the CLI and updating config.yaml manually. Child procedures in this section cover certificate creation, configuration, testing, and trust setup.
Configuring custom SSL/TLS certificates by using the command line interface
To enable custom SSL/TLS certificates on your Project Quay deployment, you can copy certificate files to your configuration directory and update the config.yaml file to use HTTPS. You can then restart the registry container to apply the SSL/TLS configuration.
-
You have created a certificate authority and signed the certificate.
-
Copy the certificate file and primary key file to your configuration directory, ensuring they are named
ssl.certandssl.keyrespectively:cp ~/ssl.cert ~/ssl.key /path/to/configuration_directory -
Navigate to the configuration directory by entering the following command:
$ cd /path/to/configuration_directory -
Edit the
config.yamlfile and specify that you want Project Quay to handle SSL/TLS:Exampleconfig.yamlfile# ... SERVER_HOSTNAME: <quay-server.example.com> ... PREFERRED_URL_SCHEME: https # ... -
Optional: Append the contents of the
rootCA.pemfile to the end of thessl.certfile by entering the following command:$ cat rootCA.pem >> ssl.cert -
Stop the
Quaycontainer by entering the following command:$ sudo podman stop <quay_container_name> -
Restart the registry by entering the following command:
$ sudo podman run -d --rm -p 80:8080 -p 443:8443 \
  --name=quay \
  -v $QUAY/config:/conf/stack:Z \
  -v $QUAY/storage:/datastorage:Z \
  {productrepo}/{quayimage}:{productminv}
Configuring Podman to trust the Certificate Authority
To configure Podman to trust your self-signed certificate authority for Project Quay, you can copy the root CA to the hostname-specific certificate directory under /etc/containers/certs.d/ or /etc/docker/certs.d/.
.Procedure
-
Copy the root CA file to one of
/etc/containers/certs.d/or/etc/docker/certs.d/. Use the exact path determined by the server hostname, and name the fileca.crt:$ sudo cp rootCA.pem /etc/containers/certs.d/quay-server.example.com/ca.crt -
Verify that you no longer need to use the
--tls-verify=falseoption when logging in to your Project Quay registry:$ sudo podman login quay-server.example.comExample outputLogin Succeeded!
Configuring the system to trust the certificate authority
To trust your self-signed certificate authority, you can add the root CA to the system-wide trust store and update certificate configuration. You can verify trust with the trust list command before browsing your Project Quay registry over HTTPS.
-
Enter the following command to copy the
rootCA.pemfile to the consolidated system-wide trust store:$ sudo cp rootCA.pem /etc/pki/ca-trust/source/anchors/ -
Enter the following command to update the system-wide trust store configuration:
$ sudo update-ca-trust extract -
Optional. You can use the
trust listcommand to ensure that theQuayserver has been configured:$ trust list | grep quay label: quay-server.example.comNow, when you browse to the registry at
https://quay-server.example.com, the lock icon shows that the connection is secure: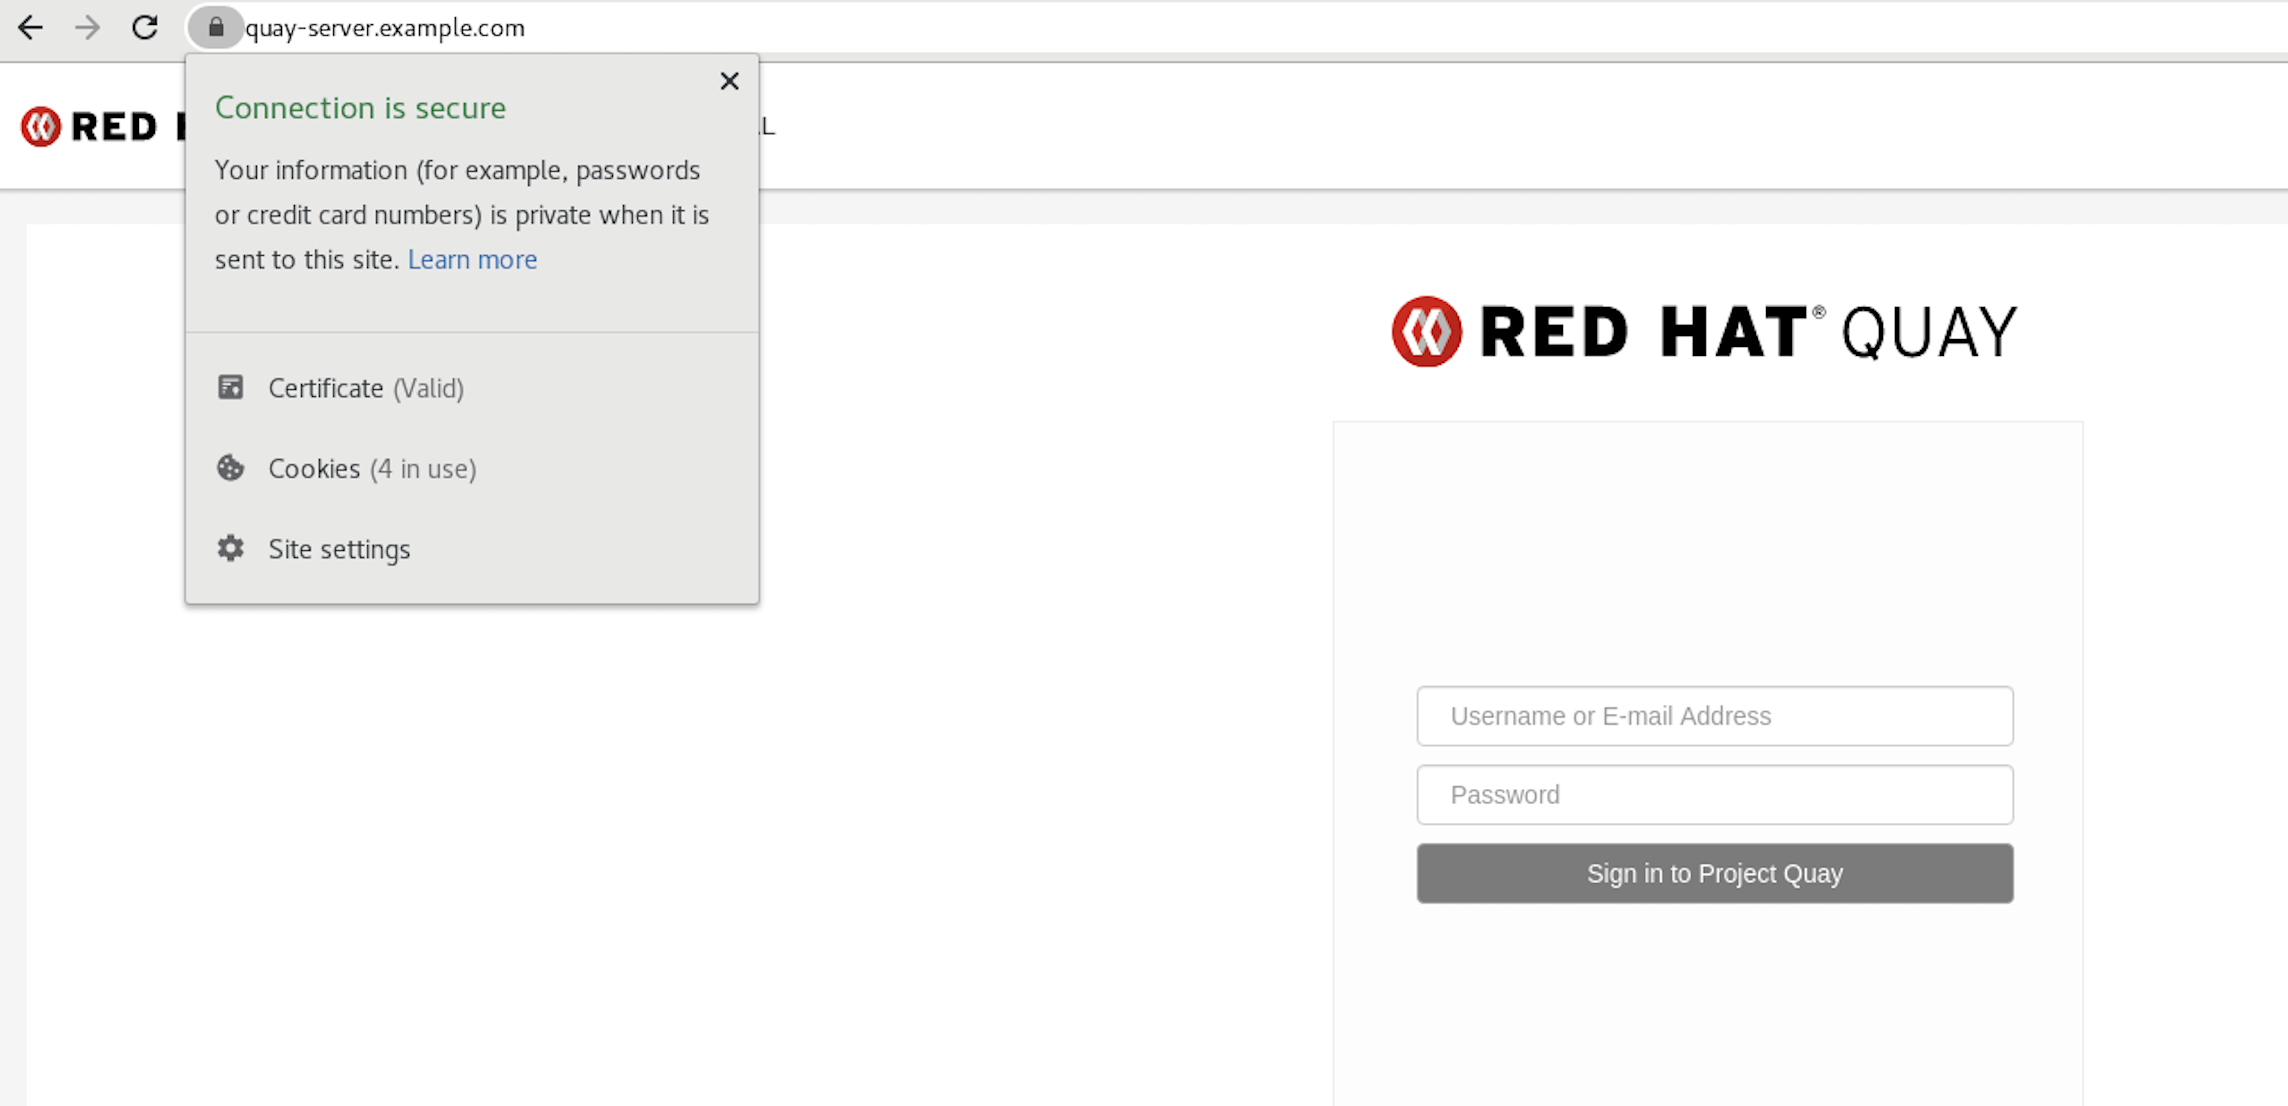
-
To remove the
rootCA.pemfile from system-wide trust, delete the file and update the configuration:$ sudo rm /etc/pki/ca-trust/source/anchors/rootCA.pem$ sudo update-ca-trust extract$ trust list | grep quay
Configuring custom SSL/TLS certificates for Red Hat Quay on OpenShift Container Platform
When you deploy Red Hat Quay on OpenShift Container Platform, the Operator can use OpenShift Container Platform Certificate Authority certificates or custom SSL/TLS certificates in the config bundle.
Configuring custom certificates can be done before or after initial deployment by updating the configBundleSecret and setting the tls component to unmanaged (managed: false). By default, when Project Quay is deployed on OpenShift Container Platform, the tls component of the QuayRegistry custom resource definition (CRD) is set to managed (managed: true). As a result, OpenShift Container Platform’s Certificate Authority is used to create HTTPS endpoints and to rotate SSL/TLS certificates.
You can configure custom SSL/TLS certificates before or after the initial deployment of Red Hat Quay on OpenShift Container Platform. This process involves creating or updating the configBundleSecret resource within the QuayRegistry YAML file to integrate your custom certificates and setting the tls component to unmanaged.
|
Important
|
When configuring custom SSL/TLS certificates for Project Quay, administrators are responsible for certificate rotation. |
The following procedures enable you to apply custom SSL/TLS certificates to ensure secure communication and meet specific security requirements for your Red Hat Quay on OpenShift Container Platform deployment. These steps assumed you have already created a Certificate Authority (CA) bundle or an ssl.key, and an ssl.cert. The procedure then shows you how to integrate those files into your Red Hat Quay on OpenShift Container Platform deployment, which ensures that your registry operates with the specified security settings and conforms to your organization’s SSL/TLS policies.
|
Note
|
|
OpenShift Container Platform cluster TLS security profile inheritance
To align Project Quay with the OpenShift Container Platform TLS security policy, the Project Quay Operator can apply the cluster-wide tlsSecurityProfile to the registry and mirror workers.
The Operator reads the tlsSecurityProfile from the OpenShift Container Platform APIServer cluster resource and applies the corresponding SSL_PROTOCOLS and SSL_CIPHERS settings without requiring manual configuration.
How TLS profile inheritance works
The Operator reads spec.tlsSecurityProfile from the APIServer cluster resource and translates the profile into Project Quay SSL_PROTOCOLS and SSL_CIPHERS values in the generated config.yaml. Supported profile types are Old, Intermediate, Modern, and Custom. If the cluster has no profile set, the Operator defaults to the Intermediate profile (TLS 1.2 and TLS 1.3).
To fully override cluster-profile inheritance, set both SSL_PROTOCOLS and SSL_CIPHERS in the configBundleSecret. Setting either field disables inheritance for both fields. On Kubernetes clusters without the config.openshift.io API, the Operator does not inject TLS settings and Project Quay uses its built-in defaults.
Managed TLS and unmanaged TLS
How the cluster TLS security profile applies depends on whether the Operator or Project Quay terminates TLS:
-
When the
tlscomponent is set tomanaged, the OpenShift Container Platform Route enforces the cluster TLS profile. No additional TLS protocol or cipher configuration is required in the config bundle. -
When the
tlscomponent is set tounmanaged, Project Quay terminates TLS directly. When neitherSSL_PROTOCOLSnorSSL_CIPHERSis set in the config bundle, Project Quay inherits the cluster TLS security profile.
Preserving TLS settings before upgrading Red Hat Quay on OpenShift Container Platform
The Project Quay Operator can inherit the cluster-wide TLS security profile. Before upgrading, review your cluster profile and set SSL_PROTOCOLS and SSL_CIPHERS if you need to preserve your current TLS behavior.
The Operator inherits the cluster-wide TLS security profile from the OpenShift APIServer configuration when neither SSL_PROTOCOLS nor SSL_CIPHERS is set in the configBundleSecret resource.
When the tls component is set to managed, the OpenShift Route already enforces the cluster TLS profile, and no action is required.
When the tls component is set to unmanaged, Project Quay terminates TLS directly and inherits the cluster profile after the upgrade unless you override it in the config bundle. If you have already set both SSL_PROTOCOLS and SSL_CIPHERS, no additional TLS configuration is required before upgrading. Setting only one field disables cluster-profile inheritance for both fields.
-
You have cluster administrator access to review the OpenShift Container Platform
APIServerconfiguration. -
You can edit the
configBundleSecretreferenced by yourQuayRegistrycustom resource (CR).
-
Review the cluster TLS security profile:
$ oc get apiserver cluster -o jsonpath='{.spec.tlsSecurityProfile}{"\n"}' -
If you must preserve your current TLS settings, add
SSL_PROTOCOLSandSSL_CIPHERSto theconfig.yamlfile in yourconfigBundleSecretbefore upgrading. For example:# ... SSL_PROTOCOLS: - TLSv1.2 - TLSv1.3 SSL_CIPHERS: - ECDHE-RSA-AES128-GCM-SHA256 - ECDHE-ECDSA-AES128-GCM-SHA256 - ECDHE-RSA-AES256-GCM-SHA384 - ECDHE-ECDSA-AES256-GCM-SHA384 # Add other required ciphers # ...NoteInclude every cipher suite your clients require. To fully override cluster-profile inheritance, set both
SSL_PROTOCOLSandSSL_CIPHERS. Setting either field disables inheritance for both fields. -
Update the
configBundleSecretwith the modifiedconfig.yamlfile. You can edit the secret in the OpenShift Container Platform web console or recreate it from a local file. For example:$ oc create secret generic <config_bundle_secret_name> \ --from-file config.yaml=./config.yaml \ --dry-run=client -o yaml | oc apply -f - -
Proceed with the Project Quay Operator upgrade. If the cluster TLS profile is acceptable and neither
SSL_PROTOCOLSnorSSL_CIPHERSis set, no additional TLS configuration is required.
Creating a custom SSL/TLS configBundleSecret resource
To upload custom SSL/TLS certificates to Red Hat Quay on OpenShift Container Platform, you can create a configBundleSecret resource that includes your ssl.cert and ssl.key files and reference it from the QuayRegistry custom resource.
-
You have base64 decoded the original config bundle into a
config.yamlfile. For more information, see Downloading the existing configuration. -
You have generated custom SSL certificates and keys.
-
Create a new YAML file, for example,
custom-ssl-config-bundle-secret.yaml:$ touch custom-ssl-config-bundle-secret.yaml -
Create the
custom-ssl-config-bundle-secretresource.-
Create the resource by entering the following command:
$ oc -n <namespace> create secret generic custom-ssl-config-bundle-secret \
  --from-file=config.yaml=</path/to/config.yaml> \
  --from-file=ssl.cert=</path/to/ssl.cert> \
  --from-file=extra_ca_cert_<name-of-certificate>.crt=ca-certificate-bundle.crt \
  --from-file=ssl.key=</path/to/ssl.key> \
  --dry-run=client -o yaml > custom-ssl-config-bundle-secret.yaml
where:
--from-file=config.yaml=</path/to/config.yaml>-
Specifies your base64 decoded
config.yamlfile. --from-file=ssl.cert=</path/to/ssl.cert>-
Specifies your
ssl.certfile. --from-file=extra_ca_cert_<name-of-certificate>.crt=ca-certificate-bundle.crt-
Specifies an additional CA PEM using a Secret key that starts with
extra_ca_cert_(for example,--from-file=extra_ca_cert_<name-of-certificate>.crt=ca-certificate-bundle.crt). The Project Quay Operator writes these files underconf/stack/extra_ca_certs/in the deployed bundle. For LDAP, OIDC, or other integrations that need custom CAs, supply the PEMs this way and useconf/stack/extra_ca_certs/<file>inconfig.yamlwhen a field such asssl_ca_pathrequires an explicit path. This parameter is optional. --from-file=ssl.key=</path/to/ssl.key>-
Specifies your
ssl.keyfile.
-
-
Optional. You can check the content of the
custom-ssl-config-bundle-secret.yamlfile by entering the following command:$ cat custom-ssl-config-bundle-secret.yamlExample outputapiVersion: v1 data: config.yaml: QUxMT1dfUFVMTFNfV0lUSE9VVF9TVFJJQ1RfTE9HR0lORzogZmFsc2UKQVVUSEVOVElDQVRJT05fVFlQRTogRGF0YWJhc2UKREVGQVVMVF9UQUdfRVhQSVJBVElPTjogMncKRElTVFJJQlVURURfU1R... ssl.cert: LS0tLS1CRUdJTiBDRVJUSUZJQ0FURS0tLS0tCk1JSUVYakNDQTBhZ0F3SUJBZ0lVTUFBRk1YVWlWVHNoMGxNTWI3U1l0eFV5eTJjd0RRWUpLb1pJaHZjTkFRRUwKQlFBd2dZZ3hDekFKQmdOVkJBWVR... extra_ca_cert_<name-of-certificate>:LS0tLS1CRUdJTiBDRVJUSUZJQ0FURS0tLS0tCk1JSUVYakNDQTBhZ0F3SUJBZ0lVTUFBRk1YVWlWVHNoMGxNTWI3U1l0eFV5eTJjd0RRWUpLb1pJaHZjTkFRRUwKQlFBd2dZZ3hDe... ssl.key: LS0tLS1CRUdJTiBQUklWQVRFIEtFWS0tLS0tCk1JSUV2UUlCQURBTkJna3Foa2lHOXcwQkFRRUZBQVNDQktjd2dnU2pBZ0VBQW9JQkFRQ2c0VWxZOVV1SVJPY1oKcFhpZk9MVEdqaS9neUxQMlpiMXQ... kind: Secret metadata: creationTimestamp: null name: custom-ssl-config-bundle-secret namespace: <namespace> -
Create the
configBundleSecretresource by entering the following command:$ oc create -n <namespace> -f custom-ssl-config-bundle-secret.yamlExample outputsecret/custom-ssl-config-bundle-secret created -
Update the
QuayRegistryYAML file to reference thecustom-ssl-config-bundle-secretobject by entering the following command:$ oc patch quayregistry <registry_name> -n <namespace> --type=merge -p '{"spec":{"configBundleSecret":"custom-ssl-config-bundle-secret"}}'Example outputquayregistry.quay.redhat.com/example-registry patched -
Set the
tlscomponent of theQuayRegistryYAML toFalseby entering the following command:$ oc patch quayregistry <registry_name> -n <namespace> --type=merge -p '{"spec":{"components":[{"kind":"tls","managed":false}]}}'Example outputquayregistry.quay.redhat.com/example-registry patched -
Ensure that your
QuayRegistryYAML file has been updated to use the custom SSLconfigBundleSecretresource, and that your andtlsresource is set toFalseby entering the following command:$ oc get quayregistry <registry_name> -n <namespace> -o yamlExample output# ... configBundleSecret: custom-ssl-config-bundle-secret # ... spec: components: - kind: tls managed: false # ...
-
Confirm a TLS connection to the server and port by entering the following command:
$ openssl s_client -connect <quay-server.example.com>:443Example output# ... SSL-Session: Protocol : TLSv1.3 Cipher : TLS_AES_256_GCM_SHA384 Session-ID: 0E995850DC3A8EB1A838E2FF06CE56DBA81BD8443E7FA05895FBD6FBDE9FE737 Session-ID-ctx: Resumption PSK: 1EA68F33C65A0F0FA2655BF9C1FE906152C6E3FEEE3AEB6B1B99BA7C41F06077989352C58E07CD2FBDC363FA8A542975 PSK identity: None PSK identity hint: None SRP username: None TLS session ticket lifetime hint: 7200 (seconds) # ...
Referencing an external TLS Secret for Red Hat Quay on OpenShift Container Platform
Reference an external kubernetes.io/tls Secret from the tls component of the QuayRegistry custom resource (CR) to enable automated certificate rotation from sources such as cert-manager, HashiCorp Vault, or manual Secret updates.
With this approach, the Project Quay Operator uses the certificate and private key from the referenced Secret instead of embedding ssl.cert and ssl.key files in the configBundleSecret resource.
When you use an external TLS Secret, set spec.components[kind: tls].managed to false and specify secretRef. The Operator watches the referenced Secret and performs a rolling restart of Project Quay pods when the certificate data changes.
|
Important
|
|
-
You have deployed the Project Quay Operator and a
QuayRegistryCR. -
You have a TLS Secret of type
kubernetes.io/tlsin the same namespace as theQuayRegistry, withtls.crtandtls.keydata keys. -
The certificate and private key are valid (format, key match, chain, and hostname).
-
Create a TLS Secret in the registry namespace, for example:
apiVersion: v1 kind: Secret metadata: name: my-quay-tls namespace: <namespace> type: kubernetes.io/tls data: tls.crt: <base64_encoded_certificate> tls.key: <base64_encoded_private_key> -
Set the
tlscomponent to unmanaged and reference the Secret by entering the following command:$ oc patch quayregistry <registry_name> -n <namespace> --type=merge -p '{"spec":{"components":[{"kind":"tls","managed":false,"secretRef":{"name":"my-quay-tls"}}]}}' -
Verify that the
QuayRegistryCR contains the expected configuration:$ oc get quayregistry <registry_name> -n <namespace> -o yamlExample outputspec: components: - kind: tls managed: false secretRef: name: my-quay-tls -
Wait for the Operator to reconcile the registry. When certificate data in the referenced Secret changes, the Operator triggers a rolling restart of Project Quay pods to load the updated certificate.
-
Verify that TLS from the external Secret is ready by entering the following command. When the TLS component is healthy, the
ComponentTLSReadycondition reportsstatus: "True".$ oc wait quayregistry <registry_name> -n <namespace> --for=condition=ComponentTLSReady=True --timeout=300sYou can also review all component conditions in the OpenShift Container Platform web console on the QuayRegistry details page, or by entering
oc get quayregistry <registry_name> -n <namespace> -o yamland checkingstatus.conditions.
Using cert-manager with an external TLS Secret
You can install cert-manager on your cluster, issue a certificate into a kubernetes.io/tls Secret, and reference that Secret from the tls component of your QuayRegistry CR. When cert-manager renews the certificate, the Project Quay Operator detects the updated Secret and rolls out updated pods.
-
You have installed cert-manager on the cluster. For more information, see the cert-manager documentation.
-
You have a
ClusterIssuerorIssuerthat can issue certificates for your registry hostname. -
You know the hostname clients use to reach the registry. After deployment, this hostname is often available in
status.registryEndpointon theQuayRegistryCR.
-
Create a
ClusterIssuerCR, for example a self-signed issuer for testing:apiVersion: cert-manager.io/v1 kind: ClusterIssuer metadata: name: selfsigned-issuer spec: selfSigned: {} -
Create a
CertificateCR that writes to the Secret referenced by yourQuayRegistrysecretRef. SetdnsNamesto the registry route hostname, for example the host instatus.registryEndpoint:apiVersion: cert-manager.io/v1 kind: Certificate metadata: name: quay-tls namespace: <namespace> spec: secretName: quay-tls duration: 2160h renewBefore: 360h issuerRef: name: selfsigned-issuer kind: ClusterIssuer dnsNames: - <quay_route_hostname> -
Configure the
QuayRegistryCR to reference the Secret. For example:apiVersion: quay.redhat.com/v1 kind: QuayRegistry metadata: name: <registry_name> namespace: <namespace> spec: components: - kind: tls managed: false secretRef: name: quay-tls -
Wait for cert-manager to populate the TLS Secret. Then, confirm that the Operator has reconciled the registry by running the following command:
$ oc wait quayregistry <registry_name> -n <namespace> --for=condition=ComponentTLSReady=True --timeout=300s -
Optional. Force certificate renewal to verify that rotation triggers a rollout. This requires the cert-manager command-line plugin:
$ oc cert-manager renew quay-tls -n <namespace>After renewal, wait again for
ComponentTLSReady=Trueand confirm that Project Quay pods were replaced. -
Optional. Delete the TLS Secret by running the following command:
$ oc delete secret quay-tls -n <namespace>
Certificate-based authentication between Project Quay and SQL
You can configure certificate-based authentication between Project Quay and SQL databases such as PostgreSQL and GCP CloudSQL by supplying client-side SSL/TLS certificates. This approach verifies the server certificate against a trusted Certificate Authority and supports automated deployments.
TLS encryption for Operator-managed PostgreSQL
You can enable TLS encryption for Operator-managed PostgreSQL databases used by Project Quay and Clair. Configure TLS through the overrides.tls fields on the postgres and clairpostgres components in the QuayRegistry custom resource.
|
Important
|
This feature configures transport encryption for Operator-managed PostgreSQL connections. It is distinct from the managed |
When TLS is enabled, the Operator configures PostgreSQL to accept encrypted connections and mounts the TLS certificates on the database pod. TLS is opt-in. Existing deployments continue to use unencrypted database connections until you explicitly enable it.
|
Note
|
After you enable TLS, confirm that PostgreSQL reports |
You can enable TLS independently for the postgres and clairpostgres components.
Certificate options
| Option | Description |
|---|---|
OpenShift Container Platform Service CA (default on OpenShift Container Platform) |
When you set |
Operator-generated self-signed certificates |
On Kubernetes clusters without the OpenShift Container Platform Service CA, the Operator generates ECDSA P-256 certificates with a 10-year validity period when no |
User-provided or cert-manager certificates |
Reference a Secret containing |
|
Note
|
This feature does not provide mutual TLS (mTLS) or automatic certificate rotation. To integrate with enterprise PKI or automate rotation, use |
Enabling TLS for Operator-managed PostgreSQL
To encrypt database traffic for Operator-managed PostgreSQL used by Project Quay and Clair, you can set overrides.tls.enabled: true on the postgres and clairpostgres components in the QuayRegistry custom resource.
-
The
postgresand/orclairpostgrescomponents that you want to protect are set tomanaged: true. -
You have access to edit the
QuayRegistrycustom resource in your registry namespace.
-
Edit your
QuayRegistrycustom resource. For example:$ oc edit quayregistry <registry_name> -n <namespace> -
Under
spec.components, addoverrides.tls.enabled: trueto the managed PostgreSQL components. For example:spec: components: - kind: postgres managed: true overrides: tls: enabled: true - kind: clairpostgres managed: true overrides: tls: enabled: true -
Save the changes and wait for the Operator to reconcile the registry.
NoteOn OpenShift Container Platform, the Operator might briefly report
RolloutBlockedwhile it waits for the Service CA to create the serving certificate Secret. Reconciliation retries until the Secret is available. -
Verify that PostgreSQL has SSL enabled:
$ oc exec -n <namespace> deploy/<registry_name>-quay-database -c postgres -- \
  bash -lc 'psql -U "$POSTGRESQL_USER" -d "$POSTGRESQL_DATABASE" -tAc "SHOW ssl;"'
The command should return
on. For Clair, run the same check against the Clair PostgreSQL deployment when that component is managed. -
Verify that the
QuayRegistrystatus shows a healthy deployment and thatRolloutBlockedis not stuck in an error state. -
Optional: Confirm client TLS sessions with the following command:
$ oc exec -n <namespace> deploy/<registry_name>-quay-database -c postgres -- \
  bash -lc 'psql -U "$POSTGRESQL_USER" -d "$POSTGRESQL_DATABASE" -tAc "SELECT count(*) FROM pg_stat_ssl s JOIN pg_stat_activity a ON s.pid = a.pid WHERE s.ssl = true AND a.client_addr IS NOT NULL;"'
A count greater than
0indicates active TLS client connections. If the count remains0, PostgreSQL still has TLS enabled on the server, but clients might not yet be connecting with SSL. Check the registry database URI or connection arguments for ansslmodevalue such asverify-full, and review Operator Events for certificate or CA errors.
Providing custom TLS certificates
To use your own certificates instead of Operator-generated or Service CA certificates, create a Secret and reference it from the component override.
-
TLS is enabled on the target component (
overrides.tls.enabled: true). -
You have a Secret containing PEM-encoded
ca.crt,tls.crt, andtls.keyentries. -
Your TLS certificate includes Subject Alternative Name (SAN) entries that match the PostgreSQL Service DNS names. For the
postgrescomponent, include the following names:<registry_name>-quay-database <registry_name>-quay-database.<namespace> <registry_name>-quay-database.<namespace>.svc <registry_name>-quay-database.<namespace>.svc.cluster.local localhostFor the
clairpostgrescomponent, include the following names:<registry_name>-clair-postgres <registry_name>-clair-postgres.<namespace> <registry_name>-clair-postgres.<namespace>.svc <registry_name>-clair-postgres.<namespace>.svc.cluster.local localhost
-
Create a Secret in the same namespace as your
QuayRegistrycustom resource. For example:apiVersion: v1 kind: Secret metadata: name: <postgres_or_clairpostgres_name>-tls namespace: <namespace> type: Opaque stringData: ca.crt: | -----BEGIN CERTIFICATE----- ... -----END CERTIFICATE----- tls.crt: | -----BEGIN CERTIFICATE----- ... -----END CERTIFICATE----- tls.key: | -----BEGIN EC PRIVATE KEY----- ... -----END EC PRIVATE KEY----- -
Reference the Secret from the PostgreSQL component override:
- kind: postgres managed: true overrides: tls: enabled: true secretRef: name: <postgres_or_clairpostgres_name>-tls -
Save the
QuayRegistryand wait for reconciliation.
-
Connect to the Project Quay PostgreSQL pod and check that SSL is enabled:
$ oc exec -n <namespace> deploy/<registry>-quay-database -c postgres -- bash -lc 'psql -U "$POSTGRESQL_USER" -d "$POSTGRESQL_DATABASE" -tAc "SHOW ssl;"'The command should return
on. -
Optional: Confirm that client connections use SSL:
$ oc exec -n <namespace> deploy/<registry_name>-quay-database -c postgres -- \
  bash -lc 'psql -U "$POSTGRESQL_USER" -d "$POSTGRESQL_DATABASE" -tAc "SELECT count(*) FROM pg_stat_ssl s JOIN pg_stat_activity a ON s.pid = a.pid WHERE s.ssl = true AND a.client_addr IS NOT NULL;"'
A count greater than
0indicates active TLS client connections. If the count remains0, PostgreSQL still has TLS enabled on the server, but clients might not yet be connecting with SSL. Check the registry database URI or connection arguments for ansslmodevalue such asverify-full, and review Operator Events for certificate or CA errors.
Disabling TLS
You can disable TLS on an existing deployment without data loss by removing or setting overrides.tls.enabled to false on the affected components. The Operator removes TLS configuration from PostgreSQL and restores unencrypted connection strings.
-
Edit the
QuayRegistrycustom resource. -
Set
overrides.tls.enabled: falseor remove theoverrides.tlsblock from thepostgresand/orclairpostgrescomponents. -
Save the changes and wait for the Operator to reconcile the registry.
Troubleshooting Operator-managed PostgreSQL TLS configurations
If TLS configuration is invalid, the Operator sets a RolloutBlocked condition on the QuayRegistry and emits Kubernetes Events with details.
Common causes include:
-
A referenced TLS Secret does not exist
-
The Secret is missing
ca.crt,tls.crt, ortls.key -
The certificate and private key do not match
-
The certificate has expired
On OpenShift Container Platform, if the Service CA serving certificate Secret has not yet been created, the Operator emits Events such as a PostgreSQL service CA error and retries until the Secret is available. A brief RolloutBlocked condition during that wait is expected.
If SHOW ssl; returns on but pg_stat_ssl shows no TLS client sessions, PostgreSQL is accepting encrypted connections, but Project Quay or Clair might still be connecting without SSL. Check the registry configuration for an sslmode value on the database URI or connection arguments, and review Operator Events for certificate or CA problems.
For external PostgreSQL databases, continue to configure TLS through DB_URI and related configuration fields in the config bundle. For more information, see Database configuration fields.
Configuring certificate-based authentication with SQL
To connect Project Quay to an SQL database with client-side certificates, you can create a configBundleSecret that includes TLS certificate files and update DB_CONNECTION_ARGS and DB_URI in the config.yaml file.
This procedure uses CloudSQL as an example and also applies to PostgreSQL and other supported databases.
-
You have generated custom Certificate Authorities (CAs) and your SSL/TLS certificates and keys are available in
PEMformat that will be used to generate an SSL connection with your CloudSQL database. For more information, see SSL and TLS for Project Quay. -
You have
base64 decodedthe original config bundle into aconfig.yamlfile. For more information, see Downloading the existing configuration. -
You are using an externally managed PostgreSQL or CloudSQL database. For more information, see Using and existing PostgreSQL database with the
DB_URIvariable set. -
Your externally managed PostgreSQL or CloudSQL database is configured for SSL/TLS.
-
The
postgrescomponent of yourQuayRegistryCRD is set tomanaged: false, and your CloudSQL database is set with theDB_URIconfiguration variable. The following procedure usespostgresql://<cloudsql_username>:<dbpassword>@<database_host>:<port>/<database_name>.
-
After you have generated the CAs and SSL/TLS certificates and keys for your CloudSQL database and ensured that they are in
.pemformat, test the SSL connection to your CloudSQL server:-
Initiate a connection to your CloudSQL server by entering the following command:
$ psql "sslmode=verify-ca sslrootcert=<ssl_server_certificate_authority>.pem sslcert=<ssl_client_certificate>.pem sslkey=<ssl_client_key>.pem hostaddr=<database_host> port=<5432> user=<cloudsql_username> dbname=<cloudsql_database_name>"
-
-
In your Project Quay directory, create a new YAML file, for example,
quay-config-bundle.yaml, by running the following command:$ touch quay-config-bundle.yaml -
Create a
postgresql-client-certsresource by entering the following command:$ oc -n <quay_namespace> create secret generic postgresql-client-certs \ --from-file config.yaml=<path/to/config.yaml> \ --from-file=tls.crt=<path/to/ssl_client_certificate.pem> \ --from-file=tls.key=<path/to/ssl_client_key.pem> \ --from-file=ca.crt=<path/to/ssl_server_certificate.pem>where:
config.yaml=<path/to/config.yaml>-
Specifies your base64 decoded
config.yamlfile. tls.crt=<path/to/ssl_client_certificate.pem>-
Specifies your SSL certificate in
.pemformat. tls.key=<path/to/ssl_client_key.pem>-
Specifies your SSL key in
.pemformat. ca.crt=<path/to/ssl_server_certificate.pem>-
Specifies your SSL root CA in
.pemformat.
-
Edit your
`quay-config-bundle.yamlfile to include the following database connection settings:Important-
The information included in the
DB_CONNECTION_ARGSvariable, for example,sslmode,sslrootcert,sslcert, andsslkeymust match the information appended to theDB_URIvariable. Failure to match might result in a failed connection. -
You cannot specify custom filenames or paths. Certificate file paths for
sslrootcert,sslcert, andsslkeyare hardcoded defaults and mounted into theQuaypod from the Kubernetes secret. You must adhere to the following naming conventions or it will result in a failed connection.
DB_CONNECTION_ARGS:
    autorollback: true
    sslmode: verify-ca
    sslrootcert: /.postgresql/root.crt
    sslcert: /.postgresql/postgresql.crt
    sslkey: /.postgresql/postgresql.key
    threadlocals: true
DB_URI: postgresql://<dbusername>:<dbpassword>@<database_host>:<port>/<database_name>?sslmode=verify-full&sslrootcert=/.postgresql/root.crt&sslcert=/.postgresql/postgresql.crt&sslkey=/.postgresql/postgresql.key
where:
DB_CONNECTION_ARGS.sslmode-
Specifies
verify-ca, which ensures that the database connection uses SSL/TLS and verifies the server certificate against a trusted CA. This can work with both trusted CA and self-signed CA certificates. However, this mode does not verify the hostname of the server. For full hostname and certificate verification, useverify-full. For more information about the configuration options available, see PostgreSQL SSL/TLS connection arguments. DB_CONNECTION_ARGS.sslrootcert-
Specifies the
root.crtfile that contains the root certificate used to verify the SSL/TLS connection with your CloudSQL database. This file is mounted in theQuaypod from the Kubernetes secret. DB_CONNECTION_ARGS.sslcert-
Specifies the
postgresql.crtfile that contains the client certificate used to authenticate the connection to your CloudSQL database. This file is mounted in theQuaypod from the Kubernetes secret. DB_CONNECTION_ARGS.sslkey-
Specifies the
postgresql.keyfile that contains the private key associated with the client certificate. This file is mounted in theQuaypod from the Kubernetes secret. DB_CONNECTION_ARGS.threadlocals-
Specifies auto-rollback for connections.
DB_URI-
Specifies the URI that accesses your CloudSQL database. Must be appended with the
sslmodetype, yourroot.crt,postgresql.crt, andpostgresql.keyfiles. The SSL/TLS information included inDB_URImust match the information provided inDB_CONNECTION_ARGS. If you are using CloudSQL, you must include your database username and password in this variable.
-
-
Create the
configBundleSecretresource by entering the following command:$ oc create -n <namespace> -f quay-config-bundle.yamlExample outputsecret/quay-config-bundle created -
Update the
QuayRegistryYAML file to reference thequay-config-bundleobject by entering the following command:$ oc patch quayregistry <registry_name> -n <namespace> --type=merge -p '{"spec":{"configBundleSecret":"quay-config-bundle"}}'Example outputquayregistry.quay.redhat.com/example-registry patched -
Ensure that your
QuayRegistryYAML file has been updated to use the extra CA certificateconfigBundleSecretresource by entering the following command:$ oc get quayregistry <registry_name> -n <namespace> -o yamlExample output# ... configBundleSecret: quay-config-bundle # ...
Adding additional Certificate Authorities for Project Quay
Certificate Authorities (CAs) enable Project Quay to verify SSL/TLS connections to external services such as OIDC providers, LDAP servers, and storage backends. The steps for adding additional CAs differ between standalone deployments and Red Hat Quay on OpenShift Container Platform.
Adding additional Certificate Authorities to the Project Quay container
To add Certificate Authorities to a standalone Project Quay container, you can copy CA files into the extra_ca_certs directory in your configuration folder and restart the registry container. Project Quay uses these certificates to verify TLS connections to external services.
-
You have a CA for the desired service.
-
View the certificate to be added to the container by entering the following command:
$ cat storage.crtExample output-----BEGIN CERTIFICATE----- MIIDTTCCAjWgAwIBAgIJAMVr9ngjJhzbMA0GCSqGSIb3DQEBCwUAMD0xCzAJBgNV... -----END CERTIFICATE----- -
Create the
extra_ca_certsin the/configfolder of your Project Quay directory by entering the following command:$ mkdir -p /path/to/quay_config_folder/extra_ca_certs -
Copy the CA file to the
extra_ca_certsfolder. For example:$ cp storage.crt /path/to/quay_config_folder/extra_ca_certs/ -
Ensure that the
storage.crtfile exists within theextra_ca_certsfolder by entering the following command:$ tree /path/to/quay_config_folder/extra_ca_certsExample output/path/to/quay_config_folder/extra_ca_certs ├── storage.crt---- -
Obtain the
CONTAINER IDof yourQuayconsider by entering the following command:$ podman psExample outputCONTAINER ID IMAGE COMMAND CREATED STATUS PORTS 5a3e82c4a75f <registry>/<repo>/quay:{productminv} "/sbin/my_init" 24 hours ago Up 18 hours 0.0.0.0:80->80/tcp, 0.0.0.0:443->443/tcp, 443/tcp grave_keller -
Restart the container by entering the following command
$ podman restart 5a3e82c4a75f -
Confirm that the certificate was copied into the container namespace by running the following command:
$ podman exec -it 5a3e82c4a75f cat /etc/ssl/certs/storage.pemExample output-----BEGIN CERTIFICATE----- MIIDTTCCAjWgAwIBAgIJAMVr9ngjJhzbMA0GCSqGSIb3DQEBCwUAMD0xCzAJBgNV... -----END CERTIFICATE-----
Adding additional Certificate Authorities to Red Hat Quay on OpenShift Container Platform
On Red Hat Quay on OpenShift Container Platform, additional Certificate Authorities (CAs) in the configuration bundle are added to the registry trust store. Project Quay uses these CAs to verify TLS connections to external services.
This path is the same logical location as the extra_ca_certs directory used on standalone deployments. On Red Hat Quay on OpenShift Container Platform, you do not create that directory on a node yourself. Instead, add each CA PEM file to the configBundleSecret as its own Secret data entry whose key name begins with extra_ca_cert_. The Project Quay Operator extracts these keys when it reconciles the registry and writes the files under conf/stack/extra_ca_certs/. The file name in that directory is the key name with the extra_ca_cert_ prefix removed. For example, a Secret key extra_ca_cert_ldap-ca.pem is available at runtime as conf/stack/extra_ca_certs/ldap-ca.pem.
You do not add an extra_ca_certs list or block to config.yaml only to load those CAs on Red Hat Quay on OpenShift Container Platform. The supported approach is the extra_ca_cert_* keys in the bundle Secret, as shown in the procedures that follow.
When another setting requires an explicit path to one of those PEM files (for example, ssl_ca_path for a given integration), set the path in config.yaml to the runtime location under conf/stack/extra_ca_certs/, for example:
# ...
ssl_ca_path: conf/stack/extra_ca_certs/ldap-ca.pem
# ...
The following procedures show you how to download your existing configuration file, include additional CA files in the configBundleSecret, and re-apply the bundle so that OpenShift Container Platform deploys the updated configuration.
Modifying the configuration file by using the CLI
To modify the config.yaml file for your Project Quay registry and enable new features, you can download the existing configuration from the configBundleSecret by using the CLI. After making changes, you can re-upload the configBundleSecret resource to apply the changes.
|
Note
|
Modifying the |
-
You are logged in to the OpenShift Container Platform cluster as a user with admin privileges.
-
Describe the
QuayRegistryresource by entering the following command:$ oc describe quayregistry -n <quay_namespace># ... Config Bundle Secret: example-registry-config-bundle-v123x # ... -
Obtain the secret data by entering the following command:
$ oc get secret -n <quay_namespace> <example-registry-config-bundle-v123x> -o jsonpath='{.data}'{ "config.yaml": "RkVBVFVSRV9VU0 ... MDAwMAo=" } -
Decode the data into a YAML file into the current directory by passing in the
>> config.yamlflag. For example:$ echo 'RkVBVFVSRV9VU0 ... MDAwMAo=' | base64 --decode >> config.yaml -
Make the desired changes to your
config.yamlfile, and then save the file asconfig.yaml. -
Create a new
configBundleSecretYAML by entering the following command.$ touch <new_configBundleSecret_name>.yaml -
Create the new
configBundleSecretresource, passing in theconfig.yamlfile` by entering the following command:$ oc -n <namespace> create secret generic <secret_name> \ --from-file=config.yaml=</path/to/config.yaml> \ --dry-run=client -o yaml > <new_configBundleSecret_name>.yamlwhere:
- </path/to/config.yaml>
-
Specifies your base64 decoded
config.yamlfile.
-
Create the
configBundleSecretresource by entering the following command:$ oc create -n <namespace> -f <new_configBundleSecret_name>.yamlsecret/config-bundle created -
Update the
QuayRegistryYAML file to reference the newconfigBundleSecretobject by entering the following command:$ oc patch quayregistry <registry_name> -n <namespace> --type=merge -p '{"spec":{"configBundleSecret":"<new_configBundleSecret_name>"}}'quayregistry.quay.redhat.com/example-registry patched
-
Verify that the
QuayRegistryCR has been updated with the newconfigBundleSecret:$ oc describe quayregistry -n <quay_namespace># ... Config Bundle Secret: <new_configBundleSecret_name> # ...After patching the registry, the Project Quay Operator automatically reconciles the changes.
Adding additional Certificate Authorities to Red Hat Quay on OpenShift Container Platform
To add additional Certificate Authorities to Red Hat Quay on OpenShift Container Platform, you can extend the configBundleSecret with extra_ca_cert_* entries for each CA PEM file and update the QuayRegistry custom resource to reference the updated secret.
Each key name determines the file name under conf/stack/extra_ca_certs/ at runtime. Additional CAs are not declared as an extra_ca_certs field inside the config.yaml file. Each CA is a separate entry in the Secret: the key must start with extra_ca_cert_, and the remainder of the key name becomes the file name under conf/stack/extra_ca_certs/ after the Operator reconciles the registry.
-
You have base64 decoded the original config bundle into a
config.yamlfile. For more information, see Downloading the existing configuration. -
You have a Certificate Authority (CA) file or files.
-
Create a new YAML file, for example,
extra-ca-certificate-config-bundle-secret.yaml:$ touch extra-ca-certificate-config-bundle-secret.yaml -
Create the
extra-ca-certificate-config-bundle-secretresource.-
Create the resource by entering the following command:
$ oc -n <namespace> create secret generic extra-ca-certificate-config-bundle-secret \
  --from-file=config.yaml=</path/to/config.yaml> \
  --from-file=extra_ca_cert_<name-of-certificate-one>=<path/to/certificate_one> \
  --from-file=extra_ca_cert_<name-of-certificate-two>=<path/to/certificate_two> \
  --from-file=extra_ca_cert_<name-of-certificate-three>=<path/to/certificate_three> \
  --dry-run=client -o yaml > extra-ca-certificate-config-bundle-secret.yaml
where:
--from-file=config.yaml=</path/to/config.yaml>-
Specifies your base64 decoded
config.yamlfile. --from-file=extra_ca_cert_<name-of-certificate-one>=<path/to/certificate_one>-
Specifies the extra CA file to be added to the system trust bundle.
--from-file=extra_ca_cert_<name-of-certificate-two>=<path/to/certificate_two>-
Specifies a second CA file to be added into the system trust bundle. This parameter is optional.
--from-file=extra_ca_cert_<name-of-certificate-three>=<path/to/certificate_three>-
Specifies a third CA file to be added into the system trust bundle. This parameter is optional.
-
-
Optional. You can check the content of the
extra-ca-certificate-config-bundle-secret.yamlfile by entering the following command:$ cat extra-ca-certificate-config-bundle-secret.yamlExample outputapiVersion: v1 data: config.yaml: <example_scren>... extra_ca_cert_certificate-one: <example_secret>... extra_ca_cert_certificate-three: <example_secret>... extra_ca_cert_certificate-two: <example_secret>... kind: Secret metadata: creationTimestamp: null name: extra-ca-certificate-config-bundle-secret namespace: <namespace> -
Create the
configBundleSecretresource by entering the following command:$ oc create -n <namespace> -f extra-ca-certificate-config-bundle-secret.yamlExample outputsecret/extra-ca-certificate-config-bundle-secret created -
Update the
QuayRegistryYAML file to reference theextra-ca-certificate-config-bundle-secretobject by entering the following command:$ oc patch quayregistry <registry_name> -n <namespace> --type=merge -p '{"spec":{"configBundleSecret":"extra-ca-certificate-config-bundle-secret"}}'Example outputquayregistry.quay.redhat.com/example-registry patched -
Ensure that your
QuayRegistryYAML file has been updated to use the extra CA certificateconfigBundleSecretresource by entering the following command:$ oc get quayregistry <registry_name> -n <namespace> -o yamlExample output# ... configBundleSecret: extra-ca-certificate-config-bundle-secret # ...
Adding custom SSL/TLS certificates when Project Quay is deployed on Kubernetes
To add custom SSL/TLS certificates to your Project Quay deployment on Kubernetes, you can base64 encode the certificate, add it to the config secret, and restart the pods.
The following procedure works around the limitation where the superuser panel certificate upload function does not work with Kubernetes deployments.
-
Project Quay has been deployed.
-
You have a custom
ca.crtfile.
-
Base64 encode the contents of an SSL/TLS certificate by entering the following command:
$ cat ca.crt | base64 -w 0Example output...c1psWGpqeGlPQmNEWkJPMjJ5d0pDemVnR2QNCnRsbW9JdEF4YnFSdVd3PT0KLS0tLS1FTkQgQ0VSVElGSUNBVEUtLS0tLQo= -
Enter the following
kubectlcommand to edit thequay-enterprise-config-secretfile:$ kubectl --namespace quay-enterprise edit secret/quay-enterprise-config-secret -
Add an entry for the certificate and paste the full
base64encoded stringer under the entry. For example:custom-cert.crt: c1psWGpqeGlPQmNEWkJPMjJ5d0pDemVnR2QNCnRsbW9JdEF4YnFSdVd3PT0KLS0tLS1FTkQgQ0VSVElGSUNBVEUtLS0tLQo= -
Use the
kubectl deletecommand to remove all Project Quay pods. For example:$ kubectl delete pod quay-operator.v3.7.1-6f9d859bd-p5ftc quayregistry-clair-postgres-7487f5bd86-xnxpr quayregistry-quay-app-upgrade-xq2v6 quayregistry-quay-database-859d5445ff-cqthr quayregistry-quay-redis-84f888776f-hhgmsAfterwards, the Project Quay deployment automatically schedules replace pods with the new certificate data.