Configure SSL/TLS for standalone Red Hat Quay
Create a certificate authority, configure custom SSL/TLS certificates, and configure Podman and system trust for standalone Red Hat Quay.
Creating a Certificate Authority
To secure your Project Quay deployment with self-signed certificates, you can create a root certificate authority and generate a server certificate for your registry hostname. You can use OpenSSL to create the CA key, signing request, and certificate files.
-
Generate the root CA key by entering the following command:
$ openssl genrsa -out rootCA.key 2048 -
Generate the root CA certificate by entering the following command:
$ openssl req -x509 -new -nodes -key rootCA.key -sha256 -days 1024 -out rootCA.pem -
Enter the information to incorporate into your certificate request, including the server hostname, for example:
Country Name (2 letter code) [XX]:IE State or Province Name (full name) []:GALWAY Locality Name (eg, city) [Default City]:GALWAY Organization Name (eg, company) [Default Company Ltd]:QUAY Organizational Unit Name (eg, section) []:DOCS Common Name (eg, your name or your server's hostname) []:quay-server.example.com -
Generate the server key by entering the following command:
$ openssl genrsa -out ssl.key 2048 -
Generate a signing request by entering the following command:
$ openssl req -new -key ssl.key -out ssl.csr -
Enter the information to incorporate into your certificate request, including the server hostname, for example:
Country Name (2 letter code) [XX]:IE State or Province Name (full name) []:GALWAY Locality Name (eg, city) [Default City]:GALWAY Organization Name (eg, company) [Default Company Ltd]:QUAY Organizational Unit Name (eg, section) []:DOCS Common Name (eg, your name or your server's hostname) []:quay-server.example.com Email Address []: -
Create a configuration file
openssl.cnf, specifying the server hostname, for example:Exampleopenssl.cnffile[req] req_extensions = v3_req distinguished_name = req_distinguished_name [req_distinguished_name] [ v3_req ] basicConstraints = CA:FALSE keyUsage = nonRepudiation, digitalSignature, keyEncipherment subjectAltName = @alt_names [alt_names] DNS.1 = <quay-server.example.com> IP.1 = 192.168.1.112 -
Use the configuration file to generate the certificate
ssl.cert:$ openssl x509 -req -in ssl.csr -CA rootCA.pem -CAkey rootCA.key -CAcreateserial -out ssl.cert -days 356 -extensions v3_req -extfile openssl.cnf -
Confirm your created certificates and files by entering the following command:
$ ls /path/to/certificatesExample outputrootCA.key ssl-bundle.cert ssl.key custom-ssl-config-bundle-secret.yaml rootCA.pem ssl.cert openssl.cnf rootCA.srl ssl.csr
Configuring custom SSL/TLS certificates by using the command line interface
To enable custom SSL/TLS certificates on your Project Quay deployment, you can copy certificate files to your configuration directory and update the config.yaml file to use HTTPS. You can then restart the registry container to apply the SSL/TLS configuration.
-
You have created a certificate authority and signed the certificate.
-
Copy the certificate file and primary key file to your configuration directory, ensuring they are named
ssl.certandssl.keyrespectively:cp ~/ssl.cert ~/ssl.key /path/to/configuration_directory -
Navigate to the configuration directory by entering the following command:
$ cd /path/to/configuration_directory -
Edit the
config.yamlfile and specify that you want Project Quay to handle SSL/TLS:Exampleconfig.yamlfile# ... SERVER_HOSTNAME: <quay-server.example.com> ... PREFERRED_URL_SCHEME: https # ... -
Optional: Append the contents of the
rootCA.pemfile to the end of thessl.certfile by entering the following command:$ cat rootCA.pem >> ssl.cert -
Stop the
Quaycontainer by entering the following command:$ sudo podman stop <quay_container_name> -
Restart the registry by entering the following command:
$ sudo podman run -d --rm -p 80:8080 -p 443:8443 \
  --name=quay \
  -v $QUAY/config:/conf/stack:Z \
  -v $QUAY/storage:/datastorage:Z \
  {productrepo}/{quayimage}:{productminv}
Configuring Podman to trust the Certificate Authority
To configure Podman to trust your self-signed certificate authority for Project Quay, you can copy the root CA to the hostname-specific certificate directory under /etc/containers/certs.d/ or /etc/docker/certs.d/.
.Procedure
-
Copy the root CA file to one of
/etc/containers/certs.d/or/etc/docker/certs.d/. Use the exact path determined by the server hostname, and name the fileca.crt:$ sudo cp rootCA.pem /etc/containers/certs.d/quay-server.example.com/ca.crt -
Verify that you no longer need to use the
--tls-verify=falseoption when logging in to your Project Quay registry:$ sudo podman login quay-server.example.comExample outputLogin Succeeded!
Configuring the system to trust the certificate authority
To trust your self-signed certificate authority, you can add the root CA to the system-wide trust store and update certificate configuration. You can verify trust with the trust list command before browsing your Project Quay registry over HTTPS.
-
Enter the following command to copy the
rootCA.pemfile to the consolidated system-wide trust store:$ sudo cp rootCA.pem /etc/pki/ca-trust/source/anchors/ -
Enter the following command to update the system-wide trust store configuration:
$ sudo update-ca-trust extract -
Optional. You can use the
trust listcommand to ensure that theQuayserver has been configured:$ trust list | grep quay label: quay-server.example.comNow, when you browse to the registry at
https://quay-server.example.com, the lock icon shows that the connection is secure: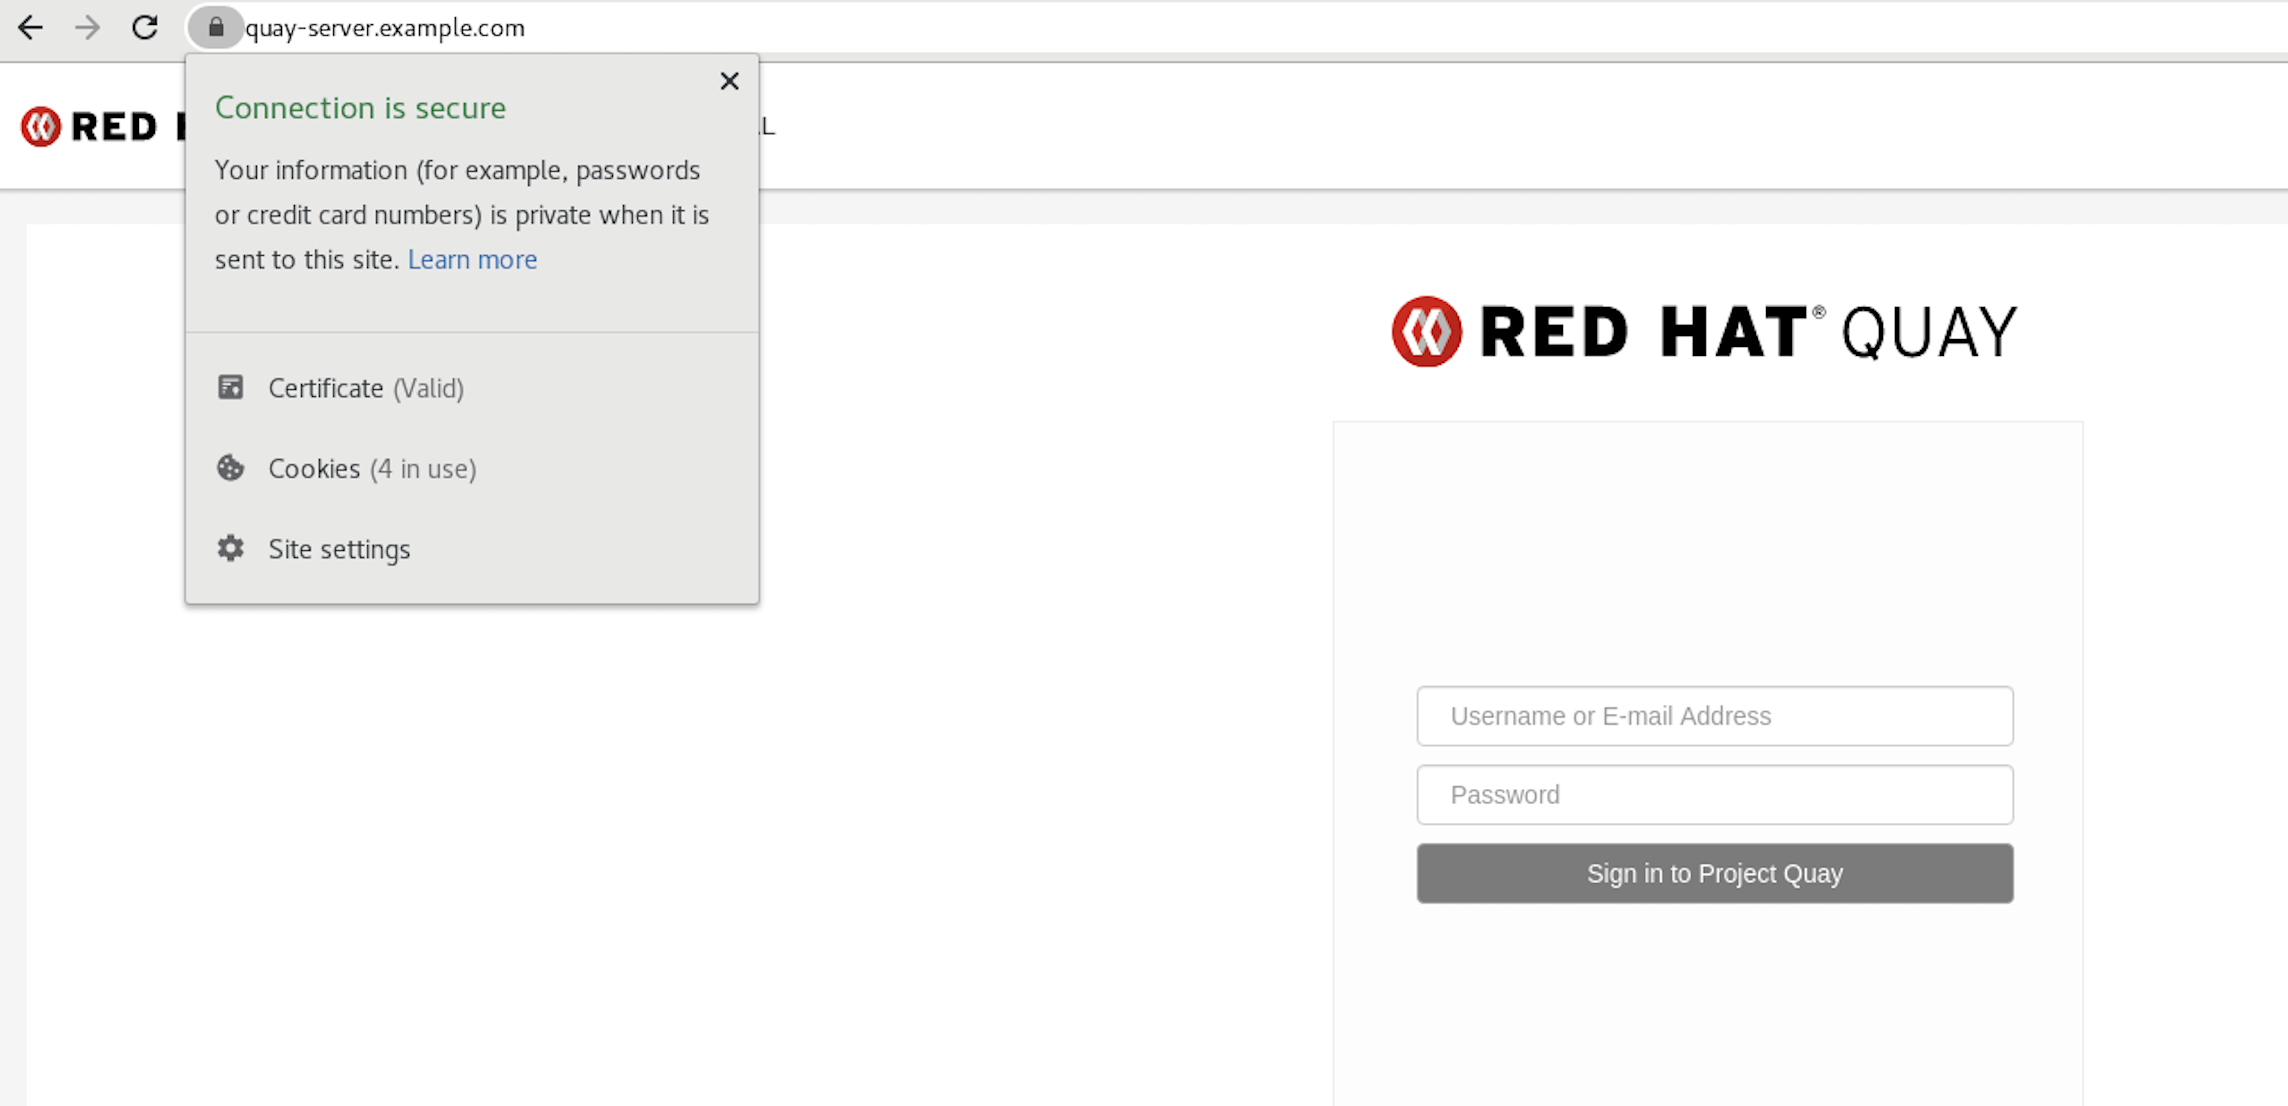
-
To remove the
rootCA.pemfile from system-wide trust, delete the file and update the configuration:$ sudo rm /etc/pki/ca-trust/source/anchors/rootCA.pem$ sudo update-ca-trust extract$ trust list | grep quay
Configure SSL/TLS for Red Hat Quay on OpenShift Container Platform
Configure custom SSL/TLS certificates for Operator-managed Red Hat Quay, preserve TLS settings across upgrades, and use cert-manager with external secrets.
Configuring custom SSL/TLS certificates for Red Hat Quay on OpenShift Container Platform
When you deploy Red Hat Quay on OpenShift Container Platform, the Operator can use OpenShift Container Platform Certificate Authority certificates or custom SSL/TLS certificates in the config bundle.
Configuring custom certificates can be done before or after initial deployment by updating the configBundleSecret and setting the tls component to unmanaged (managed: false). By default, when Project Quay is deployed on OpenShift Container Platform, the tls component of the QuayRegistry custom resource definition (CRD) is set to managed (managed: true). As a result, OpenShift Container Platform’s Certificate Authority is used to create HTTPS endpoints and to rotate SSL/TLS certificates.
You can configure custom SSL/TLS certificates before or after the initial deployment of Red Hat Quay on OpenShift Container Platform. This process involves creating or updating the configBundleSecret resource within the QuayRegistry YAML file to integrate your custom certificates and setting the tls component to unmanaged.
|
Important
|
When configuring custom SSL/TLS certificates for Project Quay, administrators are responsible for certificate rotation. |
The following procedures enable you to apply custom SSL/TLS certificates to ensure secure communication and meet specific security requirements for your Red Hat Quay on OpenShift Container Platform deployment. These steps assumed you have already created a Certificate Authority (CA) bundle or an ssl.key, and an ssl.cert. The procedure then shows you how to integrate those files into your Red Hat Quay on OpenShift Container Platform deployment, which ensures that your registry operates with the specified security settings and conforms to your organization’s SSL/TLS policies.
|
Note
|
|
OpenShift Container Platform cluster TLS security profile inheritance
To align Project Quay with the OpenShift Container Platform TLS security policy, the Project Quay Operator can apply the cluster-wide tlsSecurityProfile to the registry and mirror workers.
The Operator reads the tlsSecurityProfile from the OpenShift Container Platform APIServer cluster resource and applies the corresponding SSL_PROTOCOLS and SSL_CIPHERS settings without requiring manual configuration.
How TLS profile inheritance works
The Operator reads spec.tlsSecurityProfile from the APIServer cluster resource and translates the profile into Project Quay SSL_PROTOCOLS and SSL_CIPHERS values in the generated config.yaml. Supported profile types are Old, Intermediate, Modern, and Custom. If the cluster has no profile set, the Operator defaults to the Intermediate profile (TLS 1.2 and TLS 1.3).
To fully override cluster-profile inheritance, set both SSL_PROTOCOLS and SSL_CIPHERS in the configBundleSecret. Setting either field disables inheritance for both fields. On Kubernetes clusters without the config.openshift.io API, the Operator does not inject TLS settings and Project Quay uses its built-in defaults.
Managed TLS and unmanaged TLS
How the cluster TLS security profile applies depends on whether the Operator or Project Quay terminates TLS:
-
When the
tlscomponent is set tomanaged, the OpenShift Container Platform Route enforces the cluster TLS profile. No additional TLS protocol or cipher configuration is required in the config bundle. -
When the
tlscomponent is set tounmanaged, Project Quay terminates TLS directly. When neitherSSL_PROTOCOLSnorSSL_CIPHERSis set in the config bundle, Project Quay inherits the cluster TLS security profile.
Preserving TLS settings before upgrading Red Hat Quay on OpenShift Container Platform
The Project Quay Operator can inherit the cluster-wide TLS security profile. Before upgrading, review your cluster profile and set SSL_PROTOCOLS and SSL_CIPHERS if you need to preserve your current TLS behavior.
The Operator inherits the cluster-wide TLS security profile from the OpenShift APIServer configuration when neither SSL_PROTOCOLS nor SSL_CIPHERS is set in the configBundleSecret resource.
When the tls component is set to managed, the OpenShift Route already enforces the cluster TLS profile, and no action is required.
When the tls component is set to unmanaged, Project Quay terminates TLS directly and inherits the cluster profile after the upgrade unless you override it in the config bundle. If you have already set both SSL_PROTOCOLS and SSL_CIPHERS, no additional TLS configuration is required before upgrading. Setting only one field disables cluster-profile inheritance for both fields.
-
You have cluster administrator access to review the OpenShift Container Platform
APIServerconfiguration. -
You can edit the
configBundleSecretreferenced by yourQuayRegistrycustom resource (CR).
-
Review the cluster TLS security profile:
$ oc get apiserver cluster -o jsonpath='{.spec.tlsSecurityProfile}{"\n"}' -
If you must preserve your current TLS settings, add
SSL_PROTOCOLSandSSL_CIPHERSto theconfig.yamlfile in yourconfigBundleSecretbefore upgrading. For example:# ... SSL_PROTOCOLS: - TLSv1.2 - TLSv1.3 SSL_CIPHERS: - ECDHE-RSA-AES128-GCM-SHA256 - ECDHE-ECDSA-AES128-GCM-SHA256 - ECDHE-RSA-AES256-GCM-SHA384 - ECDHE-ECDSA-AES256-GCM-SHA384 # Add other required ciphers # ...NoteInclude every cipher suite your clients require. To fully override cluster-profile inheritance, set both
SSL_PROTOCOLSandSSL_CIPHERS. Setting either field disables inheritance for both fields. -
Update the
configBundleSecretwith the modifiedconfig.yamlfile. You can edit the secret in the OpenShift Container Platform web console or recreate it from a local file. For example:$ oc create secret generic <config_bundle_secret_name> \ --from-file config.yaml=./config.yaml \ --dry-run=client -o yaml | oc apply -f - -
Proceed with the Project Quay Operator upgrade. If the cluster TLS profile is acceptable and neither
SSL_PROTOCOLSnorSSL_CIPHERSis set, no additional TLS configuration is required.
Creating a custom SSL/TLS configBundleSecret resource
To upload custom SSL/TLS certificates to Red Hat Quay on OpenShift Container Platform, you can create a configBundleSecret resource that includes your ssl.cert and ssl.key files and reference it from the QuayRegistry custom resource.
-
You have base64 decoded the original config bundle into a
config.yamlfile. For more information, see Downloading the existing configuration. -
You have generated custom SSL certificates and keys.
-
Create a new YAML file, for example,
custom-ssl-config-bundle-secret.yaml:$ touch custom-ssl-config-bundle-secret.yaml -
Create the
custom-ssl-config-bundle-secretresource.-
Create the resource by entering the following command:
$ oc -n <namespace> create secret generic custom-ssl-config-bundle-secret \
  --from-file=config.yaml=</path/to/config.yaml> \
  --from-file=ssl.cert=</path/to/ssl.cert> \
  --from-file=extra_ca_cert_<name-of-certificate>.crt=ca-certificate-bundle.crt \
  --from-file=ssl.key=</path/to/ssl.key> \
  --dry-run=client -o yaml > custom-ssl-config-bundle-secret.yaml
where:
--from-file=config.yaml=</path/to/config.yaml>-
Specifies your base64 decoded
config.yamlfile. --from-file=ssl.cert=</path/to/ssl.cert>-
Specifies your
ssl.certfile. --from-file=extra_ca_cert_<name-of-certificate>.crt=ca-certificate-bundle.crt-
Specifies an additional CA PEM using a Secret key that starts with
extra_ca_cert_(for example,--from-file=extra_ca_cert_<name-of-certificate>.crt=ca-certificate-bundle.crt). The Project Quay Operator writes these files underconf/stack/extra_ca_certs/in the deployed bundle. For LDAP, OIDC, or other integrations that need custom CAs, supply the PEMs this way and useconf/stack/extra_ca_certs/<file>inconfig.yamlwhen a field such asssl_ca_pathrequires an explicit path. This parameter is optional. --from-file=ssl.key=</path/to/ssl.key>-
Specifies your
ssl.keyfile.
-
-
Optional. You can check the content of the
custom-ssl-config-bundle-secret.yamlfile by entering the following command:$ cat custom-ssl-config-bundle-secret.yamlExample outputapiVersion: v1 data: config.yaml: QUxMT1dfUFVMTFNfV0lUSE9VVF9TVFJJQ1RfTE9HR0lORzogZmFsc2UKQVVUSEVOVElDQVRJT05fVFlQRTogRGF0YWJhc2UKREVGQVVMVF9UQUdfRVhQSVJBVElPTjogMncKRElTVFJJQlVURURfU1R... ssl.cert: LS0tLS1CRUdJTiBDRVJUSUZJQ0FURS0tLS0tCk1JSUVYakNDQTBhZ0F3SUJBZ0lVTUFBRk1YVWlWVHNoMGxNTWI3U1l0eFV5eTJjd0RRWUpLb1pJaHZjTkFRRUwKQlFBd2dZZ3hDekFKQmdOVkJBWVR... extra_ca_cert_<name-of-certificate>:LS0tLS1CRUdJTiBDRVJUSUZJQ0FURS0tLS0tCk1JSUVYakNDQTBhZ0F3SUJBZ0lVTUFBRk1YVWlWVHNoMGxNTWI3U1l0eFV5eTJjd0RRWUpLb1pJaHZjTkFRRUwKQlFBd2dZZ3hDe... ssl.key: LS0tLS1CRUdJTiBQUklWQVRFIEtFWS0tLS0tCk1JSUV2UUlCQURBTkJna3Foa2lHOXcwQkFRRUZBQVNDQktjd2dnU2pBZ0VBQW9JQkFRQ2c0VWxZOVV1SVJPY1oKcFhpZk9MVEdqaS9neUxQMlpiMXQ... kind: Secret metadata: creationTimestamp: null name: custom-ssl-config-bundle-secret namespace: <namespace> -
Create the
configBundleSecretresource by entering the following command:$ oc create -n <namespace> -f custom-ssl-config-bundle-secret.yamlExample outputsecret/custom-ssl-config-bundle-secret created -
Update the
QuayRegistryYAML file to reference thecustom-ssl-config-bundle-secretobject by entering the following command:$ oc patch quayregistry <registry_name> -n <namespace> --type=merge -p '{"spec":{"configBundleSecret":"custom-ssl-config-bundle-secret"}}'Example outputquayregistry.quay.redhat.com/example-registry patched -
Set the
tlscomponent of theQuayRegistryYAML toFalseby entering the following command:$ oc patch quayregistry <registry_name> -n <namespace> --type=merge -p '{"spec":{"components":[{"kind":"tls","managed":false}]}}'Example outputquayregistry.quay.redhat.com/example-registry patched -
Ensure that your
QuayRegistryYAML file has been updated to use the custom SSLconfigBundleSecretresource, and that your andtlsresource is set toFalseby entering the following command:$ oc get quayregistry <registry_name> -n <namespace> -o yamlExample output# ... configBundleSecret: custom-ssl-config-bundle-secret # ... spec: components: - kind: tls managed: false # ...
-
Confirm a TLS connection to the server and port by entering the following command:
$ openssl s_client -connect <quay-server.example.com>:443Example output# ... SSL-Session: Protocol : TLSv1.3 Cipher : TLS_AES_256_GCM_SHA384 Session-ID: 0E995850DC3A8EB1A838E2FF06CE56DBA81BD8443E7FA05895FBD6FBDE9FE737 Session-ID-ctx: Resumption PSK: 1EA68F33C65A0F0FA2655BF9C1FE906152C6E3FEEE3AEB6B1B99BA7C41F06077989352C58E07CD2FBDC363FA8A542975 PSK identity: None PSK identity hint: None SRP username: None TLS session ticket lifetime hint: 7200 (seconds) # ...
Referencing an external TLS Secret for Red Hat Quay on OpenShift Container Platform
Reference an external kubernetes.io/tls Secret from the tls component of the QuayRegistry custom resource (CR) to enable automated certificate rotation from sources such as cert-manager, HashiCorp Vault, or manual Secret updates.
With this approach, the Project Quay Operator uses the certificate and private key from the referenced Secret instead of embedding ssl.cert and ssl.key files in the configBundleSecret resource.
When you use an external TLS Secret, set spec.components[kind: tls].managed to false and specify secretRef. The Operator watches the referenced Secret and performs a rolling restart of Project Quay pods when the certificate data changes.
|
Important
|
|
-
You have deployed the Project Quay Operator and a
QuayRegistryCR. -
You have a TLS Secret of type
kubernetes.io/tlsin the same namespace as theQuayRegistry, withtls.crtandtls.keydata keys. -
The certificate and private key are valid (format, key match, chain, and hostname).
-
Create a TLS Secret in the registry namespace, for example:
apiVersion: v1 kind: Secret metadata: name: my-quay-tls namespace: <namespace> type: kubernetes.io/tls data: tls.crt: <base64_encoded_certificate> tls.key: <base64_encoded_private_key> -
Set the
tlscomponent to unmanaged and reference the Secret by entering the following command:$ oc patch quayregistry <registry_name> -n <namespace> --type=merge -p '{"spec":{"components":[{"kind":"tls","managed":false,"secretRef":{"name":"my-quay-tls"}}]}}' -
Verify that the
QuayRegistryCR contains the expected configuration:$ oc get quayregistry <registry_name> -n <namespace> -o yamlExample outputspec: components: - kind: tls managed: false secretRef: name: my-quay-tls -
Wait for the Operator to reconcile the registry. When certificate data in the referenced Secret changes, the Operator triggers a rolling restart of Project Quay pods to load the updated certificate.
-
Verify that TLS from the external Secret is ready by entering the following command. When the TLS component is healthy, the
ComponentTLSReadycondition reportsstatus: "True".$ oc wait quayregistry <registry_name> -n <namespace> --for=condition=ComponentTLSReady=True --timeout=300sYou can also review all component conditions in the OpenShift Container Platform web console on the QuayRegistry details page, or by entering
oc get quayregistry <registry_name> -n <namespace> -o yamland checkingstatus.conditions.
Using cert-manager with an external TLS Secret
You can install cert-manager on your cluster, issue a certificate into a kubernetes.io/tls Secret, and reference that Secret from the tls component of your QuayRegistry CR. When cert-manager renews the certificate, the Project Quay Operator detects the updated Secret and rolls out updated pods.
-
You have installed cert-manager on the cluster. For more information, see the cert-manager documentation.
-
You have a
ClusterIssuerorIssuerthat can issue certificates for your registry hostname. -
You know the hostname clients use to reach the registry. After deployment, this hostname is often available in
status.registryEndpointon theQuayRegistryCR.
-
Create a
ClusterIssuerCR, for example a self-signed issuer for testing:apiVersion: cert-manager.io/v1 kind: ClusterIssuer metadata: name: selfsigned-issuer spec: selfSigned: {} -
Create a
CertificateCR that writes to the Secret referenced by yourQuayRegistrysecretRef. SetdnsNamesto the registry route hostname, for example the host instatus.registryEndpoint:apiVersion: cert-manager.io/v1 kind: Certificate metadata: name: quay-tls namespace: <namespace> spec: secretName: quay-tls duration: 2160h renewBefore: 360h issuerRef: name: selfsigned-issuer kind: ClusterIssuer dnsNames: - <quay_route_hostname> -
Configure the
QuayRegistryCR to reference the Secret. For example:apiVersion: quay.redhat.com/v1 kind: QuayRegistry metadata: name: <registry_name> namespace: <namespace> spec: components: - kind: tls managed: false secretRef: name: quay-tls -
Wait for cert-manager to populate the TLS Secret. Then, confirm that the Operator has reconciled the registry by running the following command:
$ oc wait quayregistry <registry_name> -n <namespace> --for=condition=ComponentTLSReady=True --timeout=300s -
Optional. Force certificate renewal to verify that rotation triggers a rollout. This requires the cert-manager command-line plugin:
$ oc cert-manager renew quay-tls -n <namespace>After renewal, wait again for
ComponentTLSReady=Trueand confirm that Project Quay pods were replaced. -
Optional. Delete the TLS Secret by running the following command:
$ oc delete secret quay-tls -n <namespace>
Secure database connections with TLS
Configure certificate-based TLS between Red Hat Quay and PostgreSQL, including Operator-managed database TLS settings.
Certificate-based authentication between Project Quay and SQL
You can configure certificate-based authentication between Project Quay and SQL databases such as PostgreSQL and GCP CloudSQL by supplying client-side SSL/TLS certificates. This approach verifies the server certificate against a trusted Certificate Authority and supports automated deployments.
TLS encryption for Operator-managed PostgreSQL
You can enable TLS encryption for Operator-managed PostgreSQL databases used by Project Quay and Clair. Configure TLS through the overrides.tls fields on the postgres and clairpostgres components in the QuayRegistry custom resource.
|
Important
|
This feature configures transport encryption for Operator-managed PostgreSQL connections. It is distinct from the managed |
When TLS is enabled, the Operator configures PostgreSQL to accept encrypted connections and mounts the TLS certificates on the database pod. TLS is opt-in. Existing deployments continue to use unencrypted database connections until you explicitly enable it.
|
Note
|
After you enable TLS, confirm that PostgreSQL reports |
You can enable TLS independently for the postgres and clairpostgres components.
Certificate options
| Option | Description |
|---|---|
OpenShift Container Platform Service CA (default on OpenShift Container Platform) |
When you set |
Operator-generated self-signed certificates |
On Kubernetes clusters without the OpenShift Container Platform Service CA, the Operator generates ECDSA P-256 certificates with a 10-year validity period when no |
User-provided or cert-manager certificates |
Reference a Secret containing |
|
Note
|
This feature does not provide mutual TLS (mTLS) or automatic certificate rotation. To integrate with enterprise PKI or automate rotation, use |
Enabling TLS for Operator-managed PostgreSQL
To encrypt database traffic for Operator-managed PostgreSQL used by Project Quay and Clair, you can set overrides.tls.enabled: true on the postgres and clairpostgres components in the QuayRegistry custom resource.
-
The
postgresand/orclairpostgrescomponents that you want to protect are set tomanaged: true. -
You have access to edit the
QuayRegistrycustom resource in your registry namespace.
-
Edit your
QuayRegistrycustom resource. For example:$ oc edit quayregistry <registry_name> -n <namespace> -
Under
spec.components, addoverrides.tls.enabled: trueto the managed PostgreSQL components. For example:spec: components: - kind: postgres managed: true overrides: tls: enabled: true - kind: clairpostgres managed: true overrides: tls: enabled: true -
Save the changes and wait for the Operator to reconcile the registry.
NoteOn OpenShift Container Platform, the Operator might briefly report
RolloutBlockedwhile it waits for the Service CA to create the serving certificate Secret. Reconciliation retries until the Secret is available. -
Verify that PostgreSQL has SSL enabled:
$ oc exec -n <namespace> deploy/<registry_name>-quay-database -c postgres -- \
  bash -lc 'psql -U "$POSTGRESQL_USER" -d "$POSTGRESQL_DATABASE" -tAc "SHOW ssl;"'
The command should return
on. For Clair, run the same check against the Clair PostgreSQL deployment when that component is managed. -
Verify that the
QuayRegistrystatus shows a healthy deployment and thatRolloutBlockedis not stuck in an error state. -
Optional: Confirm client TLS sessions with the following command:
$ oc exec -n <namespace> deploy/<registry_name>-quay-database -c postgres -- \
  bash -lc 'psql -U "$POSTGRESQL_USER" -d "$POSTGRESQL_DATABASE" -tAc "SELECT count(*) FROM pg_stat_ssl s JOIN pg_stat_activity a ON s.pid = a.pid WHERE s.ssl = true AND a.client_addr IS NOT NULL;"'
A count greater than
0indicates active TLS client connections. If the count remains0, PostgreSQL still has TLS enabled on the server, but clients might not yet be connecting with SSL. Check the registry database URI or connection arguments for ansslmodevalue such asverify-full, and review Operator Events for certificate or CA errors.
Providing custom TLS certificates
To use your own certificates instead of Operator-generated or Service CA certificates, create a Secret and reference it from the component override.
-
TLS is enabled on the target component (
overrides.tls.enabled: true). -
You have a Secret containing PEM-encoded
ca.crt,tls.crt, andtls.keyentries. -
Your TLS certificate includes Subject Alternative Name (SAN) entries that match the PostgreSQL Service DNS names. For the
postgrescomponent, include the following names:<registry_name>-quay-database <registry_name>-quay-database.<namespace> <registry_name>-quay-database.<namespace>.svc <registry_name>-quay-database.<namespace>.svc.cluster.local localhostFor the
clairpostgrescomponent, include the following names:<registry_name>-clair-postgres <registry_name>-clair-postgres.<namespace> <registry_name>-clair-postgres.<namespace>.svc <registry_name>-clair-postgres.<namespace>.svc.cluster.local localhost
-
Create a Secret in the same namespace as your
QuayRegistrycustom resource. For example:apiVersion: v1 kind: Secret metadata: name: <postgres_or_clairpostgres_name>-tls namespace: <namespace> type: Opaque stringData: ca.crt: | -----BEGIN CERTIFICATE----- ... -----END CERTIFICATE----- tls.crt: | -----BEGIN CERTIFICATE----- ... -----END CERTIFICATE----- tls.key: | -----BEGIN EC PRIVATE KEY----- ... -----END EC PRIVATE KEY----- -
Reference the Secret from the PostgreSQL component override:
- kind: postgres managed: true overrides: tls: enabled: true secretRef: name: <postgres_or_clairpostgres_name>-tls -
Save the
QuayRegistryand wait for reconciliation.
-
Connect to the Project Quay PostgreSQL pod and check that SSL is enabled:
$ oc exec -n <namespace> deploy/<registry>-quay-database -c postgres -- bash -lc 'psql -U "$POSTGRESQL_USER" -d "$POSTGRESQL_DATABASE" -tAc "SHOW ssl;"'The command should return
on. -
Optional: Confirm that client connections use SSL:
$ oc exec -n <namespace> deploy/<registry_name>-quay-database -c postgres -- \
  bash -lc 'psql -U "$POSTGRESQL_USER" -d "$POSTGRESQL_DATABASE" -tAc "SELECT count(*) FROM pg_stat_ssl s JOIN pg_stat_activity a ON s.pid = a.pid WHERE s.ssl = true AND a.client_addr IS NOT NULL;"'
A count greater than
0indicates active TLS client connections. If the count remains0, PostgreSQL still has TLS enabled on the server, but clients might not yet be connecting with SSL. Check the registry database URI or connection arguments for ansslmodevalue such asverify-full, and review Operator Events for certificate or CA errors.
Disabling TLS
You can disable TLS on an existing deployment without data loss by removing or setting overrides.tls.enabled to false on the affected components. The Operator removes TLS configuration from PostgreSQL and restores unencrypted connection strings.
-
Edit the
QuayRegistrycustom resource. -
Set
overrides.tls.enabled: falseor remove theoverrides.tlsblock from thepostgresand/orclairpostgrescomponents. -
Save the changes and wait for the Operator to reconcile the registry.
Configuring certificate-based authentication with SQL
To connect Project Quay to an SQL database with client-side certificates, you can create a configBundleSecret that includes TLS certificate files and update DB_CONNECTION_ARGS and DB_URI in the config.yaml file.
This procedure uses CloudSQL as an example and also applies to PostgreSQL and other supported databases.
-
You have generated custom Certificate Authorities (CAs) and your SSL/TLS certificates and keys are available in
PEMformat that will be used to generate an SSL connection with your CloudSQL database. For more information, see SSL and TLS for Project Quay. -
You have
base64 decodedthe original config bundle into aconfig.yamlfile. For more information, see Downloading the existing configuration. -
You are using an externally managed PostgreSQL or CloudSQL database. For more information, see Using and existing PostgreSQL database with the
DB_URIvariable set. -
Your externally managed PostgreSQL or CloudSQL database is configured for SSL/TLS.
-
The
postgrescomponent of yourQuayRegistryCRD is set tomanaged: false, and your CloudSQL database is set with theDB_URIconfiguration variable. The following procedure usespostgresql://<cloudsql_username>:<dbpassword>@<database_host>:<port>/<database_name>.
-
After you have generated the CAs and SSL/TLS certificates and keys for your CloudSQL database and ensured that they are in
.pemformat, test the SSL connection to your CloudSQL server:-
Initiate a connection to your CloudSQL server by entering the following command:
$ psql "sslmode=verify-ca sslrootcert=<ssl_server_certificate_authority>.pem sslcert=<ssl_client_certificate>.pem sslkey=<ssl_client_key>.pem hostaddr=<database_host> port=<5432> user=<cloudsql_username> dbname=<cloudsql_database_name>"
-
-
In your Project Quay directory, create a new YAML file, for example,
quay-config-bundle.yaml, by running the following command:$ touch quay-config-bundle.yaml -
Create a
postgresql-client-certsresource by entering the following command:$ oc -n <quay_namespace> create secret generic postgresql-client-certs \ --from-file config.yaml=<path/to/config.yaml> \ --from-file=tls.crt=<path/to/ssl_client_certificate.pem> \ --from-file=tls.key=<path/to/ssl_client_key.pem> \ --from-file=ca.crt=<path/to/ssl_server_certificate.pem>where:
config.yaml=<path/to/config.yaml>-
Specifies your base64 decoded
config.yamlfile. tls.crt=<path/to/ssl_client_certificate.pem>-
Specifies your SSL certificate in
.pemformat. tls.key=<path/to/ssl_client_key.pem>-
Specifies your SSL key in
.pemformat. ca.crt=<path/to/ssl_server_certificate.pem>-
Specifies your SSL root CA in
.pemformat.
-
Edit your
`quay-config-bundle.yamlfile to include the following database connection settings:Important-
The information included in the
DB_CONNECTION_ARGSvariable, for example,sslmode,sslrootcert,sslcert, andsslkeymust match the information appended to theDB_URIvariable. Failure to match might result in a failed connection. -
You cannot specify custom filenames or paths. Certificate file paths for
sslrootcert,sslcert, andsslkeyare hardcoded defaults and mounted into theQuaypod from the Kubernetes secret. You must adhere to the following naming conventions or it will result in a failed connection.
DB_CONNECTION_ARGS:
    autorollback: true
    sslmode: verify-ca
    sslrootcert: /.postgresql/root.crt
    sslcert: /.postgresql/postgresql.crt
    sslkey: /.postgresql/postgresql.key
    threadlocals: true
DB_URI: postgresql://<dbusername>:<dbpassword>@<database_host>:<port>/<database_name>?sslmode=verify-full&sslrootcert=/.postgresql/root.crt&sslcert=/.postgresql/postgresql.crt&sslkey=/.postgresql/postgresql.key
where:
DB_CONNECTION_ARGS.sslmode-
Specifies
verify-ca, which ensures that the database connection uses SSL/TLS and verifies the server certificate against a trusted CA. This can work with both trusted CA and self-signed CA certificates. However, this mode does not verify the hostname of the server. For full hostname and certificate verification, useverify-full. For more information about the configuration options available, see PostgreSQL SSL/TLS connection arguments. DB_CONNECTION_ARGS.sslrootcert-
Specifies the
root.crtfile that contains the root certificate used to verify the SSL/TLS connection with your CloudSQL database. This file is mounted in theQuaypod from the Kubernetes secret. DB_CONNECTION_ARGS.sslcert-
Specifies the
postgresql.crtfile that contains the client certificate used to authenticate the connection to your CloudSQL database. This file is mounted in theQuaypod from the Kubernetes secret. DB_CONNECTION_ARGS.sslkey-
Specifies the
postgresql.keyfile that contains the private key associated with the client certificate. This file is mounted in theQuaypod from the Kubernetes secret. DB_CONNECTION_ARGS.threadlocals-
Specifies auto-rollback for connections.
DB_URI-
Specifies the URI that accesses your CloudSQL database. Must be appended with the
sslmodetype, yourroot.crt,postgresql.crt, andpostgresql.keyfiles. The SSL/TLS information included inDB_URImust match the information provided inDB_CONNECTION_ARGS. If you are using CloudSQL, you must include your database username and password in this variable.
-
-
Create the
configBundleSecretresource by entering the following command:$ oc create -n <namespace> -f quay-config-bundle.yamlExample outputsecret/quay-config-bundle created -
Update the
QuayRegistryYAML file to reference thequay-config-bundleobject by entering the following command:$ oc patch quayregistry <registry_name> -n <namespace> --type=merge -p '{"spec":{"configBundleSecret":"quay-config-bundle"}}'Example outputquayregistry.quay.redhat.com/example-registry patched -
Ensure that your
QuayRegistryYAML file has been updated to use the extra CA certificateconfigBundleSecretresource by entering the following command:$ oc get quayregistry <registry_name> -n <namespace> -o yamlExample output# ... configBundleSecret: quay-config-bundle # ...
Add trusted certificate authorities
Add trusted certificate authorities for LDAP, storage, and other TLS endpoints on standalone, container, and OpenShift Container Platform deployments.
Adding additional Certificate Authorities for Project Quay
Certificate Authorities (CAs) enable Project Quay to verify SSL/TLS connections to external services such as OIDC providers, LDAP servers, and storage backends. The steps for adding additional CAs differ between standalone deployments and Red Hat Quay on OpenShift Container Platform.
Adding additional Certificate Authorities to the Project Quay container
To add Certificate Authorities to a standalone Project Quay container, you can copy CA files into the extra_ca_certs directory in your configuration folder and restart the registry container. Project Quay uses these certificates to verify TLS connections to external services.
-
You have a CA for the desired service.
-
View the certificate to be added to the container by entering the following command:
$ cat storage.crtExample output-----BEGIN CERTIFICATE----- MIIDTTCCAjWgAwIBAgIJAMVr9ngjJhzbMA0GCSqGSIb3DQEBCwUAMD0xCzAJBgNV... -----END CERTIFICATE----- -
Create the
extra_ca_certsin the/configfolder of your Project Quay directory by entering the following command:$ mkdir -p /path/to/quay_config_folder/extra_ca_certs -
Copy the CA file to the
extra_ca_certsfolder. For example:$ cp storage.crt /path/to/quay_config_folder/extra_ca_certs/ -
Ensure that the
storage.crtfile exists within theextra_ca_certsfolder by entering the following command:$ tree /path/to/quay_config_folder/extra_ca_certsExample output/path/to/quay_config_folder/extra_ca_certs ├── storage.crt---- -
Obtain the
CONTAINER IDof yourQuayconsider by entering the following command:$ podman psExample outputCONTAINER ID IMAGE COMMAND CREATED STATUS PORTS 5a3e82c4a75f <registry>/<repo>/quay:{productminv} "/sbin/my_init" 24 hours ago Up 18 hours 0.0.0.0:80->80/tcp, 0.0.0.0:443->443/tcp, 443/tcp grave_keller -
Restart the container by entering the following command
$ podman restart 5a3e82c4a75f -
Confirm that the certificate was copied into the container namespace by running the following command:
$ podman exec -it 5a3e82c4a75f cat /etc/ssl/certs/storage.pemExample output-----BEGIN CERTIFICATE----- MIIDTTCCAjWgAwIBAgIJAMVr9ngjJhzbMA0GCSqGSIb3DQEBCwUAMD0xCzAJBgNV... -----END CERTIFICATE-----
Adding additional Certificate Authorities to Red Hat Quay on OpenShift Container Platform
On Red Hat Quay on OpenShift Container Platform, additional Certificate Authorities (CAs) in the configuration bundle are added to the registry trust store. Project Quay uses these CAs to verify TLS connections to external services.
This path is the same logical location as the extra_ca_certs directory used on standalone deployments. On Red Hat Quay on OpenShift Container Platform, you do not create that directory on a node yourself. Instead, add each CA PEM file to the configBundleSecret as its own Secret data entry whose key name begins with extra_ca_cert_. The Project Quay Operator extracts these keys when it reconciles the registry and writes the files under conf/stack/extra_ca_certs/. The file name in that directory is the key name with the extra_ca_cert_ prefix removed. For example, a Secret key extra_ca_cert_ldap-ca.pem is available at runtime as conf/stack/extra_ca_certs/ldap-ca.pem.
You do not add an extra_ca_certs list or block to config.yaml only to load those CAs on Red Hat Quay on OpenShift Container Platform. The supported approach is the extra_ca_cert_* keys in the bundle Secret, as shown in the procedures that follow.
When another setting requires an explicit path to one of those PEM files (for example, ssl_ca_path for a given integration), set the path in config.yaml to the runtime location under conf/stack/extra_ca_certs/, for example:
# ...
ssl_ca_path: conf/stack/extra_ca_certs/ldap-ca.pem
# ...
The following procedures show you how to download your existing configuration file, include additional CA files in the configBundleSecret, and re-apply the bundle so that OpenShift Container Platform deploys the updated configuration.
Adding additional Certificate Authorities to Red Hat Quay on OpenShift Container Platform
To add additional Certificate Authorities to Red Hat Quay on OpenShift Container Platform, you can extend the configBundleSecret with extra_ca_cert_* entries for each CA PEM file and update the QuayRegistry custom resource to reference the updated secret.
Each key name determines the file name under conf/stack/extra_ca_certs/ at runtime. Additional CAs are not declared as an extra_ca_certs field inside the config.yaml file. Each CA is a separate entry in the Secret: the key must start with extra_ca_cert_, and the remainder of the key name becomes the file name under conf/stack/extra_ca_certs/ after the Operator reconciles the registry.
-
You have base64 decoded the original config bundle into a
config.yamlfile. For more information, see Downloading the existing configuration. -
You have a Certificate Authority (CA) file or files.
-
Create a new YAML file, for example,
extra-ca-certificate-config-bundle-secret.yaml:$ touch extra-ca-certificate-config-bundle-secret.yaml -
Create the
extra-ca-certificate-config-bundle-secretresource.-
Create the resource by entering the following command:
$ oc -n <namespace> create secret generic extra-ca-certificate-config-bundle-secret \
  --from-file=config.yaml=</path/to/config.yaml> \
  --from-file=extra_ca_cert_<name-of-certificate-one>=<path/to/certificate_one> \
  --from-file=extra_ca_cert_<name-of-certificate-two>=<path/to/certificate_two> \
  --from-file=extra_ca_cert_<name-of-certificate-three>=<path/to/certificate_three> \
  --dry-run=client -o yaml > extra-ca-certificate-config-bundle-secret.yaml
where:
--from-file=config.yaml=</path/to/config.yaml>-
Specifies your base64 decoded
config.yamlfile. --from-file=extra_ca_cert_<name-of-certificate-one>=<path/to/certificate_one>-
Specifies the extra CA file to be added to the system trust bundle.
--from-file=extra_ca_cert_<name-of-certificate-two>=<path/to/certificate_two>-
Specifies a second CA file to be added into the system trust bundle. This parameter is optional.
--from-file=extra_ca_cert_<name-of-certificate-three>=<path/to/certificate_three>-
Specifies a third CA file to be added into the system trust bundle. This parameter is optional.
-
-
Optional. You can check the content of the
extra-ca-certificate-config-bundle-secret.yamlfile by entering the following command:$ cat extra-ca-certificate-config-bundle-secret.yamlExample outputapiVersion: v1 data: config.yaml: <example_scren>... extra_ca_cert_certificate-one: <example_secret>... extra_ca_cert_certificate-three: <example_secret>... extra_ca_cert_certificate-two: <example_secret>... kind: Secret metadata: creationTimestamp: null name: extra-ca-certificate-config-bundle-secret namespace: <namespace> -
Create the
configBundleSecretresource by entering the following command:$ oc create -n <namespace> -f extra-ca-certificate-config-bundle-secret.yamlExample outputsecret/extra-ca-certificate-config-bundle-secret created -
Update the
QuayRegistryYAML file to reference theextra-ca-certificate-config-bundle-secretobject by entering the following command:$ oc patch quayregistry <registry_name> -n <namespace> --type=merge -p '{"spec":{"configBundleSecret":"extra-ca-certificate-config-bundle-secret"}}'Example outputquayregistry.quay.redhat.com/example-registry patched -
Ensure that your
QuayRegistryYAML file has been updated to use the extra CA certificateconfigBundleSecretresource by entering the following command:$ oc get quayregistry <registry_name> -n <namespace> -o yamlExample output# ... configBundleSecret: extra-ca-certificate-config-bundle-secret # ...
Modifying the configuration file by using the CLI
To modify the config.yaml file for your Project Quay registry and enable new features, you can download the existing configuration from the configBundleSecret by using the CLI. After making changes, you can re-upload the configBundleSecret resource to apply the changes.
|
Note
|
Modifying the |
-
You are logged in to the OpenShift Container Platform cluster as a user with admin privileges.
-
Describe the
QuayRegistryresource by entering the following command:$ oc describe quayregistry -n <quay_namespace># ... Config Bundle Secret: example-registry-config-bundle-v123x # ... -
Obtain the secret data by entering the following command:
$ oc get secret -n <quay_namespace> <example-registry-config-bundle-v123x> -o jsonpath='{.data}'{ "config.yaml": "RkVBVFVSRV9VU0 ... MDAwMAo=" } -
Decode the data into a YAML file into the current directory by passing in the
>> config.yamlflag. For example:$ echo 'RkVBVFVSRV9VU0 ... MDAwMAo=' | base64 --decode >> config.yaml -
Make the desired changes to your
config.yamlfile, and then save the file asconfig.yaml. -
Create a new
configBundleSecretYAML by entering the following command.$ touch <new_configBundleSecret_name>.yaml -
Create the new
configBundleSecretresource, passing in theconfig.yamlfile` by entering the following command:$ oc -n <namespace> create secret generic <secret_name> \ --from-file=config.yaml=</path/to/config.yaml> \ --dry-run=client -o yaml > <new_configBundleSecret_name>.yamlwhere:
- </path/to/config.yaml>
-
Specifies your base64 decoded
config.yamlfile.
-
Create the
configBundleSecretresource by entering the following command:$ oc create -n <namespace> -f <new_configBundleSecret_name>.yamlsecret/config-bundle created -
Update the
QuayRegistryYAML file to reference the newconfigBundleSecretobject by entering the following command:$ oc patch quayregistry <registry_name> -n <namespace> --type=merge -p '{"spec":{"configBundleSecret":"<new_configBundleSecret_name>"}}'quayregistry.quay.redhat.com/example-registry patched
-
Verify that the
QuayRegistryCR has been updated with the newconfigBundleSecret:$ oc describe quayregistry -n <quay_namespace># ... Config Bundle Secret: <new_configBundleSecret_name> # ...After patching the registry, the Project Quay Operator automatically reconciles the changes.
Adding custom SSL/TLS certificates when Project Quay is deployed on Kubernetes
To add custom SSL/TLS certificates to your Project Quay deployment on Kubernetes, you can base64 encode the certificate, add it to the config secret, and restart the pods.
The following procedure works around the limitation where the superuser panel certificate upload function does not work with Kubernetes deployments.
-
Project Quay has been deployed.
-
You have a custom
ca.crtfile.
-
Base64 encode the contents of an SSL/TLS certificate by entering the following command:
$ cat ca.crt | base64 -w 0Example output...c1psWGpqeGlPQmNEWkJPMjJ5d0pDemVnR2QNCnRsbW9JdEF4YnFSdVd3PT0KLS0tLS1FTkQgQ0VSVElGSUNBVEUtLS0tLQo= -
Enter the following
kubectlcommand to edit thequay-enterprise-config-secretfile:$ kubectl --namespace quay-enterprise edit secret/quay-enterprise-config-secret -
Add an entry for the certificate and paste the full
base64encoded stringer under the entry. For example:custom-cert.crt: c1psWGpqeGlPQmNEWkJPMjJ5d0pDemVnR2QNCnRsbW9JdEF4YnFSdVd3PT0KLS0tLS1FTkQgQ0VSVElGSUNBVEUtLS0tLQo= -
Use the
kubectl deletecommand to remove all Project Quay pods. For example:$ kubectl delete pod quay-operator.v3.7.1-6f9d859bd-p5ftc quayregistry-clair-postgres-7487f5bd86-xnxpr quayregistry-quay-app-upgrade-xq2v6 quayregistry-quay-database-859d5445ff-cqthr quayregistry-quay-redis-84f888776f-hhgmsAfterwards, the Project Quay deployment automatically schedules replace pods with the new certificate data.
Authenticate users with LDAP
Configure LDAP authentication, restricted user and superuser filters, and troubleshoot common directory integration issues.
LDAP authentication setup for Project Quay
You can configure Lightweight Directory Access Protocol (LDAP) authentication for Project Quay in your config.yaml file. LDAP can create users on first login and can map selected users as restricted users or superusers.
Considerations when enabling LDAP
Before you enable LDAP for Project Quay, review how existing local usernames interact with directory accounts and how FEATURE_USER_CREATION affects first login.
Existing Project Quay deployments
Conflicts between usernames can arise when you enable LDAP for an existing Project Quay deployment that already has users configured. For example, one user, alice, was manually created in Project Quay prior to enabling LDAP. If the username alice also exists in the LDAP directory, Project Quay automatically creates a new user, alice-1, when alice logs in for the first time using LDAP. Project Quay then automatically maps the LDAP credentials to the alice account. For consistency reasons, this might be erroneous for your Project Quay deployment. Remove any potentially conflicting local account names from Project Quay prior to enabling LDAP.
Manual user creation and LDAP authentication
When Project Quay is configured for LDAP, LDAP-authenticated users are automatically created in the Project Quay database on first log in, if the configuration option FEATURE_USER_CREATION is set to true. If this option is set to false, the automatic user creation for LDAP users fails, and the user is not allowed to log in. In this scenario, the superuser needs to create the desired user account first. Conversely, if FEATURE_USER_CREATION is set to true, a user can still create an account from the Project Quay login screen, even if an equivalent user exists in LDAP.
Configuring LDAP for Project Quay
To configure LDAP authentication for Project Quay, you can update your config.yaml file with the required LDAP fields and restart the registry.
-
Update your
config.yamlfile directly to include the following relevant information:# ... AUTHENTICATION_TYPE: LDAP # ... LDAP_ADMIN_DN: uid=<name>,ou=Users,o=<organization_id>,dc=<example_domain_component>,dc=com LDAP_ADMIN_PASSWD: ABC123 LDAP_ALLOW_INSECURE_FALLBACK: false LDAP_BASE_DN: - dc=example - dc=com LDAP_EMAIL_ATTR: mail LDAP_UID_ATTR: uid LDAP_URI: ldap://<example_url>.com LDAP_USER_FILTER: (memberof=cn=developers,ou=Users,dc=<domain_name>,dc=com) LDAP_USER_RDN: - ou=people LDAP_SECONDARY_USER_RDNS: - ou=<example_organization_unit_one> - ou=<example_organization_unit_two> - ou=<example_organization_unit_three> - ou=<example_organization_unit_four> FEATURE_LDAP_CACHING: true LDAP_CACHE_TTL: 10 # ...where:
AUTHENTICATION_TYPE-
Specifies the authentication type. This field is required and must be set to
LDAP. LDAP_ADMIN_DN-
Specifies the admin DN for LDAP authentication. This field is required.
LDAP_ADMIN_PASSWD-
Specifies the admin password for LDAP authentication. This field is required.
LDAP_ALLOW_INSECURE_FALLBACK-
Specifies whether to allow SSL/TLS insecure fallback for LDAP authentication. This field is required.
LDAP_BASE_DN-
Specifies the base DN for LDAP authentication. This field is required.
LDAP_EMAIL_ATTR-
Specifies the email attribute for LDAP authentication. This field is required.
LDAP_UID_ATTR-
Specifies the UID attribute for LDAP authentication. This field is required.
LDAP_URI-
Specifies the LDAP URI. This field is required.
LDAP_USER_FILTER-
Specifies the user filter for LDAP authentication. This field is required.
LDAP_USER_RDN-
Specifies the user RDN for LDAP authentication. This field is required.
LDAP_SECONDARY_USER_RDNS-
Optional. Specifies secondary user relative DNs when user objects are located in multiple organizational units.
FEATURE_LDAP_CACHING-
Optional. Specifies whether to enable in-memory caching for LDAP permission check results (superuser, restricted user). Caching reduces LDAP server load. Defaults to
false. LDAP_CACHE_TTL-
Specifies the time-to-live, in seconds, for cached LDAP permission results. Defaults to
60.
-
After you have added all required LDAP fields, save the changes and restart your Project Quay deployment.
Enabling the LDAP_RESTRICTED_USER_FILTER configuration field
To mark selected LDAP users as restricted in Project Quay, you can set FEATURE_RESTRICTED_USERS and LDAP_RESTRICTED_USER_FILTER in your config.yaml file and restart the registry.
The LDAP_RESTRICTED_USER_FILTER configuration field is a subset of the LDAP_USER_FILTER configuration field. When configured, this option allows Project Quay administrators to configure LDAP users as restricted users when Project Quay uses LDAP as its authentication provider.
-
Your Project Quay deployment uses LDAP as its authentication provider.
-
You have configured the
LDAP_USER_FILTERfield in yourconfig.yamlfile.
-
In your deployment’s
config.yamlfile, add theLDAP_RESTRICTED_USER_FILTERparameter and specify the group of restricted users, for example,members:# ... AUTHENTICATION_TYPE: LDAP # ... FEATURE_RESTRICTED_USERS: true # ... LDAP_ADMIN_DN: uid=<name>,ou=Users,o=<organization_id>,dc=<example_domain_component>,dc=com LDAP_ADMIN_PASSWD: ABC123 LDAP_ALLOW_INSECURE_FALLBACK: false LDAP_BASE_DN: - o=<organization_id> - dc=<example_domain_component> - dc=com LDAP_EMAIL_ATTR: mail LDAP_UID_ATTR: uid LDAP_URI: ldap://<example_url>.com LDAP_USER_FILTER: (memberof=cn=developers,ou=Users,o=<example_organization_unit>,dc=<example_domain_component>,dc=com) LDAP_RESTRICTED_USER_FILTER: (<filterField>=<value>) LDAP_USER_RDN: - ou=<example_organization_unit> - o=<organization_id> - dc=<example_domain_component> - dc=com FEATURE_LDAP_CACHING: true LDAP_CACHE_TTL: 10 # ...where:
FEATURE_RESTRICTED_USERS-
Specifies whether restricted users are enabled. Must be set to
truewhen configuring an LDAP restricted user. LDAP_RESTRICTED_USER_FILTER-
Specifies the filter that configures selected users as restricted users.
-
Start, or restart, your Project Quay deployment.
-
After enabling the
LDAP_RESTRICTED_USER_FILTERfeature, your LDAP Project Quay users are restricted from reading and writing content, and creating organizations.
Enabling the LDAP_SUPERUSER_FILTER configuration field
To grant selected LDAP users superuser privileges in Project Quay, you can set LDAP_SUPERUSER_FILTER in your config.yaml file and restart the registry.
-
Your Project Quay deployment uses LDAP as its authentication provider.
-
You have configured the
LDAP_USER_FILTERfield in yourconfig.yamlfile.
-
In your deployment’s
config.yamlfile, add theLDAP_SUPERUSER_FILTERparameter and add the group of users you want configured as superusers, for example,root:# ... AUTHENTICATION_TYPE: LDAP # ... LDAP_ADMIN_DN: uid=<name>,ou=Users,o=<organization_id>,dc=<example_domain_component>,dc=com LDAP_ADMIN_PASSWD: ABC123 LDAP_ALLOW_INSECURE_FALLBACK: false LDAP_BASE_DN: - o=<organization_id> - dc=<example_domain_component> - dc=com LDAP_EMAIL_ATTR: mail LDAP_UID_ATTR: uid LDAP_URI: ldap://<example_url>.com LDAP_USER_FILTER: (memberof=cn=developers,ou=Users,o=<example_organization_unit>,dc=<example_domain_component>,dc=com) LDAP_SUPERUSER_FILTER: (<filterField>=<value>) LDAP_USER_RDN: - ou=<example_organization_unit> - o=<organization_id> - dc=<example_domain_component> - dc=com FEATURE_LDAP_CACHING: true LDAP_CACHE_TTL: 10 # ...where:
LDAP_SUPERUSER_FILTER-
Specifies the filter that configures selected users as superusers.
-
Start, or restart, your Project Quay deployment.
-
After enabling the
LDAP_SUPERUSER_FILTERfeature, your LDAP Project Quay users have superuser privileges. The following options are available to superusers:-
Manage users
-
Manage organizations
-
Manage service keys
-
View the change log
-
Query the usage logs
-
Create globally visible user messages
-
Common LDAP configuration issues
Invalid LDAP settings in Project Quay can return errors such as invalid credentials, failed superuser verification, or an inability to find the logged-in user.
The following errors might be returned with an invalid configuration.
-
Invalid credentials. If you receive this error, the Administrator DN or Administrator DN password values are incorrect. Ensure that you are providing accurate Administrator DN and password values.
-
Verification of superuser %USERNAME% failed. This error is returned for the following reasons:
-
The username has not been found.
-
The user does not exist in the remote authentication system.
-
LDAP authorization is configured improperly.
-
-
Cannot find the current logged in user. When configuring LDAP for Project Quay, situations can occur where the LDAP connection is established successfully using the username and password provided in the Administrator DN fields. However, if the current logged-in user cannot be found within the specified User Relative DN path using the UID Attribute or Mail Attribute fields, two potential reasons typically apply:
-
The current logged in user does not exist in the User Relative DN path.
-
The Administrator DN does not have rights to search or read the specified LDAP path.
To fix this issue, ensure that the logged in user is included in the User Relative DN path, or provide the correct permissions to the Administrator DN account.
-
Authenticate users with OIDC and single sign-on
Configure Microsoft Entra ID OIDC, Red Hat Single Sign-On, team synchronization, and On-Behalf-Of flows for enterprise login.
Configuring Microsoft Entra ID OIDC on a standalone deployment of Project Quay
To configure Microsoft Entra ID OIDC on a standalone Project Quay deployment, you can add an AZURE_LOGIN_CONFIG block to your config.yaml file and restart the registry.
By integrating Microsoft Entra ID authentication with Project Quay, your organization can take advantage of the centralized user management and security features offered by Microsoft Entra ID. Some features include the ability to manage user access to Project Quay repositories based on their Microsoft Entra ID roles and permissions, and the ability to enable multi-factor authentication and other security features provided by Microsoft Entra ID.
Azure Active Directory (Microsoft Entra ID) authentication for Project Quay allows users to authenticate and access Project Quay by using their Microsoft Entra ID credentials.
|
Note
|
|
-
Use the following reference and update your
config.yamlfile with your desired OIDC provider’s credentials:AUTHENTICATION_TYPE: OIDC # ... AZURE_LOGIN_CONFIG: CLIENT_ID: <client_id> CLIENT_SECRET: <client_secret> OIDC_SERVER: https://login.microsoftonline.com/<tenant-id>/v2.0/ SERVICE_NAME: Microsoft Entra ID OIDC_DISABLE_USER_ENDPOINT: true VERIFIED_EMAIL_CLAIM_NAME: <verified_email> USE_PKCE: True PKCE_METHOD: "S256" PUBLIC_CLIENT: True # ...where:
AZURE_LOGIN_CONFIG-
Specifies the parent key that holds the OIDC configuration settings. In this example, the parent key used is
AZURE_LOGIN_CONFIG. However, the stringAZUREcan be replaced with any arbitrary string based on your specific needs, for exampleABC123. The following strings are not accepted:GOOGLE,GITHUB. These strings are reserved for their respective identity platforms and require a specificconfig.yamlentry contingent upon which platform you are using. CLIENT_ID-
Specifies the client ID of the application that is being registered with the identity provider.
CLIENT_SECRET-
Specifies the client secret of the application that is being registered with the identity provider.
OIDC_SERVER-
Specifies the OIDC discovery base URL. The URL must end with a trailing
/because Project Quay uses path joining for OIDC discovery. For new deployments, use the Entra ID v2.0 endpoint. To accept both v1.0 and v2.0 tokens during migration, configure multi-issuer OIDC. SERVICE_NAME-
Specifies the name of the service that is being authenticated.
OIDC_DISABLE_USER_ENDPOINT-
Specifies whether to disable the
/userinfoendpoint. Set totruefor Microsoft Entra ID because Azure obtains user information from the token instead of calling the/userinfoendpoint. VERIFIED_EMAIL_CLAIM_NAME-
Specifies the name of the claim that is used to verify the email address of the user.
USE_PKCE-
Specifies whether to enable Proof Key for Code Exchange (PKCE) for OIDC authentication. Defaults to
false. PKCE_METHOD-
Specifies the code challenge method used to generate the
code_challengesent in the initial authorization request. Defaults toS256. PUBLIC_CLIENT-
Specifies whether to omit
client_secretduring the token request when the client is public. Defaults tofalse.
-
Proper configuration of Microsoft Entra ID results in three redirects with the following format:
-
https://QUAY_HOSTNAME/oauth2/<name_of_service>/callback -
https://QUAY_HOSTNAME/oauth2/<name_of_service>/callback/attach -
https://QUAY_HOSTNAME/oauth2/<name_of_service>/callback/cli
-
-
Restart your Project Quay deployment.
Configuring Microsoft Entra ID v2 and multi-issuer OIDC
To accept Microsoft Entra ID v2.0 tokens and On-Behalf-Of API flows in Project Quay, you can configure multi-issuer and multi-audience settings in your OIDC *_LOGIN_CONFIG block.
This support enables Microsoft Entra ID v2.0 access tokens, dual v1.0 and v2.0 acceptance during migration, and On-Behalf-Of (OBO) API flows used by integrations such as Red Hat Developer Hub (RHDH).
-
You have an Entra ID app registration for Project Quay with a client secret and redirect URIs for your Project Quay hostname.
-
You can edit the Project Quay
config.yamlfile or OperatorconfigBundleSecretresource.
-
In the Azure Portal, open your Project Quay app registration and set
requestedAccessTokenVersionto2in the app manifest. The field might appear asapi.requestedAccessTokenVersion.For OBO flows, expose an API on the Project Quay app registration, for example
api://quay-api, and grant the upstream application permission to that scope. -
Update your
*_LOGIN_CONFIGblock with the v2.0 discovery endpoint and multi-issuer settings. For example:AUTHENTICATION_TYPE: OIDC # ... AZURE_LOGIN_CONFIG: CLIENT_ID: <quay_app_client_id> CLIENT_SECRET: <quay_app_client_secret> OIDC_SERVER: https://login.microsoftonline.com/<tenant-id>/v2.0/ SERVICE_NAME: Microsoft Entra ID OIDC_DISABLE_USER_ENDPOINT: true OIDC_ISSUERS: - https://sts.windows.net/<tenant-id>/ - https://login.microsoftonline.com/<tenant-id>/v2.0 OIDC_AUDIENCES: - <quay_app_client_id> - api://quay-api OIDC_ALLOWED_CLIENTS: - <quay_app_client_id> - <upstream_app_client_id> USE_PKCE: true PKCE_METHOD: "S256" PUBLIC_CLIENT: true # ... -
Restart your Project Quay deployment or reconcile the Operator so the updated configuration is applied.
Note-
Set
OIDC_SERVERto the v2.0 endpoint. The v2.0 JWKS endpoint includes v1.0 signing keys, so one discovery URL supports both token versions. -
If you set
OIDC_ALLOWED_CLIENTS, include your Project Quay application’s ownCLIENT_ID. Direct user logins setazpto the application’s client ID. OmitOIDC_ALLOWED_CLIENTSif you do not need to restrict OBO clients. -
Do not request Microsoft Graph scopes such as
openid profile emailwhen you need tokens with a custom audience. Use application-specific scopes such asapi://quay-api/registry.accessinstead.
-
Configuring On-Behalf-Of (OBO) flows
To allow an upstream service to call Project Quay APIs on behalf of authenticated users, you can configure On-Behalf-Of (OBO) audiences and allowed clients in your Entra ID OIDC settings.
-
In the Azure Portal, expose an API on the Project Quay app registration and add a scope, for example
registry.accessunderapi://quay-api. -
Create a second app registration for the upstream service and grant it permission to the Project Quay API scope.
-
Add the exposed API identifier to
OIDC_AUDIENCESin your Project Quay configuration, for exampleapi://quay-api. -
Add the upstream application’s client ID to
OIDC_ALLOWED_CLIENTS.OBO tokens have
aud: api://quay-apiandazp: <upstream_client_id>. Project Quay validates both claims.
Troubleshooting Microsoft Entra ID OIDC
Use this reference to resolve common Microsoft Entra ID OIDC errors in Project Quay, including issuer, audience, allowed client, and JWKS signature failures.
| Error or symptom | Resolution |
|---|---|
Issuer not configured |
The token |
Audience doesn’t match |
The token |
Client is not in the allowed clients list |
The token |
Signature verification failed |
JWKS keys from |
OIDC discovery fails |
|
Configuring Red Hat Single Sign-On for Project Quay
You can configure Red Hat Single Sign-On (RH-SSO) as an OpenID Connect provider for Project Quay on OpenShift Container Platform. Create an RH-SSO client, then add an RHSSO_LOGIN_CONFIG block to your Operator config bundle.
Based on the Keycloak project, Red Hat Single Sign-On (RH-SSO) is an open source identity and access management (IAM) solution provided by Red Hat. RH-SSO allows organizations to manage user identities, secure applications, and enforce access control policies across their systems and applications. It also provides a unified authentication and authorization framework, which allows users to log in one time and gain access to multiple applications and resources without needing to re-authenticate.
By configuring Red Hat Single Sign-On on Project Quay, you can create a seamless authentication integration between Project Quay and other application platforms like OpenShift Container Platform.
Configuring the Red Hat Single Sign-On Operator for use with the Project Quay Operator
To prepare Red Hat Single Sign-On for Project Quay on OpenShift Container Platform, you can create a confidential OIDC client in the RH-SSO Admin Console and copy the client secret.
-
You have configured the Red Hat Single Sign-On Operator.
-
You have configured SSL/TLS for your Red Hat Quay on OpenShift Container Platform deployment and for Red Hat Single Sign-On.
-
You have generated a single Certificate Authority (CA) and uploaded it to your Red Hat Single Sign-On Operator and to your Project Quay configuration.
-
Navigate to the Red Hat Single Sign-On Admin Console.
-
On the OpenShift Container Platform Web Console, navigate to Network → Route.
-
Select the Red Hat Single Sign-On project from the drop-down list.
-
Find the Red Hat Single Sign-On Admin Console in the Routes table.
-
-
Select the Realm that you use to configure Project Quay.
-
Click Clients under the Configure section of the navigation panel, and then click Create to add a new OIDC client for Project Quay.
-
Enter the following information:
-
Client ID:
quay-enterprise -
Client Protocol:
openid-connect -
Root URL:
https://<quay_endpoint>/
-
-
Click Save. This results in a redirect to the Clients setting panel.
-
Navigate to Access Type and select Confidential.
-
Navigate to Valid Redirect URIs. You must provide three redirect URIs. The value should be the fully qualified domain name of the Project Quay registry appended with
/oauth2/redhatsso/callback. For example:-
https://<quay_endpoint>/oauth2/redhatsso/callback -
https://<quay_endpoint>/oauth2/redhatsso/callback/attach -
https://<quay_endpoint>/oauth2/redhatsso/callback/cli
-
-
Click Save and navigate to the new Credentials setting.
-
Copy the value of the Secret.
Configuring the Project Quay Operator to use Red Hat Single Sign-On
To enable Red Hat Single Sign-On authentication for an Operator-based Project Quay deployment, you can add an RHSSO_LOGIN_CONFIG block to your config bundle and restart the registry.
-
You have configured the Red Hat Single Sign-On Operator.
-
You have configured SSL/TLS for your Red Hat Quay on OpenShift Container Platform deployment and for Red Hat Single Sign-On.
-
You have generated a single Certificate Authority (CA) and uploaded it to your Red Hat Single Sign-On Operator and to your Project Quay configuration.
-
Edit your Project Quay
config.yamlfile by navigating to Operators → Installed Operators → Red Hat Quay → Quay Registry → Config Bundle Secret. Then, click Actions → Edit Secret. Alternatively, you can update theconfig.yamlfile locally. -
Add the following information to your Red Hat Quay on OpenShift Container Platform
config.yamlfile:# ... RHSSO_LOGIN_CONFIG: CLIENT_ID: <client_id> CLIENT_SECRET: <client_secret> OIDC_SERVER: <oidc_server_url> SERVICE_NAME: <service_name> SERVICE_ICON: <service_icon> VERIFIED_EMAIL_CLAIM_NAME: <example_email_address> PREFERRED_USERNAME_CLAIM_NAME: <preferred_username> LOGIN_SCOPES: [ 'openid', 'roles' ] USE_PKCE: true PKCE_METHOD: "S256" # ...where:
RHSSO_LOGIN_CONFIG-
Specifies the parent key that holds the OIDC configuration settings. In this example, the parent key used is
RHSSO_LOGIN_CONFIG. The string can be replaced with any arbitrary string based on your specific needs, for exampleABC123. However, the stringsGOOGLEandGITHUBare not accepted. These strings are reserved for their respective identity platforms and require a specificconfig.yamlentry contingent upon which platform you are using. CLIENT_ID-
Specifies the client ID of the application that is being registered with the identity provider. For example,
quay. CLIENT_SECRET-
Specifies the client secret.
OIDC_SERVER-
Specifies the fully qualified domain name (FQDN) of the Red Hat Single Sign-On instance, appended with
/auth/realms/and the Realm name. You must include the forward slash at the end, for example,https://sso-redhat.example.com/auth/realms/<your_realm_name>/. SERVICE_NAME-
Specifies the name that is displayed on the Project Quay login page, for example,
Red Hat Single Sign-On. SERVICE_ICON-
Specifies the icon on the login screen. For example,
/static/img/RedHat.svg. VERIFIED_EMAIL_CLAIM_NAME-
Specifies the name of the claim that is used to verify the email address of the user.
PREFERRED_USERNAME_CLAIM_NAME-
Specifies the name of the claim that is used for the preferred username of the user.
LOGIN_SCOPES-
Specifies the scopes to send to the OIDC provider when performing the login flow, for example,
openid. USE_PKCE-
Specifies whether to enable Proof Key for Code Exchange (PKCE). Defaults to
false. PKCE_METHOD-
Specifies the code challenge method used to generate the
code_challengesent in the initial authorization request. Defaults toS256.
-
Restart your Red Hat Quay on OpenShift Container Platform deployment with Red Hat Single Sign-On enabled.
Team synchronization for Project Quay OIDC deployments
You can sync Project Quay team membership with groups from an OpenID Connect (OIDC) identity provider. Enable team syncing in your config.yaml file, then configure directory sync for a team in the UI.
Enabling synchronization for Project Quay OIDC deployments
To enable team synchronization when your Project Quay deployment uses an OIDC authenticator, you can set the team syncing fields in your config.yaml file and restart the registry.
|
Important
|
The following procedure does not use a specific OIDC provider. Instead, it provides a general outline of how best to approach team synchronization between an OIDC provider and Project Quay. Any OIDC provider can be used to enable team synchronization, however, setup might vary depending on your provider. |
-
Update your
config.yamlfile with the following information:AUTHENTICATION_TYPE: OIDC # ... OIDC_LOGIN_CONFIG: CLIENT_ID: CLIENT_SECRET: OIDC_SERVER: SERVICE_NAME: PREFERRED_GROUP_CLAIM_NAME: LOGIN_SCOPES: [ 'openid', '<example_scope>' ] OIDC_DISABLE_USER_ENDPOINT: false # ... FEATURE_TEAM_SYNCING: true FEATURE_NONSUPERUSER_TEAM_SYNCING_SETUP: true FEATURE_UI_V2: true # ...where:
CLIENT_ID-
Specifies the registered OIDC client ID for this Project Quay instance. This field is required.
CLIENT_SECRET-
Specifies the registered OIDC client secret for this Project Quay instance. This field is required.
OIDC_SERVER-
Specifies the address of the OIDC server that is being used for authentication. This URL should be such that a
GETrequest to<OIDC_SERVER>/.well-known/openid-configurationreturns the provider’s configuration information. This field is required. SERVICE_NAME-
Specifies the name of the service that is being authenticated. This field is required.
PREFERRED_GROUP_CLAIM_NAME-
Specifies the key name within the OIDC token payload that holds information about the user’s group memberships. This field allows the authentication system to extract group membership information from the OIDC token so that it can be used with Project Quay. This field is required.
LOGIN_SCOPES-
Specifies the scopes Project Quay requests during login. Must include
'openid'. Each scope must also be listed in the identity provider’sscopes_supportedfrom/.well-known/openid-configuration. This field is required. OIDC_DISABLE_USER_ENDPOINT-
Specifies whether to allow or disable the
/userinfoendpoint. If using Azure Entra ID, set this field totrue. Defaults tofalse. FEATURE_TEAM_SYNCING-
Specifies whether to allow team membership to be synced from a backing group in the authentication engine. This field is required.
FEATURE_NONSUPERUSER_TEAM_SYNCING_SETUP-
Optional. If enabled, non-superusers can configure team synchronization.
-
Restart your Project Quay registry.
Setting up your Project Quay deployment for team synchronization
To sync a Project Quay team with an OIDC group, you can create an organization and team in the UI, enable directory sync, and verify membership changes from the identity provider.
-
You have enabled team synchronization for your OIDC-authenticated Project Quay deployment.
-
Log in to your Project Quay registry by using your OIDC provider.
-
On the Project Quay v2 UI dashboard, click Create Organization.
-
Enter an organization name, for example,
test-org. -
Click the name of the organization.
-
In the navigation pane, click Teams and membership.
-
Click Create new team and enter a name, for example,
testteam. -
On the Create team pop-up:
-
Optional. Add this team to a repository.
-
Add a team member, for example,
user1, by typing in the user’s account name. -
Add a robot account to this team. This page provides the option to create a robot account.
-
-
Click Next.
-
On the Review and Finish page, review the information that you have provided and click Review and Finish.
-
To enable team synchronization for your Project Quay OIDC deployment, click Enable Directory Sync on the Teams and membership page.
-
You are prompted to enter the group Object ID if your OIDC authenticator is Azure Entra ID, or the group name if using a different provider.
WarningAfter you enable team syncing, membership of users who are already part of the team is revoked. The OIDC group is the single source of truth. This action is not reversible. Team user membership from within Project Quay is read-only.
-
Click Enable Sync.
-
You are returned to the Teams and membership page. Note that users of this team are removed and are re-added upon logging back in. At this stage, only the robot account is still part of the team.
A banner at the top of the page confirms that the team is synced:
This team is synchronized with a group in OIDC and its user membership is therefore read-only.By clicking the Directory Synchronization Config accordion, the OIDC group that your deployment syncs with appears.
-
Log out of your Project Quay registry.
-
Log back in to your Project Quay registry.
-
Click Organizations → test-org → test-team → Teams and memberships.
user1now appears as a team member for this team. -
Navigate to your OIDC provider’s administration console.
-
Navigate to the Users page of your OIDC provider. The name of this page varies depending on your provider.
-
Click the name of the user associated with Project Quay, for example,
user1. -
Remove the user from the group in the configured identity provider.
-
Remove, or unassign, the access permissions from the user.
-
Log in to your Project Quay registry.
-
Click Organizations → test-org → test-team → Teams and memberships.
user1has been removed from this team.
Eliminate long-lived robot credentials with keyless authentication
Configure keyless robot account federation to exchange short-lived OAuth2 tokens for registry access.
Keyless authentication with robot accounts
With keyless authentication in Project Quay, you can exchange an OIDC token for a short-lived robot account token that expires after one hour.
In previous versions of Project Quay, robot account tokens were valid for the lifetime of the token unless deleted or regenerated. Tokens that do not expire have security implications for users who do not want to store long-term passwords or manage the deletion or regeneration of authentication tokens.
Keyless authentication reduces the risk of robot token exposure by removing exchanged tokens after one hour.
Configuring keyless authentication with robot accounts is a multi-step procedure that requires setting a robot federation, generating an OAuth2 token from your OIDC provider, and exchanging the OAuth2 token for a robot account access token.
Generating an OAuth2 token with Red Hat Single Sign-On
To exchange an external OIDC token for a Project Quay robot account token, you can first generate an OAuth2 token by using Red Hat Single Sign-On.
-
On the Red Hat Single Sign-On UI:
-
Click Clients and then the name of the application or service that can request authentication of a user.
-
On the Settings page of your client, ensure that the following options are set or enabled:
-
Client ID
-
Valid redirect URI
-
Client authentication
-
Authorization
-
Standard flow
-
Direct access grants
NoteSettings can differ depending on your setup.
-
-
On the Credentials page, store the Client Secret for future use.
-
On the Users page, click Add user and enter a username, for example,
service-account-quaydev. Then, click Create. -
Click the name of the user, for example service-account-quaydev on the Users page.
-
Click the Credentials tab → Set password → and provide a password for the user. If warranted, you can make this password temporary by selecting the Temporary option.
-
Click the Realm settings tab → OpenID Endpoint Configuration. Store the
/protocol/openid-connect/tokenendpoint. For example:http://localhost:8080/realms/master/protocol/openid-connect/token
-
-
On a web browser, navigate to the following URL:
http://<keycloak_url>/realms/<realm_name>/protocol/openid-connect/auth?response_type=code&client_id=<client_id> -
When prompted, log in with the service-account-quaydev user and the temporary password you set. Complete the login by providing the required information and setting a permanent password if necessary.
-
You are redirected to the URI address provided for your client. For example:
https://localhost:3000/cb?session_state=5c9bce22-6b85-4654-b716-e9bbb3e755bc&iss=http%3A%2F%2Flocalhost%3A8080%2Frealms%2Fmaster&code=ea5b76eb-47a5-4e5d-8f71-0892178250db.5c9bce22-6b85-4654-b716-e9bbb3e755bc.cdffafbc-20fb-42b9-b254-866017057f43Take note of the
codeprovided in the address. For example:code=ea5b76eb-47a5-4e5d-8f71-0892178250db.5c9bce22-6b85-4654-b716-e9bbb3e755bc.cdffafbc-20fb-42b9-b254-866017057f43NoteThis is a temporary code that can only be used one time. If necessary, you can refresh the page or revisit the URL to obtain another code.
-
On your terminal, use the following
curl -X POSTcommand to generate a temporary OAuth2 access token:$ curl -X POST "http://localhost:8080/realms/master/protocol/openid-connect/token" \ -H "Content-Type: application/x-www-form-urlencoded" \ -d "client_id=quaydev" \ -d "client_secret=<client_secret>" \ -d "grant_type=authorization_code" \ -d "code=ea5b76eb-47a5-4e5d-8f71-0892178250db.5c9bce22-6b85-4654-b716-e9bbb3e755bc.cdffafbc-20fb-42b9-b254-866017057f43"where:
http://localhost:8080/realms/master/protocol/openid-connect/token-
Specifies the
protocol/openid-connect/tokenendpoint found on the Realm settings page of the Red Hat Single Sign-On UI. quaydev-
Specifies the Client ID used for this procedure.
<client_secret>-
Specifies the Client Secret for the Client ID.
ea5b76eb-47a5-4e5d-8f71-0892178250db.5c9bce22-6b85-4654-b716-e9bbb3e755bc.cdffafbc-20fb-42b9-b254-866017057f43-
Specifies the code returned from the redirect URI.
Example output{"access_token":"<access_token>...", "expires_in":60,"refresh_expires_in":1800,"refresh_token":"<refresh_token>","token_type":"Bearer","not-before-policy":0,"session_state":"5c9bce22-6b85-4654-b716-e9bbb3e755bc","scope":"profile email"}
-
Store the
access_tokenfrom the previous step so that you can exchange it for a Project Quay robot account token in the following procedure.
Setting up a robot account federation by using the UI
To configure robot account federation in Project Quay, you can map an OIDC issuer and subject to a robot account in the v2 UI.
This procedure uses Red Hat Single Sign-On, which is based on the Keycloak project. The steps, and the information used to configure a robot account federation, vary depending on your OIDC provider.
-
You have created an organization. The following example uses
fed_test. -
You have created a robot account. The following example uses
fest_test+robot1. -
You have configured OIDC for your Project Quay deployment. The following example uses Red Hat Single Sign-On.
-
On the Red Hat Single Sign-On main page:
-
Select the appropriate realm that is authenticated for use with Project Quay. Store the issuer URL, for example,
https://keycloak-auth-realm.quayadmin.org/realms/quayrealm. -
Click Users → the name of the user to be linked with the robot account for authentication. You must use the same user account that you used when generating the OAuth2 access token.
-
On the Details page, store the ID of the user, for example,
449e14f8-9eb5-4d59-a63e-b7a77c75f770.NoteThe information collected in this step varies depending on your OIDC provider. For example, with Red Hat Single Sign-On, the ID of a user is used as the Subject to configure the robot account federation in a subsequent step. For a different OIDC provider, like Microsoft Entra ID, this information is stored as the Subject.
-
-
On your Project Quay registry:
-
Navigate to Organizations and click the name of your organization, for example, fed_test.
-
Click Robot Accounts.
-
Click the menu kebab → Set robot federation.
-
Click the + symbol.
-
In the popup window, include the following information:
-
Issuer URL:
https://keycloak-auth-realm.quayadmin.org/realms/quayrealm. For Red Hat Single Sign-On, this is the URL of your Red Hat Single Sign-On realm. This might vary depending on your OIDC provider. -
Subject:
449e14f8-9eb5-4d59-a63e-b7a77c75f770. For Red Hat Single Sign-On, the Subject is the ID of your Red Hat Single Sign-On user. This varies depending on your OIDC provider. For example, if you are using Microsoft Entra ID, the Subject is the Subject of your Entra ID user.
-
-
Click Save.
NoteThe Project Quay v2 UI federation modal accepts Issuer URL and Subject only.
-
Configuring federation audiences
To manage robot federation entries in Project Quay, you can use the robot federation API to set the issuer and subject that map an OIDC identity to a robot account.
Each robot federation entry maps an external OIDC identity (issuer and subject) to a Project Quay robot account. Starting in Project Quay {producty}, robot federation supports an optional audiences array on each entry for token audience validation during federated robot token exchange (GET /oauth2/federation/robot/token).
|
Important
|
In Project Quay 3.18, create and update requests persist |
When audiences is present in stored federation configuration, configure it to match the aud claim values your OIDC provider issues—for example, a custom API audience such as api://quay-api for Microsoft Entra ID v2.0 tokens, or your OIDC client ID for standard flows. For Microsoft Entra ID v2.0, use an application-specific audience rather than the Microsoft Graph audience.
-
You have created an organization and robot account.
-
You have configured OIDC for your Project Quay deployment.
-
You have the issuer URL and subject identifier from your OIDC provider.
-
Create or update the robot federation configuration by using
POST /api/v1/organization/{orgname}/robots/{robot_shortname}/federation. Includeissuerandsubjectin each federation entry. For example:$ curl -X POST "https://<quay-server.example.com>/api/v1/organization/fed_test/robots/robot1/federation" \ -H "Authorization: Bearer <your_access_token>" \ -H "Content-Type: application/json" \ -d '[ { "issuer": "https://login.microsoftonline.com/<tenant-id>/v2.0", "subject": "<user-object-id>" } ]' -
After you configure federation, exchange an external OIDC access token for a Project Quay robot token.
Exchanging an OAuth2 access token for a Project Quay robot account token
To authenticate with a federated robot account in Project Quay, you can exchange an OAuth2 access token for a short-lived robot token by using a Python script.
|
Note
|
The following example uses a Python script to exchange the OAuth2 access token for a Project Quay robot account token. |
-
You have the
python3CLI tool installed.
-
Save the following Python script in a
.pyfile, for example,robot_fed_token_auth.py:import requests import os TOKEN=os.environ.get('TOKEN') robot_user = "fed-test+robot1" def get_quay_robot_token(fed_token): URL = "https://<quay-server.example.com>/oauth2/federation/robot/token" response = requests.get(URL, auth=(robot_user,fed_token)) print(response) print(response.text) if __name__ == "__main__": get_quay_robot_token(TOKEN)where:
response = requests.get(URL, auth=(robot_user,fed_token))-
Specifies the request that retrieves the robot token. If your Project Quay deployment is using custom SSL/TLS certificates, the response must be
response = requests.get(URL,auth=(robot_user,fed_token),verify=False), which includes theverify=Falseflag.
-
Export the OAuth2 access token as
TOKEN. For example:$ export TOKEN=<export_token>... -
Run the
robot_fed_token_auth.pyscript by entering the following command:$ python3 robot_fed_token_auth.pyExample output<Response [200]> {"token": "string..."}ImportantThis token expires after one hour. After one hour, you must generate a new token.
-
Export the robot account access token as
QUAY_TOKEN. For example:$ export QUAY_TOKEN=<quay_token>
Pushing and pulling images
To verify federated robot account access in Project Quay, you can log in with the robot token and pull images that the robot is allowed to access.
-
You have exported the OAuth2 access token into a new robot account access token.
-
Log in to your Project Quay registry by using the
fed_test+robot1robot account and theQUAY_TOKENaccess token. For example:$ podman login <quay-server.example.com> -u fed_test+robot1 -p $QUAY_TOKEN -
Pull an image from a Project Quay repository for which the robot account has the proper permissions. For example:
$ podman pull <quay-server.example.com>/<repository_name>/<image_name>Example outputGetting image source signatures Copying blob 900e6061671b done Copying config 8135583d97 done Writing manifest to image destination Storing signatures 8135583d97feb82398909c9c97607159e6db2c4ca2c885c0b8f590ee0f9fe90d 0.57user 0.11system 0:00.99elapsed 68%CPU (0avgtext+0avgdata 78716maxresident)k 800inputs+15424outputs (18major+6528minor)pagefaults 0swaps -
Attempt to pull an image from a Project Quay repository for which the robot account does not have the proper permissions. For example:
$ podman pull <quay-server.example.com>/<different_repository_name>/<image_name>Example outputError: initializing source docker://quay-server.example.com/example_repository/busybox:latest: reading manifest in quay-server.example.com/example_repository/busybox: unauthorized: access to the requested resource is not authorizedAfter one hour, the credentials for this robot account expire. Afterwards, you must generate a new access token for this robot account.
Ensure FIPS compliance for the registry
Enable FIPS compliance for Red Hat Quay and Clair to meet cryptographic module requirements.
Enabling FIPS compliance
To enable FIPS compliance for your Project Quay deployment, you can set the FEATURE_FIPS configuration field to True in your config.yaml file. This ensures that Project Quay uses only FIPS-validated cryptographic modules for securing sensitive data.
-
If you are running a standalone deployment of Project Quay, your Red Hat Enterprise Linux (RHEL) deployment is version 8 or later and FIPS-enabled.
-
If you are deploying Red Hat Quay on OpenShift Container Platform, OpenShift Container Platform is version 4.10 or later.
-
Your Project Quay version is 3.5.0 or later.
-
If you are using the Red Hat Quay on OpenShift Container Platform on an IBM Power or IBM Z cluster:
-
OpenShift Container Platform version 4.14 or later is required
-
Project Quay version 3.10 or later is required
-
-
You have administrative privileges for your Project Quay deployment.
-
In your Project Quay
config.yamlfile, set theFEATURE_FIPSconfiguration field toTrue. For example:# ... FEATURE_FIPS = true # ...With
FEATURE_FIPSset toTrue, Project Quay runs using FIPS-compliant hash functions.
Set repository permissions and visibility
Set default permissions, adjust repository access, and control repository visibility by using the UI or API.
Creating and managing default permissions by using the UI
To grant access automatically when users create repositories in Project Quay, you can configure default permissions in the UI. Default permissions apply to a selected user, robot, or team in addition to the repository creator.
-
Click the name of an organization.
-
Click Default permissions.
-
Click Create default permissions. A toggle drawer appears.
-
Select either Anyone or Specific user to create a default permission when a repository is created.
-
If selecting Anyone, the following information must be provided:
-
Applied to. Search, invite, or add a user/robot/team.
-
Permission. Set the permission to one of Read, Write, or Admin.
-
-
If selecting Specific user, the following information must be provided:
-
Repository creator. Provide either a user or robot account.
-
Applied to. Provide a username, robot account, or team name.
-
Permission. Set the permission to one of Read, Write, or Admin.
-
-
-
Click Create default permission. A confirmation box appears, returning the following alert: Successfully created default permission for creator.
Creating and managing default permissions by using the API
To create, update, or delete default permissions for an Project Quay organization, you can use the API. Default permissions grant access when a repository is created.
-
You have Created an OAuth access token.
-
Enter the following command to create a default permission with the
POST /api/v1/organization/{orgname}/prototypesendpoint:$ curl -X POST -H "Authorization: Bearer <bearer_token>" -H "Content-Type: application/json" --data '{ "role": "<admin_read_or_write>", "delegate": { "name": "<username>", "kind": "user" }, "activating_user": { "name": "<robot_name>" } }' https://<quay-server.example.com>/api/v1/organization/<organization_name>/prototypesExample output{"activating_user": {"name": "test-org+test", "is_robot": true, "kind": "user", "is_org_member": true, "avatar": {"name": "test-org+test", "hash": "aa85264436fe9839e7160bf349100a9b71403a5e9ec684d5b5e9571f6c821370", "color": "#8c564b", "kind": "robot"}}, "delegate": {"name": "testuser", "is_robot": false, "kind": "user", "is_org_member": false, "avatar": {"name": "testuser", "hash": "f660ab912ec121d1b1e928a0bb4bc61b15f5ad44d5efdc4e1c92a25e99b8e44a", "color": "#6b6ecf", "kind": "user"}}, "role": "admin", "id": "977dc2bc-bc75-411d-82b3-604e5b79a493"} -
Enter the following command to update a default permission using the
PUT /api/v1/organization/{orgname}/prototypes/{prototypeid}endpoint, for example, if you want to change the permission type. You must include the ID that was returned when you created the policy.$ curl -X PUT \ -H "Authorization: Bearer <bearer_token>" \ -H "Content-Type: application/json" \ --data '{ "role": "write" }' \ https://<quay-server.example.com>/api/v1/organization/<organization_name>/prototypes/<prototypeid>Example output{"activating_user": {"name": "test-org+test", "is_robot": true, "kind": "user", "is_org_member": true, "avatar": {"name": "test-org+test", "hash": "aa85264436fe9839e7160bf349100a9b71403a5e9ec684d5b5e9571f6c821370", "color": "#8c564b", "kind": "robot"}}, "delegate": {"name": "testuser", "is_robot": false, "kind": "user", "is_org_member": false, "avatar": {"name": "testuser", "hash": "f660ab912ec121d1b1e928a0bb4bc61b15f5ad44d5efdc4e1c92a25e99b8e44a", "color": "#6b6ecf", "kind": "user"}}, "role": "write", "id": "977dc2bc-bc75-411d-82b3-604e5b79a493"} -
You can delete the permission by entering the
DELETE /api/v1/organization/{orgname}/prototypes/{prototypeid}command:curl -X DELETE \ -H "Authorization: Bearer <bearer_token>" \ -H "Accept: application/json" \ https://<quay-server.example.com>/api/v1/organization/<organization_name>/prototypes/<prototype_id>This command does not return an output. Instead, you can obtain a list of all permissions by entering the
GET /api/v1/organization/{orgname}/prototypescommand:$ curl -X GET \ -H "Authorization: Bearer <bearer_token>" \ -H "Accept: application/json" \ https://<quay-server.example.com>/api/v1/organization/<organization_name>/prototypesExample output{"prototypes": []}
Adjusting access settings for a repository by using the UI
To change access for a user or robot account on a repository, you can use the Quay UI. You can set Read, Write, or Admin permissions.
-
You have created a user account or robot account.
-
Log into Quay.
-
On the v2 UI, click Repositories.
-
Click the name of a repository, for example,
quayadmin/busybox. -
Click the Settings tab.
-
Optional. Click User and robot permissions. You can adjust the settings for a user or robot account by clicking the dropdown menu option under Permissions. You can change the settings to Read, Write, or Admin.
-
Read. The User or Robot Account can view and pull from the repository.
-
Write. The User or Robot Account can read (pull) from and write (push) to the repository.
-
Admin. The User or Robot account has access to pull from, and push to, the repository, plus the ability to do administrative tasks associated with the repository.
-
Adjusting access settings for a repository by using the API
To change or remove access for a user or robot account on a repository, you can use the Project Quay API. You can grant Read, Write, or Admin permissions, or delete an existing permission.
-
You have created a user account or robot account.
-
You have Created an OAuth access token.
-
Enter the following
PUT /api/v1/repository/{repository}/permissions/user/{username}command to change the permissions of a user:$ curl -X PUT \ -H "Authorization: Bearer <bearer_token>" \ -H "Content-Type: application/json" \ -d '{"role": "admin"}' \ https://<quay-server.example.com>/api/v1/repository/<namespace>/<repository>/permissions/user/<username>Example output{"role": "admin", "name": "quayadmin+test", "is_robot": true, "avatar": {"name": "quayadmin+test", "hash": "ca9afae0a9d3ca322fc8a7a866e8476dd6c98de543decd186ae090e420a88feb", "color": "#8c564b", "kind": "robot"}} -
To delete the current permission, you can enter the
DELETE /api/v1/repository/{repository}/permissions/user/{username}command:$ curl -X DELETE \ -H "Authorization: Bearer <bearer_token>" \ -H "Accept: application/json" \ https://<quay-server.example.com>/api/v1/repository/<namespace>/<repository>/permissions/user/<username>This command does not return any output in the CLI. Instead, you can confirm deletion by entering the
GET /api/v1/repository/{repository}/permissions/user/command:$ curl -X GET \ -H "Authorization: Bearer <bearer_token>" \ -H "Accept: application/json" \ https://<quay-server.example.com>/api/v1/repository/<namespace>/<repository>/permissions/user/<username>/Example output{"message":"User does not have permission for repo."}
Adjusting repository visibility by using the UI
To control who can pull or interact with a repository, you can adjust its visibility to public or private by using the Project Quay UI.
-
On the Project Quay UI, click Repositories in the navigation pane.
-
Click the name of a repository.
-
Click Settings in the navigation pane.
-
Click Repository visibility.
-
Click Make private. The repository is made private, and only users on the permissions list can view and interact with it.
Adjusting repository visibility by using the API
To control who can pull or interact with a repository, you can set its visibility to public or private by using the Project Quay API.
The visibility of your repository can be set to private or public by using the POST /api/v1/repository/{repository}/changevisibility command.
-
You have Created an OAuth access token.
-
You have created a repository.
-
You can change the visibility of your repository to public or private by specifying the desired option in the
visibilityschema. For example:$ curl -X POST \ -H "Authorization: Bearer <bearer_token>" \ -H "Content-Type: application/json" \ -d '{ "visibility": "private" }' \ "https://quay-server.example.com/api/v1/repository/my_namespace/test_repo_three/changevisibility"Example output{"success": true}
Manage registry-wide and team access policies
Manage registry-wide access, restricted users, superuser access, and team roles for consistent security policies.
Registry-wide access management
Registry-wide access settings in Project Quay control what users and superusers can do across the entire registry. You can restrict ordinary users and grant superusers broader access when needed.
Managing restricted users
With restricted users in Project Quay, you can prevent registry members from creating organizations or pushing to their own namespaces unless they belong to an organization team. You can allowlist specific users so that they keep those capabilities.
By default, all Project Quay members part of a registry can create repositories and upload content to their own user account. For example, when user1 pushes an artifact tag such as /<user1>/<image>:<tag>, a repository of the name user1/image is created. Inside of that repository is information about the artifact tag.
With the FEATURE_RESTRICTED_USERS configuration field, Project Quay administrators can restrict all users that are part of their registry from pushing images or artifacts to the registry. This configuration field effectively renders all users from creating new organizations or pushing content altogether unless they are already part of that organization and defined as a team member of that organization; that is, restricted users still have normal permissions in organizations based on the teams that they are members of.
For example, a Project Quay administrator sets the FEATURE_RESTRICTED_USERS configuration field in their config.yaml file as follows:
FEATURE_RESTRICTED_USERS: trueWhen set as shown, user1 is unable to create a new organization by using the Project Quay UI. Upon attempt, the following error message is returned: Unauthorized. Additionally, if user1 attempts to push an image to their own namespace by using the CLI (that is, /<user1>/<image>:<tag>), the following error message is returned: Error: writing blob: initiating layer upload to /v2/user1/<image>/blobs/uploads/ in <quay-server.example.com>: unauthorized: access to the requested resource is not authorized. However, if user1 is part of an organization’s team as defined by an administrator, they maintain the permissions capable of that team. For example, if user1 is added to an organization’s team and given the Admin role, they have administrative privileges for that organization.
When you combine FEATURE_RESTRICTED_USERS with the RESTRICTED_USERS_WHITELIST configuration field, Project Quay administrators can allow specified members to continue to push to the registry or create organizations. In general, when FEATURE_RESTRICTED_USERS is set, Project Quay administrators might also set RESTRICTED_USERS_WHITELIST, otherwise all members of the registry (with the exception of those defined by a team) are rendered incapable of doing basic tasks.
For example, a Project Quay administrator sets the FEATURE_RESTRICTED_USERS and RESTRICTED_USERS_WHITELIST configuration fields in their config.yaml file as follows:
# ...
FEATURE_RESTRICTED_USERS: true
RESTRICTED_USERS_WHITELIST:
      - user2
# ...
With this configuration, all users except user2 are restricted from pushing images or creating organizations. Other users who are part of a team also have these privileges. Users in the registry who are neither defined by the RESTRICTED_USERS_WHITELIST field nor part of an organization team have no permissions within the registry, and therefore cannot perform basic tasks.
|
Note
|
This feature works differently for LDAP deployment types. |
About superuser full access
Superuser full access in Project Quay lets administrators grant superusers read, write, and delete rights in organizations that they do not own. You enable the feature with the FEATURE_SUPERUSERS_FULL_ACCESS configuration field.
When a user, for example, user1 creates an organization within a registry, they own the access and permissions to that organization. As such, they can create repositories, define teams and memberships, create robot accounts, set default permissions, view logs, and adjust other settings as warranted. That organization is effectively the user’s organization.
By default, superusers do not have access to a user’s organization. When the FEATURE_SUPERUSERS_FULL_ACCESS field is enabled (true), all organizations and members of the registry are revealed on the Organizations page of the UI. However, when this field is enabled, the superuser cannot view the image repository of every organization at once. This is a known limitation. As a temporary workaround, the superuser can view image repositories by navigating to them from the Organizations page.
|
Note
|
When |
To grant superusers full access to all organizations within the registry, you can use the following YAML configuration:
# ...
FEATURE_SUPERUSERS_FULL_ACCESS: true
# ...
After you set FEATURE_SUPERUSERS_FULL_ACCESS: true, all organizations are visible on the superuser Organization page.
Setting a team role by using the UI
To assign a role to a team within a Quay organization, you can use the UI. Team roles determine a member’s permissions, such as administrative or contributor access.
-
You have created a team.
-
On the Project Quay landing page, click the name of your Organization.
-
In the navigation pane, click Teams and Membership.
-
Select the TEAM ROLE drop-down menu, as shown in the following figure:
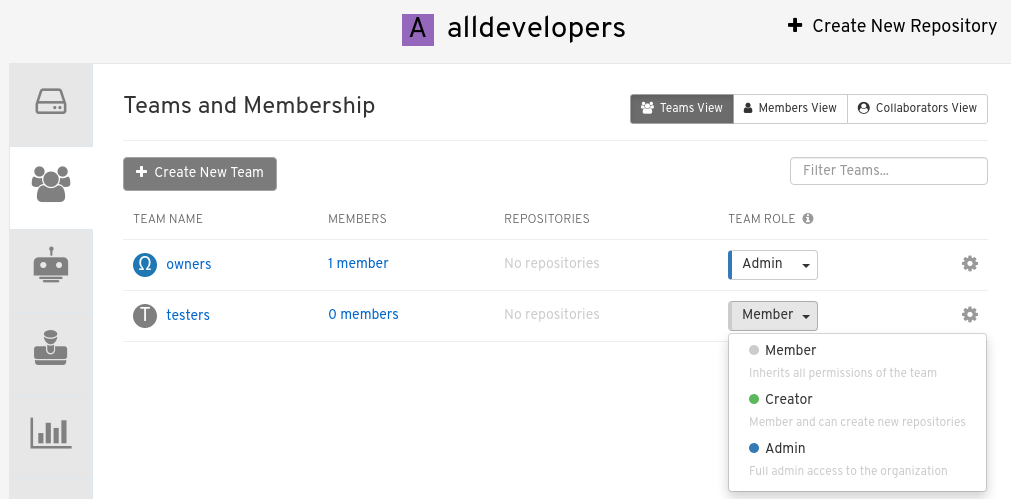
-
For the selected team, choose one of the following roles:
-
Admin. Full administrative access to the organization, including the ability to create teams, add members, and set permissions.
-
Member. Inherits all permissions set for the team.
-
Creator. All member permissions, plus the ability to create new repositories.
-
Managing team members and repository permissions
To manage team members and set repository permissions for a team, you can use the Quay UI. You can add or remove members, and adjust access levels for each repository.
-
On the Teams and membership page of your organization, you can also manage team members and set repository permissions.
-
Click the kebab menu, and select one of the following options:
-
Manage Team Members. On this page, you can view all members, team members, robot accounts, or users who have been invited. You can also add a new team member by clicking Add new member.
-
Set repository permissions. On this page, you can set the repository permissions to one of the following:
-
None. Team members have no permission to the repository.
-
Read. Team members can view and pull from the repository.
-
Write. Team members can read (pull) from and write (push) to the repository.
-
Admin. Full access to pull from, and push to, the repository, plus the ability to do administrative tasks associated with the repository.
-
-
Delete. This popup window allows you to delete the team by clicking Delete.
-
Setting the role of a team within an organization by using the API
To view repository permissions for a team or set a team’s role in an Project Quay organization, you can use the organization team API endpoints with an OAuth access token.
-
You have created an OAuth access token.
-
Enter the following
GET /api/v1/organization/{orgname}/team/{teamname}/permissionscommand to return a list of repository permissions for the organization’s team. Note that your team must have been added to a repository for this command to return information.$ curl -X GET \ -H "Authorization: Bearer <your_access_token>" \ "<quay-server.example.com>/api/v1/organization/<organization_name>/team/<team_name>/permissions"Example output{"permissions": [{"repository": {"name": "api-repo", "is_public": true}, "role": "admin"}]} -
You can create or update a team within an organization to have a specified role of admin, member, or creator using the
PUT /api/v1/organization/{orgname}/team/{teamname}command. For example:$ curl -X PUT \ -H "Authorization: Bearer <your_access_token>" \ -H "Content-Type: application/json" \ -d '{ "role": "<role>" }' \ "<quay-server.example.com>/api/v1/organization/<organization_name>/team/<team_name>"Example output{"name": "testteam", "description": "", "can_view": true, "role": "creator", "avatar": {"name": "testteam", "hash": "827f8c5762148d7e85402495b126e0a18b9b168170416ed04b49aae551099dc8", "color": "#ff7f0e", "kind": "team"}, "new_team": false}
Review Clair vulnerability scan results
Review Clair vulnerability scan results and severity mapping in the UI or API before promoting container images.
Viewing Clair security scans by using the UI
To review the results of a Clair security scan, you can open the Security Scanner page for a tag in the Project Quay UI. You can inspect detected CVEs and check available remediation options.
-
For standalone Project Quay deployments, you have deployed Clair. For more information, see "Setting up Clair on standalone Project Quay deployments"
-
Navigate to a repository and click Tags in the navigation pane. This page shows the results of the security scan.
-
To reveal more information about multi-architecture images, click See Child Manifests to see the list of manifests in extended view.
-
Click a relevant link under See Child Manifests, for example, 1 Unknown to be redirected to the Security Scanner page.
-
The Security Scanner page provides information for the tag, such as which CVEs the image is susceptible to, and what remediation options you might have available.
NoteImage scanning only lists vulnerabilities found by Clair security scanner. What users do about the vulnerabilities are uncovered is up to said user.
Viewing Clair security scans by using the API
To view Clair security scan results for a repository manifest in Project Quay, you can call the manifest security API endpoint with an OAuth access token.
-
You have created an OAuth access token.
-
Use the
GET /api/v1/repository/{repository}/manifest/{manifestref}/securityendpoint to retrieve security information about a specific manifest in a repository. For example:$ curl -X GET \ -H "Authorization: Bearer <bearer_token>" \ -H "Accept: application/json" \ "https://quay-server.example.com/api/v1/repository/<namespace>/<repository>/manifest/<manifest_digest>/security?vulnerabilities=<true_or_false>"Example output{"status": "queued", "data": null}
Clair severity mapping
Clair maps severity strings from multiple security databases to a common set of values in Project Quay. You can use the mapped severities to assess vulnerabilities consistently.
Clair severity strings
Clair alerts users with the following severity strings:
-
Unknown
-
Negligible
-
Low
-
Medium
-
High
-
Critical
These severity strings are similar to the strings found within the relevant security database.
The Alpine SecDB database does not provide severity information. All vulnerability severities are Unknown.
| Alpine Severity | Clair Severity |
|---|---|
* |
Unknown |
The AWS UpdateInfo database provides severity information.
| AWS Severity | Clair Severity |
|---|---|
low |
Low |
medium |
Medium |
important |
High |
critical |
Critical |
The Debian Oval database provides severity information.
| Debian Severity | Clair Severity |
|---|---|
* |
Unknown |
Unimportant |
Low |
Low |
Medium |
Medium |
High |
High |
Critical |
The Oracle Oval database provides severity information.
| Oracle Severity | Clair Severity |
|---|---|
N/A |
Unknown |
LOW |
Low |
MODERATE |
Medium |
IMPORTANT |
High |
CRITICAL |
Critical |
The RHEL Oval database provides severity information.
| RHEL Severity | Clair Severity |
|---|---|
None |
Unknown |
Low |
Low |
Moderate |
Medium |
Important |
High |
Critical |
Critical |
The SUSE Oval database provides severity information.
| Severity | Clair Severity |
|---|---|
None |
Unknown |
Low |
Low |
Moderate |
Medium |
Important |
High |
Critical |
Critical |
The Ubuntu Oval database provides severity information.
| Severity | Clair Severity |
|---|---|
Untriaged |
Unknown |
Negligible |
Negligible |
Low |
Low |
Medium |
Medium |
High |
High |
Critical |
Critical |
The following table shows how CVSSv3 base scores map to Clair severities:
| Base Score | Clair Severity |
|---|---|
0.0 |
Negligible |
0.1-3.9 |
Low |
4.0-6.9 |
Medium |
7.0-8.9 |
High |
9.0-10.0 |
Critical |
The following table shows how CVSSv2 base scores map to Clair severities:
| Base Score | Clair Severity |
|---|---|
0.0-3.9 |
Low |
4.0-6.9 |
Medium |
7.0-10 |
High |